

Custom connector installation
Review this information to install the iMIS Power Automate Connector as a Custom Connector in your environment. Only certain specialized Power Platform environments will require the use of these steps. Check with your IT department, MSP, or Power Platform expert before proceeding.
Installation steps
Do the following:
-
Navigate to the Power Automate homepage.
-
(Optional) Ensure that the correct environment is selected from the Environment selector in the right side of the top navigation bar.
-
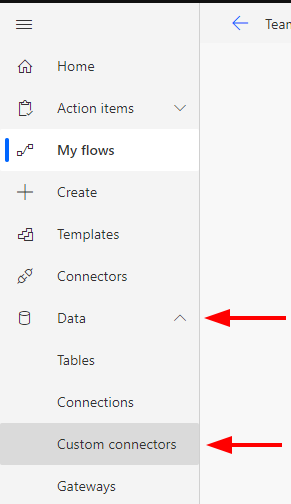
In the side navigation, expand the Data menu and select Custom Connectors.
-
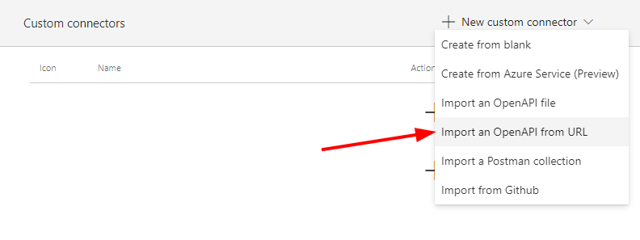
In the upper-right corner, click New custom connector, and click Import an OpenAPI from URL.
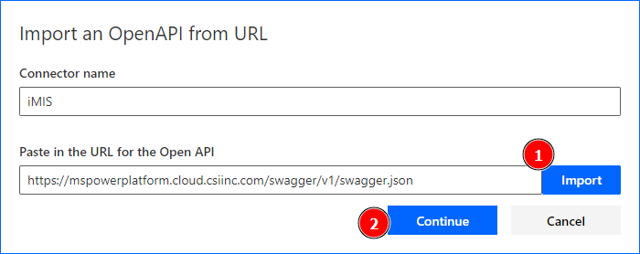
- In the box that appears, enter iMIS for the connector name, and use the following link for the URL field:
https://powerplatform.[ap|ca|uk|us].imisapps.com/swagger/v1/swagger.json
-
First, click Import, then click Continue.
-
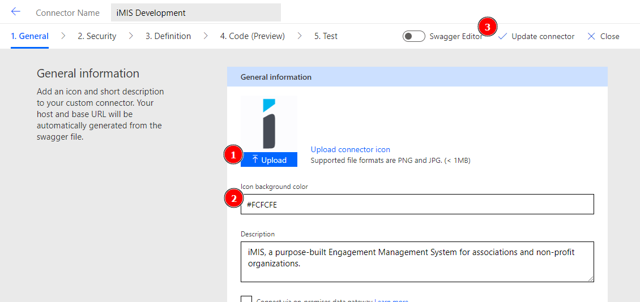
The following screen appears. Manually fill out two fields, the rest of the information is pre-populated.
-
Download (right-click and "Save Image As...") the following image: https://cdn.us.imisapps.com/icons/imis/imis-i-128.png
-
Upload this image into Power Automate by clicking the blue Upload button.
-
Enter the value
#FCFCFE(including the pound symbol) for the Icon background color value. -
Click the Update connector button in the upper-right corner.

-
A message saying "Custom connector has been successfully updated" appears.
-
You may now proceed to the next step, Obtaining your API Key, or if you have already done so, simply use your custom connector in any workflow.

Updated 2 months ago