

Individual User Installation
To deploy iMIS for Outlook to multiple users at once, refer to the organizational deployment instructions.
Note: The user interface may look different based on how you are accessing Outlook and your current configuration.
Understanding the user workflow
After installation, users can open iMIS for Outlook directly from any email message in Outlook. The add-in allows users to search for contacts, save emails, and create Activities or Interactions in iMIS.
Once installed:
- The iMIS for Outlook icon appears in:
- Emails you are reading
- New emails you are composing
- Selecting the icon launches the integration panel
- The panel allows users to:
- Search for contacts
- Associate emails to records
- Save emails as Activities or Interactions
First-time setup and login
The first time a user opens iMIS for Outlook, they must authenticate.
First-time login steps
- Open an email in Outlook.
- Select the iMIS for Outlook icon.
- Enter your iMIS username and password.
- Enter the Cloud ID provided by your administrator.
- Select how you want to save emails (Activity or Interaction).
After successful login, the integration panel will load and display search and save options.
Understanding authentication
The Outlook Integration uses a secure, cloud-based authentication process:
- User credentials are validated through the iMIS Cloud service
- A secure authentication token is created after login
- The token is used for future requests during the session
- A background account may perform certain actions on behalf of the user (depending on permissions)
This approach ensures that user credentials are not repeatedly transmitted and that all actions follow iMIS security permissions.
Single-user installation
To install iMIS for Outlook for use on Outlook on the web or the Office 365 Windows desktop application, follow either of these instructions, depending on which application you use.
Install via New Outlook or Outlook on the Web
First, sign in using either:
- Outlook on the web
- Your organization’s login URL
After signing in, follow these steps:
-
Go to the XML file and save it locally (press
Ctrl+Sor right-click an empty area of the page and select "Save As..."). -
Open Outlook on the Web's Add-ins page.
-
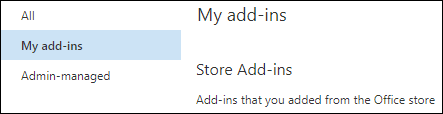
Select My Add-ins.
-
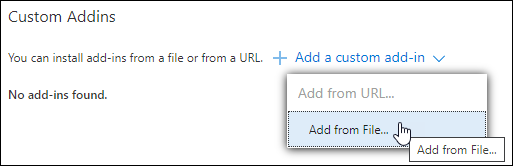
Select Add a custom add-in > Add from File....
-
Select the XML file and click Install.
-
Close the Add-ins window.
-
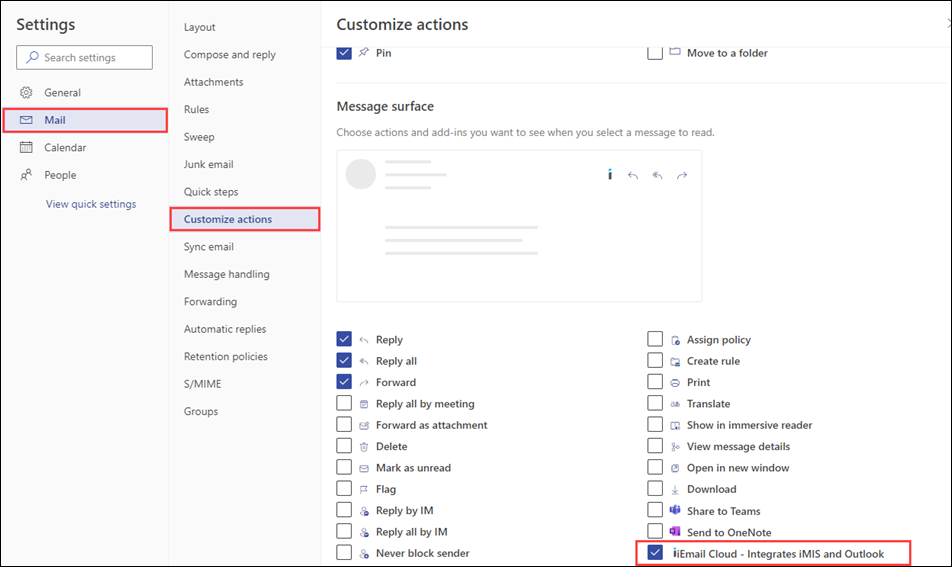
Go to Settings > Mail > Customize Actions.
-
Enable the iMIS for Outlook add-in and click Save. The iMIS for Outlook icon should now appear in emails.
Install via Outlook (classic)
-
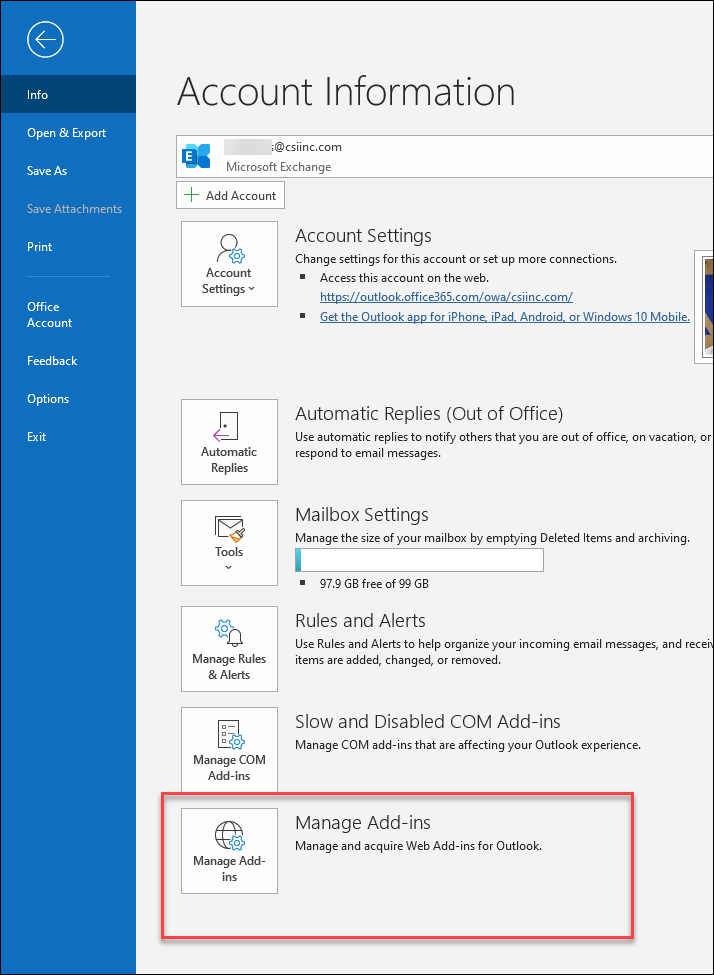
In Outlook, go to File > Manage Add-ins.
-
Log in with your Office credentials.
-
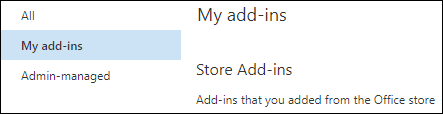
Select My Add-ins.
-
Download and save the XML file.
-
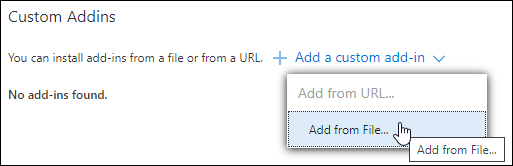
Select Add a custom add-in > Add from File....
-
Select the XML file and click Install.
-
Restart Outlook.
-
The icon appears in the Outlook ribbon.

-
If not visible, customize the ribbon and reposition the add-in.
Launching and using the add-in
After installation, do the following:
- Open an email.
- Select the iMIS for Outlook icon.
- Log in if prompted.
- Search for a contact.
- Select Save as Activity or Save as Interaction.
Note: If login is not required, your session token is still active.
Updated 18 days ago