

Getting Started Guide: iMIS Power Suite
NoteIn order to use the iMIS Power Suite, you must be licensed. For more information, contact your AiSP or CAM.
The iMIS Power Suite iMIS Power Suite Dashboard is where you access your Power Suite tools.
Obtaining a Cloud ID
When logging into the iMIS Power Suite Dashboard, you will be prompted to enter your iMIS username, iMIS password, and Cloud ID. The Cloud ID comes from ASI Support. The Cloud ID is a short, case-insensitive name that identifies and points to your instance of iMIS. Typically, it is in the following format:
- [Organization Acronym]IMIS
- [Organization Acronym]TEST (for test databases)
For example: ABCIMIS or XYZTEST.
Do the following to obtain your Cloud ID:
- Confirm your iMIS URL:
- Go to the Cloud System Readiness Check page.
- Enter the URL for your iMIS instance, such as https://mysite.org/.
- Click Start Test for your region.
- The test results page will show a green checkmark at the top of the page if your site is configured correctly. Otherwise, you will see errors on the page that indicate the problems that were found and potential solutions for those problems.
- After all checks are green, contact ASI Support with the following information:
- Your name and email address.
- Full organization name.
- URL for iMIS that passed the readiness check.
- ASI will verify your URL and then assign you a Cloud ID.
Test instances
ASI policy states that each customer who has at least one active app subscription (or trial/demo) is entitled to two Cloud IDs, one for a production/live iMIS database, and one for a test/development iMIS database. If you would like to activate your test cloud ID, ensure that the URL is also public facing, and then submit a new support ticket with your test URL requesting a test Cloud ID.
Obtaining a Background Account license
The Background Account is used by the Power Suite applications to communicate with iMIS directly, without the need for someone to be signed in. This allows for applications, like iDMS, to perform jobs overnight, and the Cloud SSO to authenticate users 24/7. The Background Account is a required setup step for all Cloud IDs that exist on the Power Suite Cloud Platform.
Do the following to obtain your free background account:
- Send an email to ASI Orders ([email protected]).
- In the email, request the free API Connector License for the Background Account used with Power Suite products.
- Optionally CC your CPIL or AiSP.
WarningDo not use the MANAGER account as the Background Account. This password changes regularly and will result in a lost connection between iMIS and your Power Suite tools.
Creating and updating the Background Account
After you have the API Connector License applied to iMIS, you must create the Background Account:
- Go to Community > Add contact.
- Enter a First name and Last name. It is recommended to name the new account something that you recognize, such as Power Suite.
- Click Save.
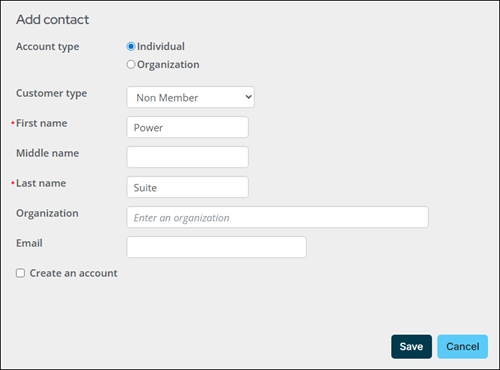
- From the account page, click the Security tab.
NoteIf you do not have the Security tab on your account pages, go to Community > Security > Users. Search for and open the new account.
-
Click the + icon next to Username:
- Username - PowerSuite
- Password & Confirm Password - Any password you choose
- Email - Email associated with the account, preferably the email of the admin of the account
- Click Create User.
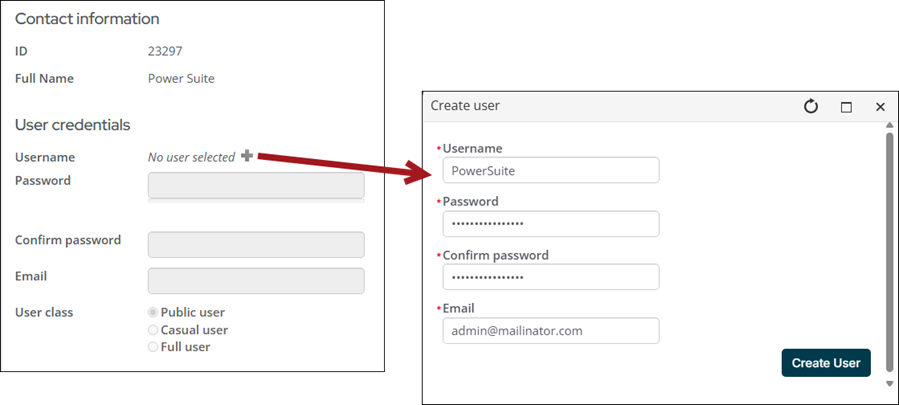
-
Update the User class to Full staff user.
-
From the Roles area, select Add.
-
Enable RemoteService and SysAdmin.
-
Click OK.
-
Click Save.
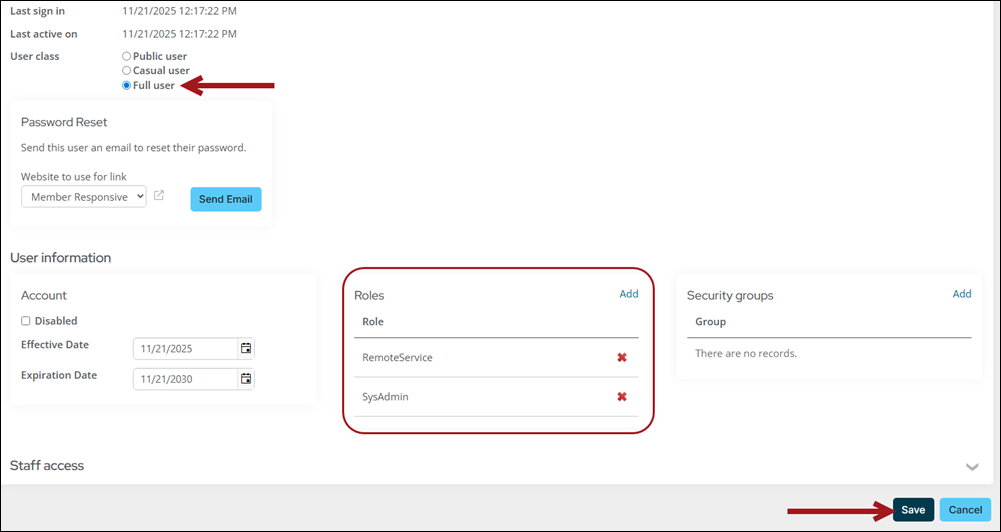
Updating user accounts that will access the iMIS Power Suite Dashboard
Any staff users that must log in to the iMIS Power Suite Dashboard and use Power Suite apps will need the RemoteService role assigned.
To add this security role to a user, do the following:
- Go to Community > Security > Users.
- Search for a user by username or other criteria.
- Select the username.
- From the Roles section, select Add role.
- Enable the RemoteService role.
- Click OK.
- Click Save.
NoteIt may take several minutes for this change to take effect. If you are not able to log in to the cloud right away, wait a few minutes, then try again.
Accessing and updating the iMIS Power Suite Dashboard
Using the new Background Account, access the iMIS Power Suite Dashboard:
- Go to the iMIS Power Suite Dashboard.
- Enter the following:
- iMIS Username - The username you created for the Background Account.
- iMIS Password - The password you created for the Background Account.
- Cloud ID - The Cloud ID sent to you by ASI Support.
- Click Log In.
TipIf you are have issues logging in, see Login Troubleshooting.
- Click My Account.
- Click Update My Account Info.
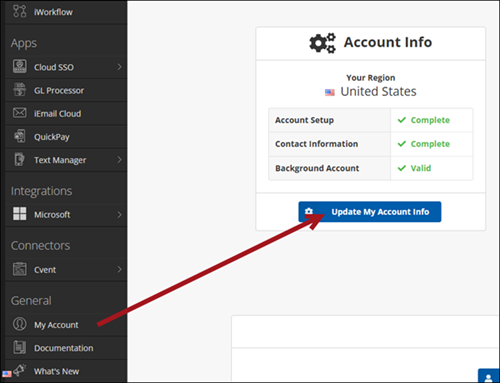
- Enter the iMIS Username and iMIS Password the Background Account.
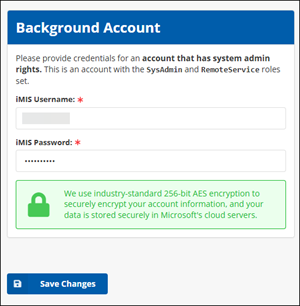
- Click Save Changes.
- Continue to add App Users, including your own iMIS username. Using the Background Account to access the iMIS Power Suite Dashboard should be a one-time occurrence. Going forward, you should use your own iMIS login.
Adding App Users
An App User is someone who has been assigned permission to use a particular cloud app within the iMIS Power Suite Dashboard. Before any apps will appear in the side navigation of the iMIS Power Suite Dashboard, users must be assigned to use them (including yourself).
- From the iMIS Power Suite Dashboard, click My Account.
- Click Assign or Remove Users.
- On this screen, you will see a list of all licensed cloud apps. To add a user, start typing an iMIS username in the box. Click to select one, and then click Assign User.
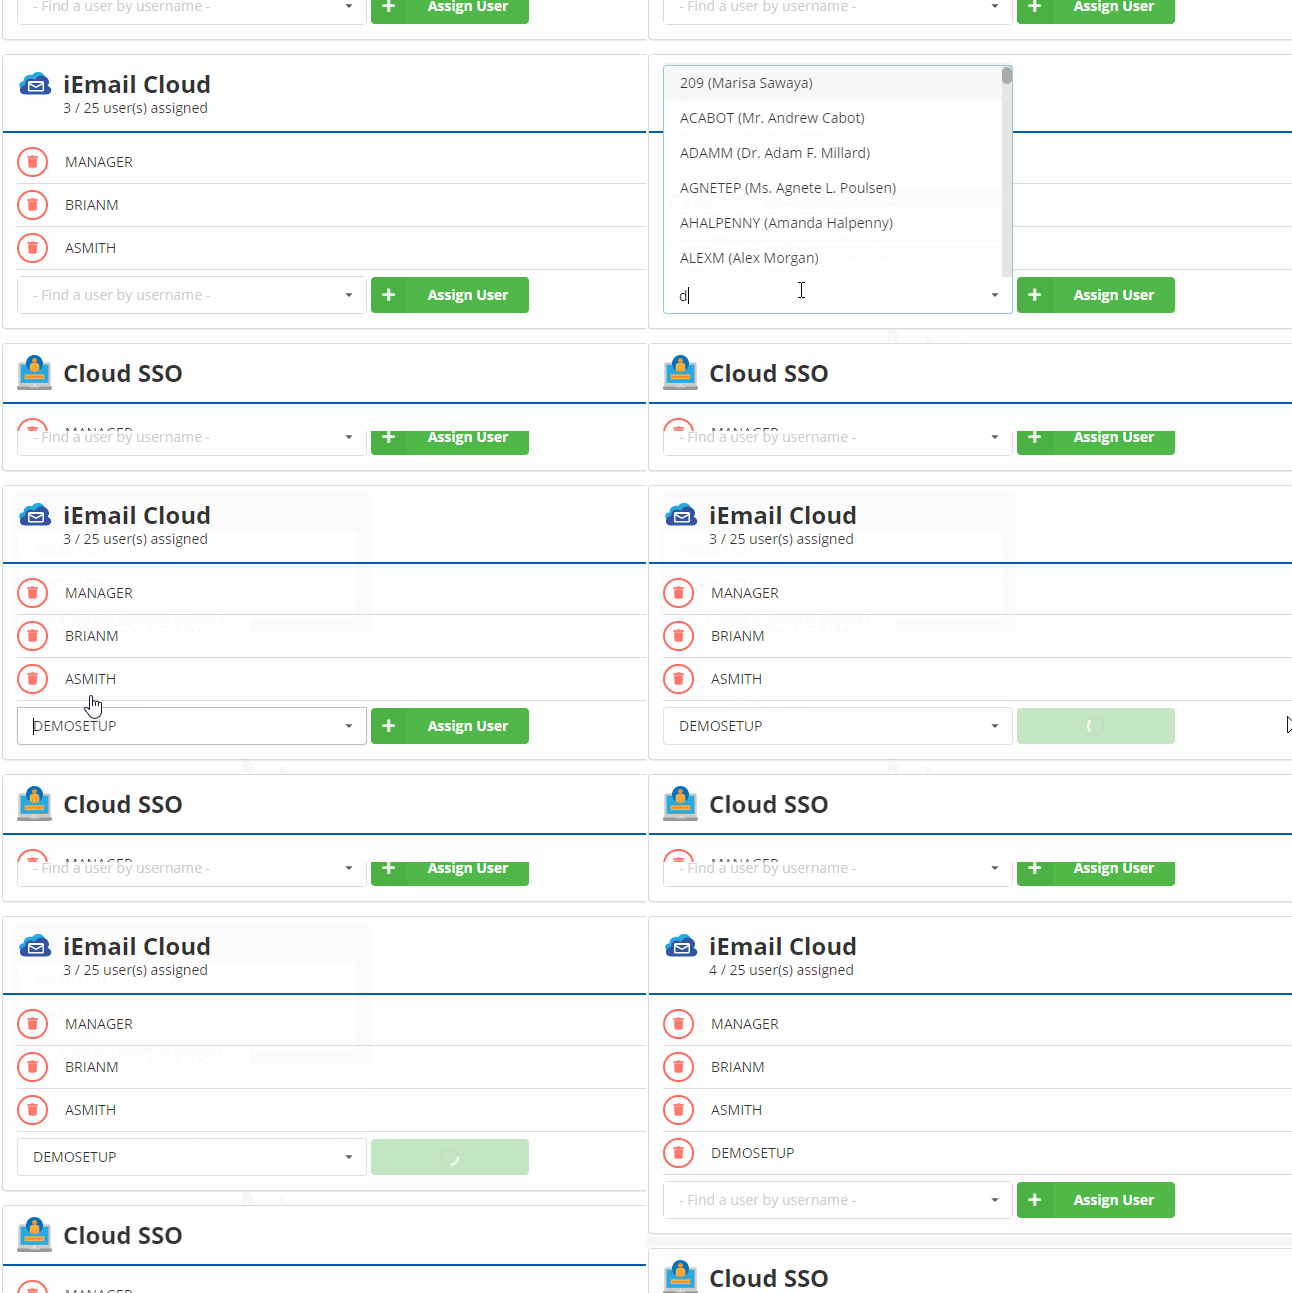
- Continue adding users for each app.
- If the user is already logged in when you assign them as an App User (including yourself), they must log out and then log back in to see the updates.
Adding Admin Users
An Admin User is a user with administrative privileges within the context of the iMIS Power Suite Cloud Platform. Any iMIS staff member with active user credentials in iMIS can be an Admin User.
| Admin Users can | Admin Users cannot |
|---|---|
|
|
NoteThe first user to sign in to the iMIS Power Suite Dashboard becomes an admin. If this user is deactivated or removed from iMIS, it is possible to end up without a valid admin account. In this scenario, please contact ASI support providing your Cloud ID, and we will manually add an admin user back for you.
Do the following to manage admin users:
- From the iMIS Power Suite Dashboard, click My Account.
- Click Add or Remove Admin Users.
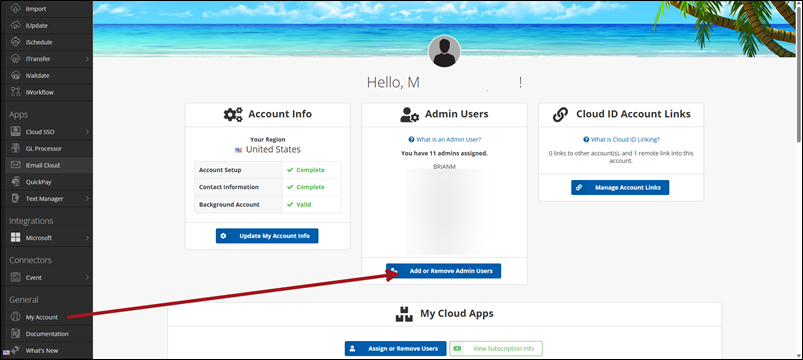
- Add the users who should have administrative rights to the iMIS Power Suite Dashboard.
- If the user is already logged in when you assign them as an Admin User (including yourself), they must log out and then log back in to see the new permissions.
Permissions overview: App user versus admin user
| Admin User | App User | Notes | |
|---|---|---|---|
| Log into the iMIS Power Suite Dashboard | No | No | Any user in iMIS with credentials can log in, but if they are not an admin, and not assigned to any apps, they will only see an empty dashboard. |
| Use a given Cloud App | No | Yes | Admin users cannot explicitly use any Cloud Apps, unless they assign themselves as an App User to each app. |
| Add or Remove App Users | Yes | No | |
| Add or Remove Admin Users | Yes | No | |
| Update the Background Account | Yes | No | |
| View Subscription Information | Yes | No |
Example
Using the iMIS Power Suite Dashboard
To get started using the iMIS Power Suite Dashboard, see Using the iMIS Power Suite Dashboard.
Updated 25 days ago