

Central Deployment for Multiple Users
WarningThis guide applies only to Office 365 and Exchange administrators. If you are not an Office365 or Exchange administrator, see the end-user installation guide instead.
For information on Shared Mailboxes, see iMIS for Outlook User Installation.
Follow the instructions on this page to set up organization-wide (optional or mandatory) deployment of iMIS for Outlook.
Only complete this step once you have received your Cloud ID and set up your Cloud Dashboard.
Configuring the Add-in in Microsoft 365 Admin Center
To configure the iMIS Outlook Integration add-in in the Microsoft 365 Admin Center, do the following:
-
Go to the Microsoft 365 Admin Center.
-
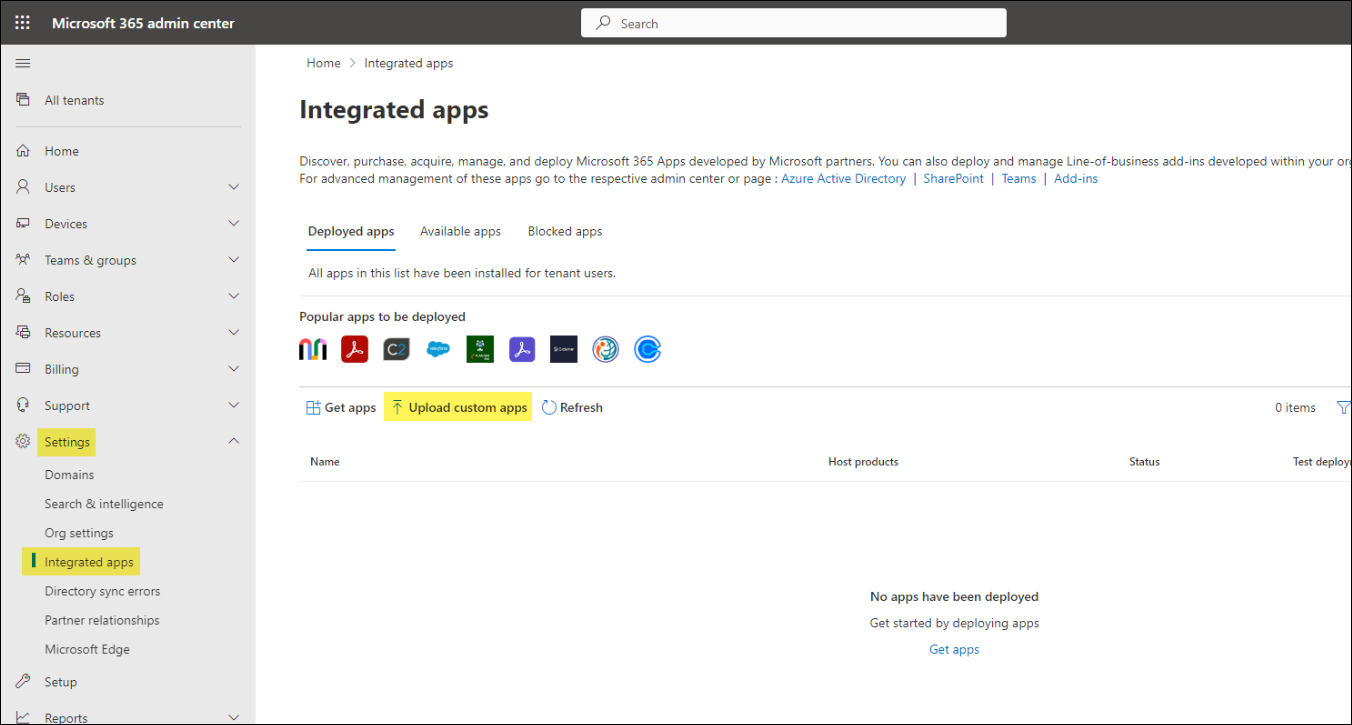
Go to Settings > Integrated Apps.
-
Click Upload custom apps.
-
Change App type to Office Add-in.
-
Select Provide a link to manifest file and paste
https://cdn.us.imisapps.com/outlook/iemail.xmlinto the field. -
Click Validate and ensure the response says Manifest file validated.
-
Click Next.
-
Decide how to deploy iMIS for Outlook to your organization by specifying Entire Organization or specifying certain Users or groups.
-
On the Accept permissions requests screen, click Next.
-
On the Review and finish deployment screen, verify the details are correct, and click Finish deployment.
Note: It may take some time (in some cases, up to 72 hours) for the add-in to appear for all users, depending on the deployment method and the organization's settings.
Users may try to clear their browser's cache or storage, or fully sign out and back in, if the add-in is still not appearing.
The add-in is now installed for your organization.
Post-Deployment
Depending on the Deployment Method used, users will need to Add iMIS Outlook Integration to their Outlook after the deployment.
Do the following:
-
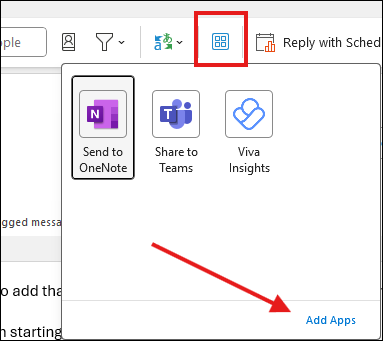
Click on Add Apps.
-
Search for iMIS for Outlook.
-
Select Add to add it to Outlook.
Updated 18 days ago