

Campaigns
Advertising campaigns allow administrators to schedule and manage banner displays in specific locations within the application for targeted periods and user groups.
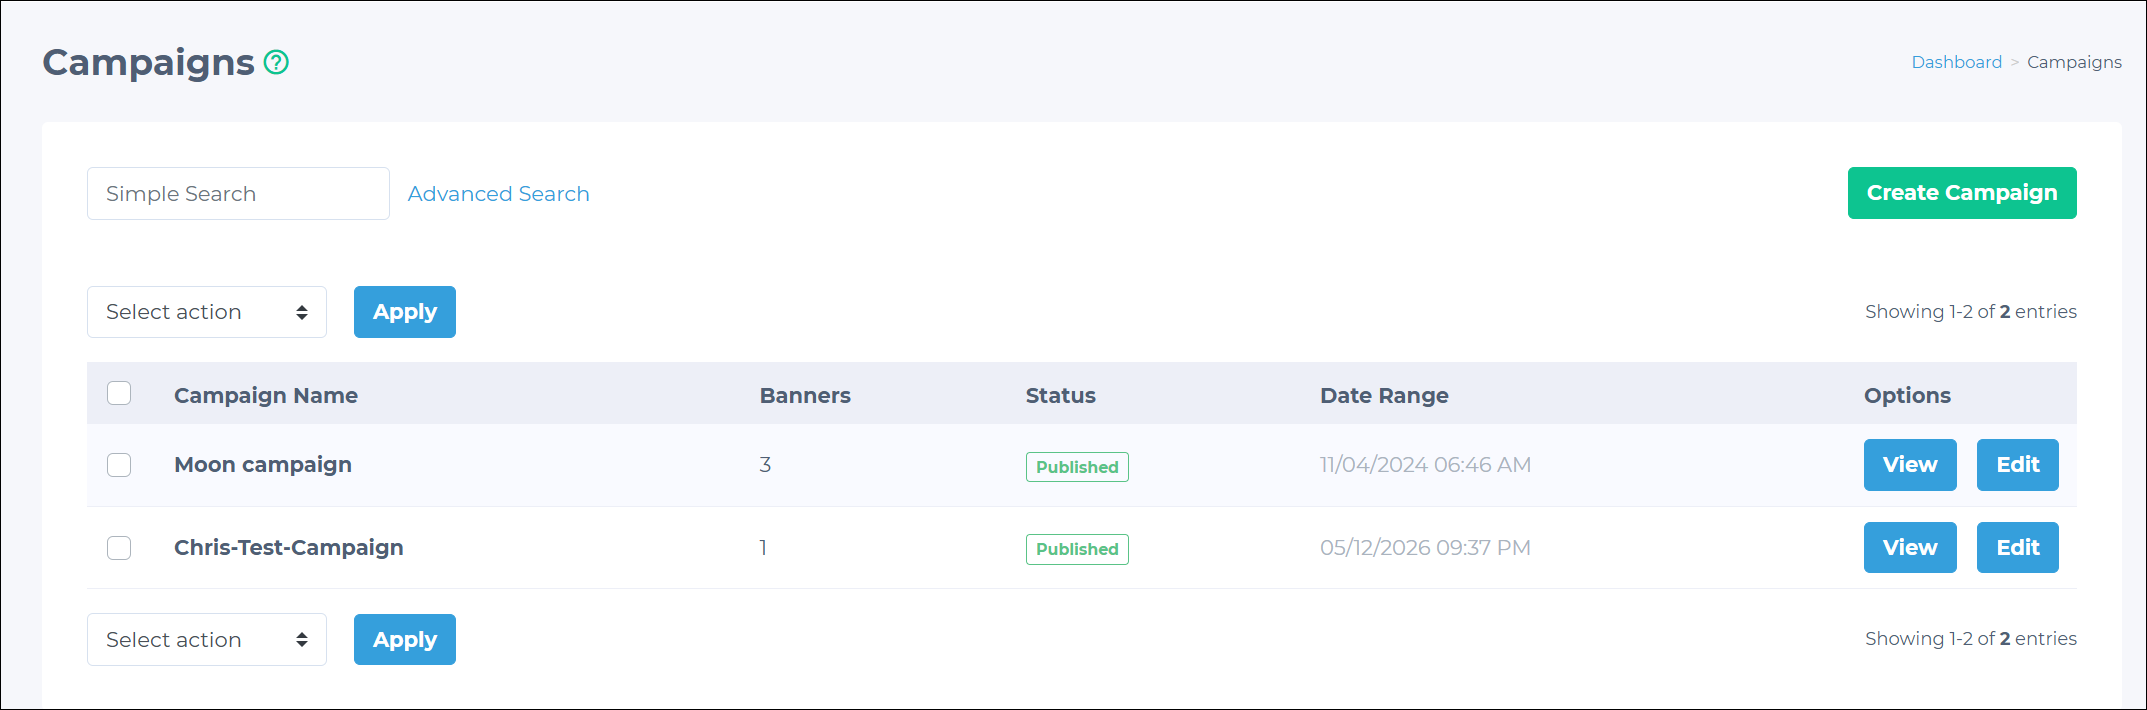
Creating new campaigns
To create a new advertising campaign:
-
Go to Advertisements > Campaigns in the Admin Panel.
-
On the Campaigns page, click the Create Campaign button.
-
On the Create Campaign page, provide the following details:
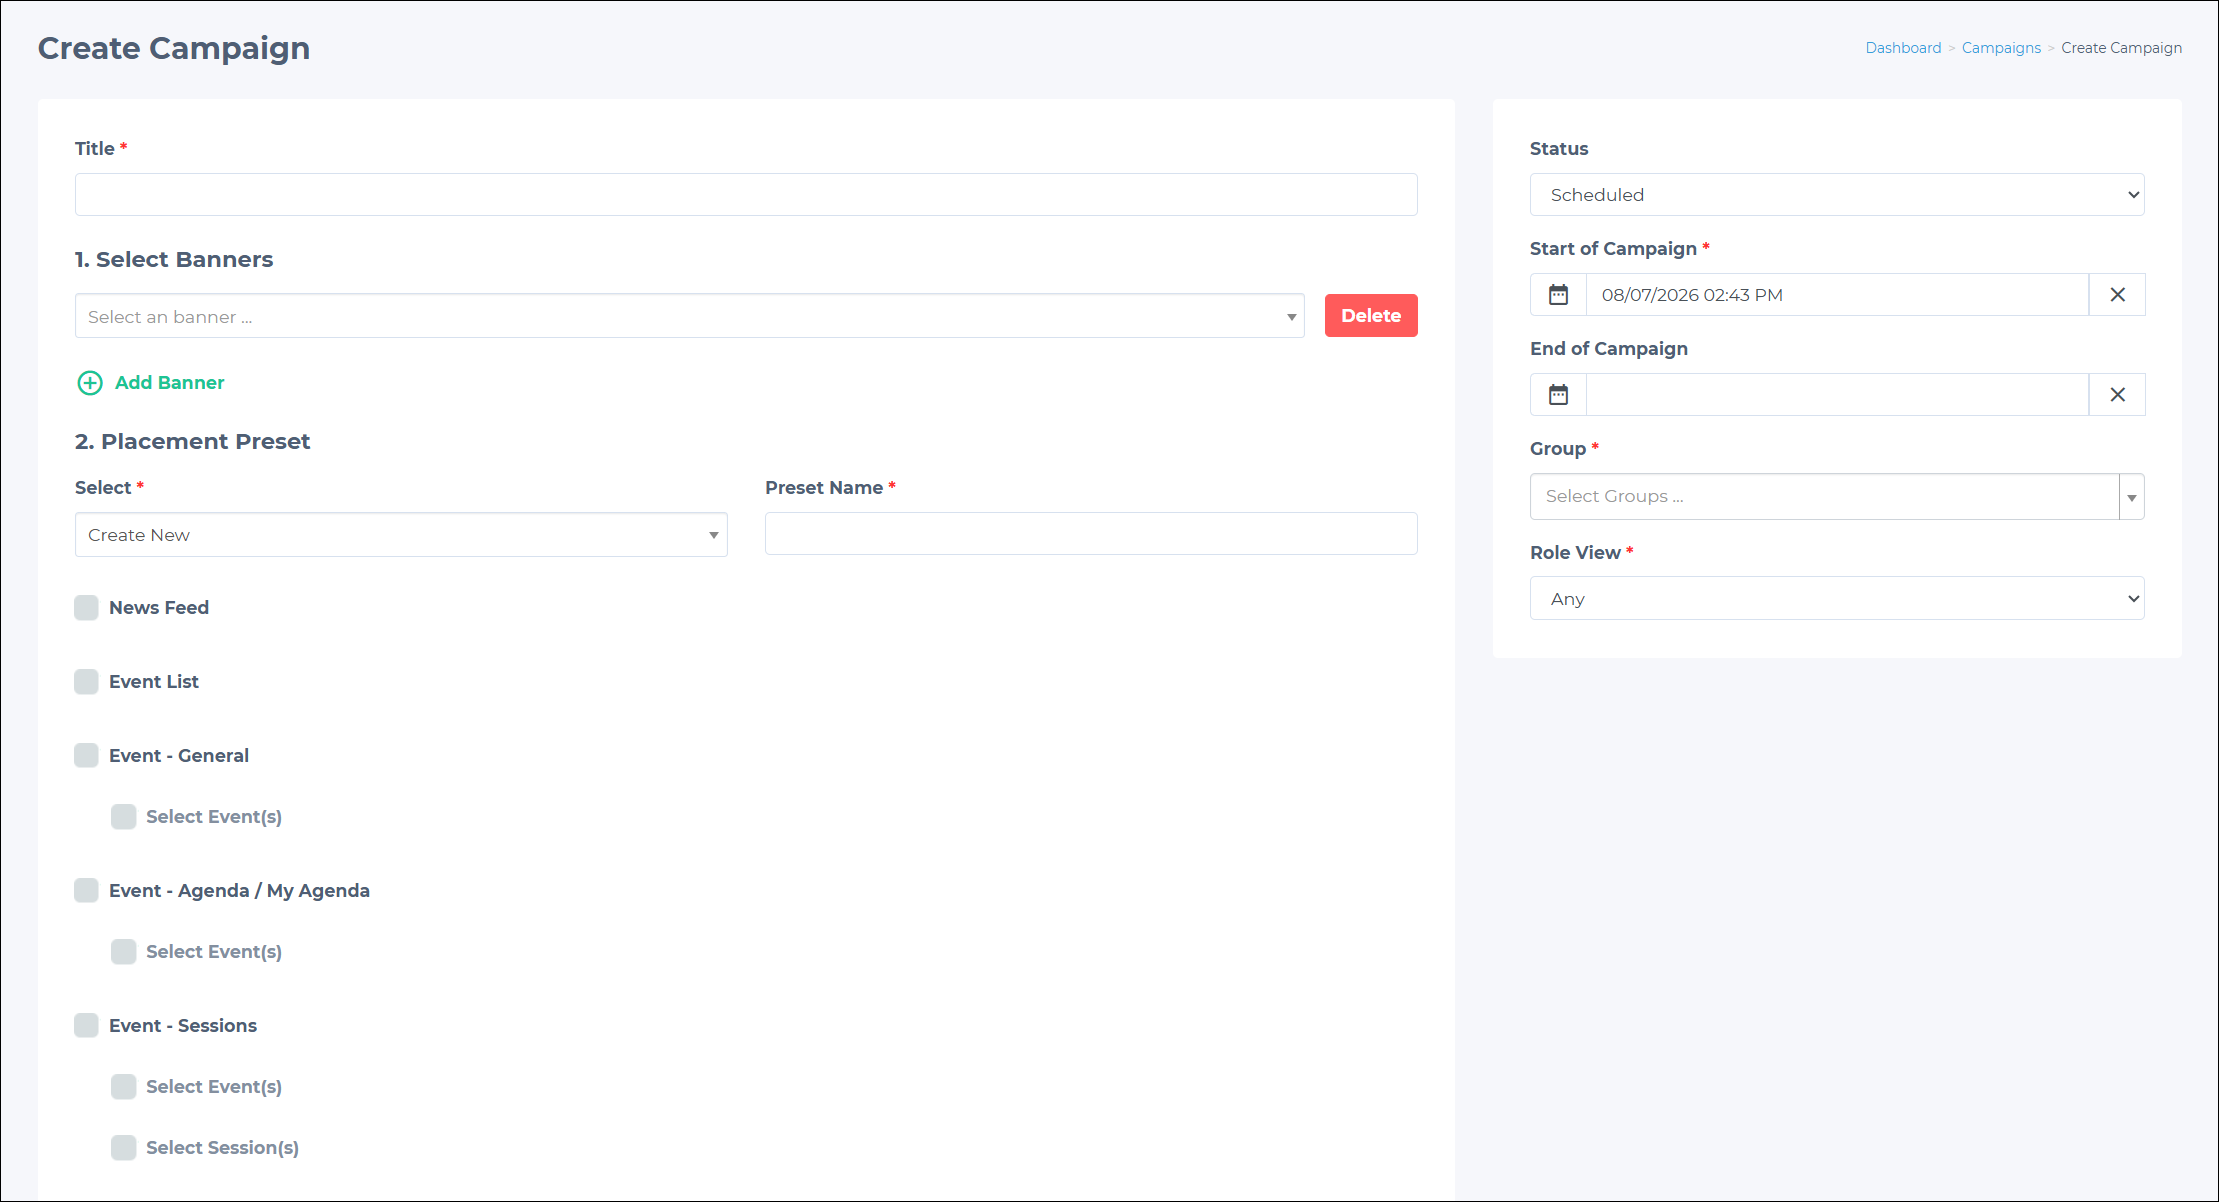
- Title (required): Give the campaign a descriptive name.
- Status: Choose the campaign status:
- Scheduled: The default status. In Scheduled, the campaign will run according to the set start and end dates.
- Draft: Saves the campaign setup without activating it.
- Disabled: The campaign is created but will not run.
- Start of Campaign (required): Set the date and time when the campaign should begin.
- End of Campaign (optional): Set an end date and time for the campaign.
- Group: Select the subgroup that will see this campaign.
- Role View: Choose the campaign's target user roles.
-
Select desired banners for this campaign. Multiple banners can be added to a single campaign.
-
Choose a Placement preset. Select from an existing preset or create a new one.
-
After configuring all settings, click the Save button to create the campaign.
Viewing campaign details and statistics
Campaign statistics support analysis of campaign and individual banner performance, helping drive data-driven decisions for future campaigns and optimizations.
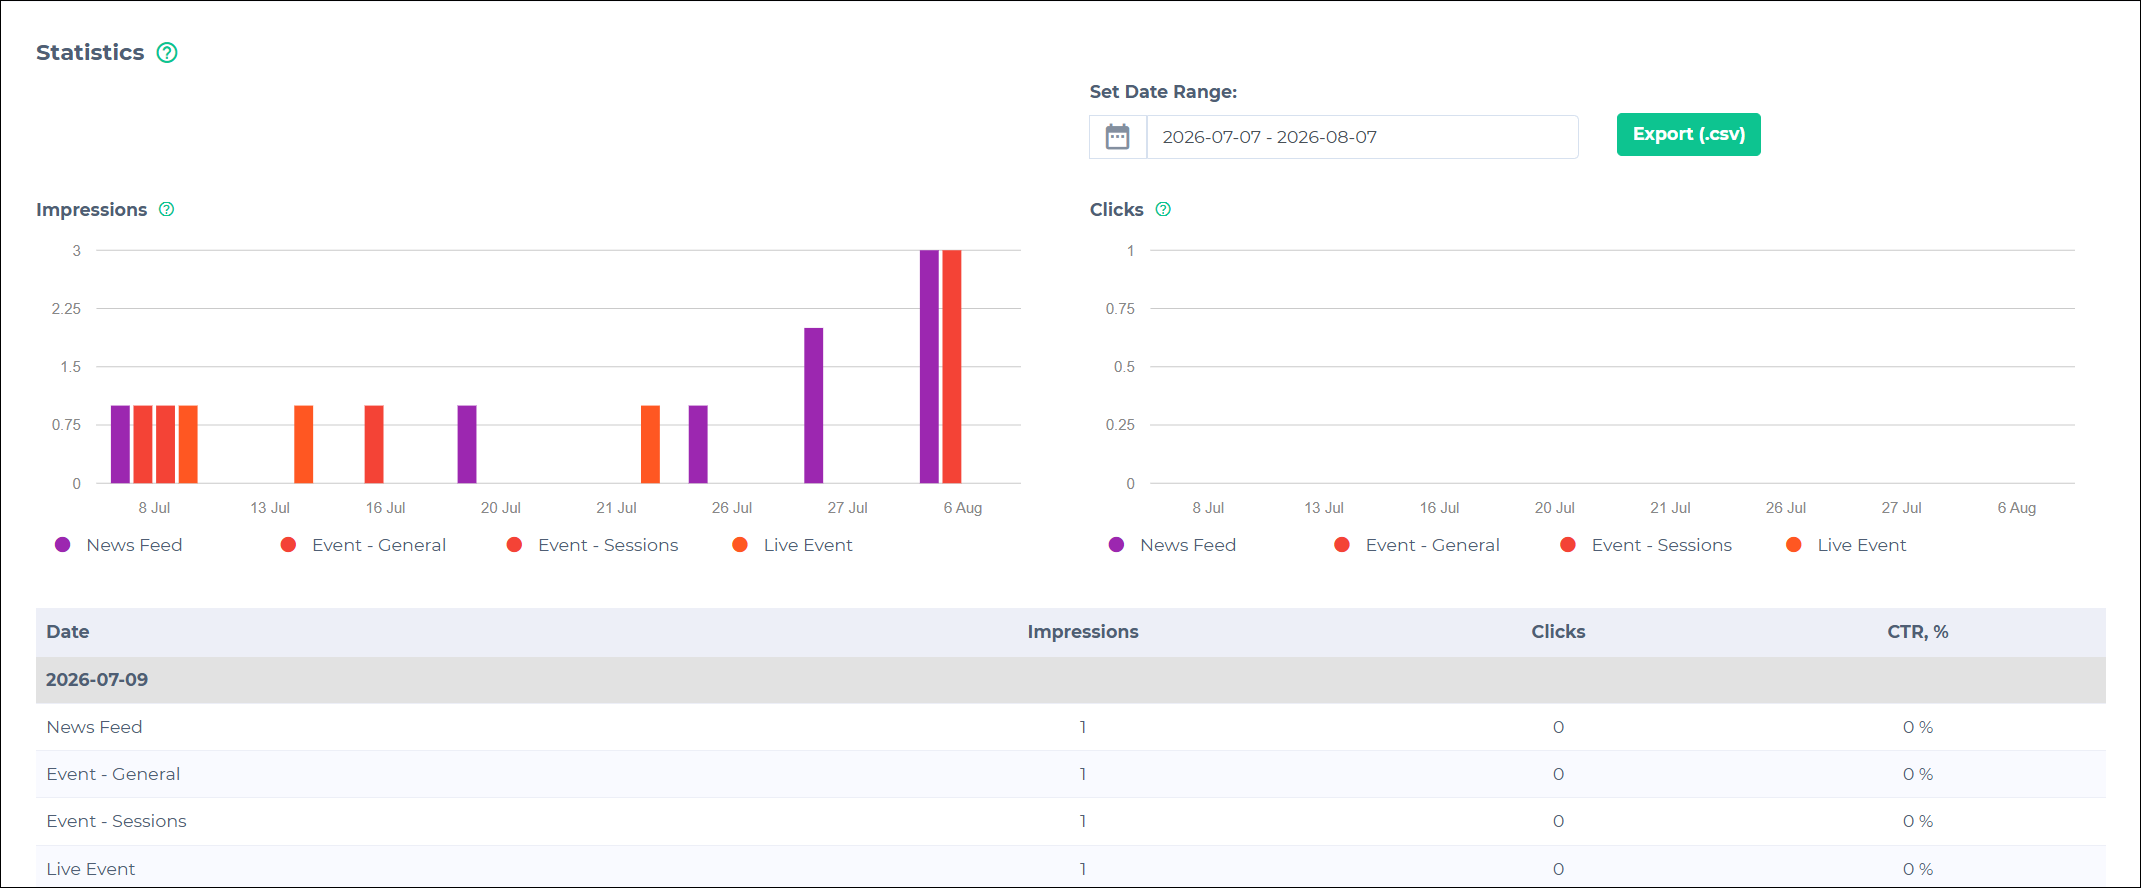
To check a campaign's details and performance statistics, click the View button for the desired campaign. The campaign details page displays the following information:
- Banners in the current campaign (active and deleted).
- Status (for example, Published).
- Campaign start and end date (end of the campaign only if set).
- Placement preset used.
- Campaign statistics.
Scroll to the Statistics section to check the campaign performance:
- Impressions: Displays the number of times each banner was displayed over time.
- Clicks: Displays the number of clicks each banner received over time.
- Data table: Displays the campaign impressions, clicks, and click-through rate by date.
Exporting campaign statistics
To export campaign statistics:
- Set a preferred date range for the statistics.
- Click the Export (.csv) button to download the data in CSV format.
Managing campaigns
After creating a campaign, its status can be edited or changed.
Editing campaign details
To edit campaign details:
- Go to Advertisements > Campaigns.
- Click the Edit button on the desired campaign.
- Modify any of the campaign details as needed.
- Click Save to apply changes.
Changing campaign status
Change the status of a campaign to control its visibility:
- Click the Edit button for the desired campaign.
- In the Status drop-down, choose one of the following options:
- Published: The campaign is active and visible.
- Disabled: The campaign is inactive but can be reactivated later.
- Deleted: The campaign is removed from the active list.
- Draft: The campaign is saved but not yet active.
- Click Save to apply the new status.
Updated 3 months ago