

Badge Builder
IMPORTANTBadge Builder is not enabled by default. To enable Badge Builder, contact your Client Account Manager.
The Badge Builder helps admins create customized badges for events, adjust the badge appearance, and generate ready-to-print PDFs.
Creating a badge pack
To create a new badge pack:
- Go to Admin Panel > Badge Builder.
NOTEAdmins may need to log in to the Badge Builder console. Use your Clowder admin credentials. If your credentials do not work, contact your Client Account Manager.
-
Click the Create New Pack button.
-
On the Manage Badges Pack page, enter the pack's name.

-
Click the Clear & Import new users button.
-
Add the CSV file with the list of users who need badges. Drag and drop the file or click to upload it.
-
After uploading the file, click the Import button.
TIPTo import more users from another CSV file, click the Import more users button. The structure of the new CSV file must match the original upload — this means the number and names of columns must be the same.
NOTEIf a user ID in the new file matches an existing one but other details have changed, those details will be updated in the table. A new entry is only created if the user ID is unique and not already present.
- Review the information from the file, including the users and their details.
- Click the Next to Collections button.
TIPTo clear and import new users, click the Clear & Import new users button, then upload a new CSV file. Click Import to replace the previous users with users from the new file.
- Click the Create New Collection button on the Badges Collections page and start configuring the badges.
Configuring badge design
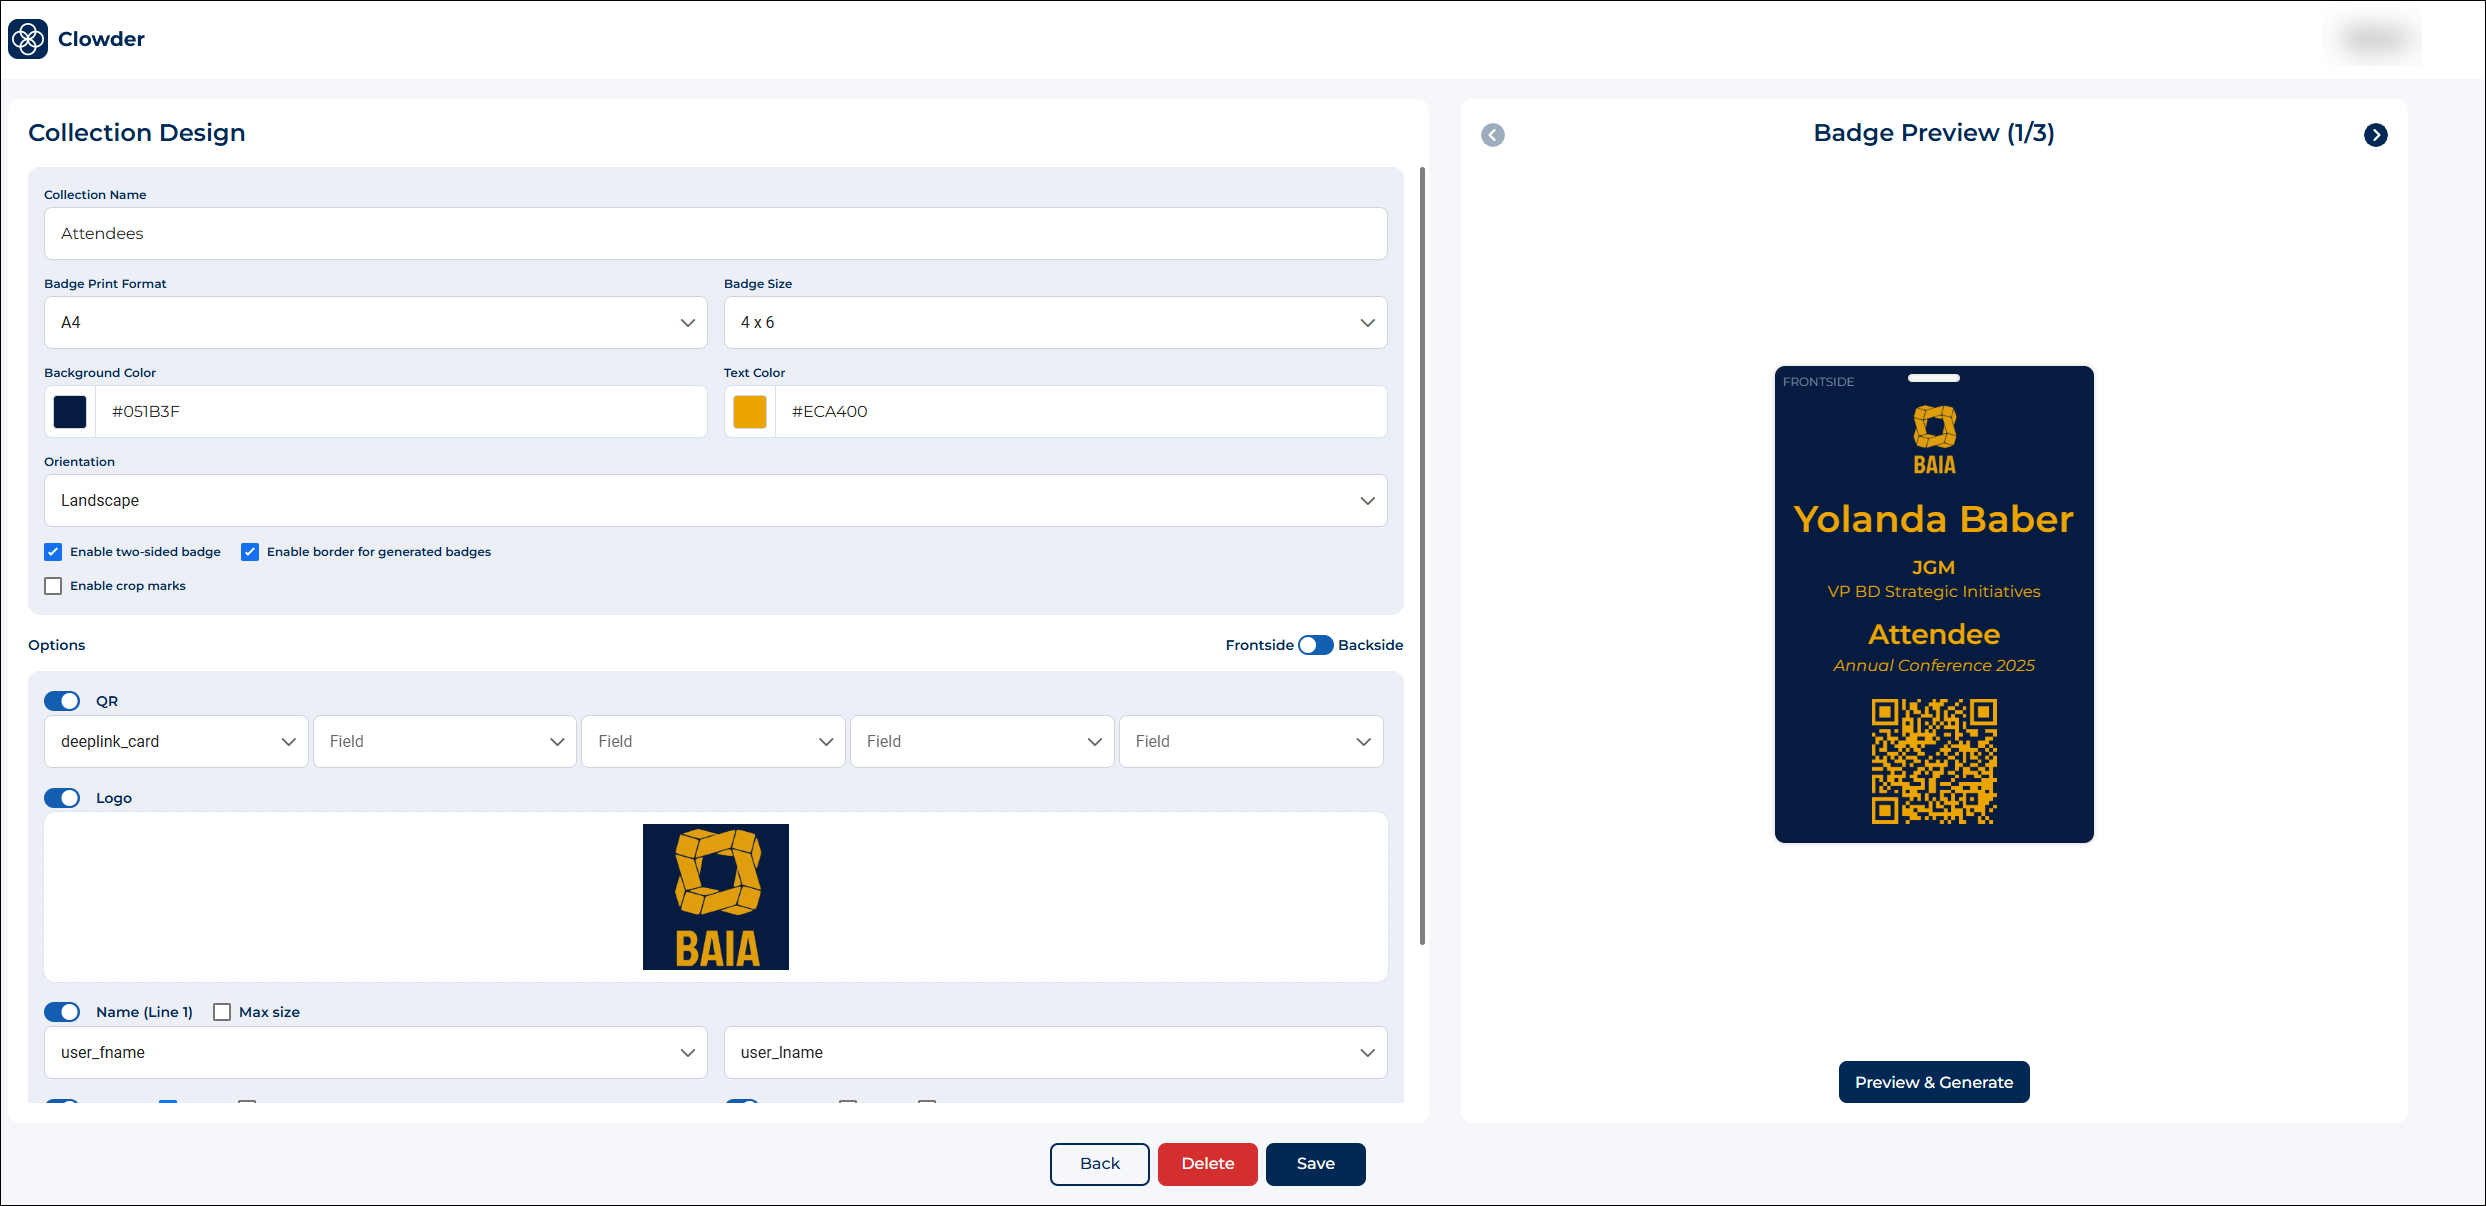
The badge configuration page has two areas:
- Collection Design: In this area, admins can set up the badge's appearance.
- Badge Preview: In this area, admins can see a live badge preview. Changes in the design area appear here. Click the arrow buttons to switch between badges and check how they look.
Collection design
In the Collection Design area, admins can customize several options:
Saving badge collection
Click the Create button to save the badge collection.
After clicking Create, the Badge Collections page opens, showing all created collections for the specific badge pack.
To make changes to the collection, scroll to the Options column and click the Edit icon. After making changes, click Save to update.
Generating badges
To generate badges:
- Click the Preview & Generate button on the Collection Design page.
- Select all users in the list or use the checkbox to pick specific users.
- After making a selection, the Generate button becomes active. Click it to start the badge generation process.
NOTEA .zip file automatically downloads to your computer after the badge creation. The resulting .zip archive will include:
- template.json: a technical document for support in case you need help with this badge pack.
- source.csv: the original file with user data used to generate this pack.
- badges.pdf: the PDF file containing the generated badges.
Managing badge packs
Go to Admin Panel > Badge Builder to see a list of all created packs. To manage a specific pack:
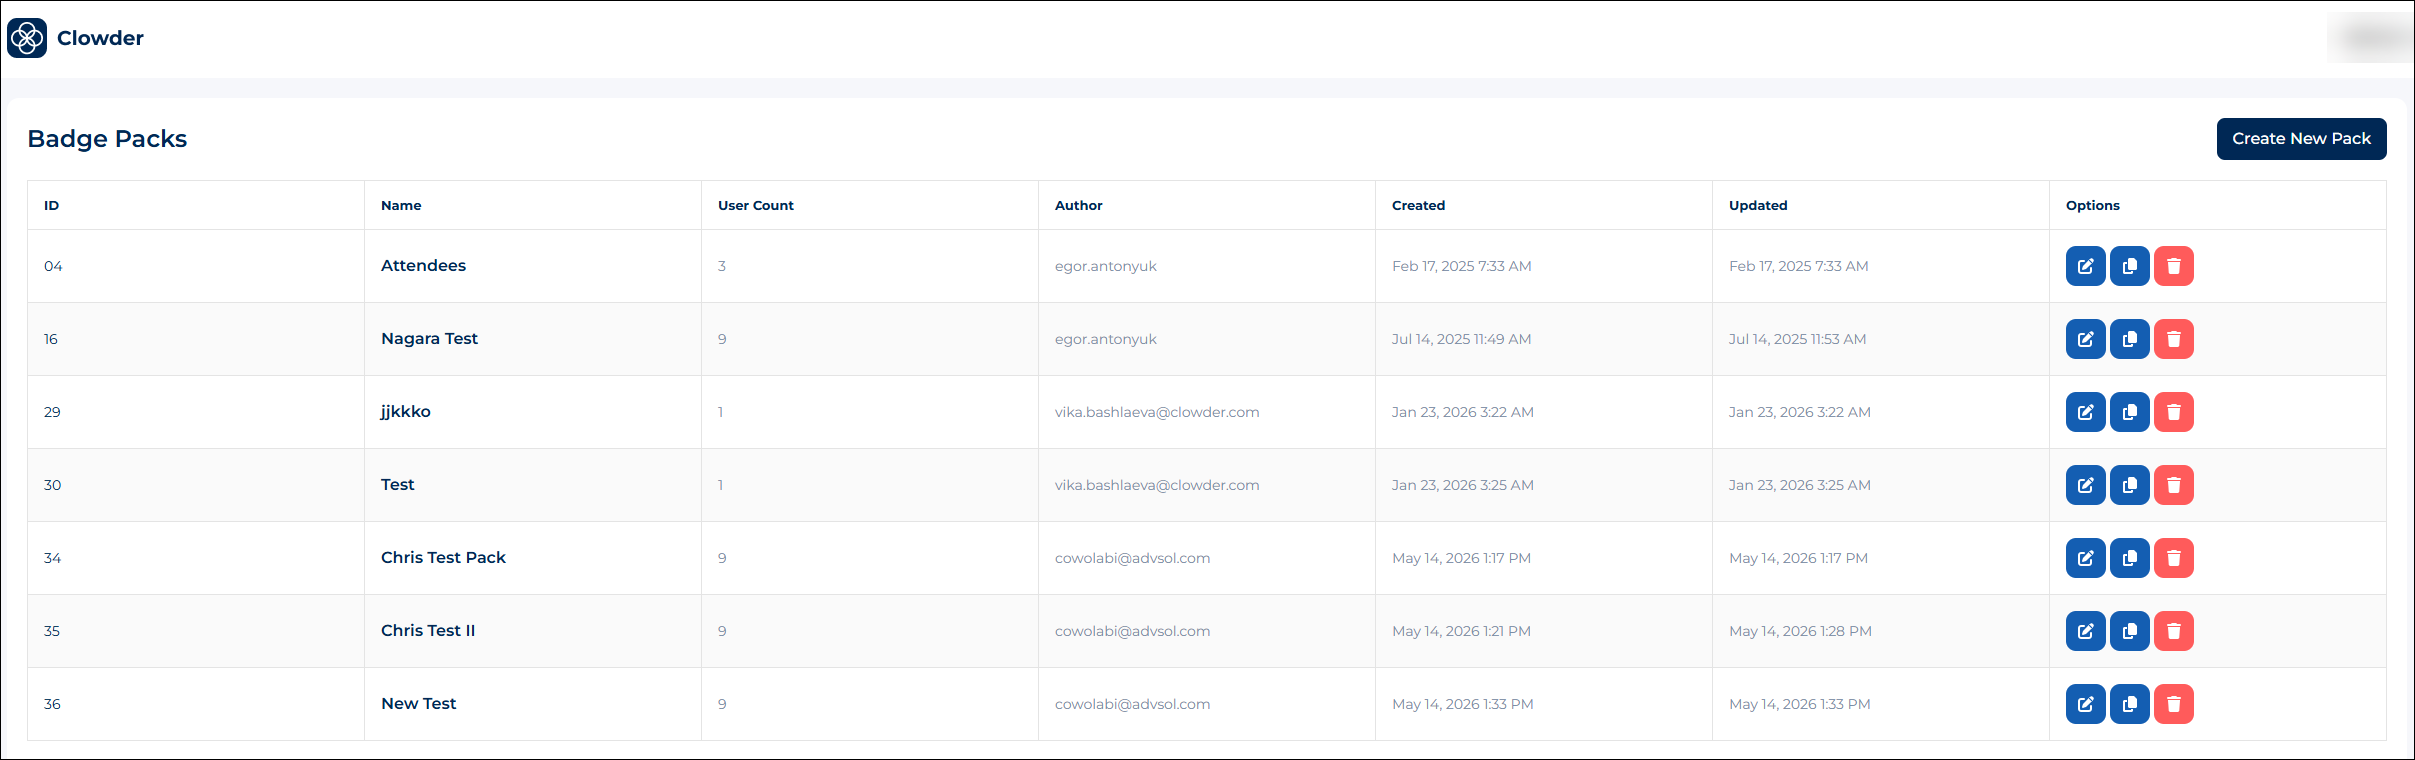
- Click the Edit button in the Options column of the desired pack.
- Click Next to Collections to open the detailed view to see all collections within the pack.
- Review or edit the collections directly from this page.
Updated 3 months ago