

Push notifications
The Push Notifications tool allows app administrators to send targeted messages to users. This feature supports automated system notifications for key events and manual notifications created through the Admin Panel.
Administrators can customize message content, schedule delivery times, target specific user groups, and include deep links to various app content in push notifications.
System notifications
System notifications are automated messages triggered by specific system events or user actions. They keep users informed about important updates and activities within the app. They include notifications for:
- Event Creation: Notifies users about newly created events.
- Mentions in comments: Alerts users when someone mentions them in a comment.
- New Polls: Informs users when a new poll is available.
- New News Posts: Updates users about the latest posts.
Creating push notifications in the Admin Panel
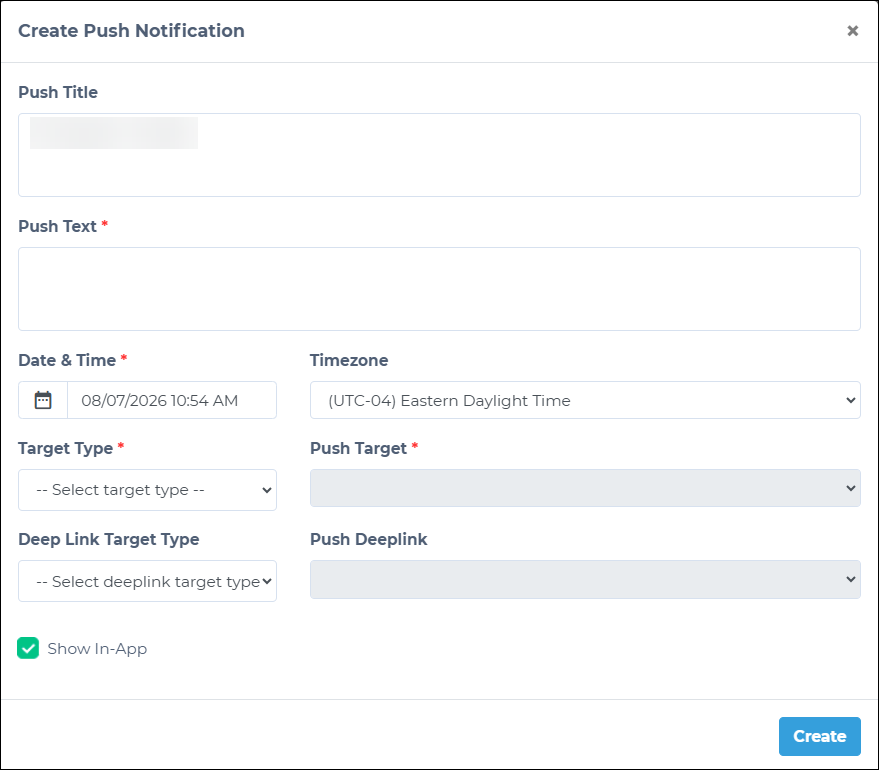
Administrators can create push notifications using the Admin Panel. To create new push notifications:
- Click Push Notifications in the Admin Panel.
- Click the Create Push Notification button.
- In the pop-up, fill in the following information:
- Push Title: Enter a short title. This could be an event name, a call to action, the sender's name, or other appropriate information.
- Push Text: Create the message sent to users.
- Push Title: Enter a short title. This could be an event name, a call to action, the sender's name, or other appropriate information.
- Specify the following information:
-
Date & Time: Schedule the notification at a specific date and time.
-
Timezone: Set the timezone to ensure the audience receives notifications at the correct local time.
-
Target Type: Select the category of users who will receive the notification. After that, a second drop-down will appear to specify the target group further:
- Group: Select a specific subgroup from the list. Only one subgroup can be selected at a time.
- Attendees: Choose the relevant event from the drop-down to notify attendees.
- User Flag: Select the necessary user flag to target users.
- User: Select the desired users.
- All: Choose a role (Non-member, Member, or Any) to target all users.
-
Deep Link Target Type: This setting determines the type of content that will be sent to the user or group as a deep link:
- User: Link to a user profile.
- Discussions: Link to a forum post's discussion section.
- Event/Session: Link to an event or session (includes a search feature within the selector).
- Resources: Link to a specific file.
- Gamification: Link to an event contest.
- News Feed: Link to a specific post.
- Meeting: Link to a specific meeting item.
- QR Profile: Link to a QR profile.
- Home: Link to the News Feed.
-
- Enable the Show In-App box to have users receive the notification while actively using the app.
- Click Create.
Managing push notifications
Admins can see all scheduled and sent push notifications by going to Push Notifications in the Admin Panel.
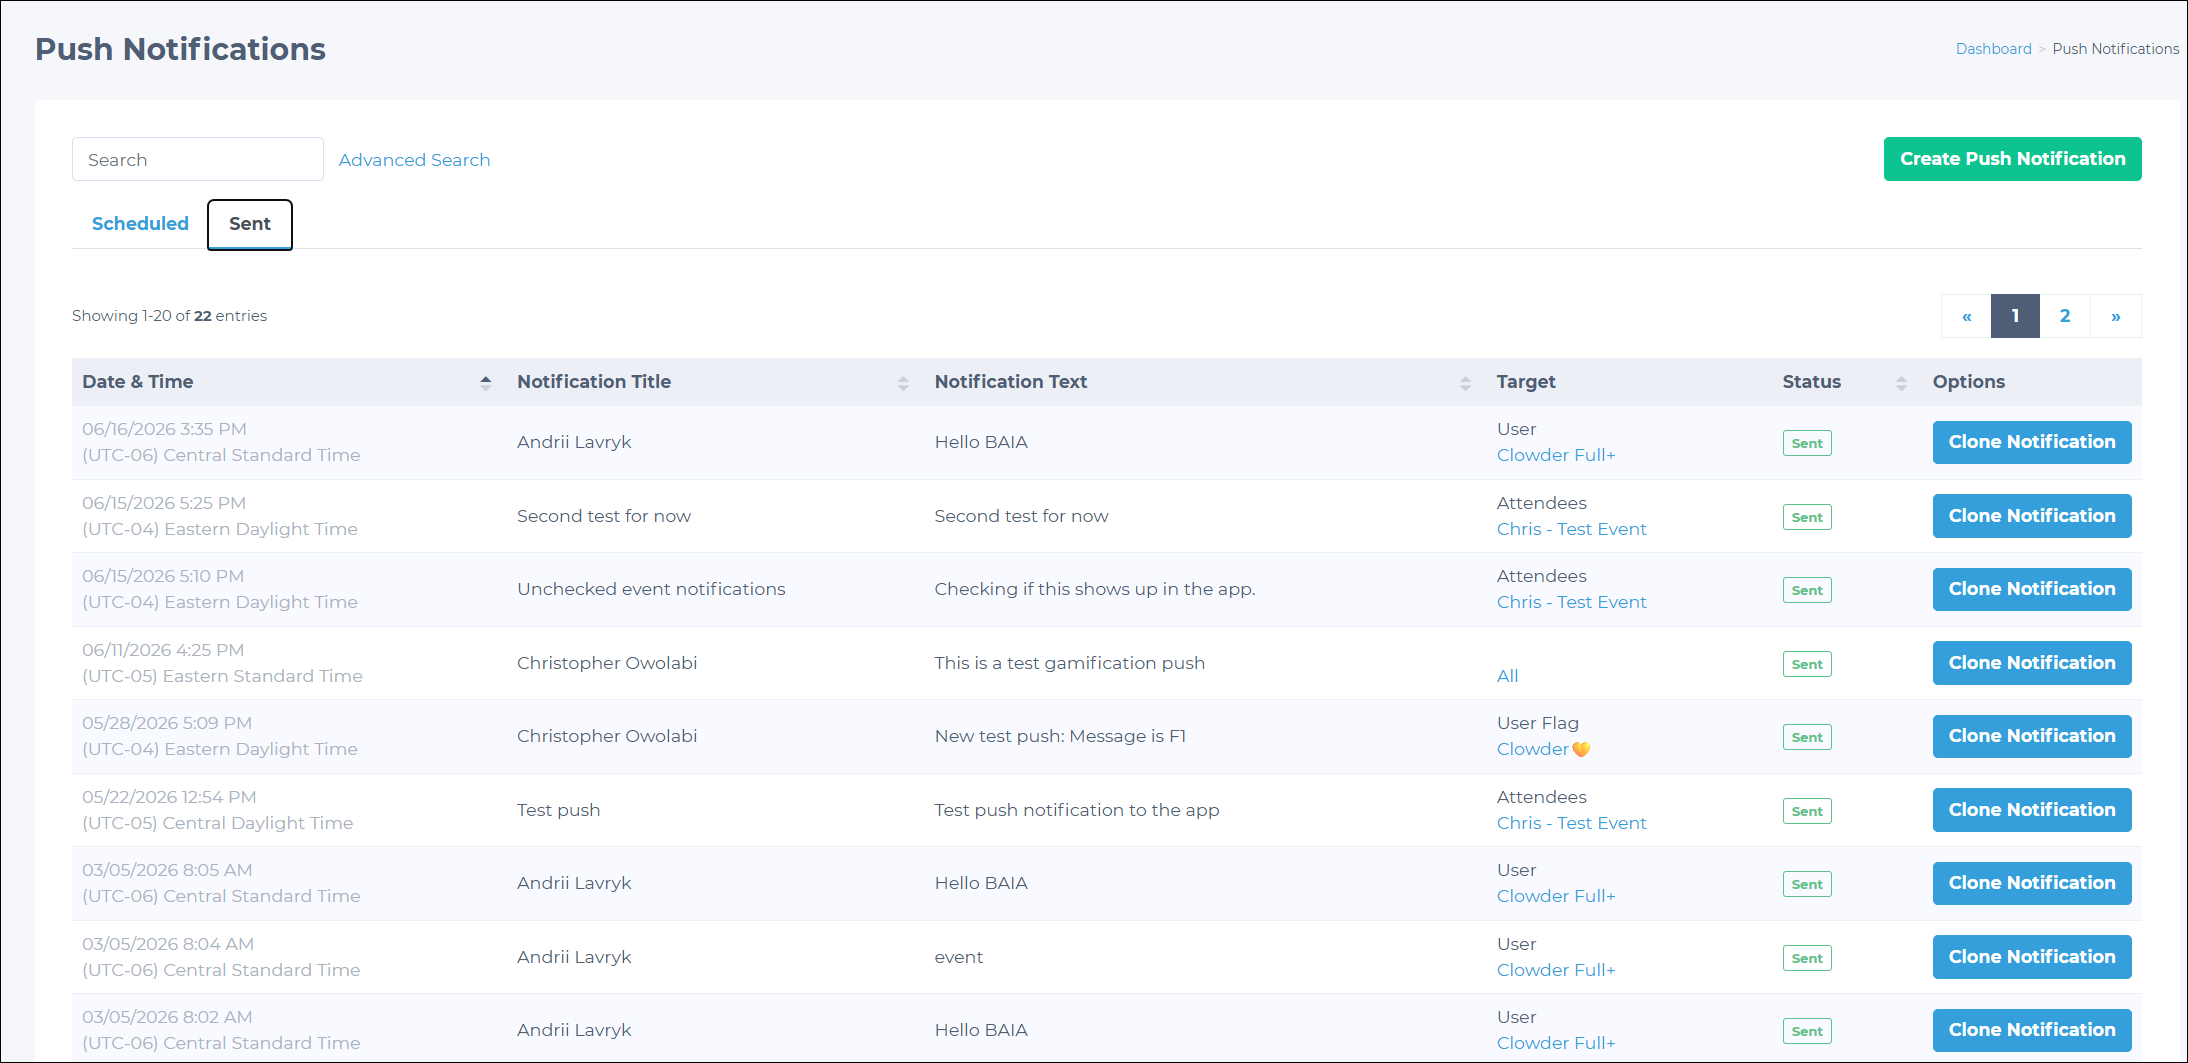
In this section, admins can also search for notifications using the following options:
- Standard search: Enables standard keyword search.
- Advanced search: Enables search filters such as notification status (for example, Disabled, Scheduled, Running), sent or scheduled date, and whether the notification was marked to show in the app.
The Push Notifications dashboard also lets administrators manage upcoming notifications, review their content, adjust send times, and modify target audiences.
Admins can quickly clone sent notifications to edit or resend them in-app. The Sent tab also displays all previously sent push notifications. Each entry shows:
- The exact send date and time.
- Full notification message text and title.
- Target audience (for example, Attendees or All).
- Status (for example, Sent).
Sending push notifications to event attendees
Admins can target all registered participants for a specific event with important updates or reminders. To notify event attendees:
- In the Admin Panel, go to Events > Events.
- Find the desired event in the list and click View.
- Click the Send Push to Registered Users button on the event details page.
- In the notification creation form:
- Add the push text.
- Set the push title.
- Specify the date, time, and timezone.
- Leave the Target Type field as pre-set to Attendees for this event; you cannot change it.
- (Optional) Modify the Deep Link Target Type, which is also typically pre-set.
- Review the settings and click Create to send the push notification.
Updated about 2 months ago