

User Flag
The User Flag feature allows administrators to create and assign custom labels to specific users or user groups within the app. These flags are visual indicators highlighting users with special statuses. They work similarly to tags in the Admin Panel but are not tied to specific subgroups.
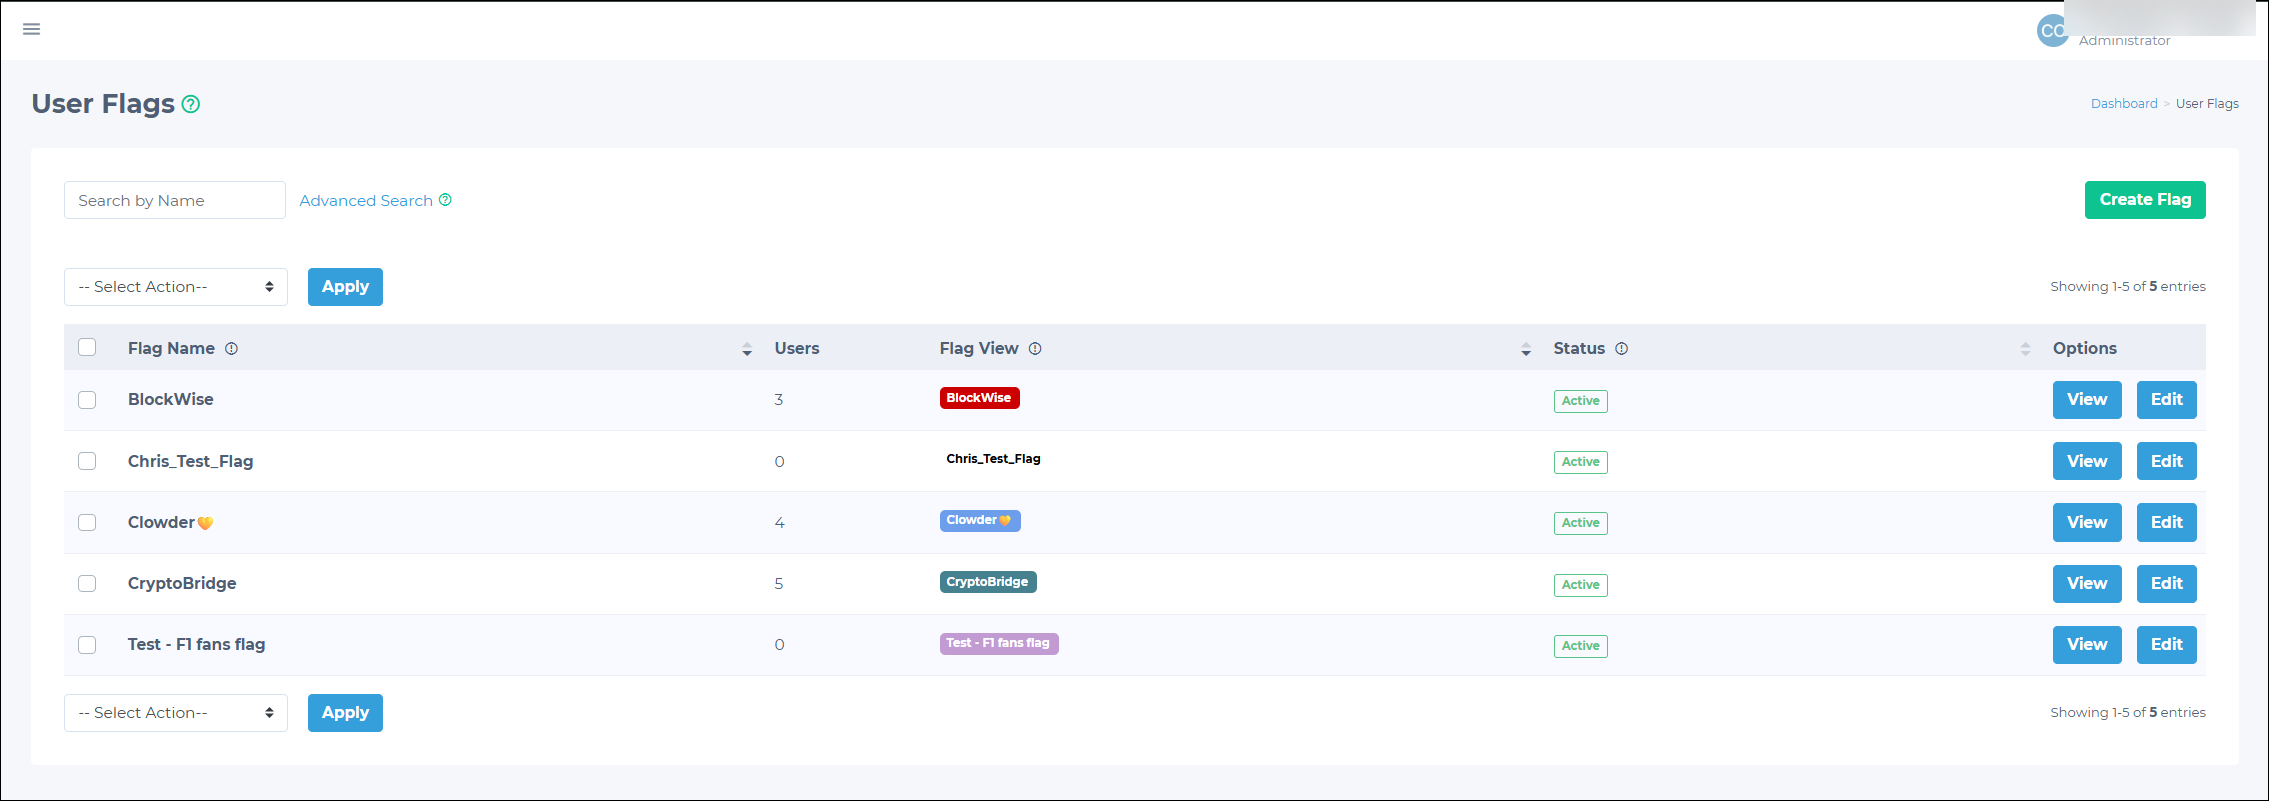
Creating a user flag
To create a new user flag, follow these steps:
-
In the Admin Panel, go to Settings > User Flags, and click the Create Flag button.
-
Enter the desired flag name in the Flag Text field.

-
Select the background and text color. Admins can use preset options or enter a custom HEX code.
-
Set the status (default is Active).
-
Click the Save button to create the new flag.
Managing user flags
To manage user flags, go to Settings > User Flags in the Admin Panel. Then, do any of the following:
-
Search for flags:
- Use the Standard Search to find flags by name.
- For more detailed searches, use the Advanced Search option, which allows admins to filter user flags by:
- Name
- Status (Active/Deleted)
- Flag Color
- Text Color
-
Perform bulk actions on flags:
- Select multiple flags by enabling the checkboxes next to them.
- Use the Select Action drop-down to select an action (Delete Selected Flags or Recover Selected Flags).
- Click the Apply button to execute the chosen action.
-
View and manage individual flags:
- Click the View button next to a flag to access its details page.
- On the flag details page, admins can:
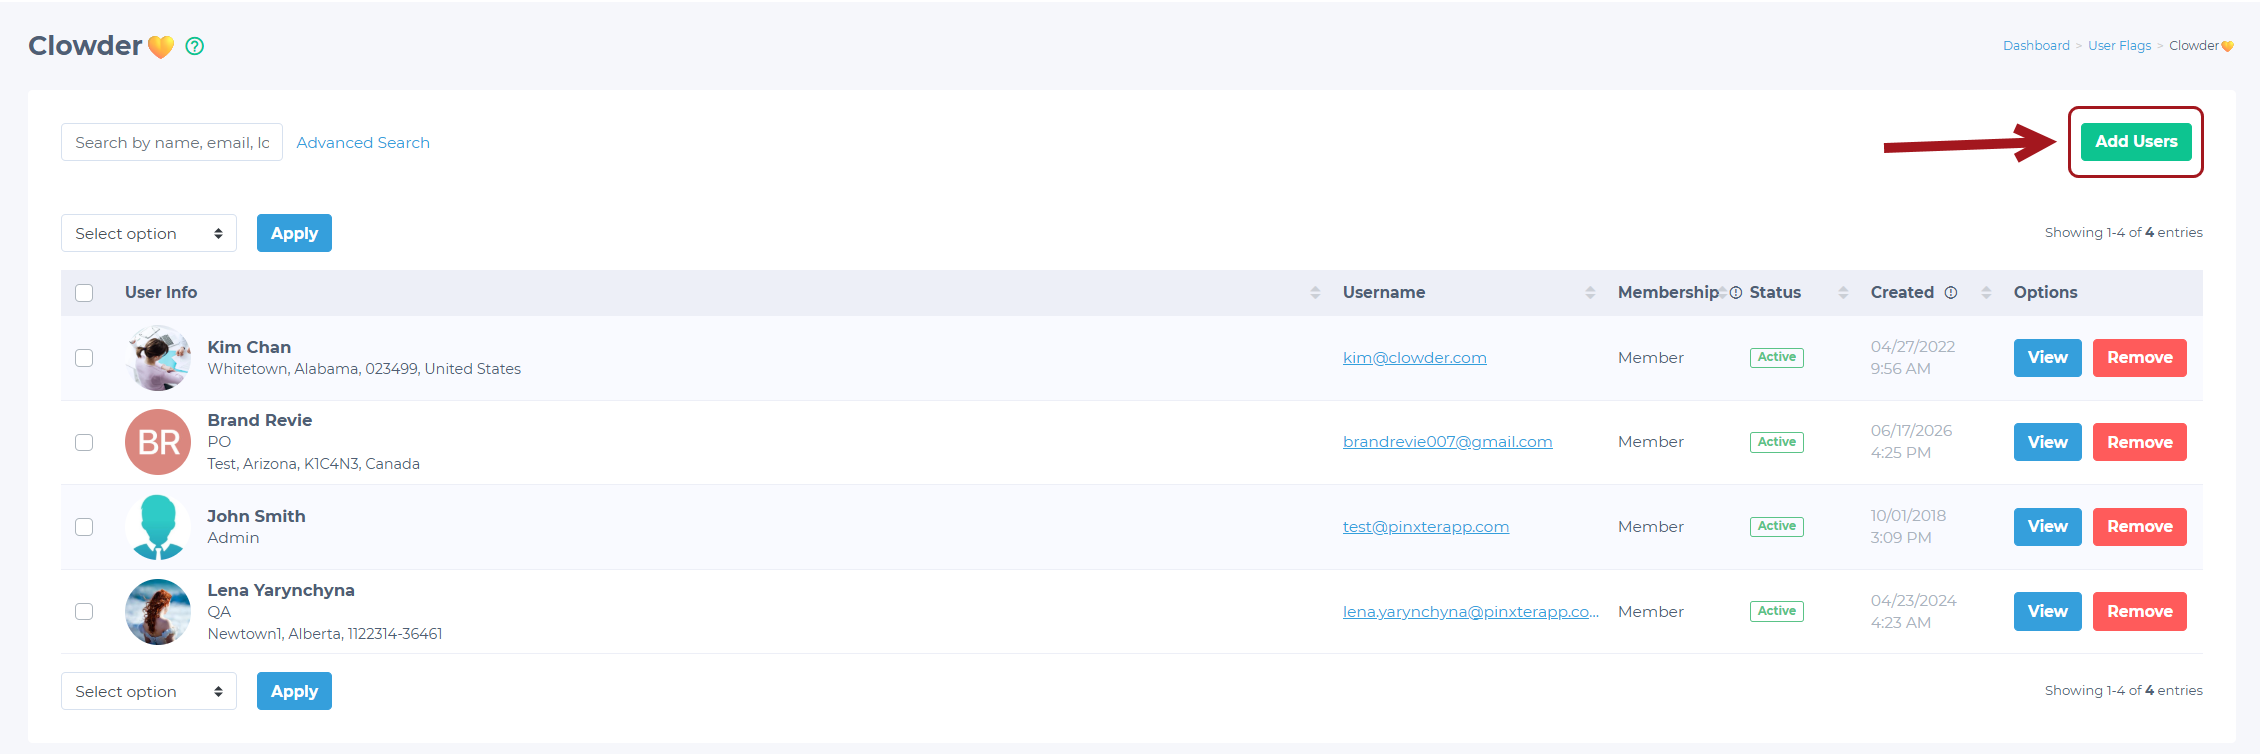
- See all users with this flag.
- Remove the flag from specific users by clicking the Remove button next to their name.
- Perform bulk removals by selecting multiple users, choosing Remove users from the drop-down, and clicking Apply.
- Use the standard or advanced search to find specific users within the flag.
- Click the View button next to a user to see their details.
-
Edit flag properties:
- Click the Edit button next to a flag to modify its properties, including flag text, background color, and text color.
-
Delete a flag:
- Go to the edit page for the desired flag.
- In the Status drop-down, select Deleted.
- Click Save to confirm the deletion.
Assigning flags to users
There are two ways to assign flags to users in the Admin Panel.
Assigning flags to a single user
To assign a flag to a single user:
-
Go to Users > Users in the Admin Panel.
-
Find the desired user using the standard or advanced search options or scroll through the list.
-
Click the Edit button next to the user's name.
-
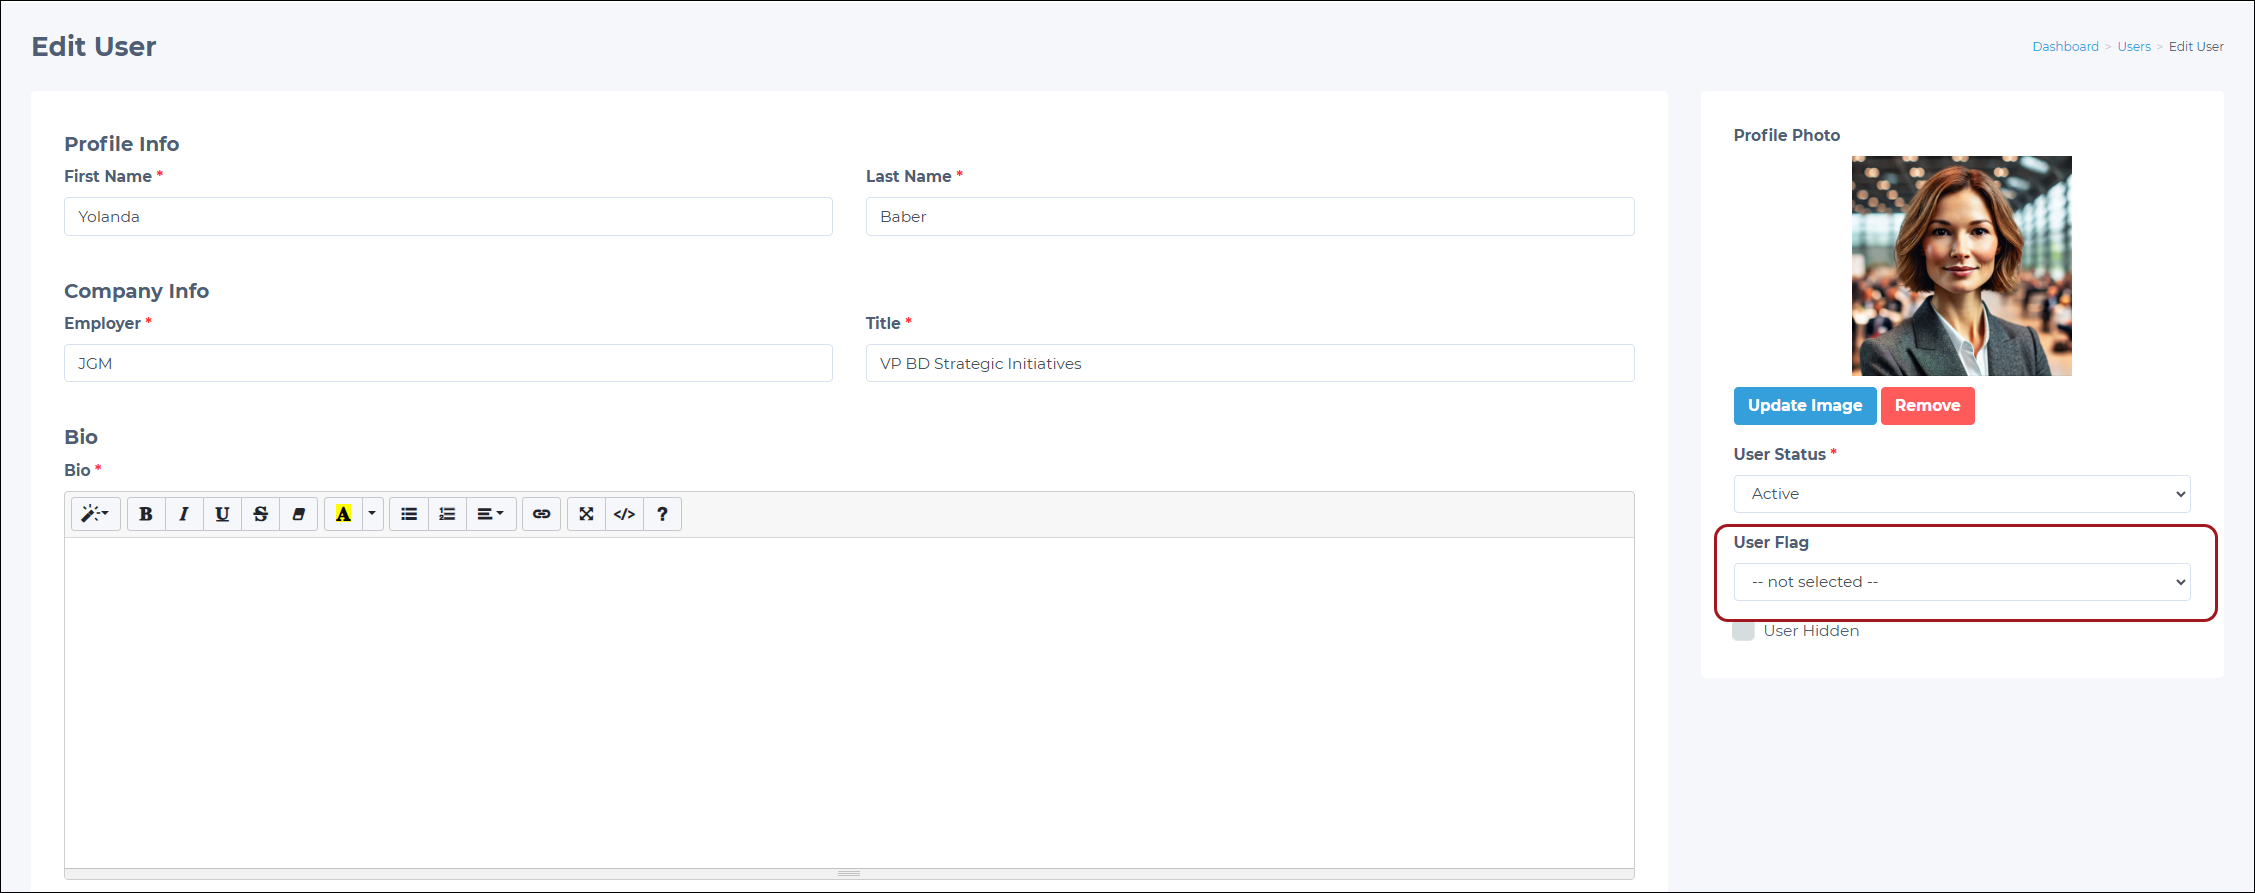
Find the User Flag drop-down menu on the user details page.
-
Select the appropriate flag from the drop-down.
-
Click Save to apply the changes.
Assigning flags to multiple users
To assign a flag to multiple users simultaneously:
-
Go to Settings > User Flags in the Admin Panel.
-
Find the desired flag by scrolling through the list or using the search.
-
Click the View button next to the desired flag.
-
On the flag details page, click the Add Users button.
-
On the Add Users page, admins can do the following:
- Use the search filters at the top to find specific users by name, email, location, status, creation date, or membership type.
- Browse through the list of users.
- Select users by enabling the boxes next to their names.
-
After selecting the desired users, click the Add Selected Users button.
NOTEUser flags appear on the user profile, the app users list, and the individual user page in the Admin Panel.
Targeting users with a specific flag for push notifications
To send push notifications to users with a specific flag:
-
Go to the Push Notifications section in the Admin Panel.
-
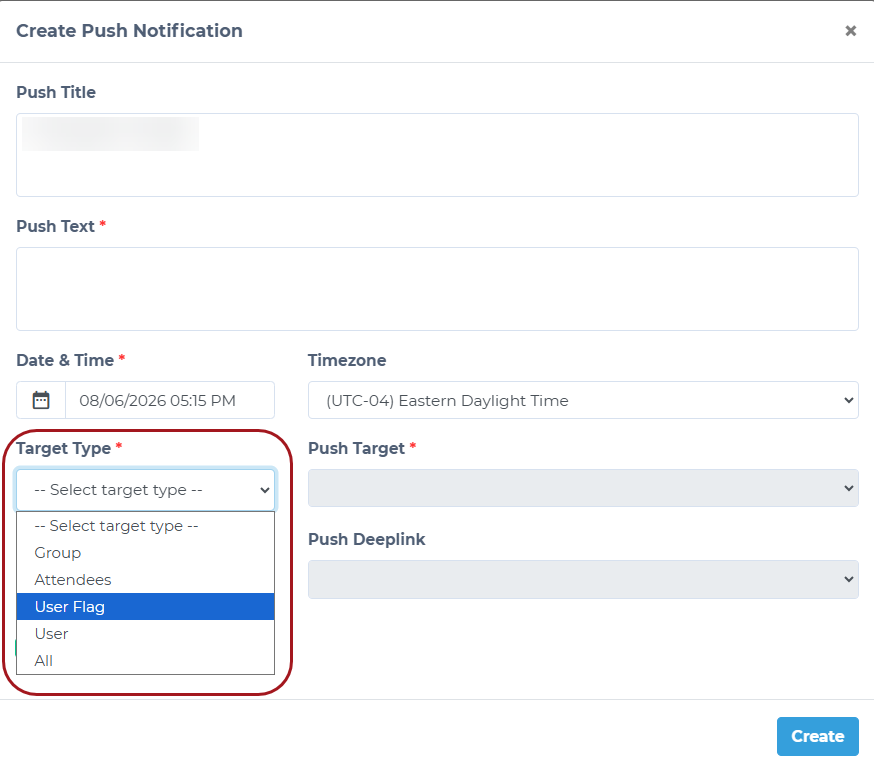
Click Create Push Notification to open the creation form.
-
Set the Target Type drop-down to User Flag.
-
Use the search function to find and select the desired flag in the User Flags field.
-
Complete the remaining notification details as needed.
-
Click Create to schedule the push notification.
Updated 3 months ago