

Groups
Groups help manage what users can see and access. Administrators can use Groups to segment content for different user groups.
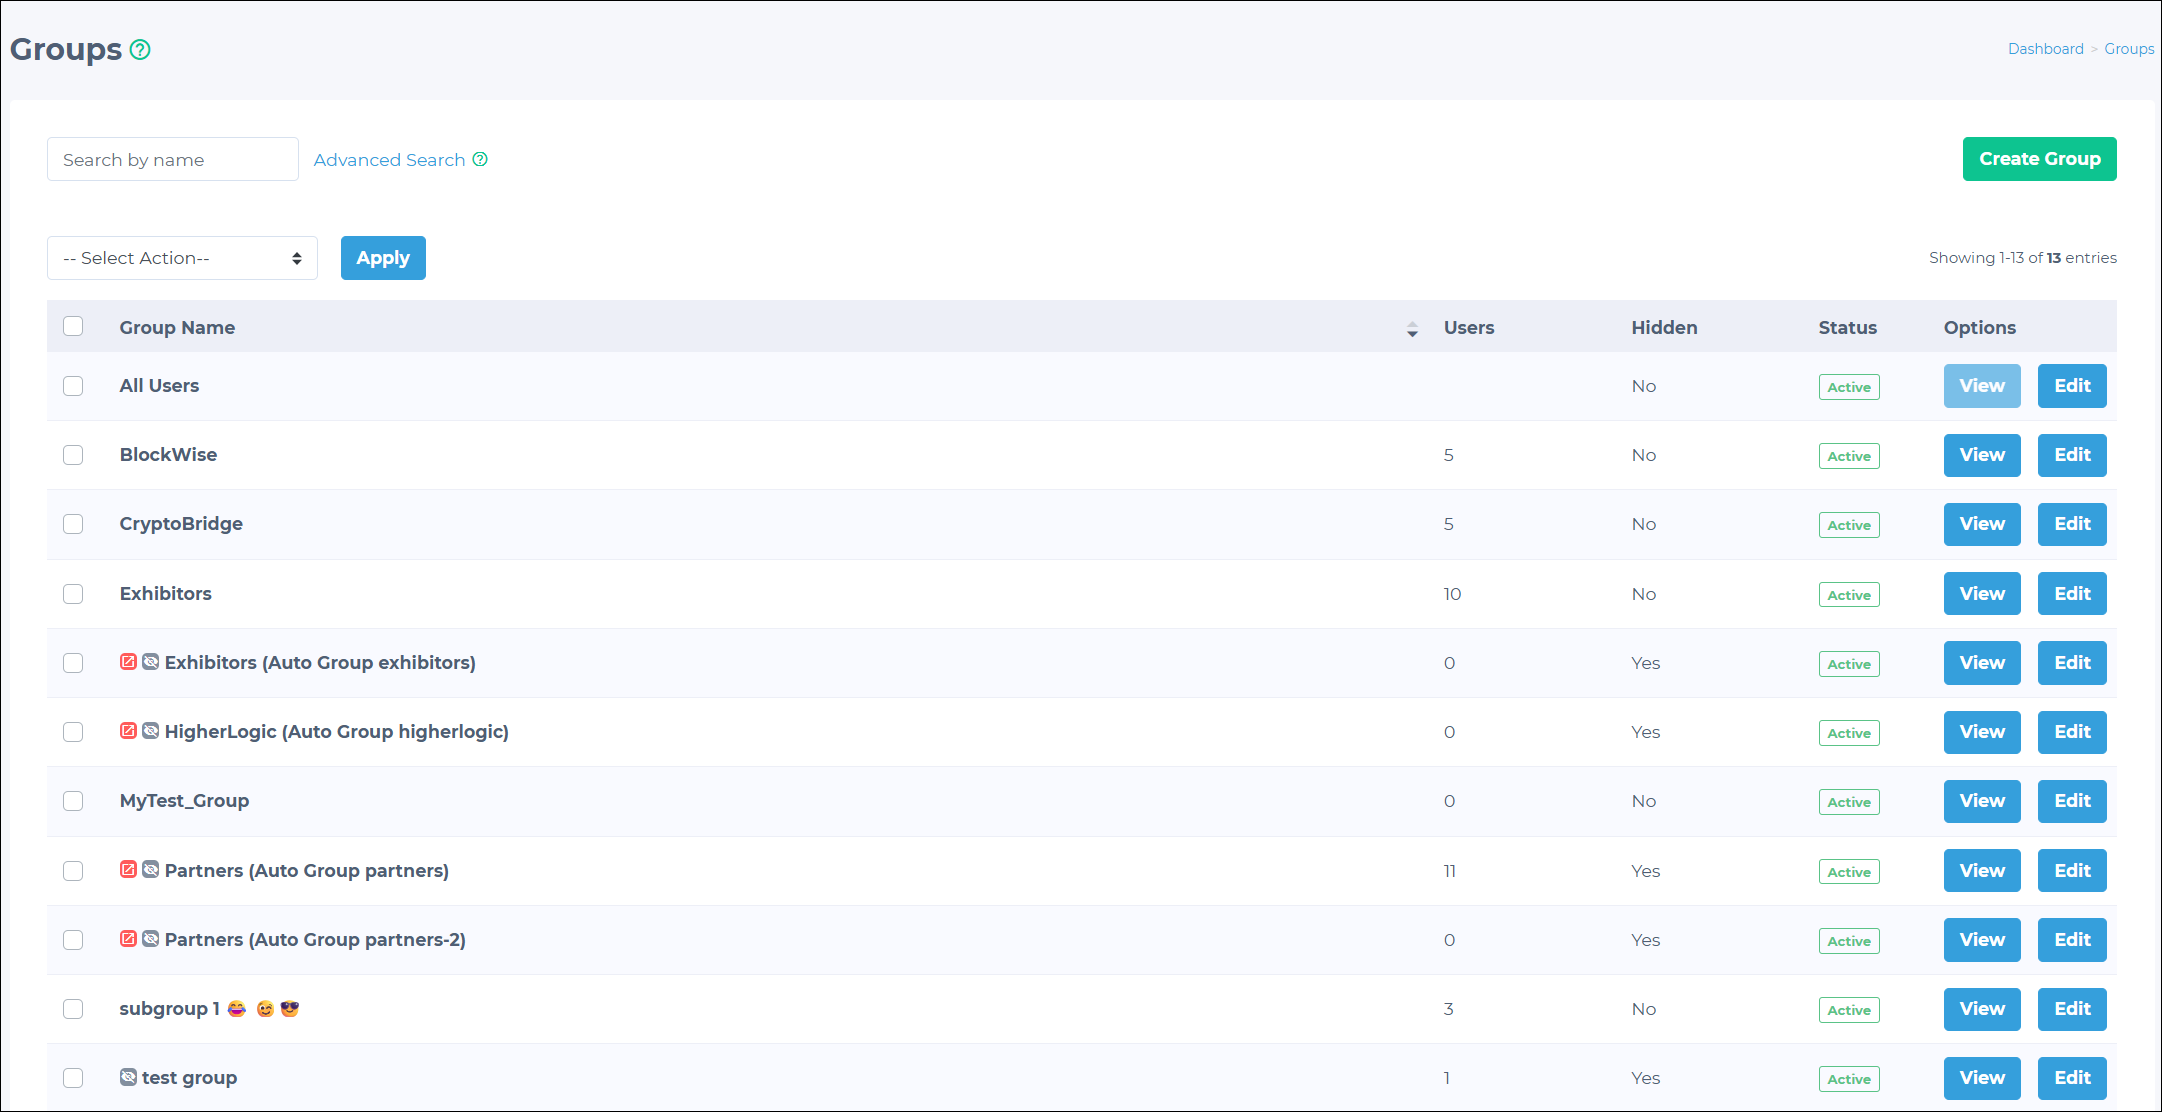
Main types of groups
There are three main types of groups:
- All Users:
- Default group for all users.
- Includes all imported and new users.
- Manual groups:
- Created in Admin Panel (Admin Roles > Groups > Create Group).
- There are no creation limits.
- Users added manually.
- Automatically created groups:
- Created based on provided sources - Group Names Sources (IQA, API, file, and so forth).
- Synchronized with these external sources.
- Automatically update to reflect changes in the client's data.
Groups with internal logic
Groups managed by internal logic (created by Clowder developers at the client's request) and groups synchronized from external sources are marked with a red badge.

Groups managed by internal logic are dynamically updated based on specific user profile fields. For example, users may be automatically assigned to different groups based on their Role field (created at the client's request).
If a user's Role is set to Parent, they are automatically assigned to the Parent group. If their Role changes to Ambassador, they will be moved to the Ambassador group.
The behavior of this automatic assignment depends on the user's Sync Type setting:
- Auto Sync:
- Users are automatically added to the new corresponding groups.
- Users are automatically removed from previous, non-corresponding groups.
- Manual Sync:
- Users are automatically added to the new corresponding groups.
- Users are not automatically removed from previous groups.
EXAMPLEFor a user changing from the Parent to the Ambassador role:
- Auto Sync: The user is removed from the Parent group and added to the Ambassador group.
- Manual Sync: The user is added to the Ambassador group but remains in the Parent group.
Changing a user's sync type
To change a user's Sync Type:
- In the Admin Panel, go to Admin Roles > Groups.
- Find and click the View button for the desired group.
- Enable the checkbox next to the necessary users.
- Click the Select option drop-down, then choose Change Sync Type.
- Click Apply.
The Sync Type will toggle between Manual and Auto for the selected users.
NOTEChanging Sync Type is only available for groups managed by internal logic. It is impossible to change the Sync Type for manually created groups or groups synchronized from external sources.
Creating groups using internal logic
The process for creating these groups is as follows:
- Admins or system administrators request the creation of a group managed by specific internal logic.
- Admins or system administrators specify which user profile field to associate with this logic.
- Developers create the group and connect the specified internal logic to the designated profile field.
Behavior and appearance of different group types
Groups behave and appear differently depending on how they are created and managed.
| Manually created groups / External groups with IQA | Groups managed by internal logic | |
|---|---|---|
| Display color in the user profile | Blue | Red |
| Sync Type | Cannot be changed in the group settings | Can be changed in the group settings |
| Manual removal | Possible | Not possible if Sync Type is set to Auto |
| Manual user assignment | Possible | Not possible |
| Other notes | Users will be pulled back into these groups:
|
Creating groups manually
Follow these steps to create a group:
- In the Admin Panel, go to Admin Roles > Groups.
- Click the Create Group button.
- Enter the required information:
- Group Name (required)
- Select Status from the drop-down (Active, Disabled, or Deleted).
- Click Save to create the group.
After successfully creating the group, the Add Users page opens. From here, admins can:
- Search for users by name, email, location, status, creation date, and membership (Member/Non-member).
- Automatically add users based on groups they already belong to (or do not belong to):
- Included Groups: Users from these groups will be added to the new group.
- Excluded Groups: Users from these groups will not be added to the new group, even if they meet other criteria.
- Find users based on the search criteria or select them from the list.
Enable the box next to the desired users, then click Add Selected Users to add them to the group.
Assigning users to groups
There are two main methods for adding users to groups:
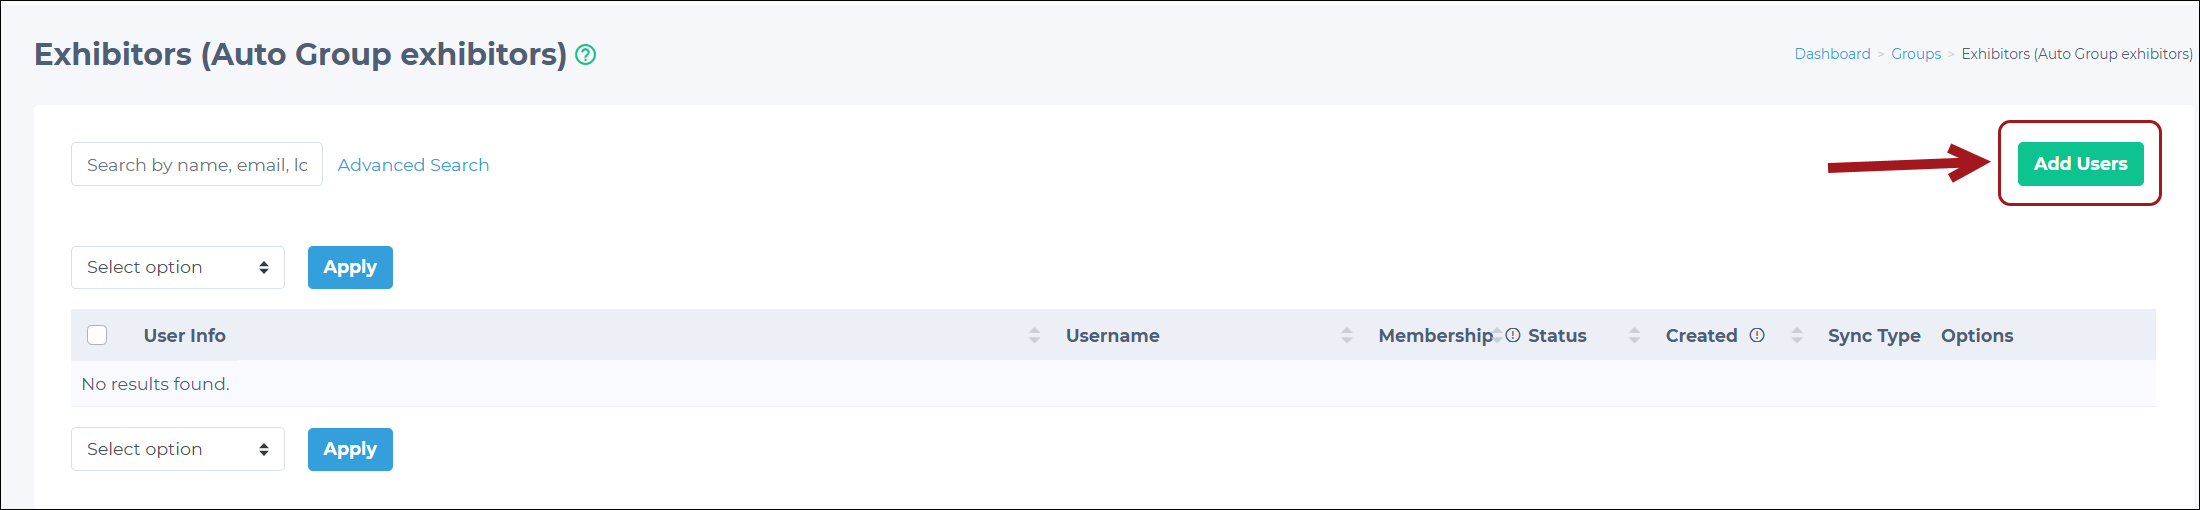
Admins can add users to groups using the group details page:
-
In the Admin Panel, go to Admin Roles > Groups.
-
Find the desired group in the list and click View.
-
On the group details page, click Add Users.
-
Select the necessary users from the list.
-
Click Add Selected Users to add them to the group.
Alternatively, admins can edit individual user access:
-
In the Admin Panel, go to Users > Users.
-
Find the user to edit and click the Edit button.
-
Find the Access to Groups multi-select drop-down.
-
Search for and add groups to grant the user access.
-
Click Save to apply the changes.
Associating content with groups
Selecting a user group is required when creating content. The Group drop-down allows targeting multiple user groups for each piece of content (such as news feed posts, events, resource folders, files, and forum categories).
When creating new content:
-
Click on the Group drop-down menu.
-
Select the desired group from the list. Multiple groups can be selected.
-
The content will now be associated with that group.
For existing content:
- Find the item to modify.
- Click the Edit button for that item.
- In the edit interface, find the Group drop-down menu.
- Choose the appropriate group from the list.
- Click Publish Post to save the changes.
Setting visibility by groups for menu items
Group access to specific menu items in the app can be controlled. To do so, contact your Client Account Manager.
Managing groups
After creating groups, several options are available for managing them, including the ability to:
-
Use the search function to find groups by name, status, visibility, or external ID.
-
Perform bulk actions:
- Select multiple groups using the checkboxes.
- Use the Select Action drop-down to disable, delete, or recover selected groups.
- Click Apply to perform the chosen action.
-
View group details:
- Click the View button next to a group to see its details.
- On the resulting page, view each user's profile or remove them individually by clicking the Remove button.
- To bulk manage users, select multiple users, use the Select option drop-down at the bottom, choose Remove users, and click Apply.
- Click the Add Users button at the top of the group details page to add users.
-
Edit groups:
- Click the Edit button next to a group to modify its properties.
- Change the group name.
- Update the status by selecting Active, Disabled, or Deleted.
- Toggle the Hidden setting to make the group visible or hidden.
Disabling the group feature
To disable group functionality, contact your Client Account Manager.
When this feature is disabled, the Access to Groups multi-select drop-down will not be available when editing users.
Updated 3 months ago