Defining products
The Item Creator content item lets you build new product offerings and edit existing ones. From the content item, you can define product details including the item Category, Item code, Name, pricing information, tax configuration, whether or not the product has inventory, and the GL account. You can edit products in the content item that were created within the Advanced Accounting Console, and vice-versa.
You can also provide post-purchase information or content to your members or visitors to your website. After purchasing a product you defined, purchasers will receive post-purchase information or content in the following:
- On-screen order confirmation upon successful order submission.
- Order confirmation email.
For more information, see Granting access to secure website content.
You can also create a collection of items, known as a kit. This allows you to create complex offerings with quantity requirements. For more information, see Defining product kits.
Using the Item Creator content item
The Item Creator content item lets you build new product offerings and edit existing product offerings. You define the offering on the Summary tab. The item Category is a shortcut to specifying the default GL accounts, tax schedule, and standard discount percentage.
The Accounting tab lets you see and override the details of methods, fees, taxes, and default GL accounts for these purchases. If any of the fields do not apply to your item, they cannot be edited. For example, for a kit without child pricing, all values on the Accounting tab are editable. For all other collections and kits, the fields are read-only (except Accounting Method).
📘 Note
Tax schedules are typically left blank unless a particular tax schedule will always apply to this item, regardless of who is buying or where you are shipping.
Defining products
The Item Creator content item has two modes:
- Add mode: Enter the Summary and Accounting information for the product, then Save to create the new product.
- Edit mode: When you pass a product’s Item code to the content item using the iProductCode URL parameter, the content item displays in edit mode.
Adding products
Do the following to add products:
- From the Staff site, go to Commerce > Add product.
- (Summary tab) Define your product:
- Select a product Category. For more information, see Defining product categories.
- Enter in an Item code. For example if you are adding a new coffee mug, the code could be MUG123.
- Enter in a Name for the item.
- (optional) Enter in a brief Description for the item.
- Enter the Standard price (Non-member) and Discounted price (Member).
- (optional) Enter the Weight to help calculate shipping costs.
- (optional) Enter dates and times for Show in search to provide a date range in which your product will show up in searches. If no date is entered, the product will always show in search.
- (optional) Select the Assign purchaser to a group option to automatically add all purchasers of this item to a group.
- Specify a new Group to which you can assign purchasers, or select an existing Group from the drop-down.
- Click the Save icon. The new group will be created, regardless of whether you complete the process of creating the product.
- Enter the Term span in months. This is the term for which the purchaser can remain a member of the group.
- (optional) Allow purchaser to enter details - Select this option to enable adding specific details about an item at the time the order is being placed. For example, when a charity accepts merchandise or services as In-Kind gifts, a staff user can specify details about the items or services received from the donor. These details are entered prior to adding the item to the cart, and will be displayed in the Shopping cart.
- (optional) Post purchase information - Information to be displayed to a user following purchase of this item. It will be included in the order confirmation message and can be used to indicate how to retrieve downloadable content.
- (optional) Click the edit icon to display a picture for this item.
📘 Note
To create a kit, you must select a category that is defined as a Product kit.📘 Note
Products can be defined with special pricing that overrides a product's price. Special product pricing is set up according to customer type. See Special Pricing window for Orders for more information.📘 Note
Staff users can choose to show inactive products in their search results.You can create products that offer group-based access to post-purchase information or content based on a group membership. For more information, see Granting access to secure website content.
📘 Note
You can create more than one group through this interface, but you can assign only one group to this product. Each group will have a role of Member and a type of Purchased Products. You can also associate multiple products to the same group once the group is created.This functionality is only available with Service Pack E or later.
- (Accounting tab) Review the default settings and make any required changes for the item. The options available depend on the taxation method set up for your default organization:
- Select a Financial entity in which the product purchase amount will be deposited to. If this option is left blank, the product purchase amount will be deposited to the Default financial entity (Default organization).
- If your organization uses the default taxation method, select Taxable.
- If the product is non-taxable, do not select an option.
- If your organization uses the VAT taxation method and the product is taxable, select Taxable and enter the VAT Tax Code you want to apply. See Taxation for more information on setting up Canadian and European (VAT) taxation methods in iMIS.
- The Inventory Item indicates whether an item is a stock item and allows tracking inventory.
- Products that are out of stock can be added to the cart and successfully checked out only as a Staff user.
- Products that are in a public user’s cart and become out of stock before the user checkouts will not be successfully checked out
- Products cannot be changed to a non-inventory item unless the inventory item quantity has been set to zero and there are no outstanding orders for the product.
- If your organization uses multiple warehouses, enable Multi-warehouses in the Advanced Accounting Console and the system will check all defined warehouses for the inventory item.
Click for details
- If you want this product to be offered as a premium, select Offer item as a premium:
- Enter a Listed minimum gift amount. This is the minimum gift amount a donor must give in order to be eligible for this premium.
- Provide a Fair market value. This is the price that the donor would need to pay if they were not receiving the product in exchange for their donation. For premiums, the tax-deductible amount is often calculated as the amount of your donation minus the Fair market value of any premium you receive for that donation. Currently, this value is not included in any of the receipting logic.
- Select the Include in premium sets field to choose existing premium sets the product will belong to. Select Add new to create a new premium set to which the product will be added.
📘 Note
If you are creating a kit, you must define the kit components for your premium.
This functionality is only available with Service Pack D or later. - Select the general ledger account(s) to associate with this item - You can override the default general ledger accounts from the Income drop-down list. Enter the desired amount name or code, and then select the account from a filtered list.
- Click Save. The item detail page displays as it will appear to users. In addition, the item will display in the list of product items. The user can click the item name to view details.
📘 Note
This option is not available unless a product Category is selected on the Summary tab.
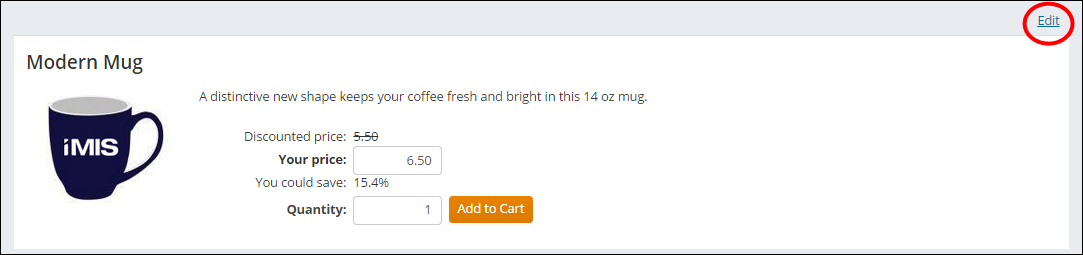
Editing products
- From the Staff site, go to Commerce > Find products.
- Select the product you want to edit.
- Select Edit.
📘 Note
The Edit link will not appear if the product is currently in the cart, a Product Kit, or a product with a negative standard price. Product Kits and products with a negative standard price can only be edited through the Advanced Accounting Console. 📘 Note
Products that have special pricing can be edited on the Web, but any pricing changes must be done in the Advanced Accounting Console. Products with special pricing applied will have a Uses pricing rules label underneath the Standard price field on the Web.
Deleting a product
You can delete a stock item only if all inventory quantities are zero. When you delete a product, all of the product's Upsell/Cross-sell/Replacement records are also deleted:
- From the Advanced Accounting Console, go to Commerce > Inventory > Products.
- Select the product from the list of Current Products, then click Delete.
- Click Yes.
Additional options from the Advanced Accounting Console
A product can be created and configured entirely through the Staff site, however some features are exclusively configured in the Advanced Accounting Console. Your Advanced Accounting Console includes a Products page with additional product-definition options.
The Web Options window is used for enabling products either for sale or for viewing on the Web.
Do the following to enable a product to be viewed or sold on the internet:
- In the Advanced Accounting Console, go to Commerce > Inventory > Products.
- Select a product from the list of Current Products.
- Click Edit.
- Click Web to open the Web Options window.
- Enable the product for the Web:
- Not on Web -The item is available for search by Staff users only when Include inactive results is selected. Staff can find the item during a search, edit the item, or add the item to an order.
- View on Web - The item is available for search by Staff users and public users. Staff can also edit the item or add the item to an order.
- Sell on Web - The item is indexed for search by Staff users and public users. Staff and public users can add the item to an order. The item is editable by Staff users only.
- Enter the Product Image Hyperlink.
- Enter the Thumbnail Image Hyperlink.
- Click Save.