iMap
iMap allows the conversion of iMIS addresses (like "855 West Prairie Avenue, Wheaton, IL") into geographic coordinates (like latitude 41.877166 and longitude -88.119687) using the Google© Geocoding API via HTTP requests.
NoteThe Google© Geocoding API can be subject to limitation, see their terms of service: https://developers.google.com/maps/terms#section_10_12
iMap provides the selection of specific iMIS addresses to be geocoded via a custom SQL view that can also be edited to specify a ranking of address priorities.
System requirements
The following system specifications are required to successfully run iMap:
- Google© Maps API Key (instructions for obtaining below)
- SQL Server 2008 or higher
- Microsoft .NET Framework v3.5 or higher
- Windows 7 or higher
- iMIS 15.2 or higher
Installing and upgrading iMap
Do the following to install and update iMAP:
- Download the app from the Support Portal.
- Unzip the folder and navigate to the unzipped folder.
- Right mouse click on the setup.exe and click Run as Administrator.
- The Setup Wizard will open.
- Click Next.
- Run setup.exe.
NoteIt is strongly recommended this be done by right-clicking the file and selecting Run as Administrator. The Installer Wizard for iMap will start.
- The license agreement will display.
- Click I accept, then Next.
- Verify the default installation folder.
- Click Next.
- Click Install to start the installation. A screen will then show, displaying the progress of the install. A screen will confirm that iMap has been successfully installed.
- Click Finish.
- After installing iMap for the first time, an administrator needs to set up and configure the required settings such as the database connection information and the geocoding preferences in order to get started.
About the License Key
The first time you log into iMap, a license key screen will appear. You will need to enter the license key CSI sent you to use iMap. If you do not have a license key, you may only use the product with an iMIS Demo database. When connecting to an iMIS Demo Database, iMap will not ask for a license key.
After entering the license key, you will be able to use iMap on your iMIS database. The license key is stored in your iMIS database, therefore you will only need to enter this key once per database. Installing iMap on a new computer will not require you to re-enter your license key.
NoteChanging the "Licensed To:" name or number of licensed users for iMIS will require a new license key. Contact support with a screen shot of the current iMIS System Setup and a new key will be emailed to you.
- Log into iMIS as an administrator (manager).
- Click on File in the top toolbar.
- Select System Setup.
- Take a screen shot and send to support.
Upgrading iMap
When upgrading with a newer version of iMap, proceed with the exact same steps mentioned above. The installer will automatically remove the previous version if installed prior to installing the new one.
Using iMap
NoteTypically addresses process immediately, however, they can sometimes take up to ten hours to process.
Do the following to use iMAP:
- Go to Start > All Programs > CSI Programs > iMap.
NoteIf you are not logged in with the Windows administrator account:
- Find the installer folder.
- Right-click on the Csi.AddressGeoCoding.exe file.
- Select Run as administrator.
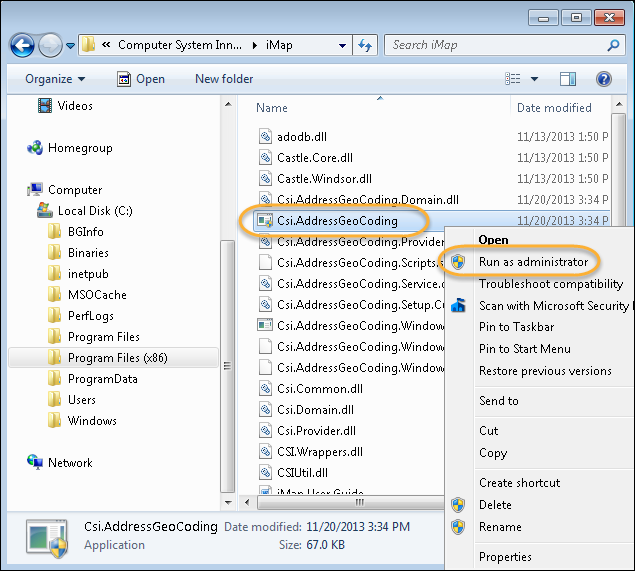
NoteThe Windows application program is only intended to configure and troubleshoot the setting. Once setup, the Windows service should operate the geocoding process continuously in the background.
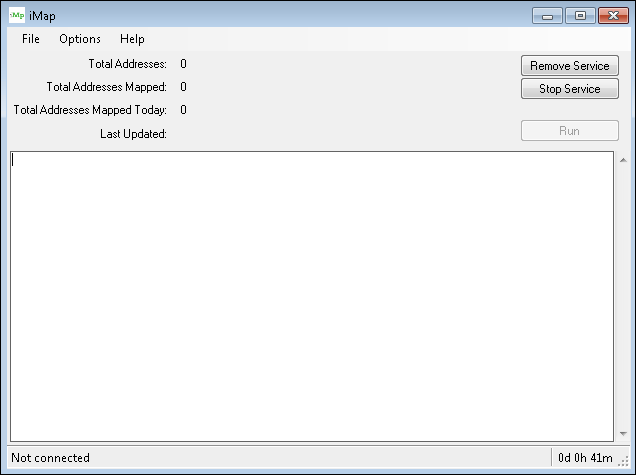
The main window provides a configuration menu and buttons to start/stop the related Windows service, and various troubleshooting information.
Setting up database connectivity
Do the following to setup database connectivity:
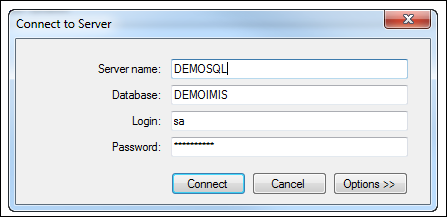
- Select the menu option: Options > Connection.
- Enter the necessary database connection information:
Setting up geocoding parameters
Do the following to set up geocoding paramenters:
- Go to Options > Configuration.
- Enter the relevant information:
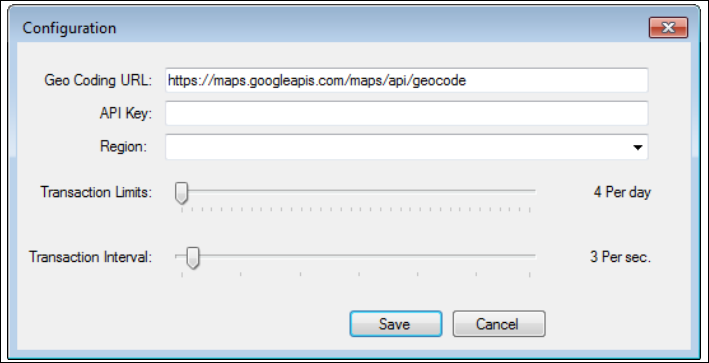
To obtain a Google API Key, please visit the following link (you will need a credit card and an existing Google account):https://developers.google.com/maps/documentation/geocoding/get-api-key
- Create a new project (you may call it iMap).
- Agree to terms and click Next.
- Click Get the API key.
- Select APIs and select Geocoding API.
- Click ENABLE.
- Create Billing Account.
- Continue setting up an account with credit card info.
- Obtain API Key.
Learn more about the Region option here:
https://developers.google.com/maps/documentation/geocoding/intro#RegionCodes.
NoteIt is recommended that Transaction Interval value be set to 3: This determines how long the next HTTP request should wait.
The Transaction Limits value is usually set to 1,300, depending on your license agreement with the Google© Geocoding API. 1,300 per day should keep you under the "free" threshold of 40,000 per month.
Setting up addresses to be geocoded
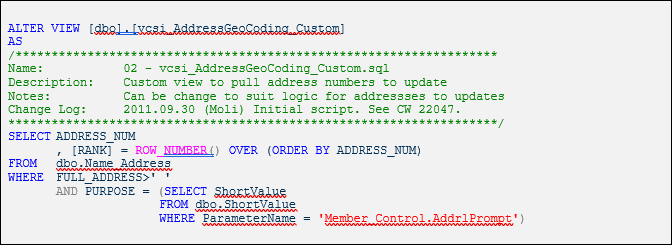
iMap installs a custom SQL view called: vcsi_AddressGeoCoding_Custom and relies on this view to get the iMIS addresses to be geocoded.
Alter the custom view to meet your requirement. For example:
A custom SQL table called csi_AddressGeoCoding is used to store the geocoding results. It includes the following fields:
- ID, ADDRESS_NUM, FULL_ADDRESS, STATUS_CODE, STATUS_CODE_TEXT, ACCURACY, LATITUDE, LONGITUDE, LAST_UPDATED, and TIME_
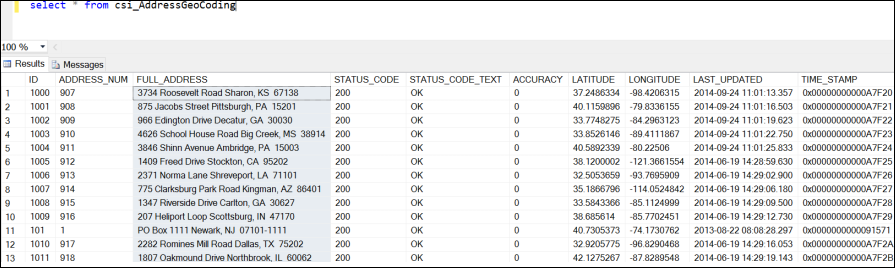
NoteThe RANK value determines the order to prioritize which addresses need to be mapped first.
Starting from version 1.0.5 a new lookup table CSI_CONFIG/IMAP can be created:
- The CODE and UPPER_CODE fields are the sorting order
- The SUBSTITUTE field should be the iMIS ID of the record to update addresses for
- The DESCRIPTION is optional and should be the address purpose or blank for all addresses.
By default, iMap will detect the any values in the lookup and process those.
Upon processing iMap will automatically remove the lookup values.
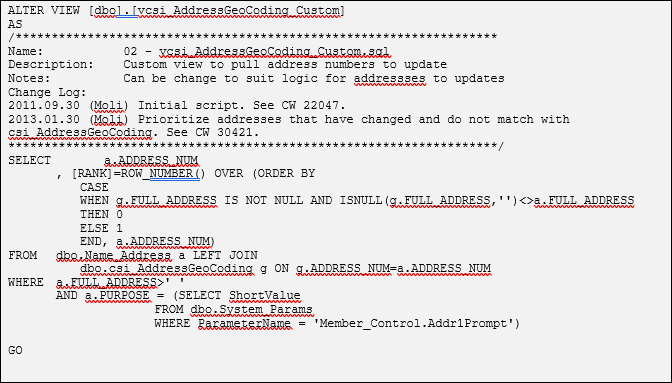
Sample two of custom view vcsi_AddressGeoCoding_Custom:
Prioritizing addresses that have changed and do not match with csi_AddressGeoCoding
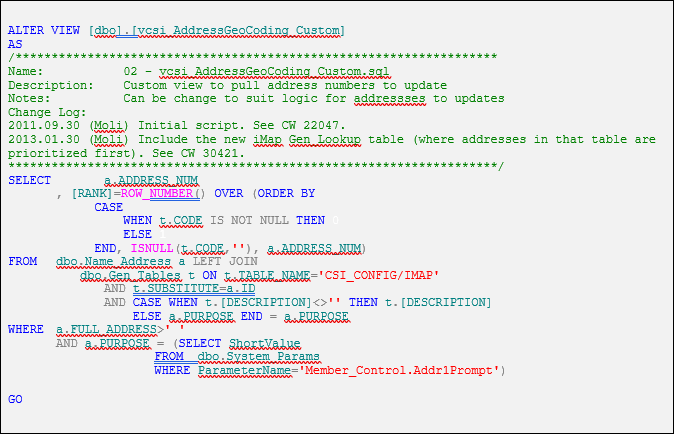
Sample three of custom view vcsi_AddressGeoCoding_Custom:
Including the new iMap Gen_Lookup table with addresses to be prioritized first.
Validating setup
Once all the settings are completed you can run a validation test that will already send the addresses to be geocoded.
- Click Run.
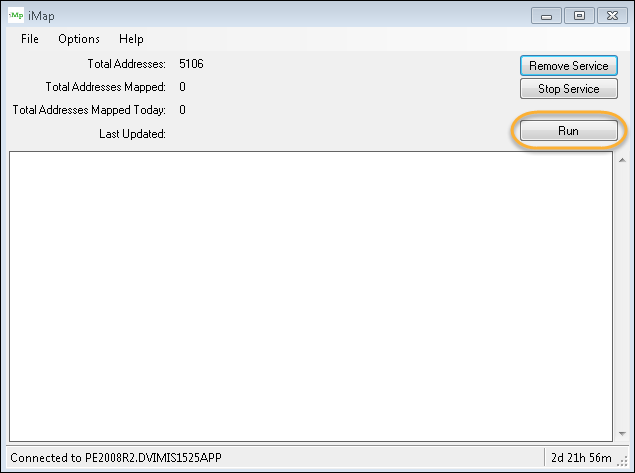
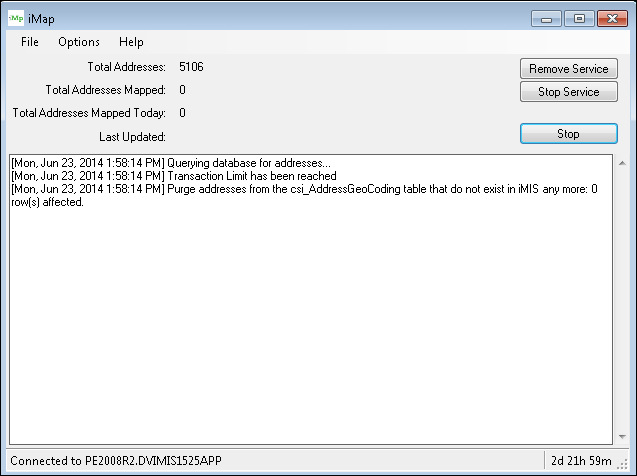
iMap will start sending HTTP requests according to the settings.
Running a Windows service
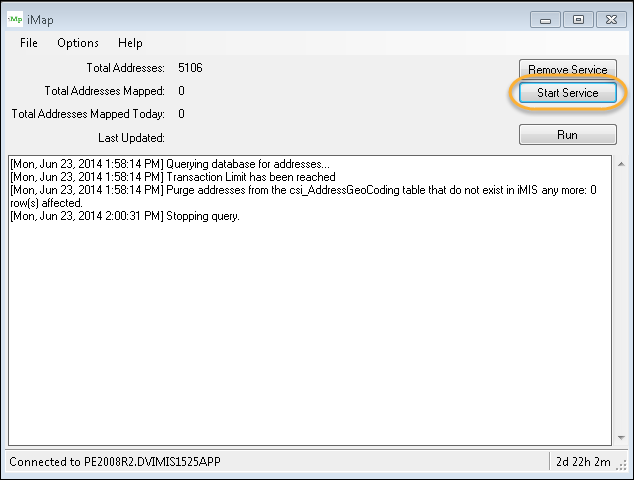
Once the settings are completed and the configuration validated, you can start the associated Windows service to let the geocoding process run in the background.
- Click Start Service.
NoteStop the iMap windows program from processing by clicking Stop (the Run label should then be displayed instead) and exit out by clicking File > Exit.
Running maintenance
Do the following to run maintenance:
- Go to Options > Maintenance.
The output results will display on the main screen:
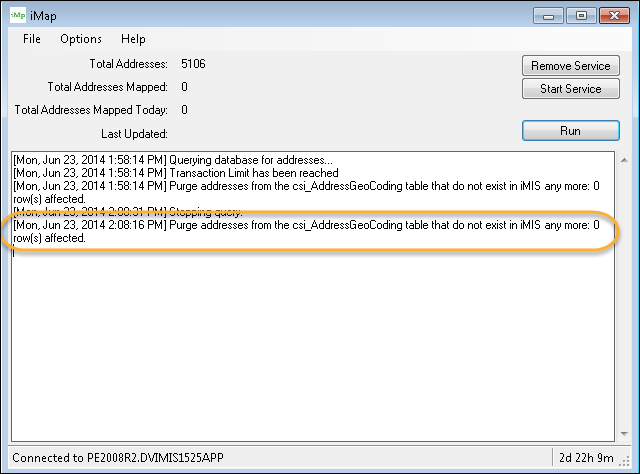
NoteThe maintenance program is automatically called when there is no mapping to be done. But it can be called manually using the menu option.six.
WarningIf you have any issues with iMap, contact support. Tickets are normally responded to within one to two business days after they are submitted.