Setting up Standing Orders
Some donors like to give recurring, open-ended gifts by instructing their bank to pay a certain amount of money each month, quarter, or year directly to the non-profit’s bank account. In the UK, these bank instructions are known as Standing Orders. Unlike a continuous credit card donation or a direct-debit bank transaction, the donor initiates the Standing Order and the bank makes regular payments on the donor's behalf.
In iMIS, Standing Orders are known as Commitments. iMIS allows charities to manage various aspects of the Standing Order process, such as:
- Handling donor commitments – Logged-in public users can make a Standing Order commitment from a simple webpage and staff can add, update, or delete commitments using specialized staff screens.
- Generating expected payments – Staff can run a monthly report that calculates the income expected from each donor so that the non-profit knows how much income is expected from Standing Orders.
- Importing bank payments – On a periodic basis, the non-profit receives or downloads the file that contains information about all of the Standing Order payments it has received from donors. Using iMIS, staff can import and process this information to match bank payments to the expected payments. iMIS gifts are created for each matched payment.
Setting up Standing Orders
To set up Standing Orders, you must:
- Configure iMIS batch control for Standing Orders.
- Edit your sitemap to display the Standing Order navigation items.
- Configure the Standing Orders pages.
Configuring batch control for Standing Orders
To use iMIS Standing Orders, you must set up your AR/Cash batch control to enable either Auto Sequential Batch Numbers or Auto Date Batch Numbers, if one of these options is not already selected.
For more information, see Setting up batch control.
After you match the Standing Order payments you receive from the bank to the payments you expected to receive, an iMIS gift is created and automatically placed in system-generated Internet batches that are created based on the date the match was made. All of the transactions from a single day are placed in a batch with the same date. If today's Internet batch is closed, and a new Standing Order transaction takes place, a new batch is created with today's date.
For more information, see Managing batches.
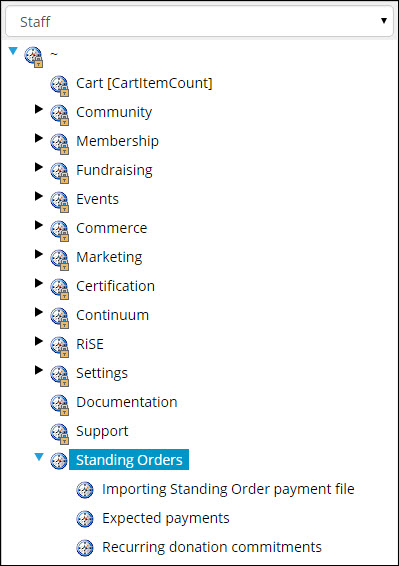
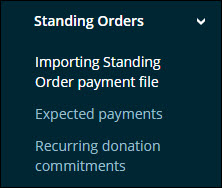
Displaying the Standing Order navigation items
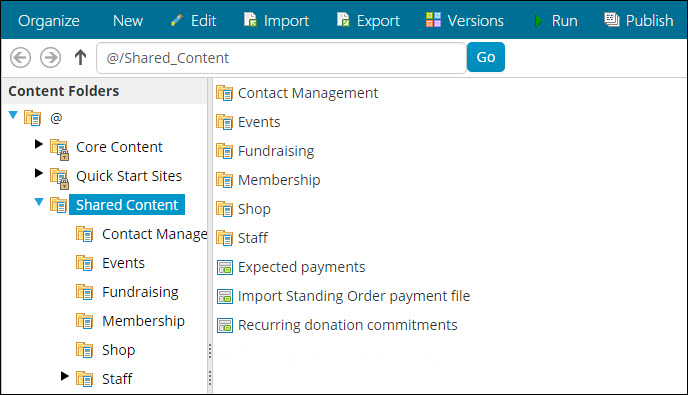
- From the Staff site, go to RiSE > Page Builder > Manage content.
- Navigate to @/iCore/Fundraising and select the following content records:
- Importing Standing Order payment file
- Expected payments
- Recurring donation commitments
- Select Organize > Copy.
- Navigate to the Shared Content folder and select Organize > Paste.
- Select Publish.
- Go to RiSE > Site Builder > Manage sitemaps.
- Select the Staff sitemap by using the drop-down list above the sitemap tree.
- Select New > Website Navigation Item:
- Enter Standing Orders as the Navigation link text.
- Click Save.
- Select the Standing Orders navigation item and create three sub-navigation items for each contact record:
- Importing Standing Order payment file
- Select the Import Standing Order payment file content record for the Content or URL to link to.
- Click Save.
- Expected payments
- Select the Expected payments content record for the Content or URL to link to.
- Click Save.
- Recurring donation commitments
- Select the Recurring donation commitment content record for the Content or URL to link to.
- Click Save.
- Importing Standing Order payment file
- Click Publish.
Configuring the Standing Order pages
You can create Standing Order pages for public, authenticated website visitors or staff users.
Create an online Standing Orders page for public users
A member can commit to a Standing Order donation after configuring the Recurring Donation Commitments Public View content item on any content record:
- Add the content item to the desired content record. For example, a Give Now page.
- Enter a new Name for the content item.
- Enter a Title that will appear to users above the content item.
- Select the desired Donation Frequencies that will be available for users to select from:
- Year
- Half Year
- Quarter
- Month
- Select the Default Donation Frequency to be initially selected.
- Select a Payment Method.
- Select the Distribution (gift item) the standing order will be applied to.
- From the Thank You content to be displayed field, select the content record that will appear after the user has submitted the standing order.
- Enter the Save Button Text.
-
Only authenticated users can make a standing order commitment, so you may want to hide the content item from unauthenticated users. If so, do the following:
- From the Staff site, go to RiSE > Site Builder > Manage sitemaps.
- Select the navigation item you created for the content item and click Edit.
- Expand the Access Settings panel.
- From the Use a preconfigured security set drop-down list, select an option to only allow access to authenticated users, such as Authenticated Users Full Control.
- Save your changes and then Publish the navigation item. The navigation item no longer appears for unauthenticated users.
📘 Note
A sample content record thanking the donor that makes a Standing Order commitment is available at @/iCore/Fundraising/Standing Order Thank You Page. Make a copy of this content record if you want to use it on your website.
Create online Standing Orders pages for Staff users
Staff users are able to generate expected Standing Order payments for a given month (Expected payments) as well as import and process Standing Order payment files received from the organization’s bank (Import Standing Order payment file).
The Recurring donation commitments navigation item allows Staff users to add, update, or delete standing orders from a detailed view of the commitment. Before using the content for the first time, the content item must be configured:
- From the Staff site, go to Recurring donation commitments and open the Content Designer.
- Configure the Recurring Donation Commitments Public View content item.
- Select a Default Donation Frequency and Payment Method.
- Click OK.
- Click Save & Publish.
Managing Standing Orders
Use iMIS Standing Orders to manage the following tasks:
- Recording a contact's commitment to donate to your organization by Standing Order.
- Generating a record of the payments your organization expects to receive every month.
- Importing the Standing Order payment file you receive periodically from your organization's bank.
- Matching the payments you received from the bank to the payments you expected to receive.
- Resolving any mismatched payments.
Recording Standing Order commitments, Staff
- Navigate to the Recurring donation commitments.
- Select the On Behalf Of icon.
- Search for and select the contact who has made the commitment.
- Create a new commitment or edit an existing commitment.
📘 Note
A donor can notify you of their intent to make donations by Standing Order if your organization has implemented the Recurring Donation Commitments Public View content item.
Generating expected payments
- From the Staff site, go to Expected payments.
- Select a Month/Year and click Generate Expected Payments.
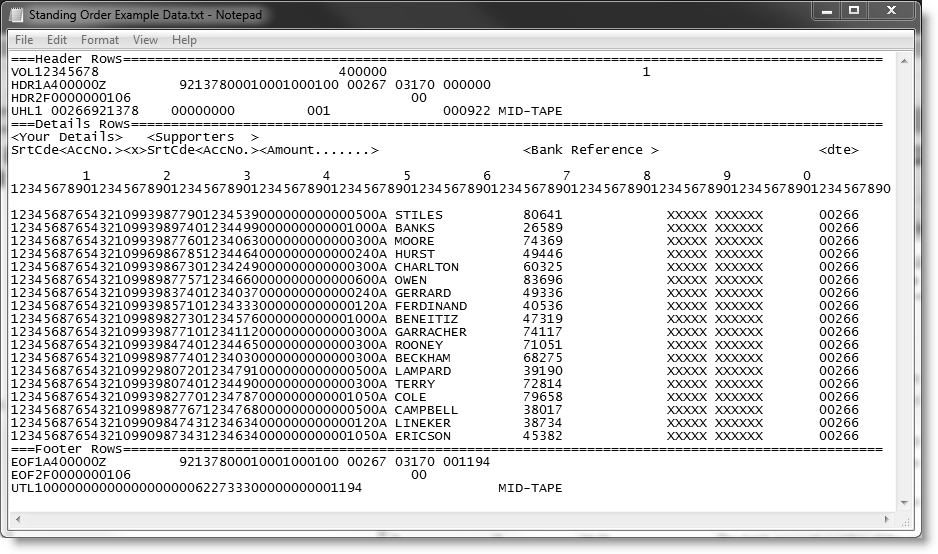
Understanding the supported Standing Order payment file format
The Standing Order data file from your bank must be in the format described below for iMIS to successfully import the file and to match the payment details to the correct Standing Order commitments. Contact your bank to obtain the Standing Order data file. They should be able to provide you with the software necessary to electronically download the file in the following format.
📘 Note
Header and footer rows in the file are ignored during processing.
Barclays Standard Format Layout 1, 106 character data record
| Field Number | Field Size | Character Position | Description |
|
1. |
6 |
1-6 |
Sort Code of your account-holding branch. |
|
2. |
8 |
7-14 |
Account Number to which the payment has been applied. |
|
3. |
1 |
15 |
Account type. Note: Must be 0 for the iMIS import. |
|
4. |
2 |
16-17 |
Transaction code for the entry type. Note: Must be 99 for the iMIS import. |
|
5. |
6 |
18-23 |
Sort Code of the bank from which the payment originated. |
|
6. |
8 |
24-31 |
Account Number of the originating contact. |
|
7. |
4 |
32-35 |
The mandate identifier assigned by the originating bank. If none, this field is zero-filled. |
|
8. |
11 |
36-46 |
The amount of the entry in pence, unsigned, right-justified and left zero-filled. |
|
9. |
18 |
47-64 |
The originating customer name. |
|
10. |
18 |
65-82 |
The reference number quoted by, or on behalf of, the originating customer. In iMIS, this corresponds to the Match Reference Number. If entered, normally the field is left-justified and space-filled for unused characters. |
|
11. |
18 |
83-100 |
Space-filled field. |
|
12. |
6 |
101-106 |
The date the entry was applied to the bank account, in bYYDDD format (b = blank, DDD = Julian date). |
Importing the Standing Order payment file
- From the Staff site, go to Standing Orders > Import Standing Order payment file.
- Browse to find a file, and then click Upload. When you upload a file, it is prepared for processing as a common standing order payment file. Currently the Standing Order payments file - BACS format is the only supported format (see Understanding the supported Standing Order payment file format).
- From the Files awaiting processing section find the file entry that corresponds to the file that was just uploaded.
- Click Process. When you click Process, iMIS compares the information in the imported bank file to the expected payments you have on record. For iMIS to successfully create a donation payment for the correct contact, each of the following items must match up:
- Branch Sort Code
- Bank Account Number
- Match Reference Number
- Donation Amount
📘 Note
An expected payment record must be generated for the month and year of the bank payment.
📘 Note
The maximum import file size that can be processed depends on many factors, such as memory, processor speed, and load on the server. If you have any problems processing a large file, then we recommend that you break it up into smaller pieces of no more than 1000 transactions per file.
After iMIS does the comparison, one of two scenarios may occur:
- If all items in the bank payment file are matched to expected payments, then the Log Viewer will display Posted in the Status column.
- If one or more items in the bank payment file could not be matched to expected payments, then the Log Viewer will display Error in the Status column. Click the arrow next to the Batch Name to expand and view the Result Text. Resolve any warnings or errors.
Resolving payment mismatches
- From the Staff site, go to Standing Orders > Import Standing Order payment file.
- From the Log Viewer section find the Batch Names that resulted in an Error status.
- Click the arrow on the left to expand the log. The log lists each payment that could not be matched and any payments that have been successfully matched.
- Review the error entries in the list. The error log entry describes the problem iMIS encountered, the steps you should take to resolve the problem, and the associated payment data from the bank.
- Create a new file with just the resolved payment mismatches using the information in the error messages. Do not include the records that were successfully imported.
- Click Upload and Process the new file.
- If all of the problems have been resolved, the Log Viewer will display Posted in the Status column. However, if there is still a problem matching payments, a new Batch Name will a Status of Error is created in the Log Viewer.