Sending communications to contacts
To email a list of contacts, you will need to create a query that groups a set of contacts together. This list of contacts will become the recipients of your email and will provide the database property fields that can be used in the email communication.
Creating a list of contacts to email
It is recommended that you set up a separate communication query for each unique grouping of contacts you want to send an email to.
- From the Staff site, go to Marketing > Communication templates.
- Define a new query. See Basic mode for more information on creating queries.
- Select New > Query and enter a name for the query.
- Select Advanced mode.
- Select source business objects.
- (Filters tab) Add property filters if you want to narrow the query list.
- (Display tab) Select the columns you want to display.
- (Required) You must select one of the following properties as a column or use one of these terms as a column alias:ContactId, Contact Id, CustomerId, Customer Id, iMISId, iMIS Id, PartyId, Party Id, StudentId, Student Id, or Id.
- By default when an email is sent from a list, the parameter {#party.Email} is included in the To field so the email is sent to the entire list.
📘 Note
If you add a filter with a required or optional prompt, you will not be able to deselect recipients from the list before sending an email.If you enter multiple email addresses in the To field, any addresses entered in the Cc or Bcc fields will receive a copy of the communication for each recipient address listed in the To field, rather than receiving a single copy of the original communication.
📘 Note
If you do not want the required column or alias to display in the Query Menu content item on your website, use code_ to preface the alias (e.g., code_PartyId or code_iMIS Id).📘 Note
Limit your display columns to show only vital information - Run the query to review the results. The results of the query determine the list of recipients to include in your email communication.
- Save the query.
- Select the folder where you want the query to be stored. To keep your email recipient queries organized, it is recommended that you use the Queries folder at $/Common/Communications.
Sending an email to a list of contacts
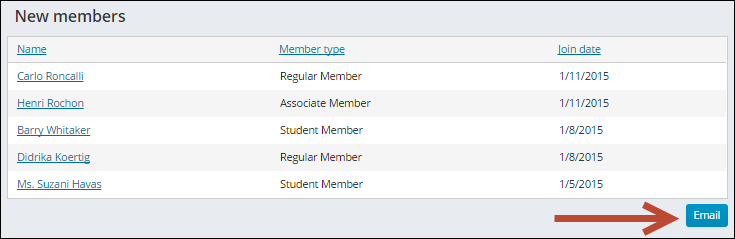
An iMIS staff user can send an email to any query-based list of contacts from a Query Menu content item if the Email button displays below the list. You can review the list, remove contacts from the list, and include attachments before sending the email.
📘 Note
If the query prompts the user to select a parameter value before displaying the contact list, the Email button will display after the parameter value is selected. For these types of queries, the Choose Recipients link will be hidden, and you will not be able to configure the recipient list before an email is sent.
Creating an email list of contacts displayed on a content page
- Open the query-based contact list from the content record.
- Click Email to open the email editor.
- (optional) Click Open to select a previously saved email message draft if desired.
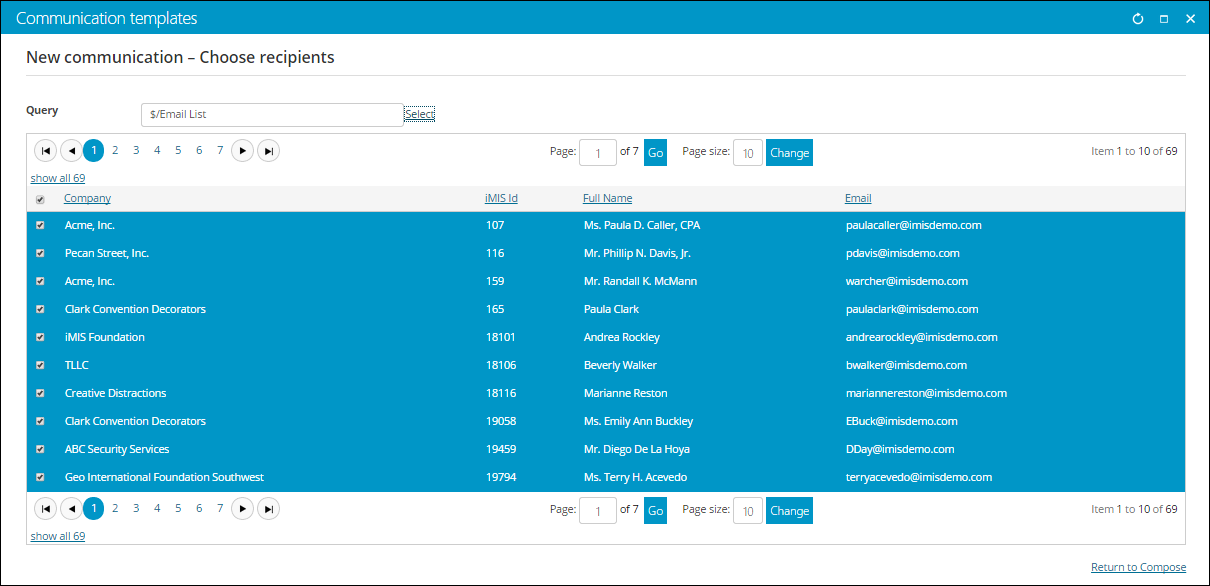
- Click Choose Recipients. You will see a grid showing the full results of the original source query. If needed, you can Select another query to use a different contact list. By default, all recipients are selected. To remove recipients from the list, review each page, and uncheck the option box for each name you want to exclude.
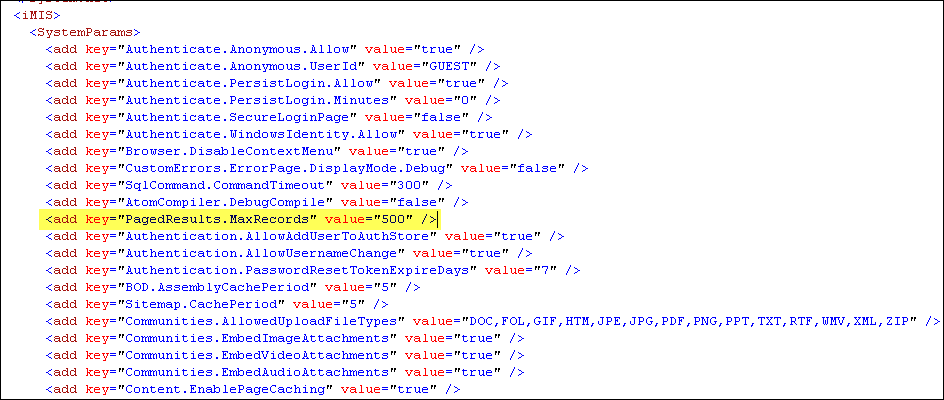
By default, the maximum recipients returned by communication queries is 500. If your query returns more than 500 recipients and you would like to deselect someone that isn't shown, you will need to modify the limit in the web.config file.
📘 Note
If you are not self-hosted, you must contact your host for assistance modifying web.config files.Modifying the limit
Locate the web.config file: C:\Program Files (x86)\ASI\iMIS\Net\web.config
Once the file is open, modify the highlighted line to the desired limit:
- Click Return to Compose to return to the email editor.
Creating an email from a communication template
- From the Staff site, go to Marketing > Communication templates.
- Open an existing template, or select New > Communication to create a new template.
- Click Choose Recipients to select the contacts to whom you will send the email.
- Click Select to select the query you want to use as the primary data source. This query retrieves the contacts to whom you will send email. By default, the SelectedContact query, which retrieves the selected contact (i.e., the contact you are signed in as or working on behalf of) is the primary data source. See Creating a list of contacts to email for more information.
- Deselect the names of any contacts that you do not want to receive the email.
- To continue composing your email template, click Return to Compose.
📘 Note
The query must have a column that identifies the contact’s ID. Also, if the query contains filters with required or optional prompts, it must have default values because they cannot be changed when the email is sent
📘 Note
If the query contains filters with required or optional prompts, you cannot deselect recipients from the list.
Composing and sending the email
- Once you have created the email communication, compose or review the email content. Enter the From, Subject, Type, and email message. If needed, click the Cc or Bcc links under the To field, so you can enter Cc and Bcc email recipients. Click Add Attachment to include a XML or RDL (SSRS report) attachment to your email.
- Click Preview to view a preview of the email for each recipient. Click Prev or Next to review the email for each recipient. Ensure that any merge fields in the email appear correctly.
- Send the email communication. To review the status of your communication job, go to the Communication logs (Marketing > Communication logs). For more information, see Communication logs.
- (optional) To save the email as a draft for future use, select Save As. By default, the email message draft is stored in the $/Common/Communications folder of the Document system.
- All information in your email is included in the saved drafts including the recipient list, attachments, and message content.
- Make sure to label your communications carefully. Saved email drafts include all information from the saved communication, including the contact list query. It is recommended to use a naming convention to identify your query in any saved email drafts. For example enter "All Members Thank You Communication" instead of "Thank you communication" to avoid any confusion about the content of the draft.
For more details about composing communications, see Working with communication templates.
📘 Note
If you enter multiple email addresses in the To field, any addresses entered in the Cc or Bcc fields will receive a copy of the communication for each recipient address listed in the To field, rather than receiving a single copy of the original communication.
📘 Note
You must enter From and To addresses to preview the email.