Importing donor and donation data
Many organizations have third-parties, such as volunteers or telemarketers, collect donations for them. Staff users can import donor and donation data into iMIS if it is saved in a file format recognized by iMIS (commonly referred to as the Donation Importer).
You can import donor information, donation information, or both at the same time. Each row contains donor information that the import process adds as a new contact or uses to update an existing contact if the donor is a person. It can also contain donation information that the import process adds to the contact.
Staff users can view information in the Review log files list about both donations that post successfully and errors in the import process. This import is limited to cash donations.
Before you begin: Important information to review and understand
Make sure the following are configured in iMIS before you import donations.
Verify IDs for customers records exist in iMIS
If you attempt to import IDs in column A that do not exist in iMIS, the import will fail. Check that the IDs are all correct.
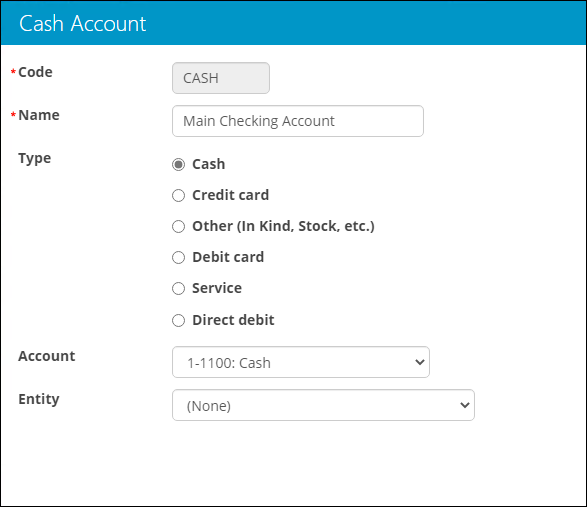
Verify you have at least one cash payment method
Do the following to verify you have at least one CASH payment method:
- Go to Settings > Finance > Cash accounts.
- Open the Cash payment method or create a new one. Cash payment methods are often labeled as Cash or Checking Account.
- From the Type field, verify Cash is selected. If it is not, change the Type to Cash.
- Click Save.
Use code values instead of descriptions or titles in the import file
You should use Code values in the import file and not Descriptions or Names .
| USE THIS VALUE | DO NOT USE THIS VALUE | |
|---|---|---|
| Import item |
Code |
Description or Name |
| Gift item |
BLDG 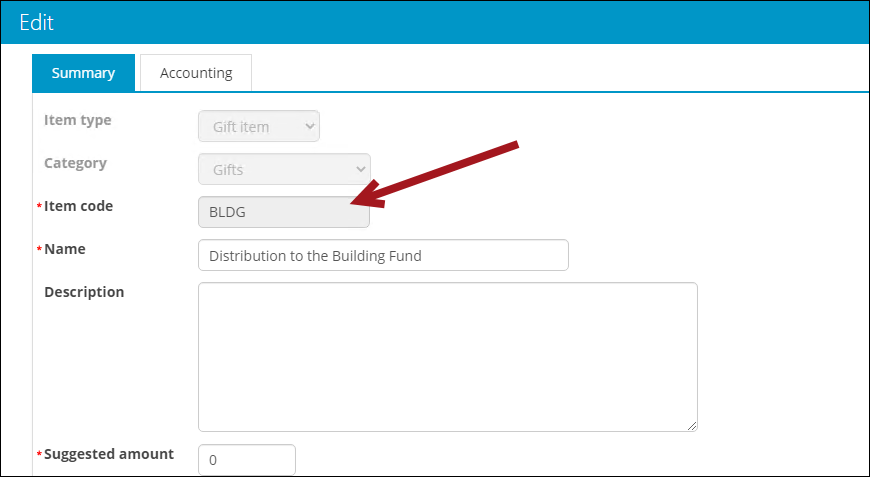
|
Distribution to the Building Fund |
| Source code |
IG 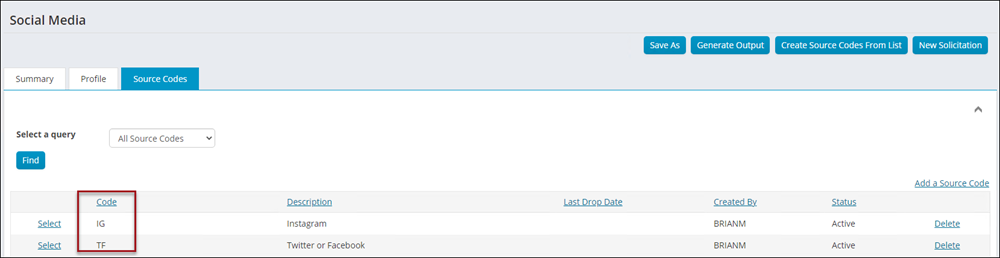
|
|
| Campaign |
ACQ 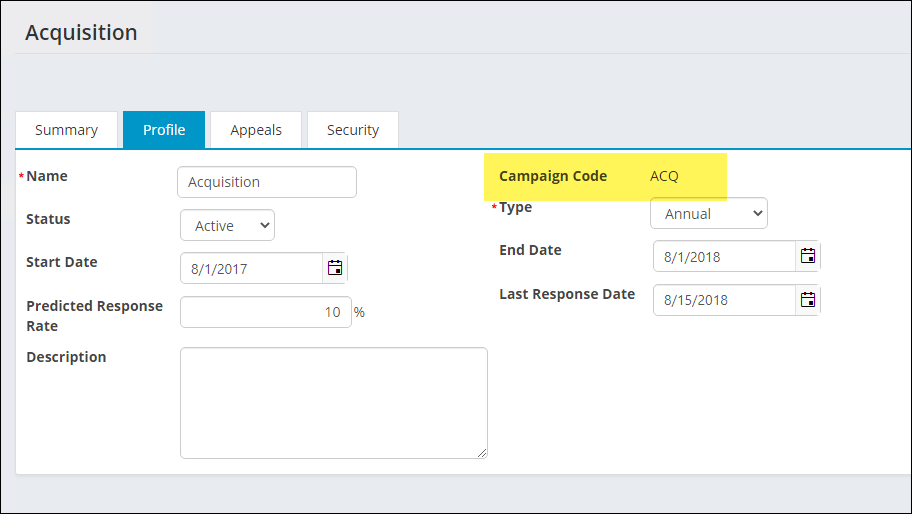
|
Acquisition |
Verify source codes and campaigns are properly configured
Review the following before importing source codes and campaigns:
- If you are importing source codes, be sure that none of your source codes are called "CASH." This is a reserved word in iMIS that will cause your import to fail. Rename your source code if you have a source code called "CASH".
- Do not add source codes or campaigns to iMIS in advance. The import will add them to the correct places. If these items already exist, check they are in the following places:
- SOURCE_CODE general lookup table
- SourceCode table
- Campaign table
- CampaignMain table
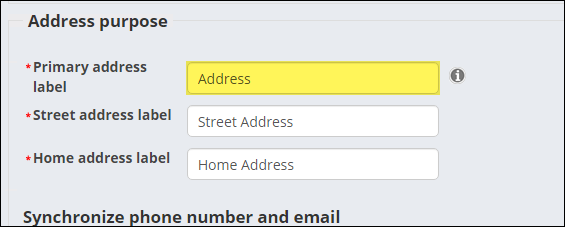
Verify the address purposes are correctly set up
Verify the following are true:
- There are no duplicate address purposes in any customer records.
- Verify at least one of your Address purpose labels is Address. Go to Settings > Contacts > System options to confirm.
- If you have an ADDRESS_PURPOSE general lookup table, make sure there are different values in the table than the three main address purposes located at Settings > Contacts > System options. For example, do not have Address in the Main address label and also Address in the ADDRESS_PURPOSE general lookup table.

Creating the donor and donation data file
In order to import donor and donation data, you must enter the data in a tab-delimited file that contains the columns listed in the table below. Most spreadsheet applications, such as Microsoft Excel, can create tab-delimited files (.txt). You must arrange the columns in the tab-delimited file in the same order as they are listed in the table.
Click to view table
🚧 Warning
Important! The only required columns are A (existing records only), C & D (new records only), F (for duplicate record checking only), O, and P.
| Column | Notes |
|---|---|
|
A. iMIS ID |
|
| B. Title |
For example, President or Director. |
| C. First name |
If no iMIS ID is defined, a First name is required for the contact to be imported. |
| D. Last name |
If no iMIS ID is defined, a Last name is required for the contact to be imported. |
| E. Organization name |
|
| F. Email address | In order to avoid creating duplicate contact records, there must be a matching Email address if there is no iMIS ID available. |
| G. Phone | |
| H. Country |
|
| I. Address line 1 | |
| J. Address line 2 | |
| K. City | |
| L. State / Province |
If a State or Province is present, it must match an iMIS state or province code. If it does not match a state or province code, the data cannot be successfully processed. |
| M. Postal / Zip Code | |
| N. Gift date |
The YYYY-MM-DD format is preferred, but other formats are accepted if they are valid for your web browser’s language setting. If a Gift date is not present, it defaults to today’s date. |
| O. Gift amount |
Do not enter a currency symbol or comma. For example, enter 1000.00 or 1000 but not $1,000. During the import, the donation amount formats according to your web browser’s language setting. |
| P. Item code |
If the Item code does not have a match in iMIS, the data cannot be successfully processed. |
| Q. Source codes |
If the source code does not yet exist and a campaign code is also specified, the source code will be created.
|
| R. Campaign | If the campaign does not yet exist, it will be created. |
| S. Appeal | If this appeal does not yet exist within the specified campaign code, it will be created. |
| T. Solicitation | If this solicitation does not yet exist within the specified campaign code and appeal, it will be created. |
📘 Note
If the row doesn't contain an iMIS ID or an iMIS Item code the row is not imported and no contact record is created.
Follow the following steps to create your donor and donation data file:
- Open a new spreadsheet document and enter in your donor and donation data.
- To find the donation Item code (for column P), go to Fundraising > Find gift items. Search for and open the desired gift item, then click the edit icon.
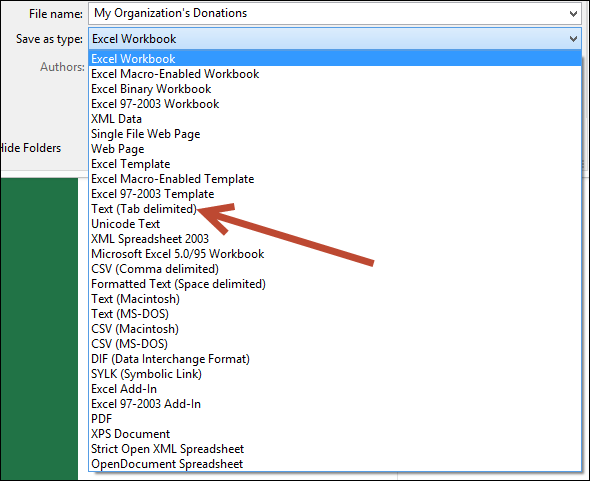
- After your donor and donation data is entered, Save the document in two different file formats:
- .XLSX - Save the data as an XLSX file. If errors occur during the import process, correct the errors in this file and upload again.
- .txt - This file format allows the data to be tab-delimited, the file format recognized by iMIS.
📘 Note
While entering data in the tab-delimited file, you may want to use a column header row for organizational purposes. You must, however, remove the column headers before importing the data file to avoid receiving an error.

Retrieving the Cause2Give import file
Before a Staff user can import Cause2Give donations, the associated funds must be configured in the iMIS database. The donation can only be assigned to the correct Cause2Give fund if there is a corresponding fund in iMIS.
📘 Note
When creating the Cause2Give fund in iMIS, the Item code must match the associated Fund Code or Name in Cause2Give.
To learn how to set up a fund, see Setting up funds.
Finding the Fund Code or Name
eDonationManager donations
- From Cause2Give, go to Solutions > eDonationManager.
- Select a folder from the Donation Form List.
- Find the Form Name, then select Edit.
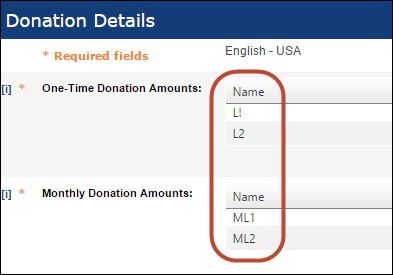
- From the Manage Form list, select Donation Details.
- The donation level name can be seen in the Name column.
- If a donor chooses to enter their own amount (for example, they select Other and enter a donation amount), and does not select one of the pre-set donation levels, the system users a separate Fund Code:
- From the Manage Form list, select General Details.
- Next to Form Type, select Donation.
- Select the Edit Codes link.
- The Fund Code appears in a new window.
P2Pledge donations
- From Cause2Give, go to Solutions > P2Pledge.
- Select a folder from the Event List.
- Find the Event Name, then select Edit.
- In the Manage Event list, select General Details.
- Scroll down till you see the Fund Code field . For P2Pledge donations, this event Fund Code is what will always be used when creating a new fund in iMIS.
Retrieving the import file
- From Cause2Give, go to Data Export Manager > Export for iMIS.
- Enter a Start and End Date to indicate what data will be exported.
- (optional) Select Include previously exported data if you are missing, or could have accidentally deleted, any previously exported data. In order to avoid duplicate transactions, the data will only be exported once unless this is checked.
- (optional) Click Preview to ensure the data format is correct.
- Click Export, then select the download file. This is the file that gets imported into iMIS.
- Before importing the file into iMIS, review the file to ensure that each line has a fund value. If a line does not have a fund value, enter in the missing value and save the file.
📘 Note
The export will indicate which records have been exported before.
To learn how to import this file, see To import donor and donation data.
Organization vs Contact
Organization:
- If an Organization name is present without an accompanying First name and Last name, the donor is considered an organization. A First name and Last name must be present for the contact to be imported.
- If an Organization name is not present, the donor is considered a person.
- If an Organization name, First name, and Last name are present, a contact for the person is created or updated using the Organization name as the primary organization for the person.
Contact:
- The required contact fields for a person are First name and Last name. If a First name or Last name is not present, the row is not imported.
- If a First name or Last name is not present, the donor will be considered an organization. A First name and Last name must be present for the contact to be imported.
- If an iMIS ID is not present, a new contact is added for the donation.
To import the donor and donation data
- From the Staff site, go to Fundraising > Import donations.
- Confirm that Donations is selected in the File Format field.
- Browse to select the tab-delimited file that contains your donor and donation data.
- Click Upload. The tab-delimited file you upload converts to a format that displays in the Process import files list.
- If you want to correct errors in the data file, click Download errors to download a tab-delimited file that only contains the rows that did not import. This button will not appear if you had no errors, but if your import did contain errors, you can correct the errors in the file and try to import again.
- Click Process to the right of the file you imported.
- View information about the processed data in the Review log files list. The Status column will display the batch as either Posted or Error. If the batch contained a warning or error, click the arrow next to the Batch Name to expand and view the Result Text. Resolve any warnings or errors.
-
If you want to correct warnings or errors in the data file, create a new tab-delimited file that contains just the warning and errors. Do not include data that has already been successfully imported. Correct the file, then upload and process it again.
A new batch is created for the imported fundraising gifts. This batch will use the default cash account defined by the default organization.
📘 Note
The Import donations page uses the File Importer for Web Services content item to import donor and donation data.
📘 Note
Rows in the tab-delimited file that contain improperly formatted data or that do not contain required fields do not import. Error messages list the rows that do not import and explain why these rows cannot import. Even if the file contains rows that cannot import, the rows that contain all of the required information in the proper formats will still import.
🚧 Warning
Do not refresh the browser window after clicking Process. Refreshing the browser will result in duplicate donations. Navigate away to another iMIS page, then come back to the Import donations page.
The donor and donation data processes, adding and updating contacts for the donors and adding and posting donations. The batch entry is removed from the file list.