Setting up Organization Joins
You can set up easy-to-use memberships for organizations. The Join Now membership makes it easy to create and purchase a company membership for a variety of organizations, such as trade associations.
For more information about defining dues items and billing products, see Defining billing products.
Creating a customer type
Customer types define the categories to which you assign each customer record. These types designate the broad classification of customer categories.
Do the following to define a customer type:
- From the Staff site, go to Settings > Contacts > Customer types.
- Select Add new customer type.
- Enter a meaningful, unique Code to represent a specific grouping.
- In the Name field, enter the descriptive, full name of the customer type.
- (optional) If the customer type you are defining represents an organization or entity other than an individual, enable Is an organization. By enabling this option, iMIS will be able to maintain relationships between organizations and individuals for the purpose of maintaining current organization rosters and other related lists.
- (optional) If the customer type you are defining represents a member rather than a nonmember category, enable Is a member. By enabling this option, iMIS can distinguish between members and nonmembers regardless of how many types or categories you maintain. This provision lets you produce quick lists, reports, and counts by members or nonmembers.
- (optional) Configure the Dues billing (membership fees) options:
- Enable Bill organization if the parent is to receive the bill for customers of this customer type that are linked to it.
- Select the Billing codes. These entries dictate the membership fees that will be automatically billed for each customer type. Do not select optional products, or products that vary from customer-to-customer. All codes selected here display as membership fees for this customer type unless the line item bills at zero dollars, and the renewal notice option to suppress the printing of zero balance line items is active.
- From the Primary fee drop-down, select the primary membership fee product. The Primary fee product controls the advancing of the overall membership, and controls the advancing of the overall membership Paid Thru date.
- Enter the fixed Amount if a rate applies to all or most customers of this type.
- Enable Complimentary if the dues product will be provided at no charge for this customer type.
🚧 Warning
Unless all line items for the type are complimentary or are to be billed zero dollars, do not choose a Primary fee product that will have a zero price amount. When a product line item is billed and a zero amount has been set, the Paid Thru date will automatically advance. - Click Save & Exit. If you modified either the Is an organization or the Is a member options, confirm you want to change the company status and the membership status for all customers of this type.
📘 Note
You cannot add a customer type Name that is the same as an existing customer type Code when adding a new customer type.
📘 Note
If you modify either the Is an organization or the Is a member options for a customer type, and contacts currently exist for that customer type, the modification will change the company status and the membership status for all customers of this type. You will be asked to confirm you want to make this change when you click Save & Exit.
Creating a dues billing cycle
The billing cycle is used to define the product the General Product Display content item displays on the web. The billing cycle determines which items are included in the Join Now product, as well as the customer Type to which the person will be set when they submit the cart to purchase the Join Now item:
- From the Staff site, go to Membership > Billing cycles.
- Select Add new billing cycle.
- Enter a descriptive Cycle name. The Cycle name will appear as the title of the product in the content. We will enter Organization since we are creating an organization Join Now membership.
- Select the Member types to bill. Be sure to select only one member type. For our organization example, select the ORG member type.
- Choose which Categories to include. Select *ALL*.
- Select Billing Types:
- Annual/Anniv. – Anniversary or Annual
- Cash/Accrual – Cash
📘 Note
To prorate the membership fee based on the date the member joins or to apply special user-defined prorating rules, you must bill on an annual basis. For more information, see Configuring billing options and Defining prorating rules.📘 Note
Join Now functionality supports only cash-based accounting. Using Join Now with an accrual dues system will still work, but iMIS will treat the dues as cash. Future renewal billings will be treated as accrual dues. - Enable Add member type items to designate the billing cycle as a Dues billing.
- Enable Use to display join item set and Use to display itemized renewals.
- Click Save.
📘 Note
The billing cycle name should not have underscores in it, only spaces.
Creating a copy of an existing Join Now page
- From the Staff site, locate a sample Join Now page and make a copy. For example, go to RiSE > Page Builder > Manage content and select the Join Now content record located under @/iCore/Membership.
- Open the content record.
- Configure the General Product Display content item.
- In Default product to display, enter the name of the billing cycle (Cycle Name) created previously, replacing spaces with underscores. This is the product code for the billing cycle. For our organization example, enter ORGANIZATION .
- Click Save & Publish.
📘 Note
You can leave the Default product to display blank and use the same content record for multiple products. The product code (billing Cycle Name) should then be included as a URL parameter for iProductCode. - Create a shortcut from RiSE > Site Builder > Manage shortcuts.
- Select Add new and provide the required information.
- Select the URL or Content Record to the copied Join Now page.
- For the URL Parameters, the iProductCode should equal the billing Cycle name . For our organization example, enter iProductCode=ORGANIZATION.
Using the Content Collection Organizer for Organization Joins
A wizard has been provided to create an easier workflow for organization joins through the use of the Content Collection Organizer.
- From the Staff site, go to RiSE > Page Builder > Manage content.
- Navigate to @/iCore/Contacts and copy the Create Organization with Administrator content record.
- Paste the content record in a content folder of your choosing.
- Open the content record.
- Configure the Contact Account Creator.
- For the Type of account to create, select Organization only.
- Enable Assign selected user as administrator for new organizations to automatically assign the logged in user as the Company Administrator for newly created organizations. If a Staff user creates the organization, they will have the ability to choose the Company Administrator.
- In the Redirects section, select Redirect to - Do not redirect.
🚧 Warning
When Organization only is selected, do not enable Hide for authenticated users. The Contact Account Creator will not display to unauthenticated users when configured for organizations.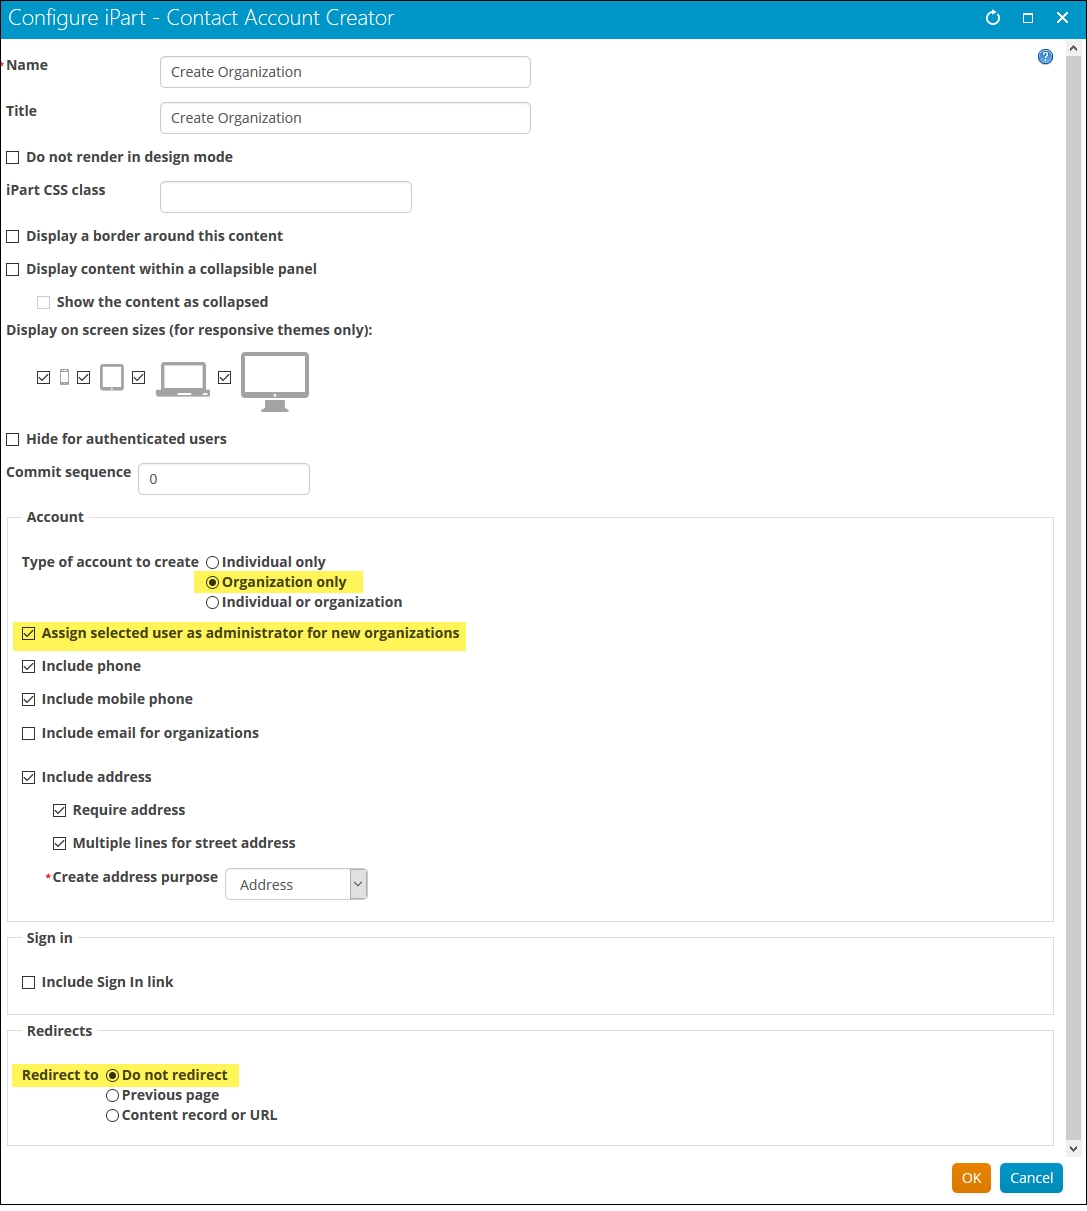
- Navigate to @/iCore/Membership and copy the Organization Join and Organization Demographics content records.
- Paste the content records in a content folder of your choosing.
- Open the Organization Join content record.
- Configure the Content Collection Organizer.
- Verify that Include ID as a URL parameter is selected.
- Edit the Content to display paths for the Create Organization and Demographics tab to point to the location of the copied content records.
- Edit the Content to display path for the Fees tab to point to the location of the previously created shortcut.
📘 Note
This passes the ID of the newly created organization contact to subsequent tabs. It allows you to include a join product or demographics panel in subsequent tabs that will apply to the organization join contact. - Click OK.
- Click Save & Publish.

Organization Join Alert
Process automation provides an alert set out-of-the box to display a Join Now button when the company administrator views the organization’s profile page and the organization is not yet a member. A Join button will remain visible to Staff users regardless of the membership status of the organization.
For more information, see Displaying automated alerts.