
Creating a new Certification Program
Do the following to create a new Certification Program:
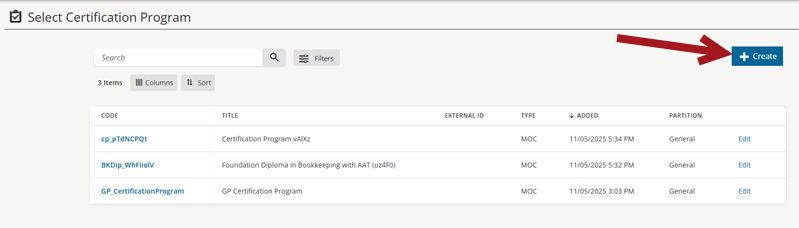
- Go to Activities and Learning > Certification Programs.
- Click Create.
- Choose one of the following as the Type:
- Maintenance of Certification (MOC) - Comprised of various learning activities and optional recertification criteria. A number of certification paths may be specified.
- Master Credential - Consist solely of one or more Certification Programs with optional final examinations. A single certification path is specified.
NoteYou cannot change the Type after the certification is created.
- Click Next.
General Details tab
The following are available in the General Details section:
- Enter the Code and Title for the Certification Program. The Code is the unique identifier, while the Title is the long name for the Certification Program that is available to learners.
- If applicable, choose a Partition.
- Upload or select an Associated Image to display for the Certification Program.
- Enter a Description of the Certification Program. This Description is parsed and added to the keywords for the catalog search, so be sure to enter helpful descriptive text. It is possible to add different file types, such as images, videos, and files. You can enter a HTML or plain text description of the objectives of the activity here. These will be available for students to view in the catalog. It is possible to add different file types in this area by doing the following:
- Click Insert > Insert Video or Insert > Insert Image.
- When the pop-up opens, click on the source icon.
- Click Upload and then click Add Files.
- Select the file you want to insert and click Open.
- Click Upload. Select the check box next to the file you want to insert and click Insert.
- Change the dimensions of the file if you want and click Ok. The files types allowed to be uploaded here are as follows: gif, jpg, htm, pdf, zip, txt, png, swf, dcr, mov, qt, ram, rm, avi, mpg, mpeg, asf, flv, css, doc, docx, ppt, pptx, mp4, wmv.
- Enter Course/Activity Information, such as objectives and learning outcomes. These will appear in the catalog to provide more information about the course and what people will expect to gain from it.
- Click Next.
- The Published toggle is off by default. This means it is hidden in the catalog. To show the Certification Program in the catalog, toggle Published on. You might need to hide the program if you are adding a new offering to the catalog, but want to make further changes to it before allowing users to see it.
- The Disable Enrollment toggle is off by default. This means learners can enroll in the Certification Program if it is published in the catalog. To disable enrollment you need to toggle on the Disable Enrollment option.
Completion, maintenance, and ownership
See Certification Programs: Completion, Maintenance, and Ownership.
Catalog Options tab
This tab controls the catalog settings for a learning activity. Catalog settings refer to how the activity is made available for enrollment. An activity can be added to one or many categories and have specific enrollment rules and pricings configured. Pricings will only be enabled if you use the eCommerce module.
Browse and Search sub-tab
The following are available on the Browse and Search sub-tab:
- Hide Activity in Catalog for Anonymous Users - If the activity should not be displayed in the catalog at this time, select this check box to hide the activity from anonymous users only. You might use this feature if you are adding a new offering to the catalog, but want to make further changes to it before allowing users to see it.
- Hide from Catalog - Enabling this setting will hide this activity from the Catalog, certain Learning Streams, and Widgets, even if the activity is published. Activities that are Published and Hidden from the Catalog will still be available for purchase or enrollment through other areas of the product (e.g., Certification Programs or Equivalent Activities).
- Resources URL - This field allows you to add a URL to link students to extra material for the conference. This URL will be available for students to view in the catalog. Clicking Verify opens the URL in a second window to check that you have entered the correct address.
- Categories - Click Add to open a popup list of categories in the catalog. Click a category to add this activity to that category in the catalog. To remove the activity from a category it has already been assigned to, select the check box beside that category and click Remove.
- Keywords - Enter keywords that describe this learning activity. These keywords will help users searching for this offering to locate it in the catalog.
- Group Access - If this activity should only be visible to members of certain groups specified on the system, click Add to open a po-pup list from which you can select a group that should have access to the offering. You can add as many groups as needed. These groups will only be able to see the offering if it is published in the catalog. To remove access to the activity for a group, select the check box beside that group’s name, click Remove and confirm when prompted.
eCommerce and Pricing sub-tab
- Currency - Select the currency that prices for this learning activity are quoted in.
- Pricing - This is the setup for different pricing options. The Default Price is always present and active and the value can be changed at any time. Other price plans can be activated for different values also. The new price options can be configured under the Price Plan menu item.
- Sales Tax Rule - To select which tax rate, if any, is applicable for this offering, select one of the following:
- No Tax: No tax is charged on the activity.
- User Location: The tax rate is determined by the user’s location.
- Fixed: The tax rate is determined by the server location. (The server location is set under System Administration | Catalog).
- Delivery: The tax rate is determined by where the conference is delivered
- Purchase Credit - If users should be allowed to purchase credit for this offering, select this check box. This gives the purchaser a coupon code to purchase enrollments in this offering. This coupon code can be passed onto other users for use also. The coupon cod can be found by doing the following:
- Go to Learning > Purchase History.
- Click the transaction ID for the purchase credit transaction. It will also be available through the purchase confirmation link provided in the purchase confirmation mail a user receives when they purchase an item.
- Early Bird Percentage Discount - To offer a discount on the offering price to users who register on or before a certain date (Early Birds), enter the percentage discount.
- Early Bird Expiry Date - Select the expiry date for the Early Bird Percentage Discount offer.
- Cross Sell - If the eCommerce module is enabled, you can promote other associated offerings in the catalog, and optionally offer discount pricing on these offerings to users requesting enrollment in the current offering by associating Cross Sell items with the current offering:
- Click Add to open a popup listing other offerings in the catalog, select the check box beside each one you wish to promote and click Submit.
- Optionally enter a percentage discount on each promoted offering’s price in the associated Discount field. Now, when a user chooses to buy both offerings together, they will receive a discount on the associated offering.
- To remove any Cross Sell offering from the list, select the check box beside that offering’s name, click Remove and confirm when prompted.
Promotion and Marketing sub-tab
- Alternative Delivery Options - It is possible to specify different ways that content is delivered. For instance, a course relating to Health and Safety may be delivered as an Online Activity which students can take in their own time. The same course content may be delivered in a classroom as Instructor Led Training (ILT). In TopClass, you can link these two delivery options so that students can choose which course they wish to enroll in.
- To add an activity as an Alternative Delivery Option, click Add , then search for the activity which you wish to link.
- In the Catalog, when students are viewing the search results, there is an indicator showing that the Activity has an Alternative Delivery option.
- When viewing the Offering Details for an activity, there is an indicator showing that the Activity has an Alternative Delivery option, and there is a section called Also available as which lists the alternative delivery options.
- Featured Activity Date - The date entered here will control whether the activity appears in the Featured Activities Widget or Stream on the students landing page or not. If the date is in the future, the activity will appear in the widget/stream up until that date.
Resources tab
Set up the content that will be used within the activity, define the list of instructors, and configure whether learners can print a certificate from the Completed tab in their Learning Center. If certificates are enabled, you can also upload a background image. The certificate fields are fixed in position, so use the provided boilerplate example as a guide when designing your background.
The following are available on the Resources tab:
- Prior to Enrollment – You can add documents that are relevant to the activity here, e.g. promotional brochures or syllabus outlines.
- To add a document to the offering, click Choose File to open a window where you can browse to and select a document, then click Save. To hide a document associated with the offering, select Yes from the Hidden drop-down for that offering. You might use this option if, for example, you want to upload next year’s syllabus for a course as soon as the document becomes available, but not display it in the catalog until enrolment for the current year is complete.
- To remove a document from the offering, select the check box beside the document, click Remove and confirm when prompted.
- Any documents added under Prior to Enrollment will only show for the activity in the catalog. Users will not be able to view this document once they have enrolled in the activity.
- After Enrollment - To make documents associated with this offering available to users after enrollment, add them here. For each document, you can specify whether users should be able to access them through their Learning screen after enrollment or through their Completed Learning screen after activity completion.
- To add a document to the activity, click Choose File to open a window where you can browse to and select a document, then click Save.
- From the Availability drop-down:
- Select Current Activities to specify that the document can be accessed from their Learning screen while they are enrolled in the activity.
- Select Completed Learning to specify that the document can be accessed from the users Completed Learning screen only after they have been completed the activity.
- Select Both to specify that the document be available after a user has successfully enrolled in the activity. In this case, the document can be accessed from the users Learning screen while they are enrolled in the activity and from the users Completed Learning screen after they have completed the activity.
- To hide a document associated with the offering, select Yes from the Hidden drop-down for that offering. You might use this option if, for example, you want to upload all background reading for a course at the start of a semester, but not display certain items on the Learning screen until other material has already been covered.
- To remove a document from the offering, select the check box beside the document, click Remove and confirm when prompted.
- Use Certificate - To award a printable certificate to users who complete the online activity turn on the Use Certificate option and click Choose to pick from your selection of previously created certificate templates.
Enrollments tab
From the Enrollments tab, you can see all enrollments in this Certification Program. The enrollments are broken into two tabs, one for Assigned Users who have been assigned to a certification path, and one for Unassigned Users who have yet to be assigned to a certification path.
Assigned Users
Assigned users is the list of users who are currently enrolled in a certification or re-certification path for the Certification Program. You can view what path the learner is enrolled in and what their status is on that path.
Click on a username to view a list of paths the learner is enrolled in or has previously completed, along with the start date, expiry date and status of those paths.
There are searches available to filter the list:
- Filter Student - This box allows you to search for a specific learner.
- Filter Latest Certification - This box allows you to search for a specific certification/re-certification path.
Unassigned Users
Unassigned users is the list of users who are currently enrolled in the Certification Program but have not been assigned to a certification path.
Do the following from the Unassigned Users tab:
- Add - Click Add to select users to enroll in this Certification Program.
- Unenroll - To un-enroll learners from the Certification Program, select the check boxes beside the learners you would like to un-enroll and click the Delete button.
- Assign to certification path (icon) - Clicking on this icon will allow you to select a certification/recertification path to enroll the learner in. Once the path has been selected, the learner will be moved into the Assigned Users tab.
- Delete (icon) - The delete icon on the learner record gives you the option of deleting the user from the Certification Program, therefore un-enrolling them.
Certification Paths tab
A certification path is how the learner will attain the Certification Program. It can be used for Initial Cert Paths only, or Maintenance Paths only or both. You can configure Mandatory Items/Elective Items/Credits Requirements/Final Section and Fees.
All of the sections are optional i.e. you could set up a cert path with no mandatory items, or no fees. See Certification path configuration for details.
Notifications tab
Setup custom text which is embedded into the notifications which are sent relating to this learning activity. The text will be specific to this Learning Activity. Also configure the rules for when reminder/re certification and pre/post work notifications are sent.
See Certification program notifications for details.
Advanced Options tab
Choose one of the following from the Advanced Options tab.
Discussion Forums
These are online forums for students to discuss classes with other students of the activities they are enrolled in.
- Add - Click to open a pop-up where you can select a forum for this activity.
- Remove - Select a check box next to the forum you want to remove and click Remove.
Ratings/Reviews
From this tab you may enable/disable user ratings/reviews for this specific Learning Activity and also decide whether individual ratings/reviews are made public or hidden.
NoteRatings/reviews marked as hidden will not be shown to other users and will be excluded from the number of ratings/reviews displayed, the average user rating and the ratings breakdown.
Extra Info
By default there are no fields in this tab. It is here as a placeholder in case any extra fields are required. If there are extra fields that you would like added for Certification Programs, please get in contact with us at WBT Systems and we will be happy to discuss the possibilities.