Creating and Configuring Tests
Creating and Configuring Tests
Creating a Test
Tests are used in the following ways:
- To evaluate how well a learner understands information.
- As a survey to gather information about a learner.
- As a post-course survey to gather feedback.
It is also possible for tests to be used to give assignments to learners to complete, who can then in turn upload a solution for correction.
To create a test, do the following:
- Go to Activities and Learning > Content.
- Select a course to add a test.
- On the Contents tab, click Add Course Content.
- Choose Test.
NoteTests can also be created using the AI Generated Quiz/Test option. See AI Test Generator for details.
- Select Edit to configure the test.
On the test configuration page, you can do the following:
- Add a Label, which is for administrative purposes only.
- Save changes.
- Delete test to remove from course.
- Preview the test at any stage of configuration.

Adding Questions to a Test

From the Questions tab, do the following:
- Click Add Question Bank to create a New Question Bank or choose to Add Existing Question Bank.
Note
See Creating Questions for details.
- Randomize Questions:
- Yes – Questions will be randomized.
- No – Questions will be displayed in sequence.
- Click Add Question Bank to include additional question banks in the test.
NoteThere is no limit to the number of question banks that can be added to a single test.
Under each question bank tab, do the following:
- Specify Number to be done:
- Details of the Available Questions include the following:
- Title
- Question Type
- Mandatory status (as set during question creation).
Note
Mandatory relates to whether the question needs to be answered by the learner during the test if it is included in the selection of questions.
- Availability – Only relevant if Number to be done setting is not All.
Note
As question banks can be used across multiple tests, some questions may be very relevant or not relevant to the specific test. Use the Availability to determine if questions should be made available, always included, or always excluded in the random selection.
- Available – Available for selection and display, i.e. depending on the number of questions to be done, it may be included or excluded (randomly determined by the system).
- Always Include – Always included in the set of questions displayed.
Note
The number of included questions should not exceed the number to be done.
- Always Exclude – Always excluded from the set of questions displayed.
Note
The number of excluded questions should not exceed the number to be done.
- Points awarded for the correct answer.
- Use the Edit button to make changes to the question.
- Click the More Options (caret) icon beside the Edit button to Preview, Delete, and Edit the question.
- Click Add Question to Bank to create a new question to be included.
Note
Any new questions created here will be available in the question bank and can be used in other tests.
- Click Save.
Adding an Introduction for the Test
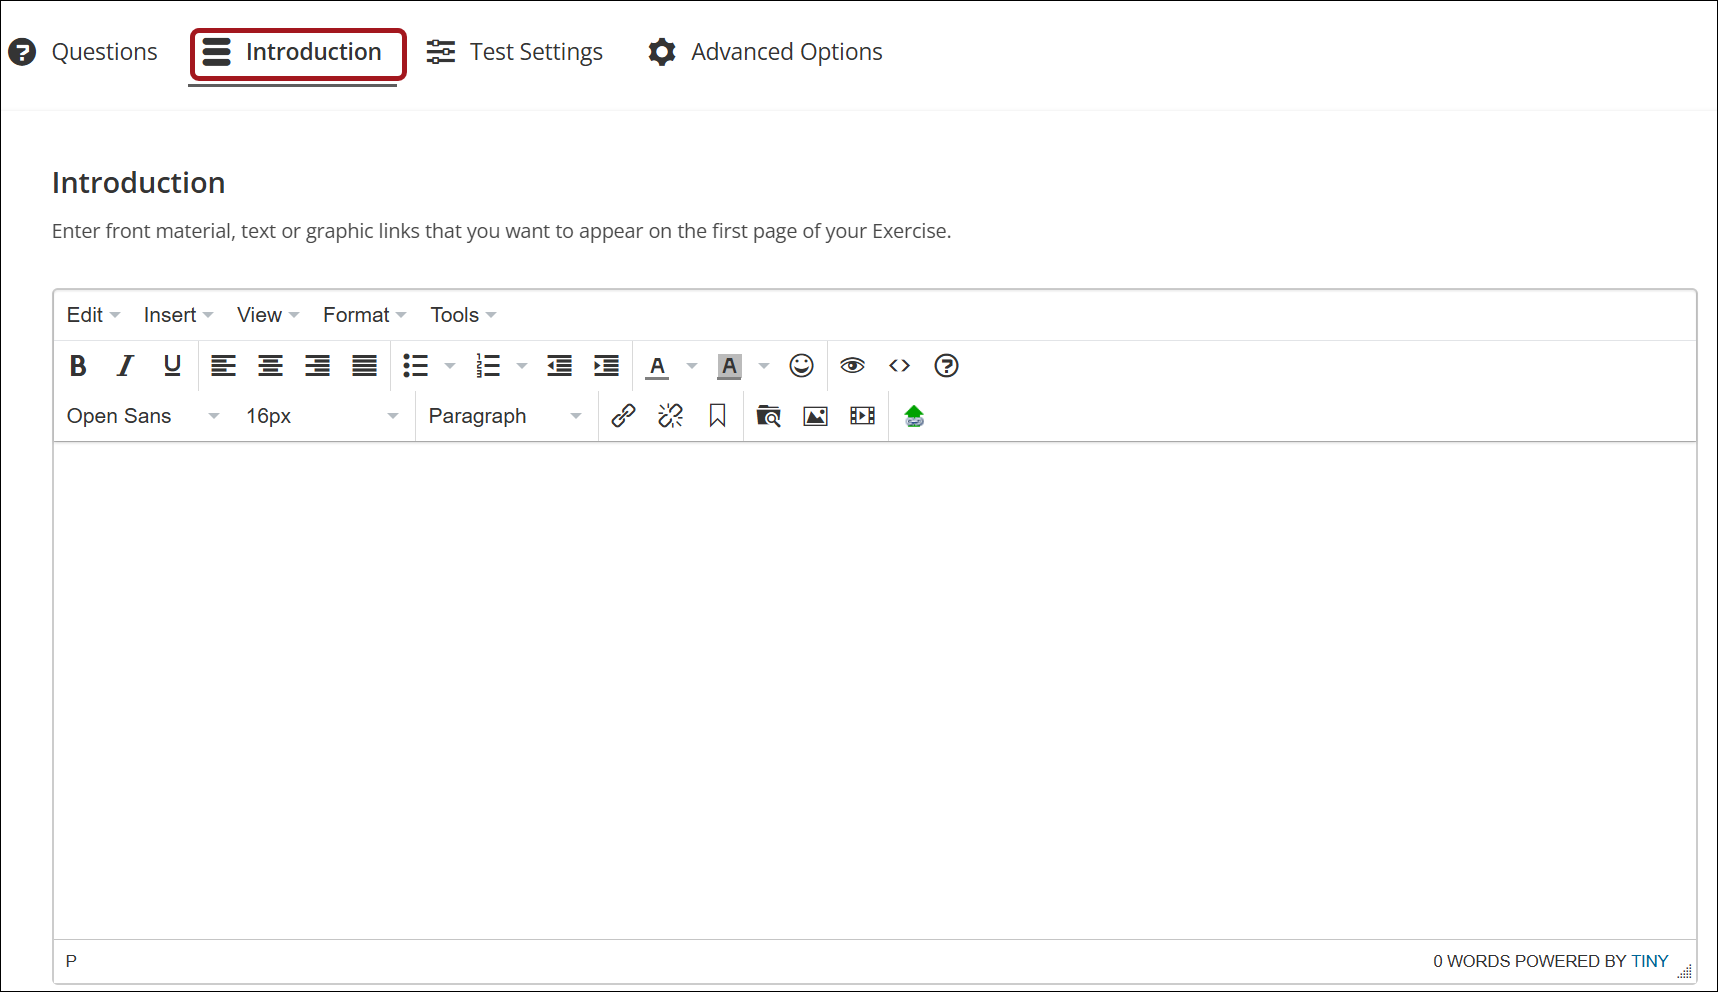
From the Introduction tab, you can configure the following:
- Enter the Introduction to appear on the first page of the test. This can include instructions for completing the test and information on grading. Images and videos can be included, and text can be formatted.
- Click Save.
Super Admin users can choose whether the introduction is shown to the learner while they are taking the test via the system settings.
To configure this setting, do the following:
-
Go to System Administration > System Settings.
-
Under the Contents tab, set Show Test Introduction Within Test to Yes.
Configuring the Test Settings
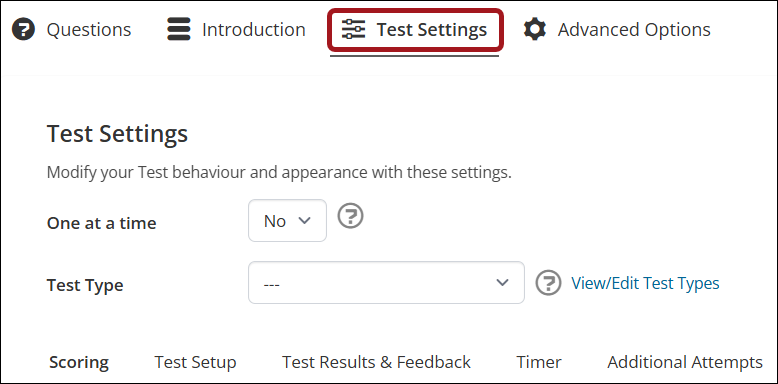
Test behavior and appearance can be modified under the Test Settings tab.
To configure the test settings, do the following:
- Use the One at a time setting to set how questions are displayed:
- Yes – Questions will be displayed as one question per page. Users can navigate between questions using the Previous and Next buttons.
- No – All questions will be displayed on one page. Users can navigate between questions using the scrollbar.
- Test Type – (optional) can be used for the following:
- My Grades (if enabled)
- Gradebook (if enabled)
- Administrative labeling of different types of tests.
- Click Save.
Defining the Scoring for a Test
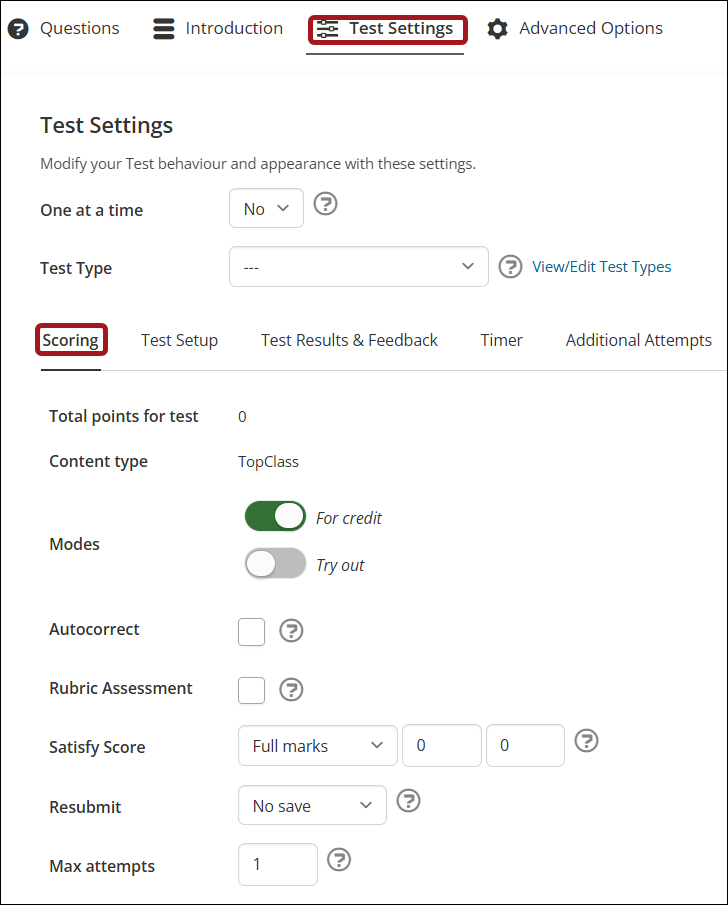
From the Scoring subtab, define the following:
- Total points for test – Automatically calculated based on the question selection and the points set per question.
- Content Type – Defaulted to TopClass.
- Modes:
- For Credit – When toggled on, the test attempt will be counted.
- Try out – When toggled on, the learner can take the test but it will not be counted as an attempt.
- Autocorrect – Select if test is to be corrected automatically by TopClass. This setting is useful for correcting tests with only Multiple Choice Answer and Boolean (True/False) type questions.
Note
Autocorrect is not recommended for Upload or Text type questions.
ImportantTurn Off for tests with rubric flagged questions and peer review tests.
- Rubric Assessment – Select if setting up a Rubric type test. See Using Rubric Assessments for details.
- Satisfy Score - Defines the condition a learner must meet to successfully pass a test and determines how a learner's score is evaluated.
- Above or Equal – Learner will pass if their score matches or exceeds the specified number.
- Setting: Enter an absolute value to compare.
- Above – Learner will pass if their score is greater than the specified number.
- Setting: Enter an absolute value to compare.
- Below – Learner will pass if their score is lower than the specified number.
- Setting: Enter an absolute value to compare.
- Below or Equal – Learner will pass if their score matches or is lower than the specified number.
- Setting: Enter an absolute value to compare.
- Always – Learner will always pass the test regardless of their score.
- Setting: No threshold required.
- Equals – Learner will pass if their score exactly matches the specified number.
- Setting: Enter an absolute value to compare.
- In Between – Learner will pass if their score falls between two specified numbers.
- Setting: Enter the lower value in the first field and the upper value in the second field.
- Outside – Learner will pass if their score is outside the two specified numbers.
- Setting: Enter the lower value in the first field and the upper value in the second field.
- Never – The action will never be triggered. Use only for testing purposes.
- Setting: No threshold required.
- Full Marks – Learner needs to reach 100% to pass.
- Setting: No threshold required.
- Completed – Learner will pass if they complete the test.
- Setting: No threshold required.
- Above or Equal – Learner will pass if their score matches or exceeds the specified number.
NoteIf Satisfy Score is set to In Between or Outside, enter the lower value in the first field and the upper value in the second. For other options that require a value (such as Above, Below, or Equals), enter the single value in the first field.
- Resubmit:
- Once Only – Learners may attempt the test only once.
- Save Answers – Learners may attempt the test multiple times, and previously submitted answers will be saved.
- No Save – Learners may attempt the test multiple times, but previously submitted answers will not be saved.
- Max Attempts – Set the maximum number of For Credit test attempts.
Note
If set to zero, learners will have unlimited attempts.
ImportantIf Try out mode is enabled, learners will have unlimited attempts in Try out mode.
Click Save.
Using Test Setup to Configure How the Test is Presented to Learners
From the Test Setup subtab, configure the following:
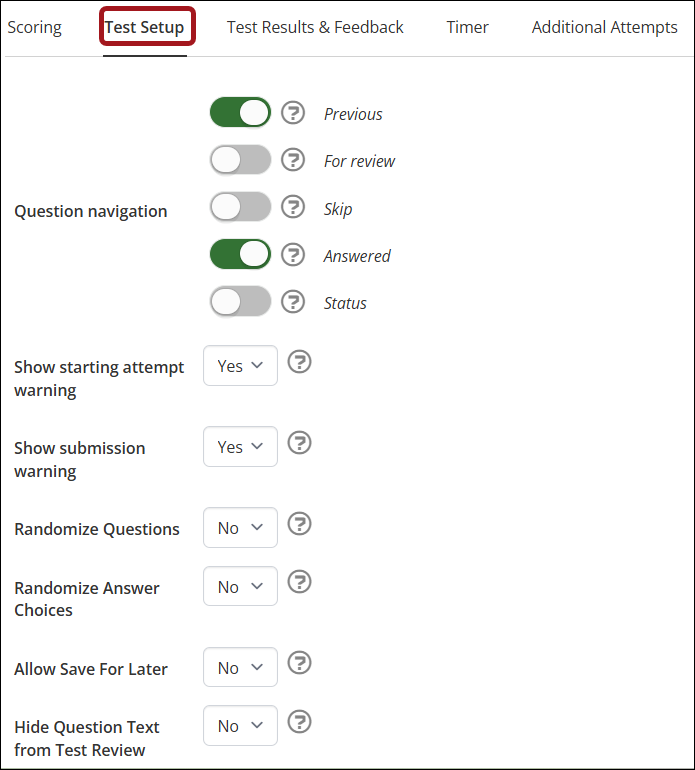
- For one at a time tests, Question Navigation may be configured as follows:
- Previous – Allow the learner to return to the previous question, leaving the status of the current question unchanged.
- For review – Allow the learner to flag the current question for review before the test is finally submitted, whether answered or not, and move to the next question.
- Skip – Allow the learner to flag the current question as skipped whether answered or not and move to the next question.
NoteThe learner will not be given the option of reviewing the question before submitting the test.
- Answered – Allow the learner to flag the current question as answered and move to the next question.
- Status – Allow the learner to see the status of all questions within the test.
- Show starting attempt warning – Select Yes to show a warning message at the start of a test to alert the learner that a test attempt will be used.
Note
This is only shown if there is a fixed number of Max Attempts set on the test.
- Show submission warning – Select Yes to show a warning message before the test is submitted.
- Randomized questions – Select Yes to randomize the order of questions. If not randomized, questions will appear in sequence.
- Randomized Answer Choices – Select Yes to randomize the order of answer choices.
- Allow Save For Later – Select Yes to allow learners to save a test attempt and resume it later.
Note
This is not recommended for timed tests.
- Hide Question Text from Test Review – Select Yes to hide the question title on the Review All Questions screen so learners only see the question number and status.
Click Save.
Displaying Test Results and Feedback to Learners
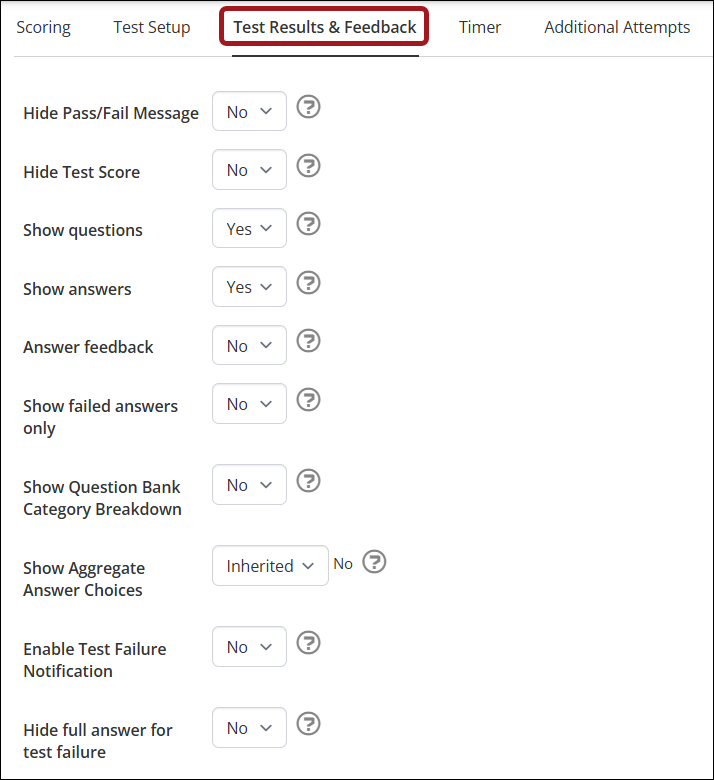
From the Test Results & Feedback tab, configure the following:
- Hide Pass/Fail Message – Select Yes to hide the pass/fail message on test completion.
- Hide Test Score – Select Yes to hide the test score on test completion.
- Show questions – Select Yes to show the learner the questions included in the test after they submit.
Note
Choosing to hide questions will automatically hide all answers as well, irrespective of the show answers setting.
- Show answers – Select Yes to show the learner the answers they submitted for each question after they submit the test.
- Answer feedback – Select Yes to show the feedback information specified in the comments field for each question.
Note
When the learner is taking the test in Try out mode and for auto corrected tests taken For Credit, feedback will be shown automatically regardless of this setting.
- Show failed answers only – Select Yes to show the learner only the questions they answered incorrectly.
- Show Question Bank Category Breakdown – Select Yes to display the category title of each question bank to learners, along with their percentage score.
Note
The relevant question bank category field should be set for each question bank used.
- Show Aggregate Answer Choices – Select Yes to show learners the aggregate answer choice data after they submit the test.
Note
Available for Boolean (True/False), Pick One, or Likert question types.
📘 NoteIf set to Inherited, the field will default to the choice set at the system settings level.
- Enable Test Failure Notification – Select Yes to trigger an email notification to the learner upon failure of the test.
- Hide full answer for test failure – Select Yes to enable. When enabled, learners will see the following when the test is submitted:
- Pass – Displays the correct answers, all available options, and indicates whether their selections were correct.
- Fail – Displays only the selected answer and indicates correctness. Correct answers and other options are not shown.
Click Save.
Setting a Time Limit on a Test Using the Timer
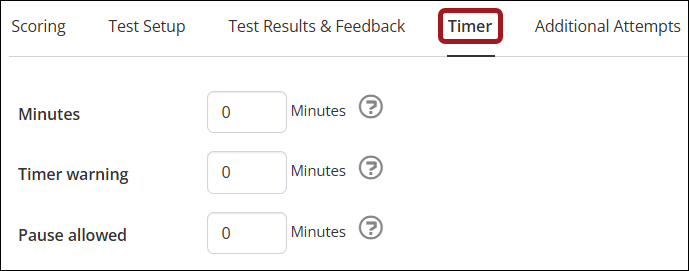
From the Timer subtab, configure the following:
- Minutes – Specify how much time should be allowed for the test in minutes. If a learner does not complete and submit the test within the specified time, their answers are auto submitted.
- Timer Warning – Specify how many minutes before the end of the test learners should be warned.
- Pause allowed – Allow learners to pause the timer for a total number of minutes. Learners may pause one or more times. For example, if you allow a 10-minute pause, learners can take one 10-minute break or two 5-minute breaks. Once total pause time elapses, the timer resumes automatically.
Click Save.
Allowing Learners to Purchase Additional Attempts
ImportantThis setting is used to configure purchasable additional test attempts. Administrators can grant additional attempts at no cost via Learning Activity > Enrollments & Submissions tab. See Creating an online activity for details.
From the Additional Attempts subtab, configure the following:
- Purchase Additional Attempts – Set to Yes to allow learners to purchase additional test attempts.
- Number of extra attempts to grant per purchase – Set the number of attempts a learner receives with each purchase.
- Number of times a learner can purchase additional attempts – Set a limit on how many times a learner can purchase additional attempts.
Note
If set to zero, the learner has unlimited purchases.
Click Save.

- To set the price and other details for learners to purchase additional attempts, do the following:
-
Click Edit Purchase Attempts Offering.
- Under the General Details tab, enter the Title to appear in the Catalog.
Note
The External ID and Source fields relate to integration settings and should be left blank.
- Under the Catalog Options tab, configure the following:
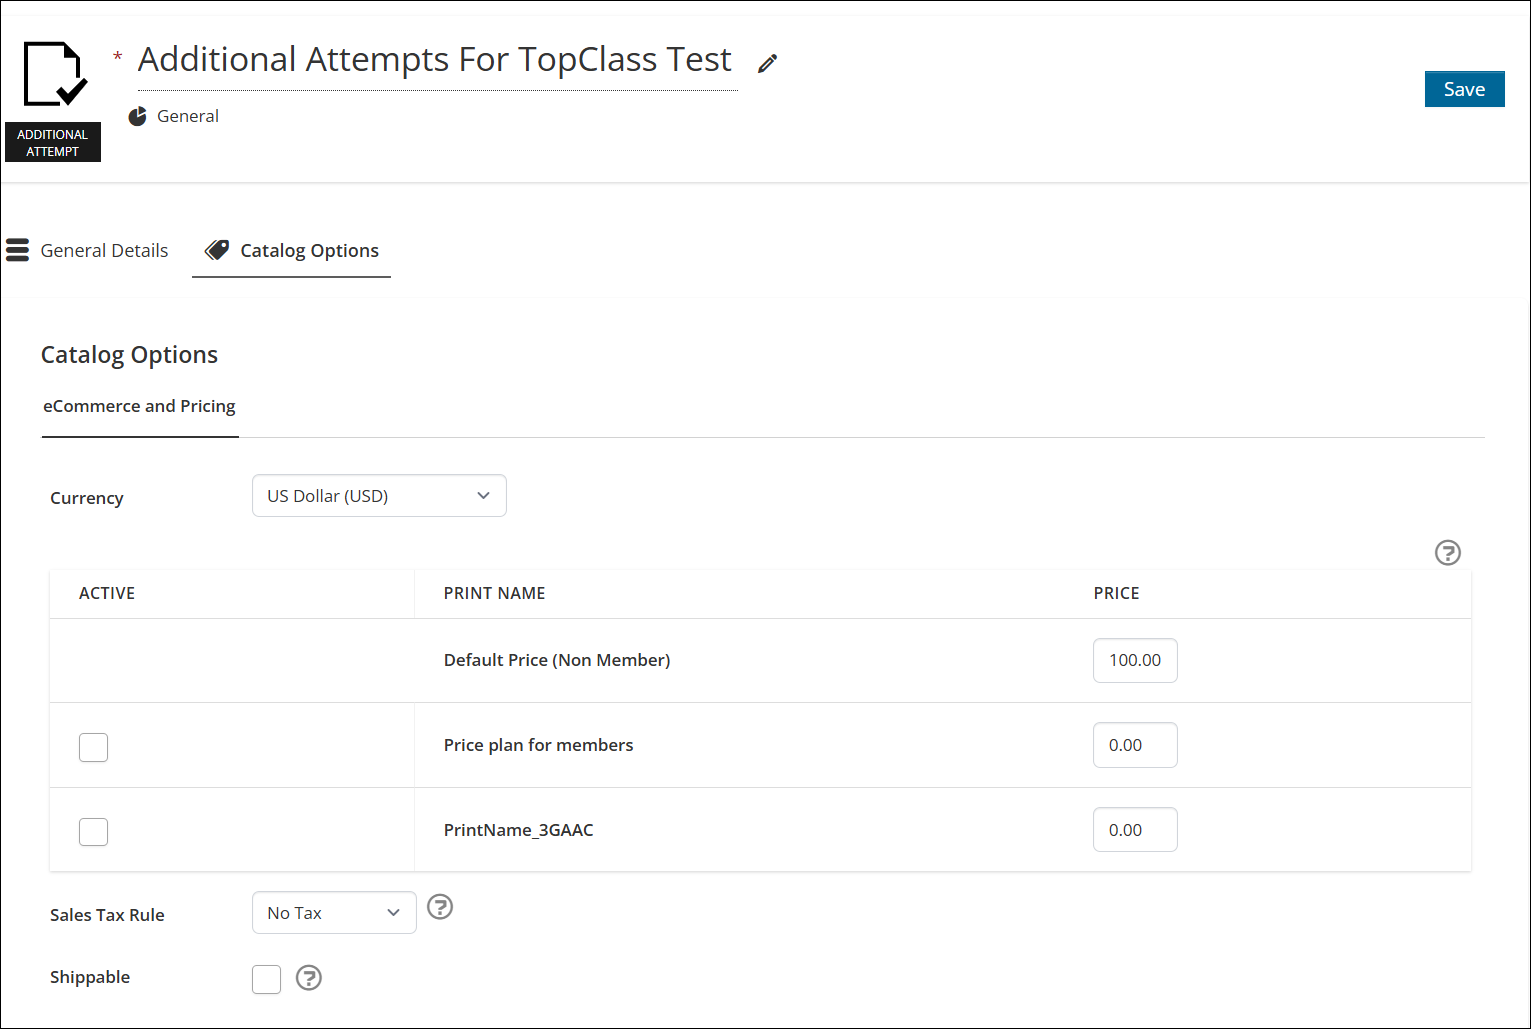
- Under the General Details tab, enter the Title to appear in the Catalog.
-
Click Save.
-
Use the breadcrumb at the top of the page to navigate back to the test configuration page.

-
Advanced Options
Implementing a Validity Period or Duration for Access to a Test
A specific time frame in which learners can access and complete a test can be set. This ensures all learners sit the test in the same period and reduces the chance of sharing questions or answers.
To set a time restriction on a test, do the following:
- On the test configuration page, go to Advanced Options > Restrictions.
- Click Add (screen will refresh).
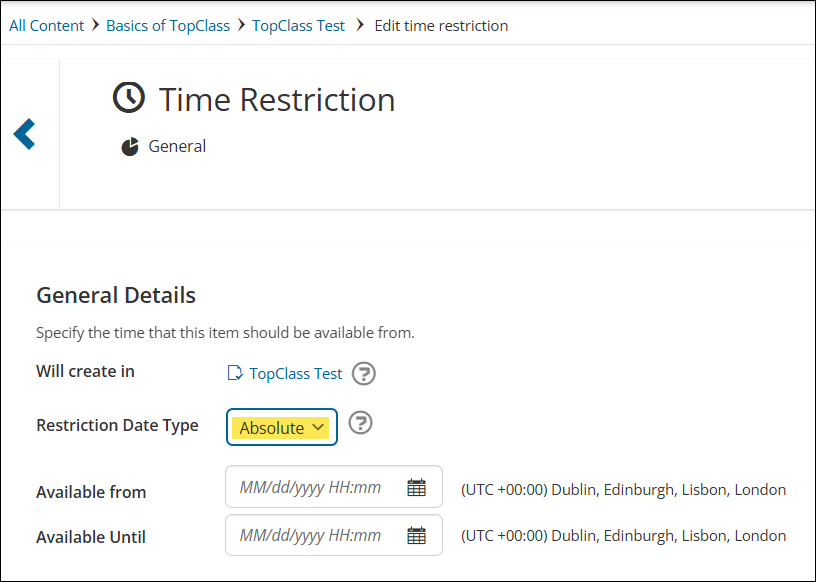
- Will create in specifies the unit of learning the restriction applies to. This is automatically populated with the test unit.
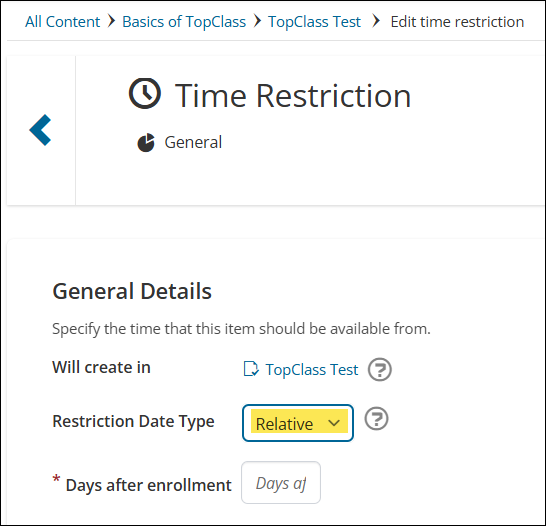
- Restriction Date Type:
-
If set to Absolute, the item will be made available for the specific date and time period, based on the server time zone.
-
Set the Available from and Available Until fields.
-
If set to Relative, the item will be made available from the specified number of days following the learner's enrollment in the activity.
-
Set the Days after enrollment field.
-
-
- Click Create.
- To navigate back to the test configuration page, use the scroll icon or the breadcrumb at the top of the page.
Triggering Additional Actions Once a Test Has Been Completed
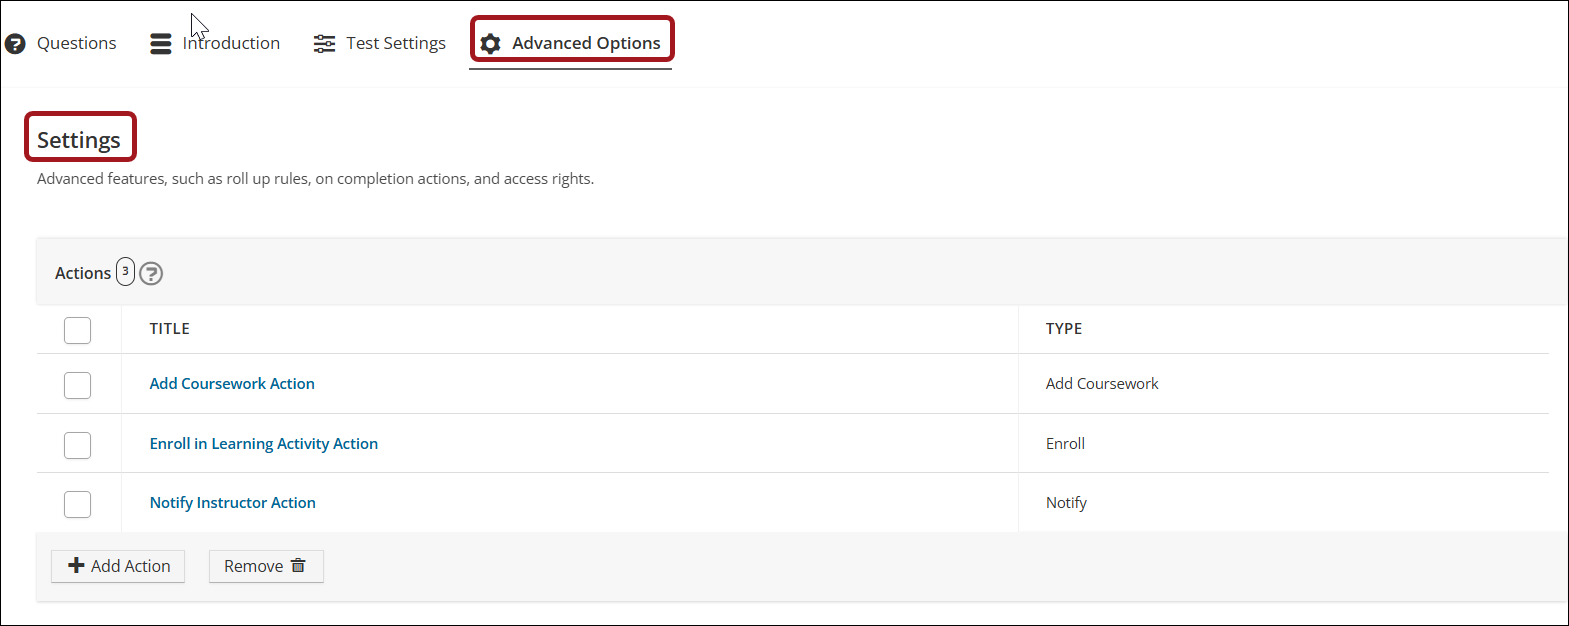
Based on the learner's scoring in a test, Super Admin users can set automatic triggers to perform the following additional actions:
- Notify Instructor
- Add coursework
- Enroll/unenroll in activity
To set additional actions, do the following:
- On the test configuration page, go to Advanced Options > Settings.
- Click Add Action.
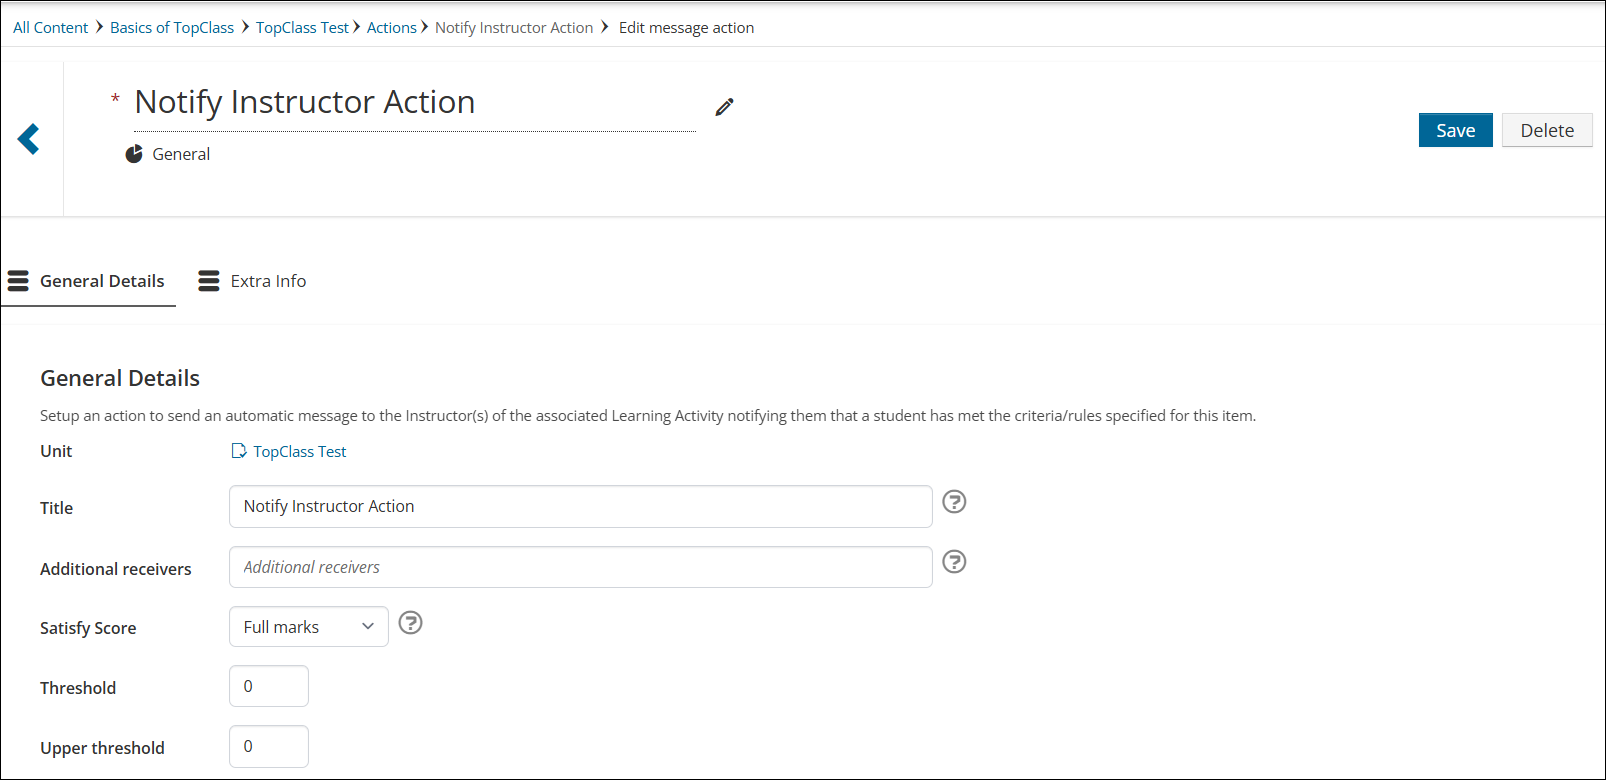
Notify Instructor
Add an action to send a message to the learners' instructor(s), triggered by a specified score. Multiple Notify Instructor actions can be added.
To add a Notify Instructor action, configure the following:
- Enter the Title for the notification action.
- Add Additional Receivers to be notified along with the instructor(s).
- Use the Satisfy Score to set when the notification is fired.
Note
Refer to Defining the Scoring for a test for details.
- Click Create.
- To navigate back to the test configuration page, use the scroll icon or the breadcrumb at the top of the page.
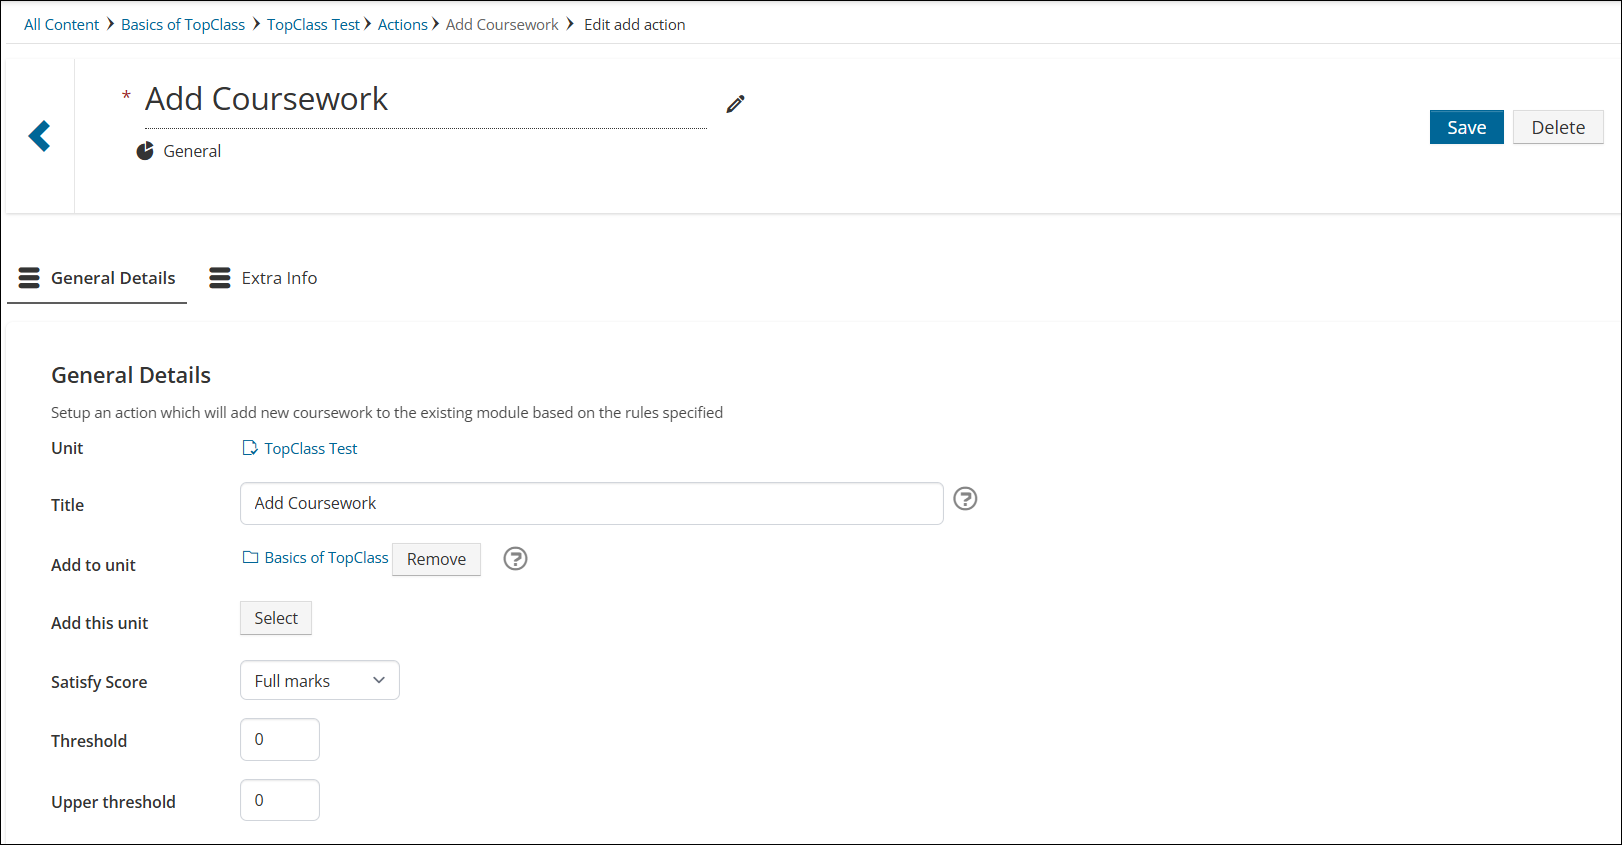
Add Coursework
Add an action to add additional units to the course based on the specified score. For example, if a learner fails the test, a revision unit can be added, or if a learner passes, a supplemental advanced unit can be added.
To add an Additional Coursework action, configure the following:
- Enter the Title for the action.
- The Add to unit field specifies the course the new unit will be added to.
- Use the Add this unit field to select which unit is to be added to the course.
- Use the Satisfy Score to set when the coursework unit is added.
Note
Refer to Defining the Scoring for a test for details.
- Click Create.
- To navigate back to the test configuration page, use the scroll icon or the breadcrumb at the top of the page.
Enroll/Unenroll in Activity
Add an action to enroll or unenroll the learner in a learning activity based on the specified score.
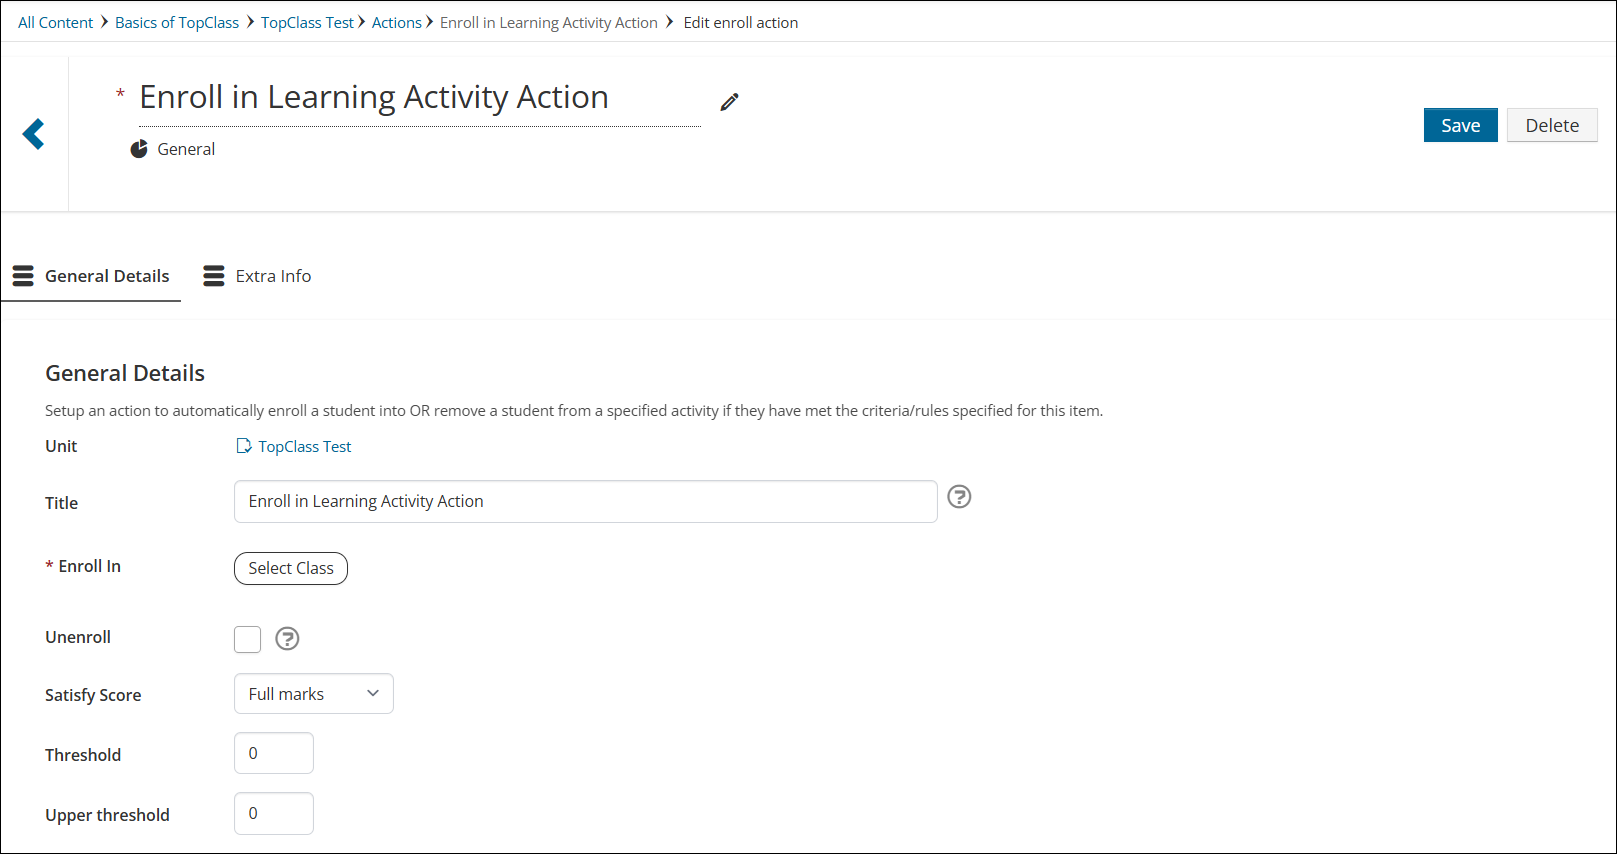
To add an Enroll/Unenroll in activity action, configure the following:
- Enter the Title for the action.
- Use the Enroll in field to select a learning activity.
Note
This action is for online activities only.
- Check the Unenroll box if the action is to unenroll the learner from an activity, rather than enroll them.
- Use the Satisfy Score to set when the learner is enrolled or unenrolled.
Note
Refer to Defining the Scoring for a test for details.
Click Create.
To navigate back to the test configuration page, use the scroll icon or the breadcrumb at the top of the page.