
Creating Content
In TopClass, you can create a variety of content types (Activities and Learning > Content) to build engaging learning experiences for your users.
Review the following to understand the available content types, how and when to use them,
and the general steps for creating and organizing course materials.
Tips for creating content
Review the following tips for creating content:
- Each content type has its own setup steps and requirements.
- Adding a Section allows you to organize content into modules.
- Toggle Enforce Content Order to require learners to complete tasks in sequence.
- Use the up and down arrows to reorder content items.
- Review each content menu to ensure all required fields are completed.
- Save progress frequently.
- Update the content’s appearance using the menu on the content page,
and preview it to see how it will appear to learners.
- Once the content is complete, it can be added to a Learning Activity.
Understanding the types of content
Each content type serves a unique purpose and offers specific functionality to support your learning activities.
Section
The Add Content menu within a Section is the only option that includes an additional sub-menu,
allowing you to add even more content types.

Folder
A folder appears as a sub-section within a section.
Folders help you organize related content into structured learning paths.

Within a folder, you can add more folders, content, or sub-sections to create a hierarchy of modules.
New items are placed under the section or folder from which you selected Add Content.

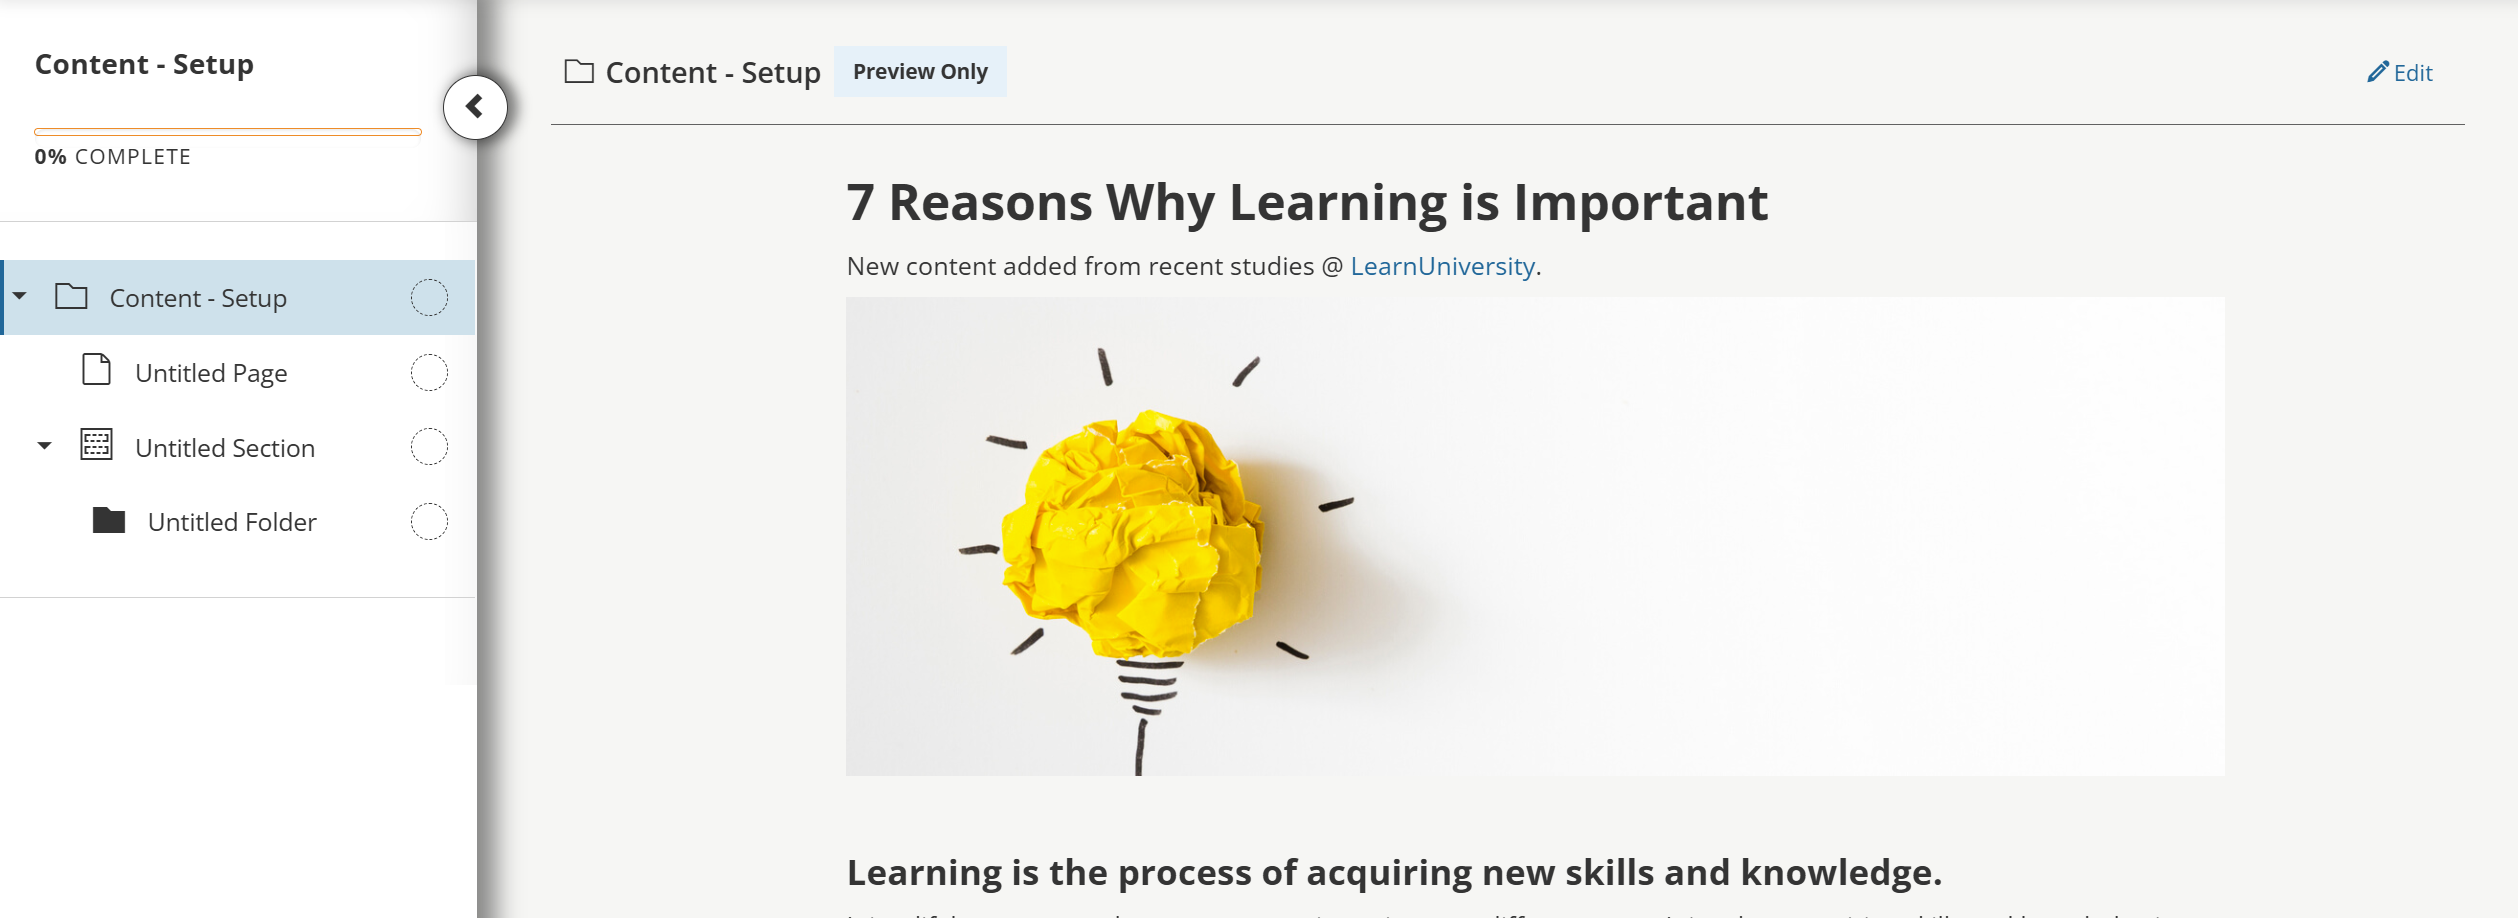
Page
A page can contain either text or images.
You can use pages to provide instructions, background information, or visual materials for your learners.

After selecting Edit, a new page menu appears with several options.
Each type of page offers different settings.
You can also click the page icon to modify content in the RTF editor.

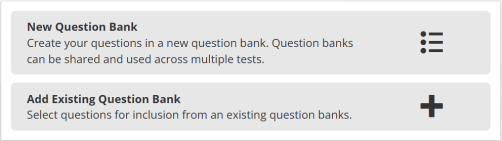
Test

From the test editing page, click Add Question Bank to add questions.
You can then choose from available options:
- New Question Bank
- Add Existing Question Bank
Use the vertical menu at the top to make edits as needed:

Interactive Video

In the interactive video editor, do the following to add a video:
- Enter a Title and Description.
- Upload the video and edit the Copyright information as needed.
- Upload a Captions Track in WebVTT format, using a converter if necessary.
- Adjust any Additional Settings as prompted on screen.
Instructor-Led Activity
Selecting an Instructor-Led Activity opens a menu of existing activities.
You can search for and choose the activity you want to use.
Once selected, an editing menu appears where you can make modifications to fit the course needs:

Complete each section of the menu to finish the setup.
Add Existing Content
Choose Add Existing Content to insert activities or materials already created. Search for and select from the list of available content types.
The editing options will vary based on the type of content selected.
Import Content
You can import existing materials as a ZIP file that matches one of the supported content types.
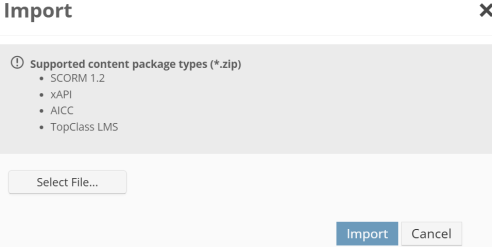
After uploading, you’ll receive a message confirming whether the file was accepted.
Once uploaded, your file appears in the content list:

You can then edit the content using the available menu options.
Creating content
Do the following to create new content:
- Go to Activities and Learning > Content.
- Click Create.
- Enter a Title.
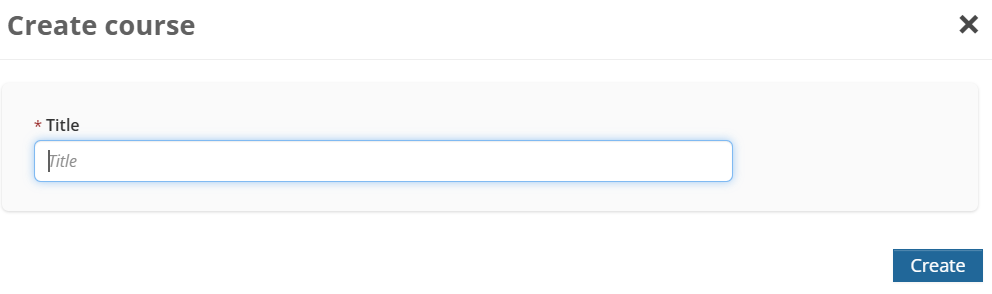
- Click Create.
- Click Add Course Content and choose the content types described above.
Follow on-screen prompts to complete each section.
You can include as many content types as needed to meet your course objectives.