Adding links to communication templates
You can add links to communication templates.
Adding a link
To add a link to your communication, do the following:
- Open the communication template.
- Click the Body tab.
- Select the Insert link drop-down.
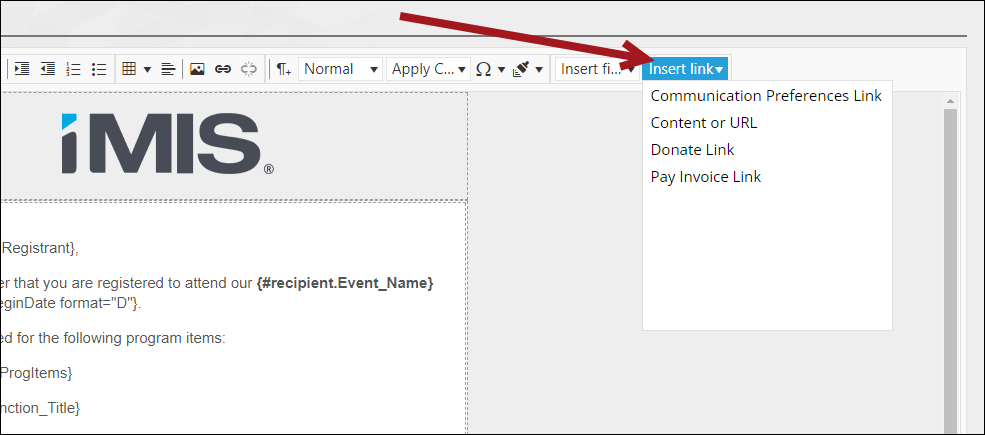
Communication Preferences Link
The Communication Preferences Link enables users to manage their email subscriptions directly, without logging in to your site. This link can be used with Advanced Email interactions with individual contacts.
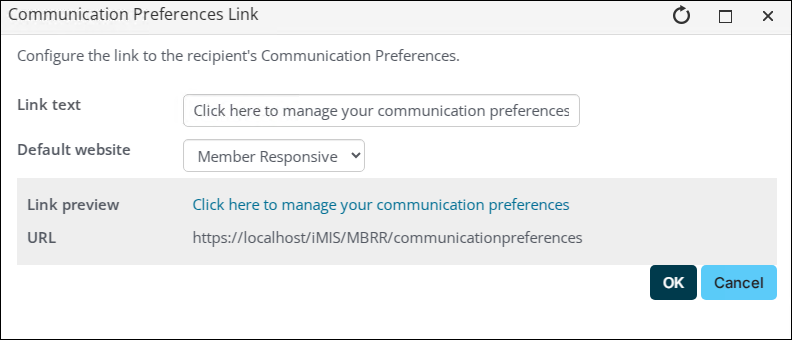
To insert this link, select Communication Preferences Link and do the following:
- Enter the Link text.
- Select the Default website where users will manage their communication preferences.
- Click OK. Once the link has been inserted into the email body, you can adjust it through the hyperlink designer or directly in HTML mode. Do not adjust any of the query parameters and always test any changes to the URL.
- Test the link from a device not connected to your corporate network to ensure the URL is accessible outside of the network.
WarningIf the hostname portion of the URL is localhost, or an internal server name, then the link will not work when your recipients try to click it.
Content or URL
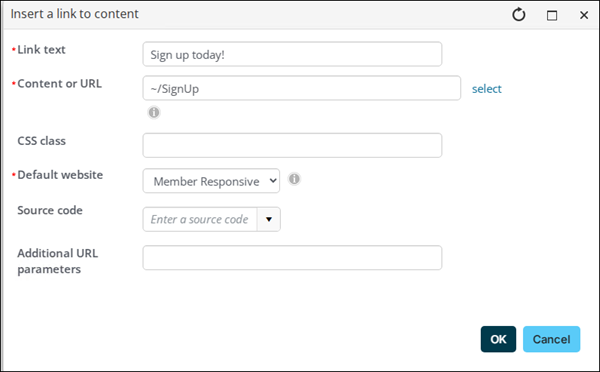
Select Content or URL to insert a standard link into the communication:
- Enter the Link text.
- Define the Content or URL:
- Select content from the Document browser.
- Type in a content record's direct path. For example, @/iCore/DefaultStaff.
- Type in a shortcut URL. This will preserve the link even if the content is moved in the document system. The shortcut must conform to the format ~/Shortcut.
- Type in a direct link. For example, http://www.help.imis.com.
- Enter a CSS Class that will be applied to the link.
- If the Content or URL is pointing to an iMIS content record, select a Default website.
- Enter or select a Source code to associate this link with a marketing campaign.
- Enter Additional URL parameters to include in the link. To add multiple URL parameters, follow this format: param1=value1¶m2=value2¶m3=value3
- Click OK.
Donate Link
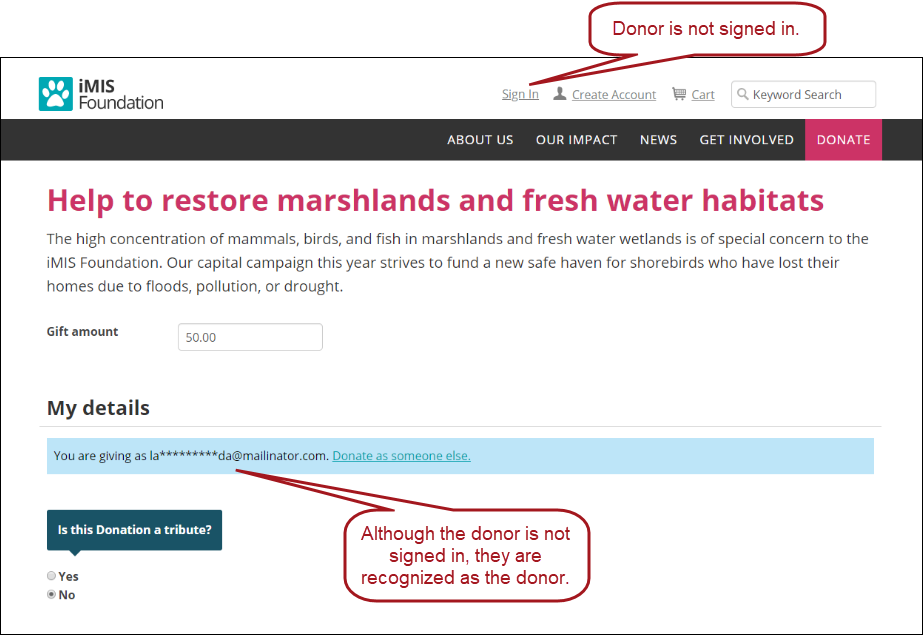
The communication creator comes equipped with a donation-link generator that permits the donor to skip the sign-in process. The link is tokenized, meaning the donor is identified and is not required to fill in their contact information. When the gift is processed, it is associated with the appropriate contact.
NoteContacts can clear the token by using a different link on the Give Now page. No personally identifiable information is available for the contact on the Give Now page.
To permit donors to give without logging in, add the donation link to a communication:
- Go to Marketing > Communication templates.
- Create a new template (New > Communication) or open an existing template for edit.
- Click the Body tab.
- From the Insert link drop-down, select Donate link:
- Enter the Link text.
- Define the Content or URL. By default, the ~/GiveNow shortcut is selected. Choose a different page or shortcut if you do not want to direct users to the page defined at the ~/GiveNow shortcut.
- Enter a CSS Class that will be applied to the link.
- If the Content or URL is pointing to an iMIS content record, select a Default website.
- Enter or select a Source code to associate this link with a marketing campaign.
- Enter Additional URL parameters to include in the link. To add multiple URL parameters, follow this format: param1=value1¶m2=value2¶m3=value3
- Leave Donor is auto-selected based on communication recipient enabled. This check allows the donor to be recognizable when they click the link in the communication.
- Enter a numerical value in the Days until link expired field. The value entered here is the amount of days that the token will recognize the donor and have them automatically associated with the donation. After the number of days entered here has passed, the donor can still use the link in the communication, but they are no longer automatically associated with the donation and must login to the site as they normally would.
Note
The Days until link expired number must be at least 1 but no more than 366.
- Enter a numerical value in the Days until link expired field. The value entered here is the amount of days that the token will recognize the donor and have them automatically associated with the donation. After the number of days entered here has passed, the donor can still use the link in the communication, but they are no longer automatically associated with the donation and must login to the site as they normally would.
- Click OK.
- Continue configuring the communication.
- Send the communication.
See Permitting donors to give without logging in for more information.