Configuring Okta for OpenID Connect (OIDC)
Review and complete the following sections before configuring the iMIS OIDC settings.
Creating an Okta application
In the Okta admin, create an application by doing the following:
- Navigate to the Okta admin console.
- Click the Admin button to navigate to the developer portal.

- From the navigation, go to Applications > Applications.
- Click Create App Integration.
- Select OIDC - OpenID Connect, and then select Web Application.
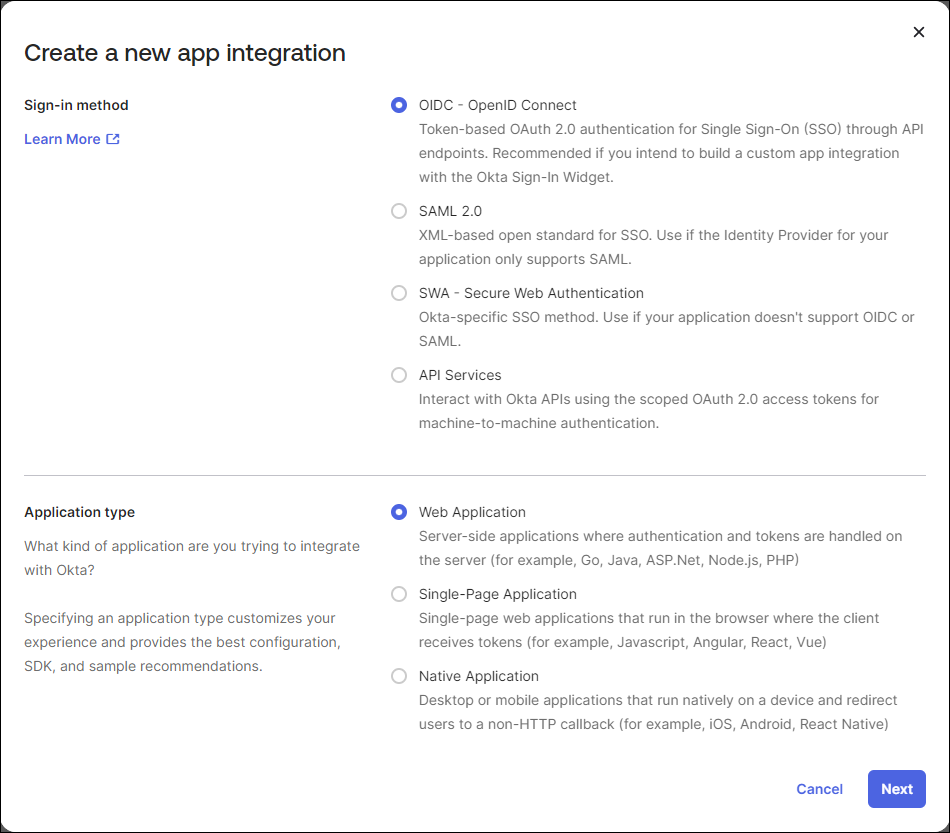
- Click Next.
- Enter an App Integration Name. Optionally, upload a Logo.
- Enable the following settings:
-
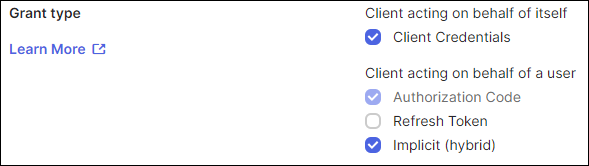
Grant type:
-
Client acting on behalf of itself - Client Credentials
-
Client acting on behalf of a user - Implicit (hybrid)
NoteThe Authorization Code setting is enabled by default.
-
-
Sign-in redirect URLS:
- Enter the URL to your iMIS sign-in page, for example https://example/sign-in.org/
-
- From the Assignments section, enable Skip group assignment for now.
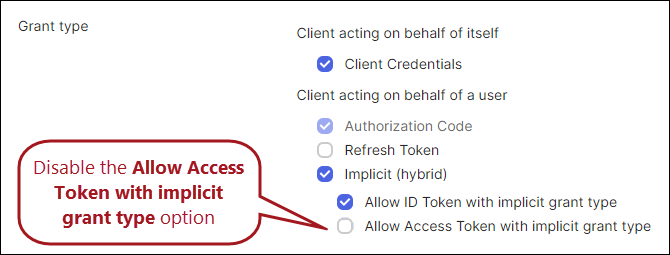
- Click Save. Once the app has been created, disable the Allow Access Token with implicit grant type option in the Grant type area of the General tab.
- Click Save.
Adding users
Each staff user must have a first and last name in the external directory.
NoteReview existing Staff users accounts to ensure they have first and last name fields populated.
To add users to your directory, do the following:
- From the navigation, go to Directory > People.
- Click Add person.
- Enter the required information.
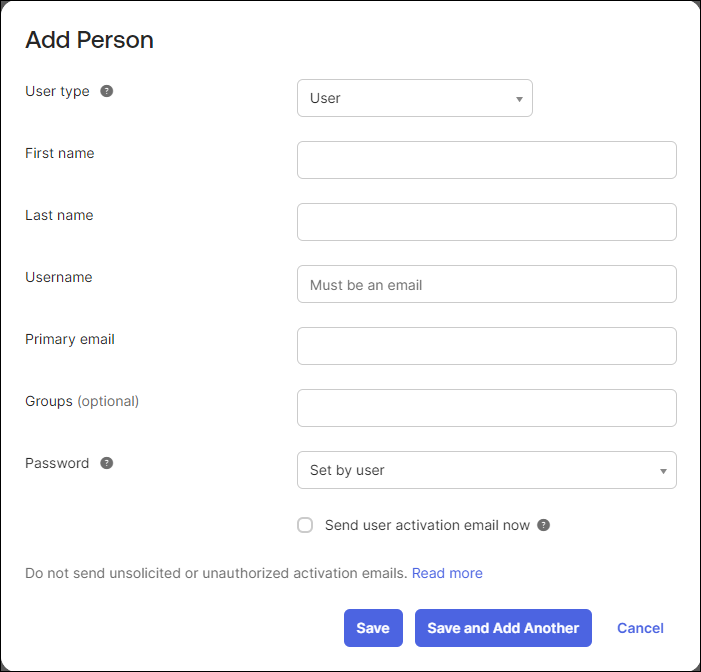
- Click Save or Save and Add Another to continue adding users.
Adding groups
Groups allow you to differentiate between system administrators (SysAdmins), regular staff users, and public users. To add a group and assign users, do the following:
- From the navigation, go to Directory > Groups.
- Click Add Group.
- Enter a Name and optional Description, then click Save.
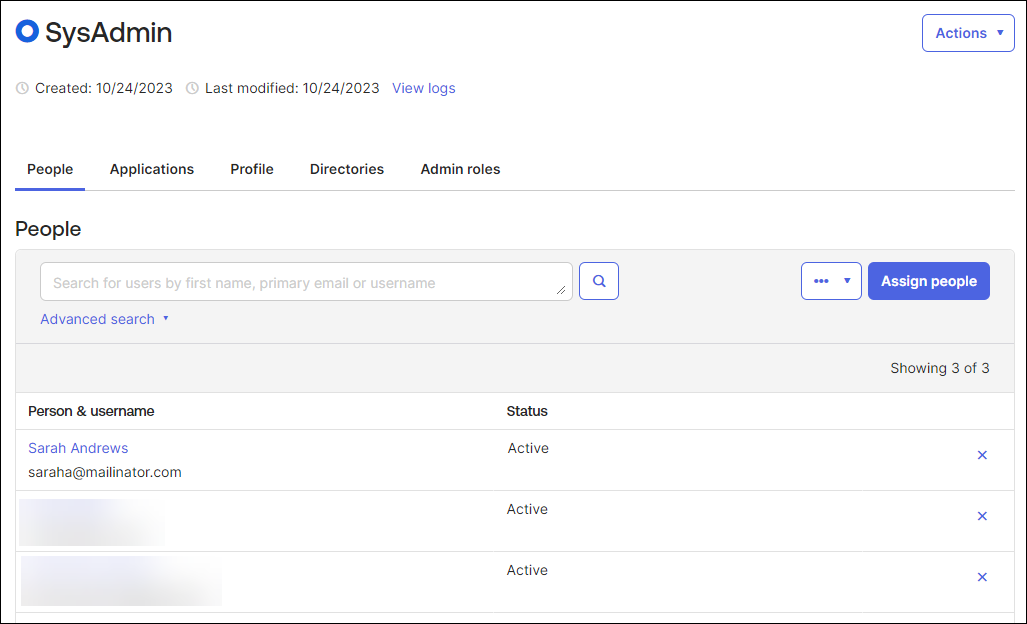
- Click the name link, then click Assign people.
- Add your staff users by clicking the plus (+) icon next to their name.
- Continue adding users, then click Done when you are finished.
IMPORTANTBe sure to add separate groups for system administrators, regular staff users, and public users.
Adding claims
Claims allow you to add specific identifiers, such as an email address, to access tokens.
IMPORTANTTo use OIDC for both staff and public users, you must have claims for each group. A claim for staff users is required. Creating a claim for public users is optional but is recommended as a best practice.
To add a claim for system administrators, do the following:
- From the developer portal, go to Security > API.
- Click the name link of your Authorization server.
- Go to the Claims tab.
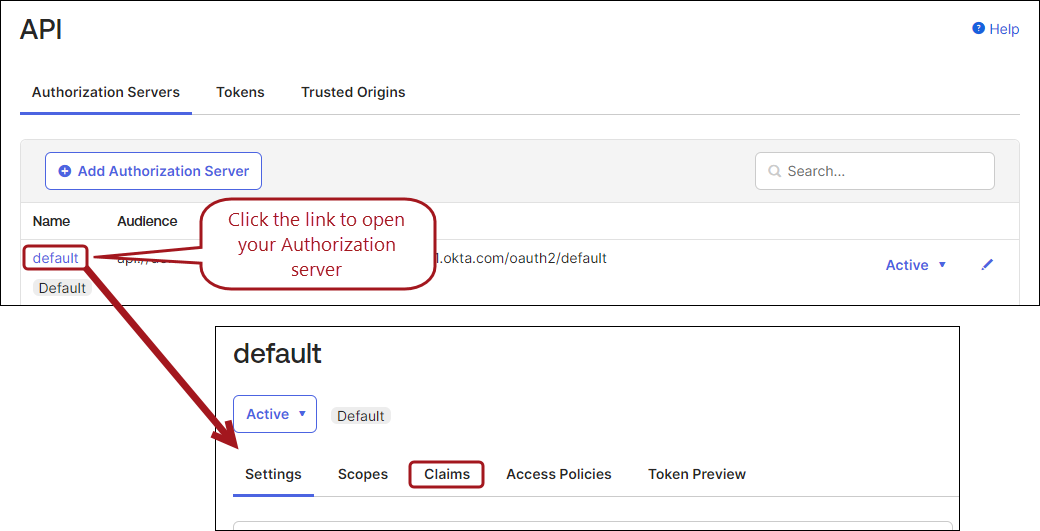
- Click Add Claim.
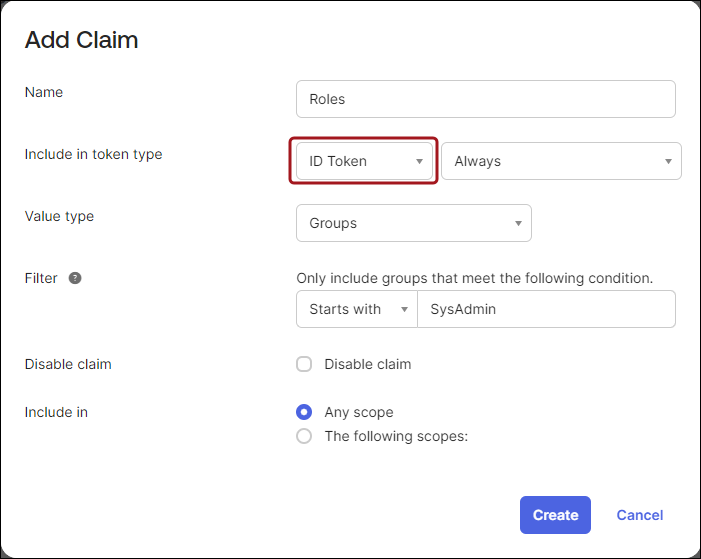
- Enter a unique name.
- Select ID Token from the Include in token type drop-down.
- Select Groups from the Value type drop-down.
- From the Filter drop-down, select Equals, and enter SysAdmin.
- Click Create.
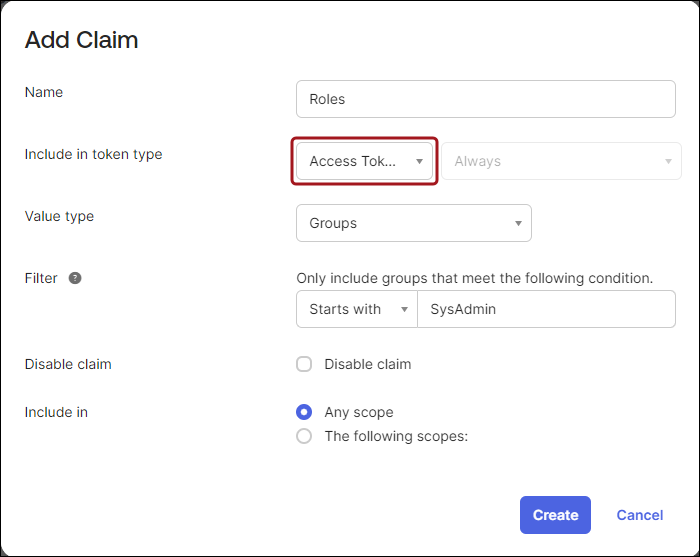
- Repeat steps 1-5.
- Select Access Token from the Include in token type drop-down.
- Repeat steps 7-9.
To add additional claims for staff and public users, repeat the previous steps, and filter on the corresponding group. Be sure to click Create when you finish configuring each claim. For more information regarding claims, see Add custom claims.
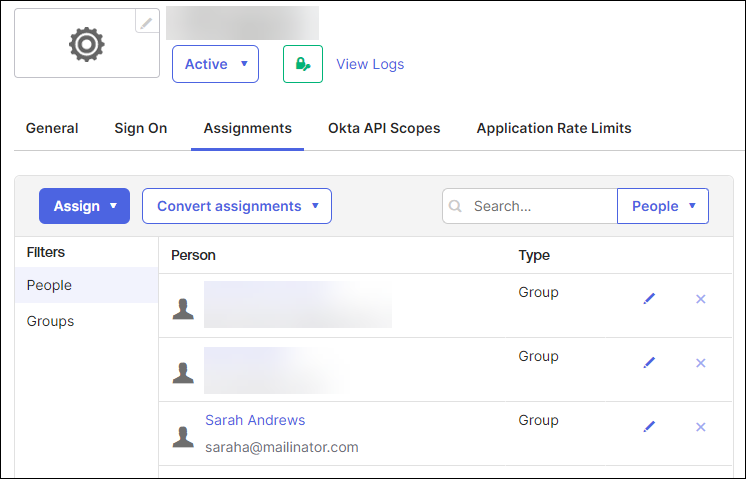
Assigning users to the application
You must add your users to the application for access to be granted to each individual user:
- From your application, go to the Assignments tab.
- From the Assign drop-down, click Assign to Groups.
- Add your Staff users and SysAdmin groups. Alternatively, you can assign individual users using the People button.
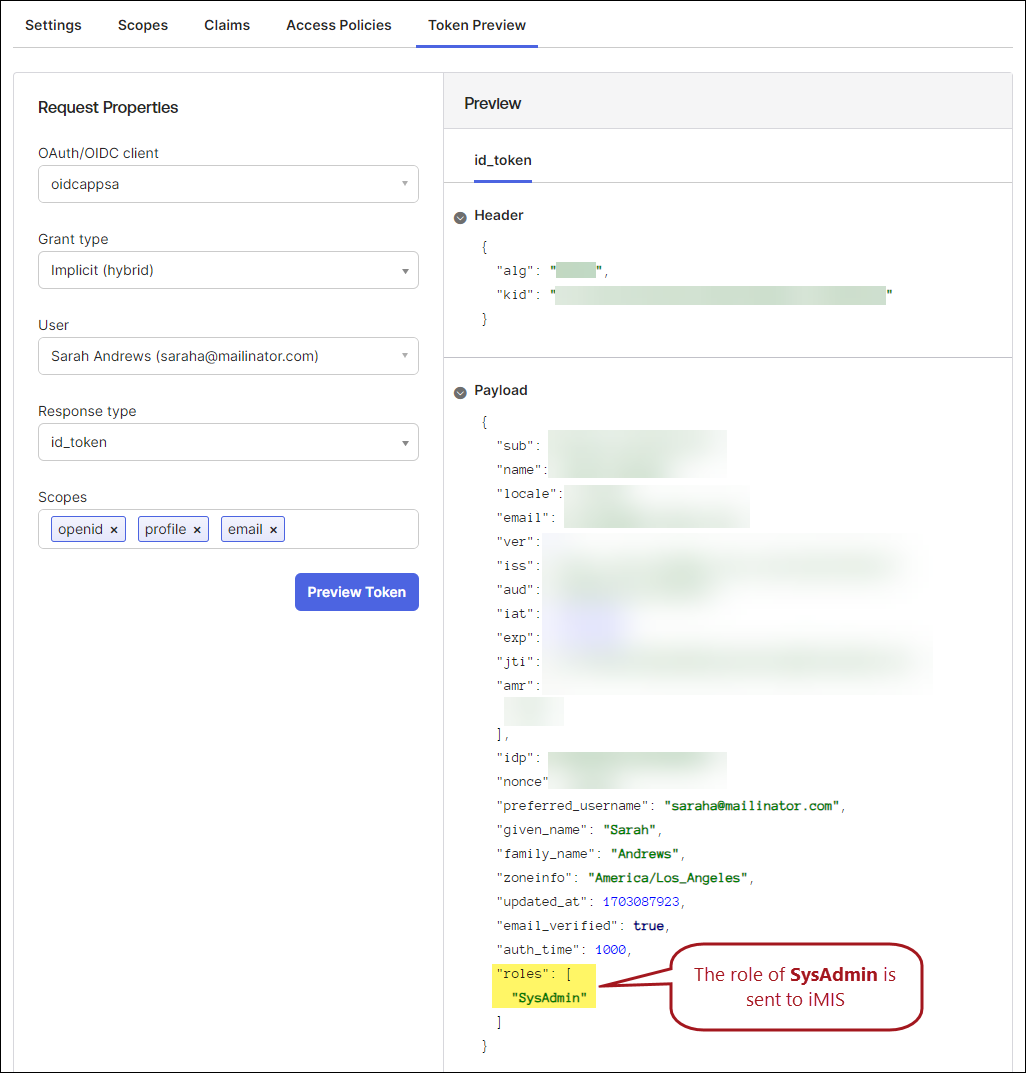
Testing the token sent to iMIS
The Okta developer portal allows you to preview the token that is sent to iMIS to ensure that the roles are being sent correctly. For example, to preview the SysAdmin token, do the folowing:
- From the developer portal, go to Security > API.
- Click the name link of your Authorization server.
- Go to the Token Preview tab.
- Enter your OAuth/OIDC client name. This is the name of your application.
- Select Implicit (hybrid) from the Grant type drop-down.
- Enter a User.
- Select id_token from the Response type drop-down.
- From the Scopes field, enter the following:
- openid
- profile
- Click Preview Token.
Configuring iMIS for OIDC settings
After configuring Okta, review and follow Configuring and troubleshooting OIDC settings in iMIS.