Performing tasks as a public user
Public users can perform many tasks without the assistance of a staff user.
NoteThe images and processes outlined may not be the exact steps your public users should take, since the iMIS out-of-the-box demonstration sites were used to illustrate the following examples. Be sure to review the processes before sending them to a public user.
Account tasks
Creating an account
Public users can create an account by selecting the Create account link in the utility navigation.

As a staff user, you must ensure the public website offers this navigation item.
Resetting username or password
Public users can reset their username and password from the Sign In page:
-
From the public website, click the Sign in link.

-
Select Forgot username? or Forgot password?
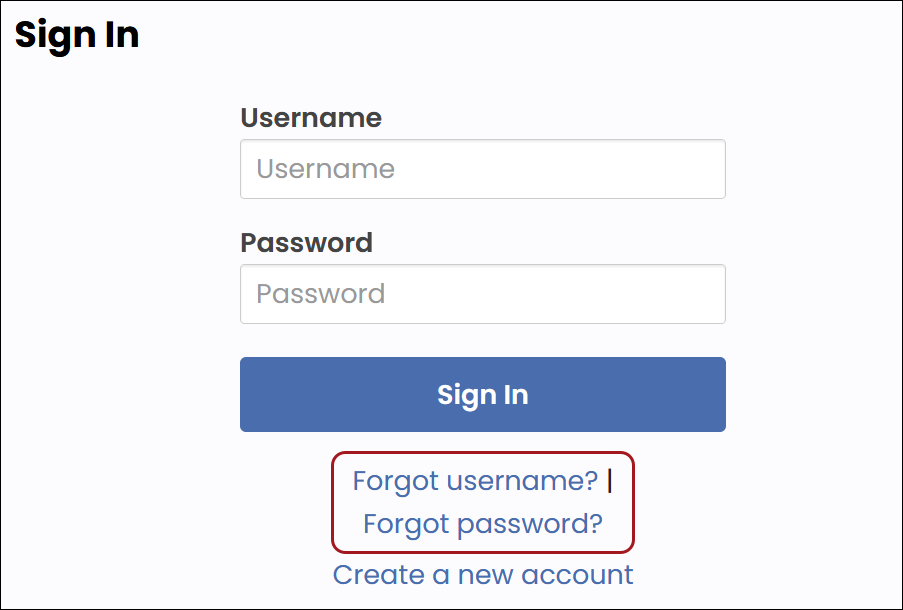
- Enter the Email address associated with the account.
- Click Submit.
- The user is sent an email with the remaining steps to perform.
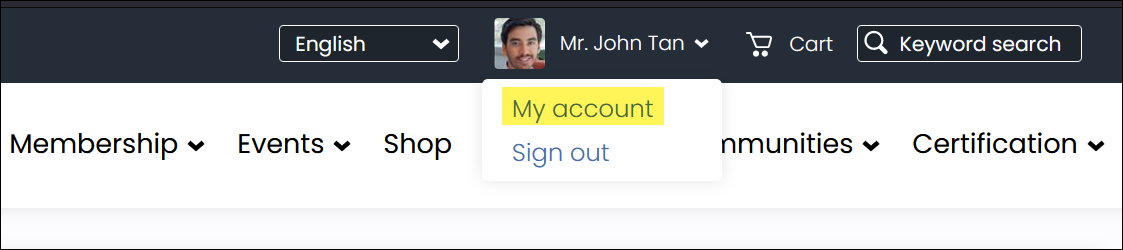
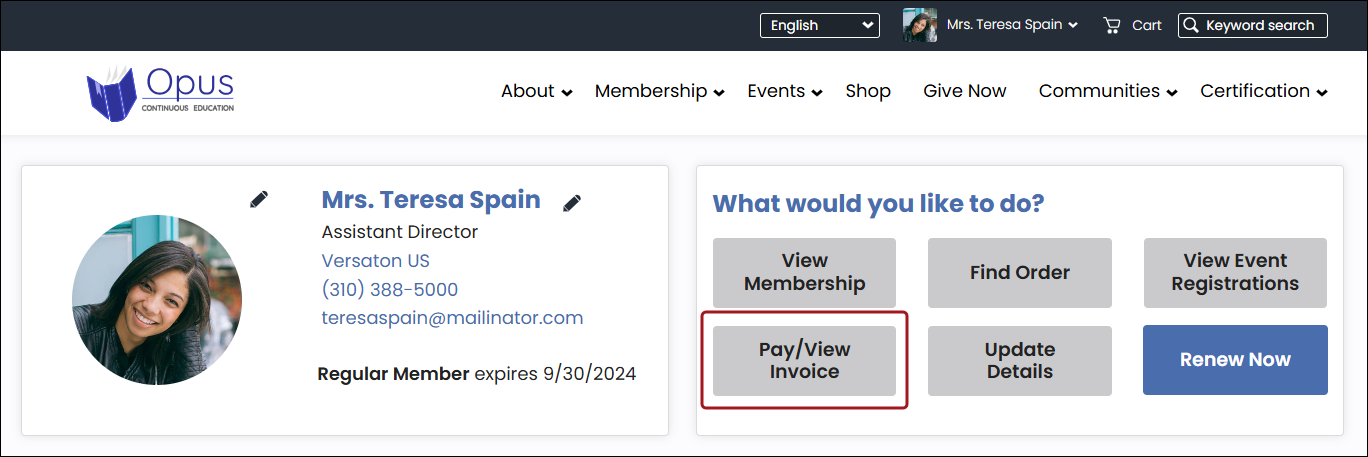
Updating profile account page information
Public users have access to edit their personal details from their account page.
Do the following to update the account page information:
- Navigate to the public website.
- Sign into the website using your username and password.
- Select your name at the top, then select My account.
The out-of-the-box account pages displays various tabs, such as About Me, Membership, Participation, Transactions, Volunteering, and Preferences.
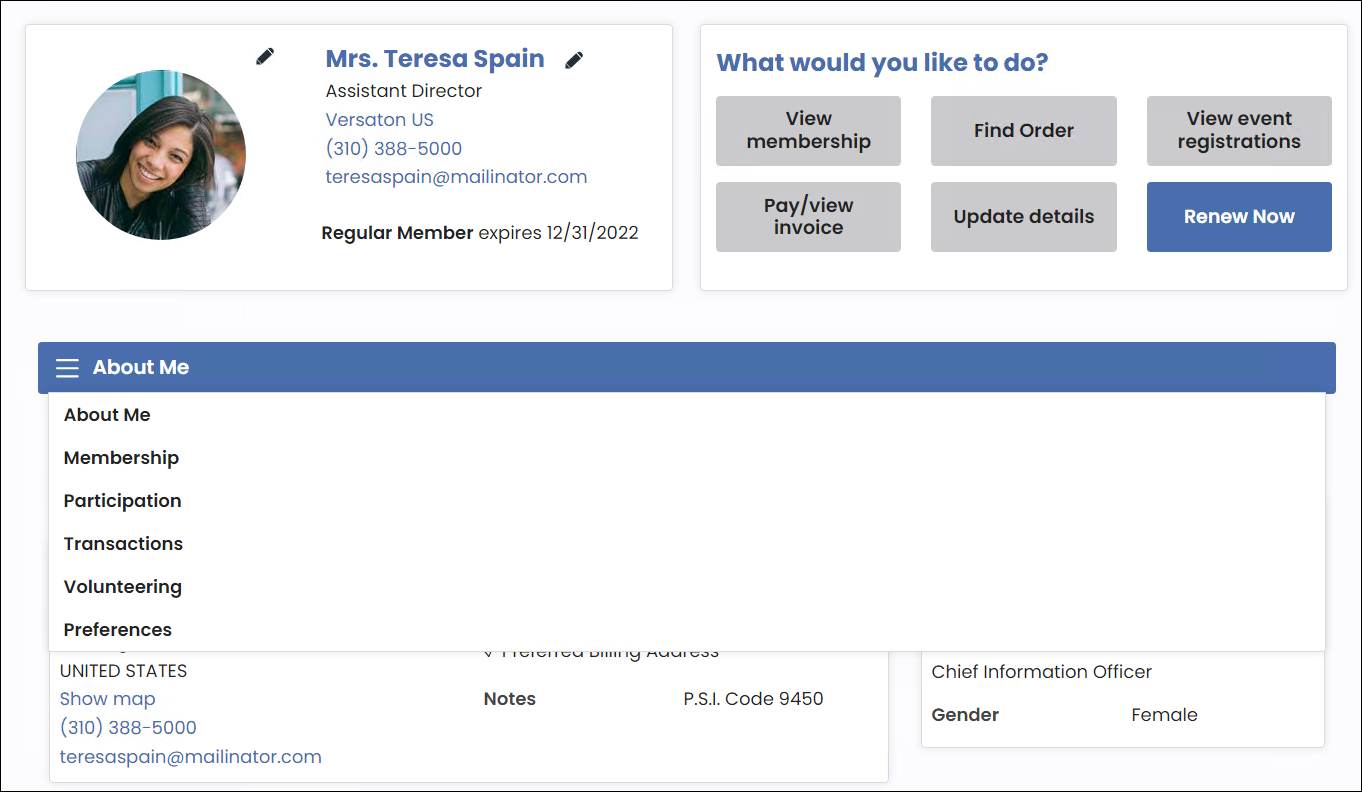
Click the edit icons next to a specific area to edit that information.
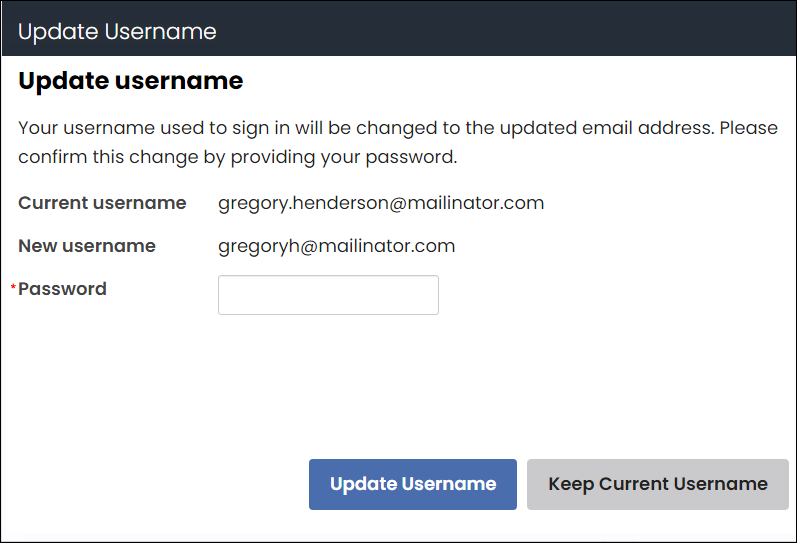
If a user updates their primary email address from a Panel Editor or Contact Address Editor content item and the previous email is their current username, they are prompted to update their username to match the new email. For more information, see Updating emails used as usernames.
Company administrator tasks
Understanding what a company administrator can do
The Company Administrator for an organization can do the following:
- Manage organization profile information
- Manage the organization member list:
-
Remove members
-
Update member roles
-
Add new contacts
NoteThe Company Administrator cannot add existing contacts to their company for security reasons. The Company Administrator can add brand new contacts only.
-
- View and update account information for organization members
- Process dues and pay event registration for existing and new contacts
- Pay any outstanding invoices for members and new contacts
- Join as a member on behalf of company contacts that are not currently a member
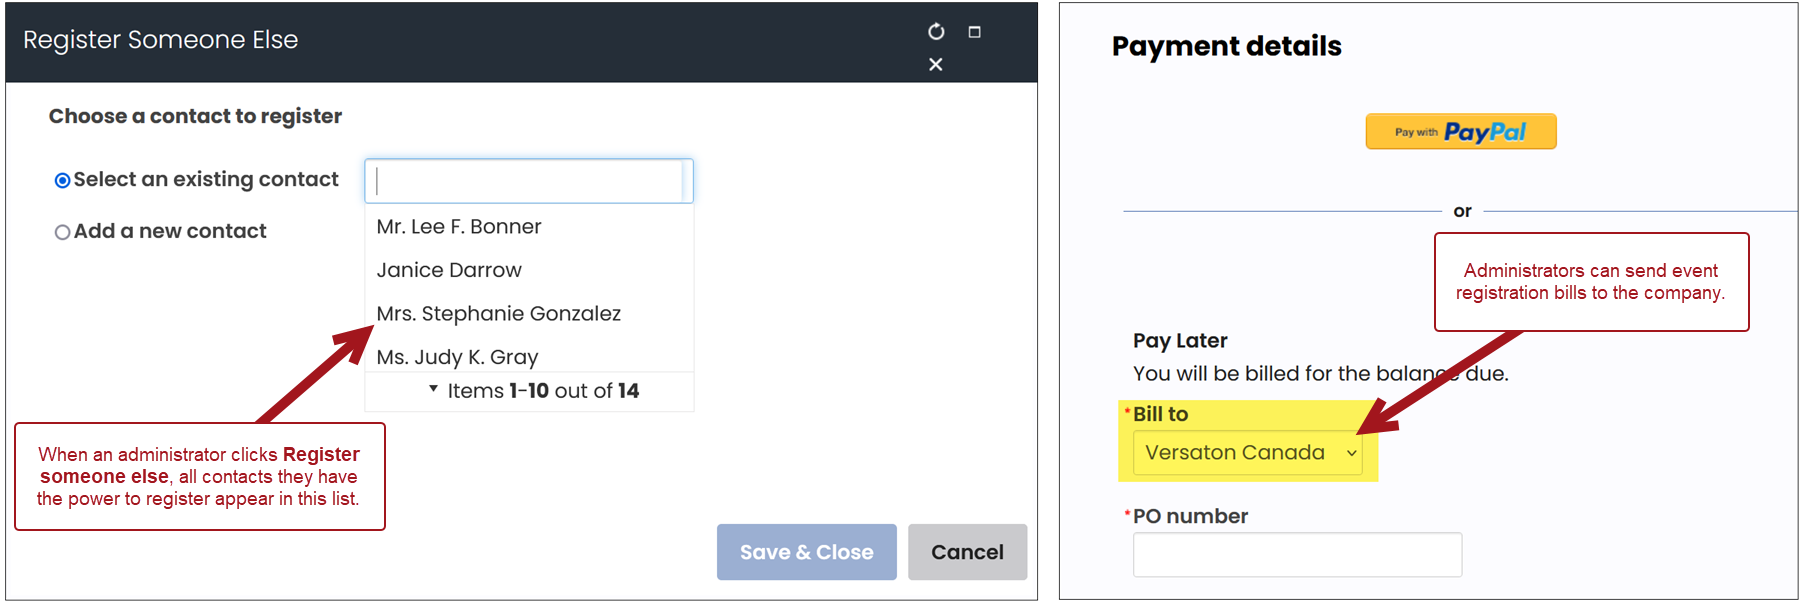
- Bill event registrations to the organization
- Manage billing for the organization
Viewing and updating the company account page information
Do the following to navigate to the company account page:
- Navigate to the public website.
- Sign into the website using your username and password.
- Navigate to your account page.
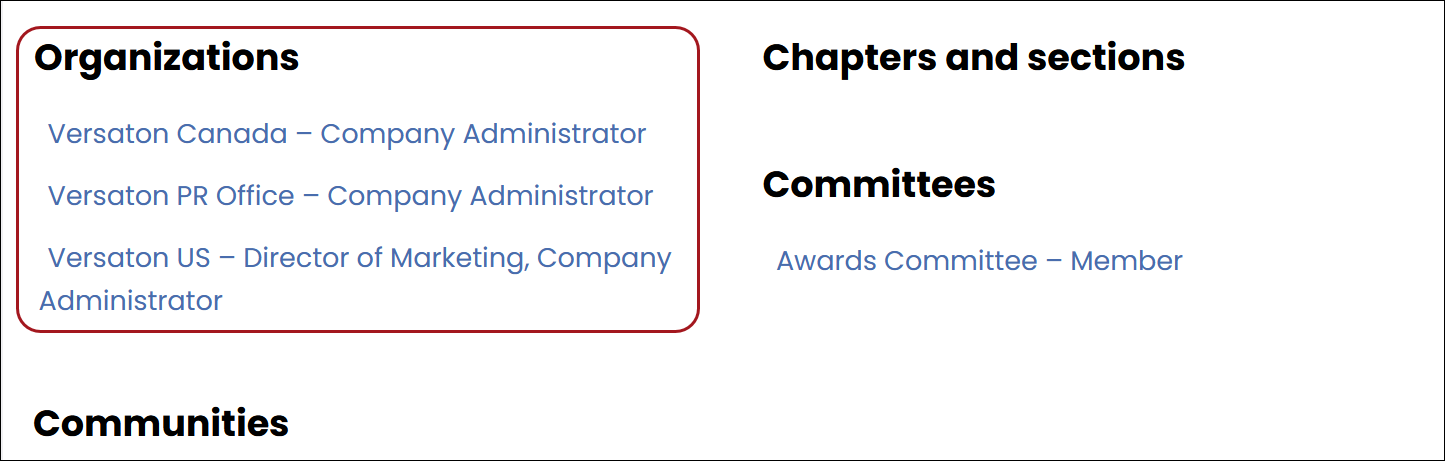
- Click the My Participation tab, then scroll to the Organizations area. Select the company from the list.
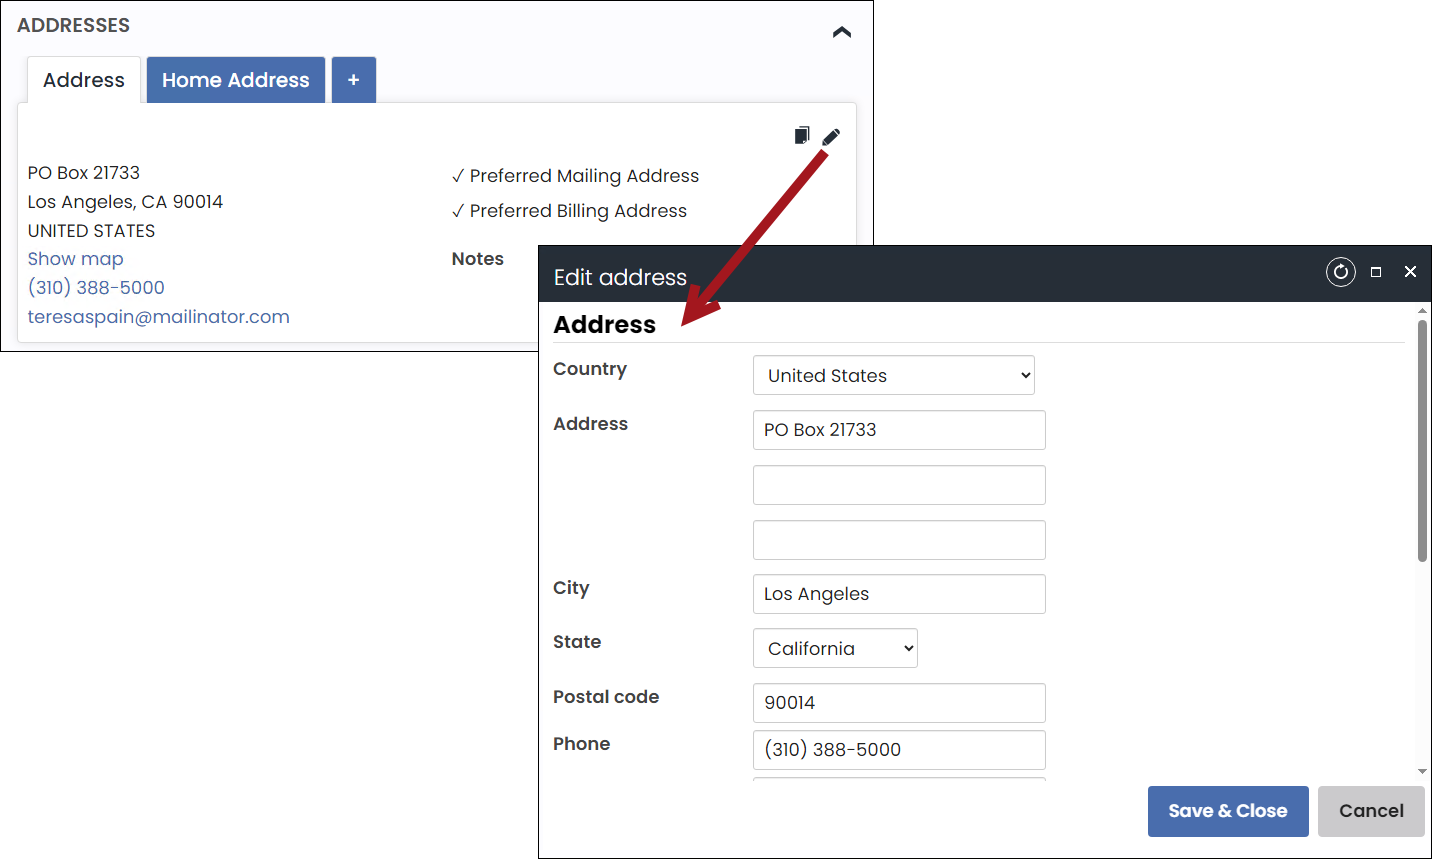
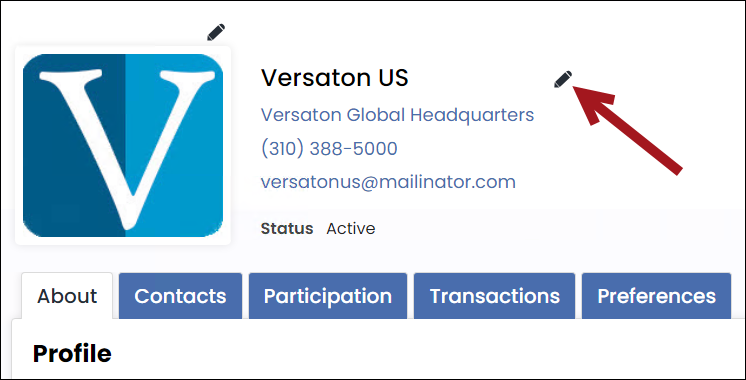
Updating the profile information
When Company Administrators view the account page for their organization, they can update the organization's account and profile, including the name, addresses, and public profile details. Click the edit icon to edit details for a particular area.
Viewing the company roster
Click the Contacts tab to review the company’s roster. From the roster, company administrators can add co-workers to the roster by selecting Add contact.
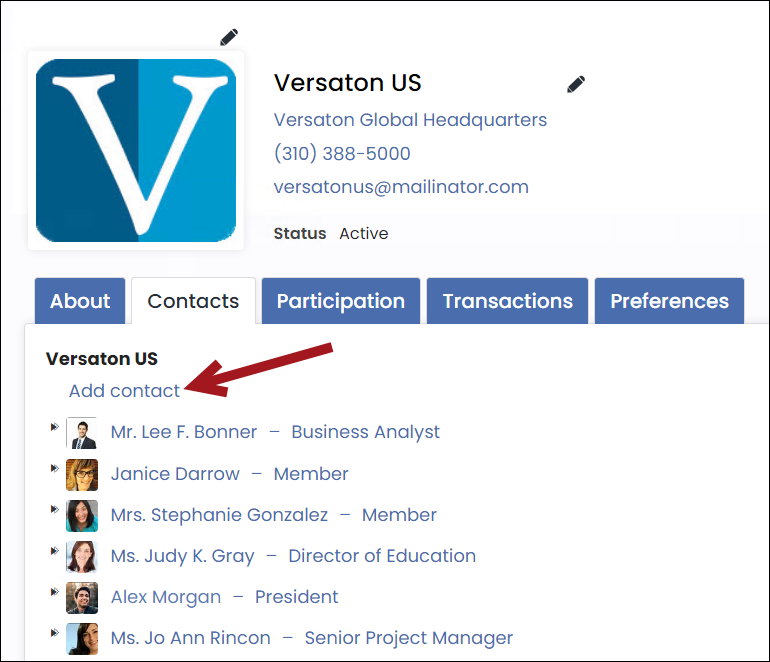
NoteThe Company Administrator cannot add existing contacts to their company for security reasons. The Company Administrator can add brand new contacts only.
Company Administrators have the ability to update contact and profile information for members of their organization, including name, title, organization, addresses, and public profile details. They can also view participation information for the contact, such as billing history.
Performing billing tasks as a company administrator
Company Administrators can perform the billing-related actions:
-
Register members for events that are apart of the organization that they are the administrator of and can then bill the registrations to the organization.
- Make purchases and bill the purchase to the organization, including AutoPay memberships and donations.
- Review past orders and invoices.
- Purchase non-dues subscription items on behalf of their organization or members while billing the purchase to the organization.
- Pay recently billed renewal invoices.
- Pay renewal invoices using the Renew Now button on the organization's account page on the organization or member's account page.
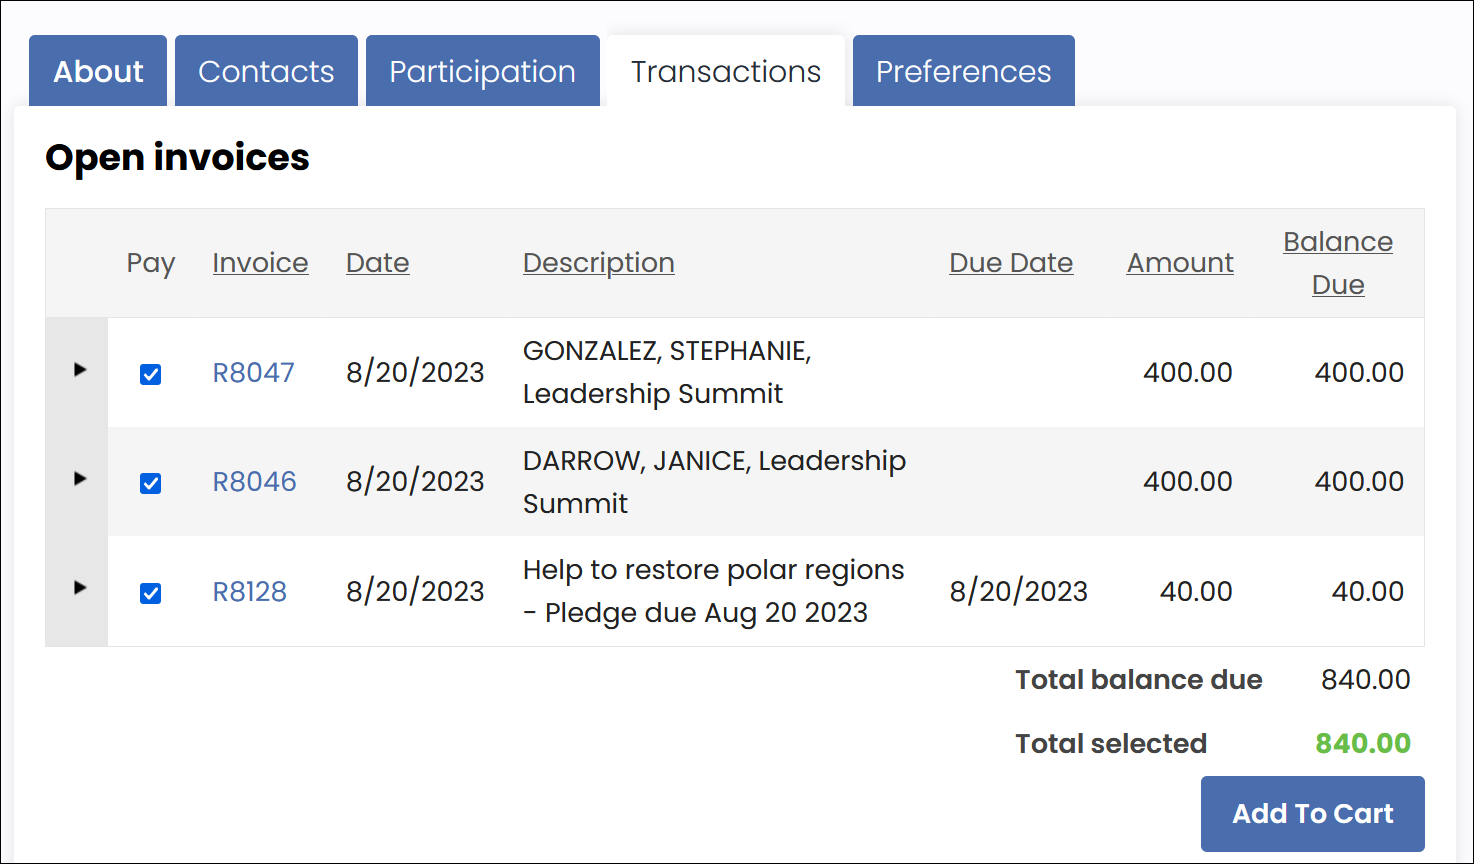
Paying open invoices for a company
To pay open invoices for the company, do the following:
-
Click the Transactions tab.
-
All open invoices appear in the Open invoices area. Select the checkbox next to the invoice number.
-
Click Add To Cart.
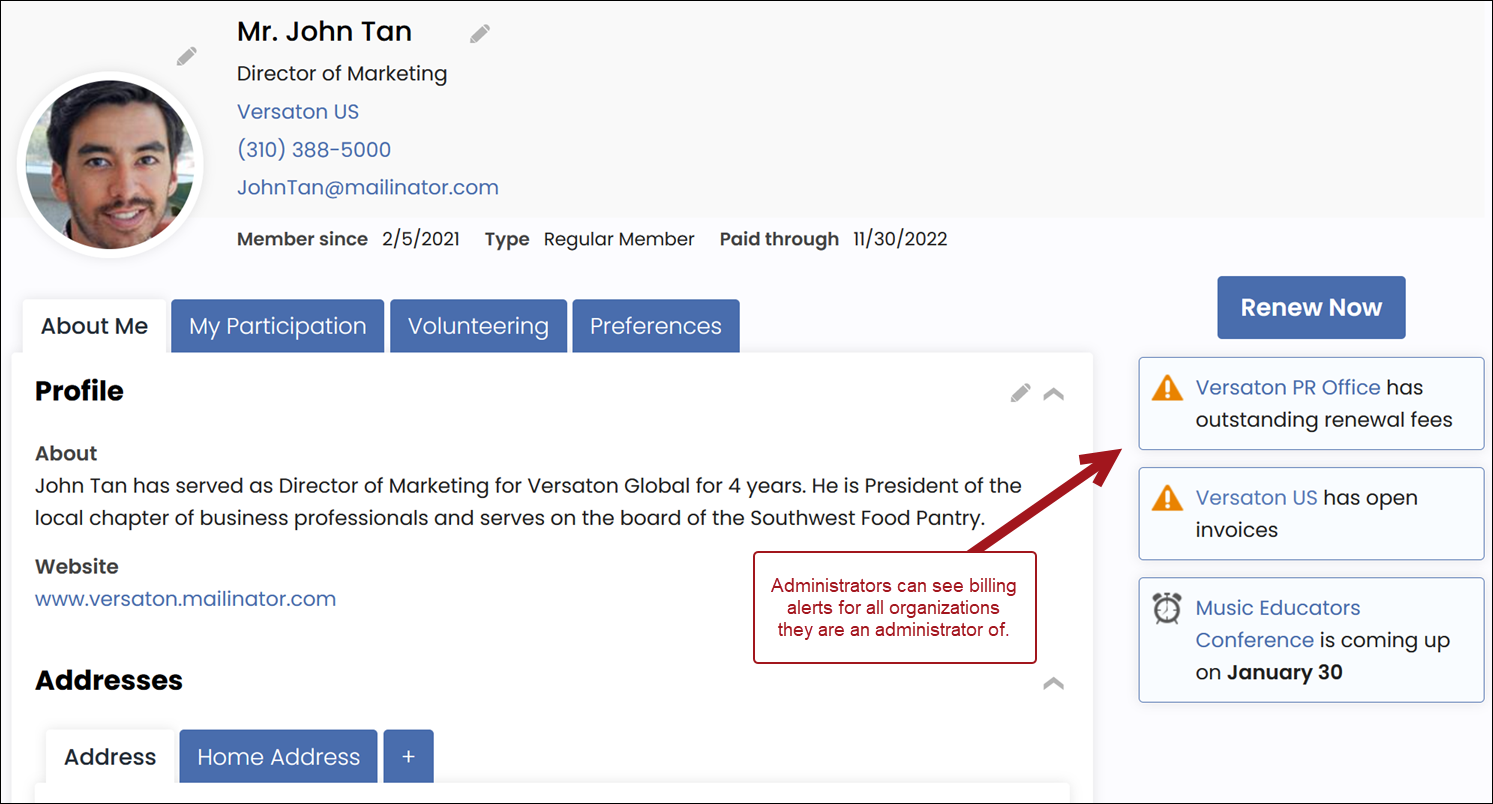
Billing alerts
When their associated organization has an outstanding membership renewal invoice, Company Administrators see a notification (for each organization they administer) on their account page that their organization has outstanding renewal fees.
Membership tasks
Renewing a membership
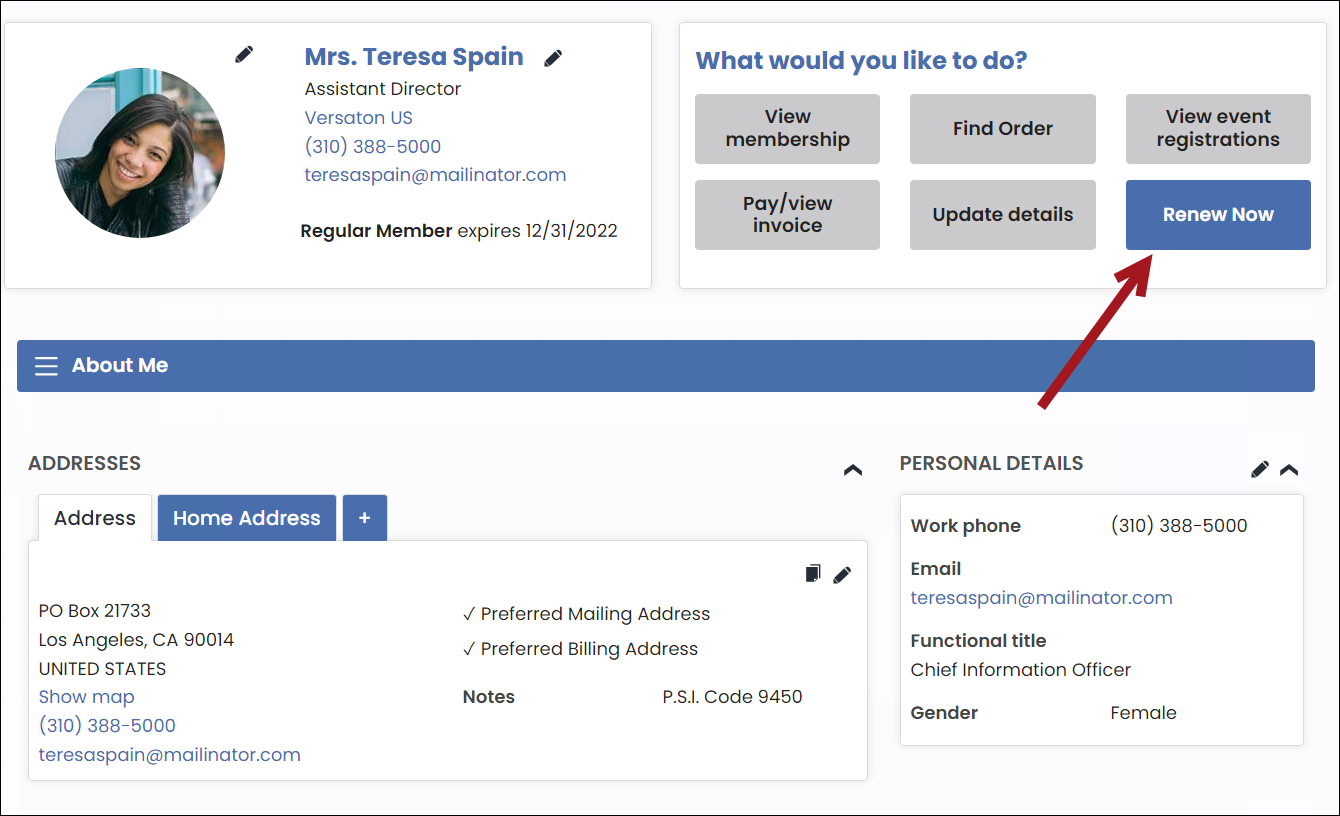
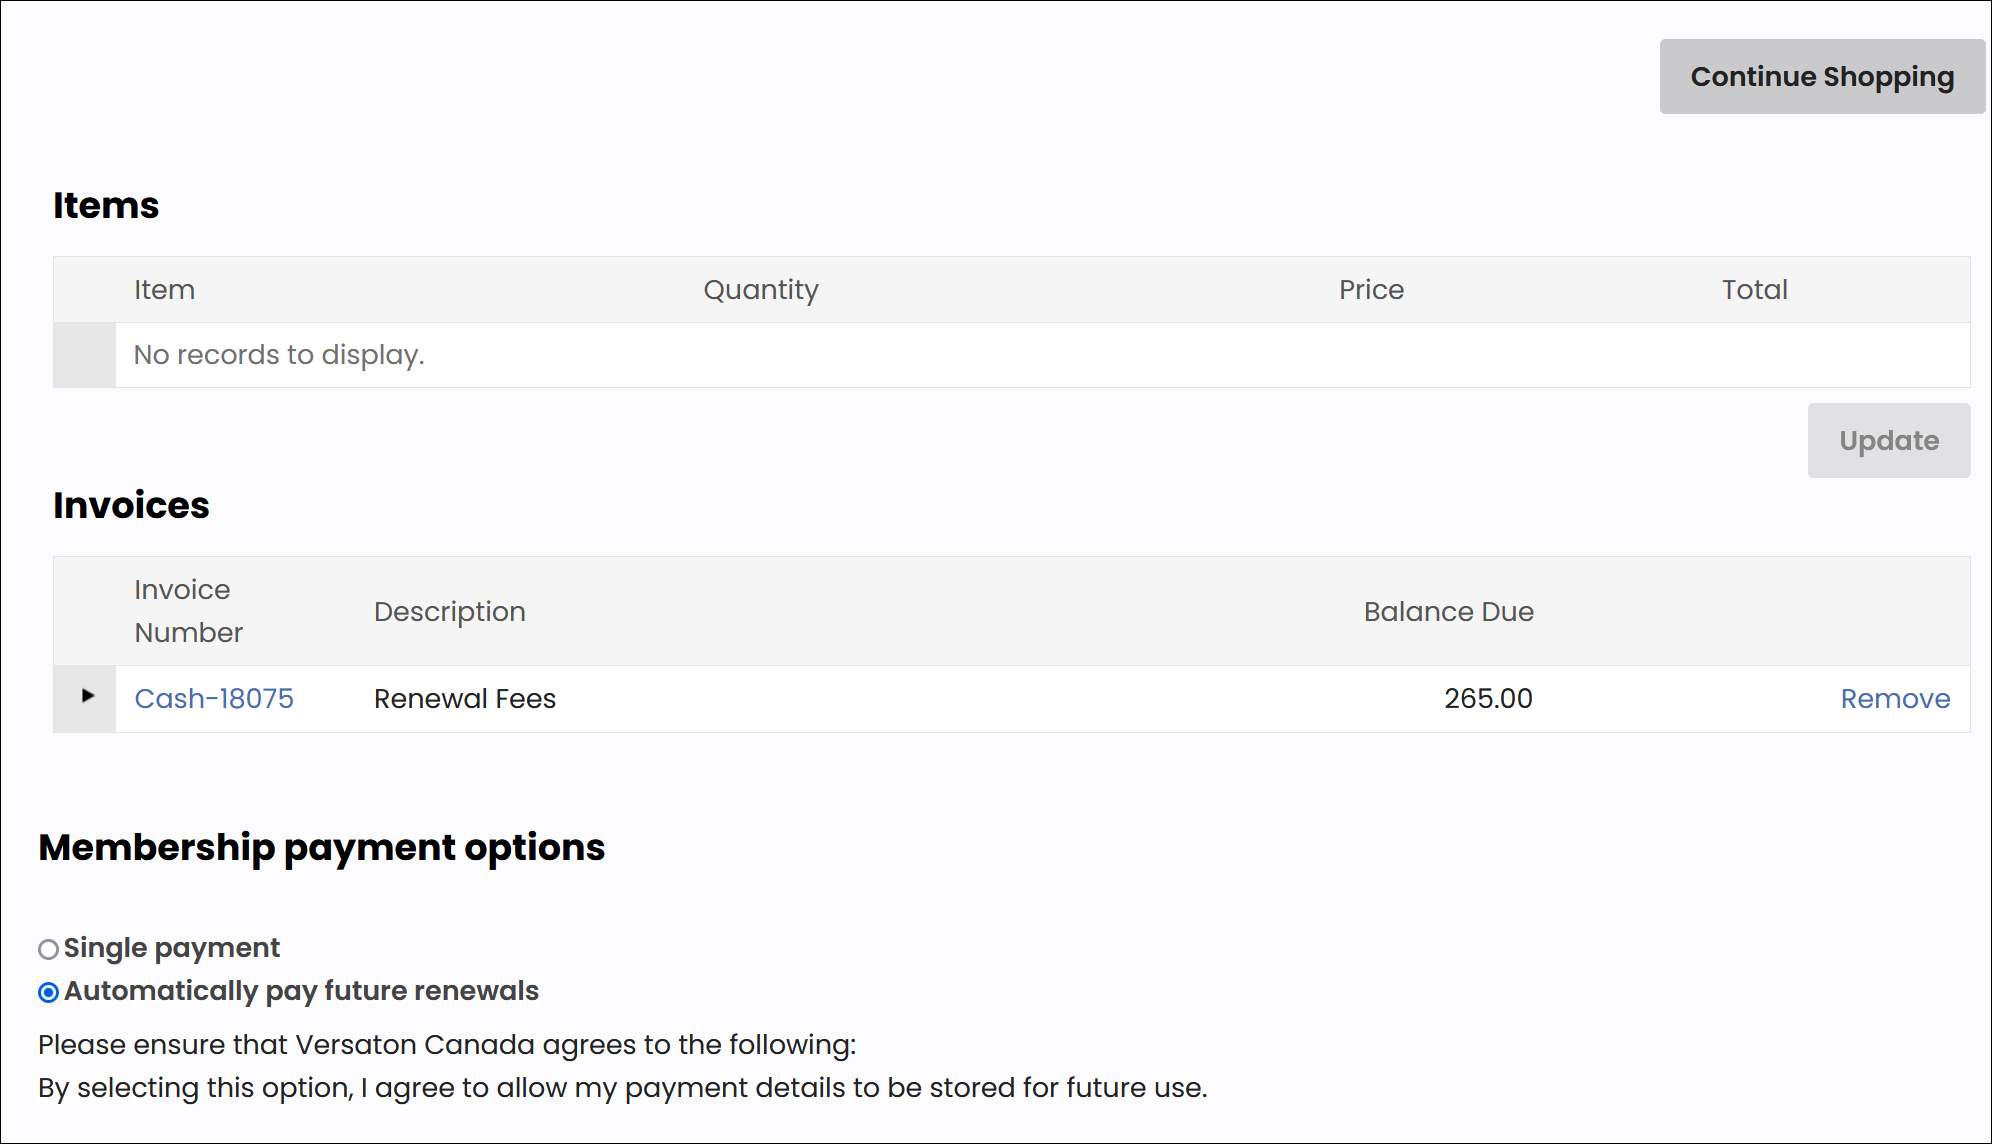
After renewals are generated, public users will have access to a Renew Now button on their account page. This is where the member can begin the renewal process.
Do the following to renew a membership:
-
The member navigates to the public website and logs in using their username and password.
-
The member navigates to their account page, then clicks the Renew Now button.
-
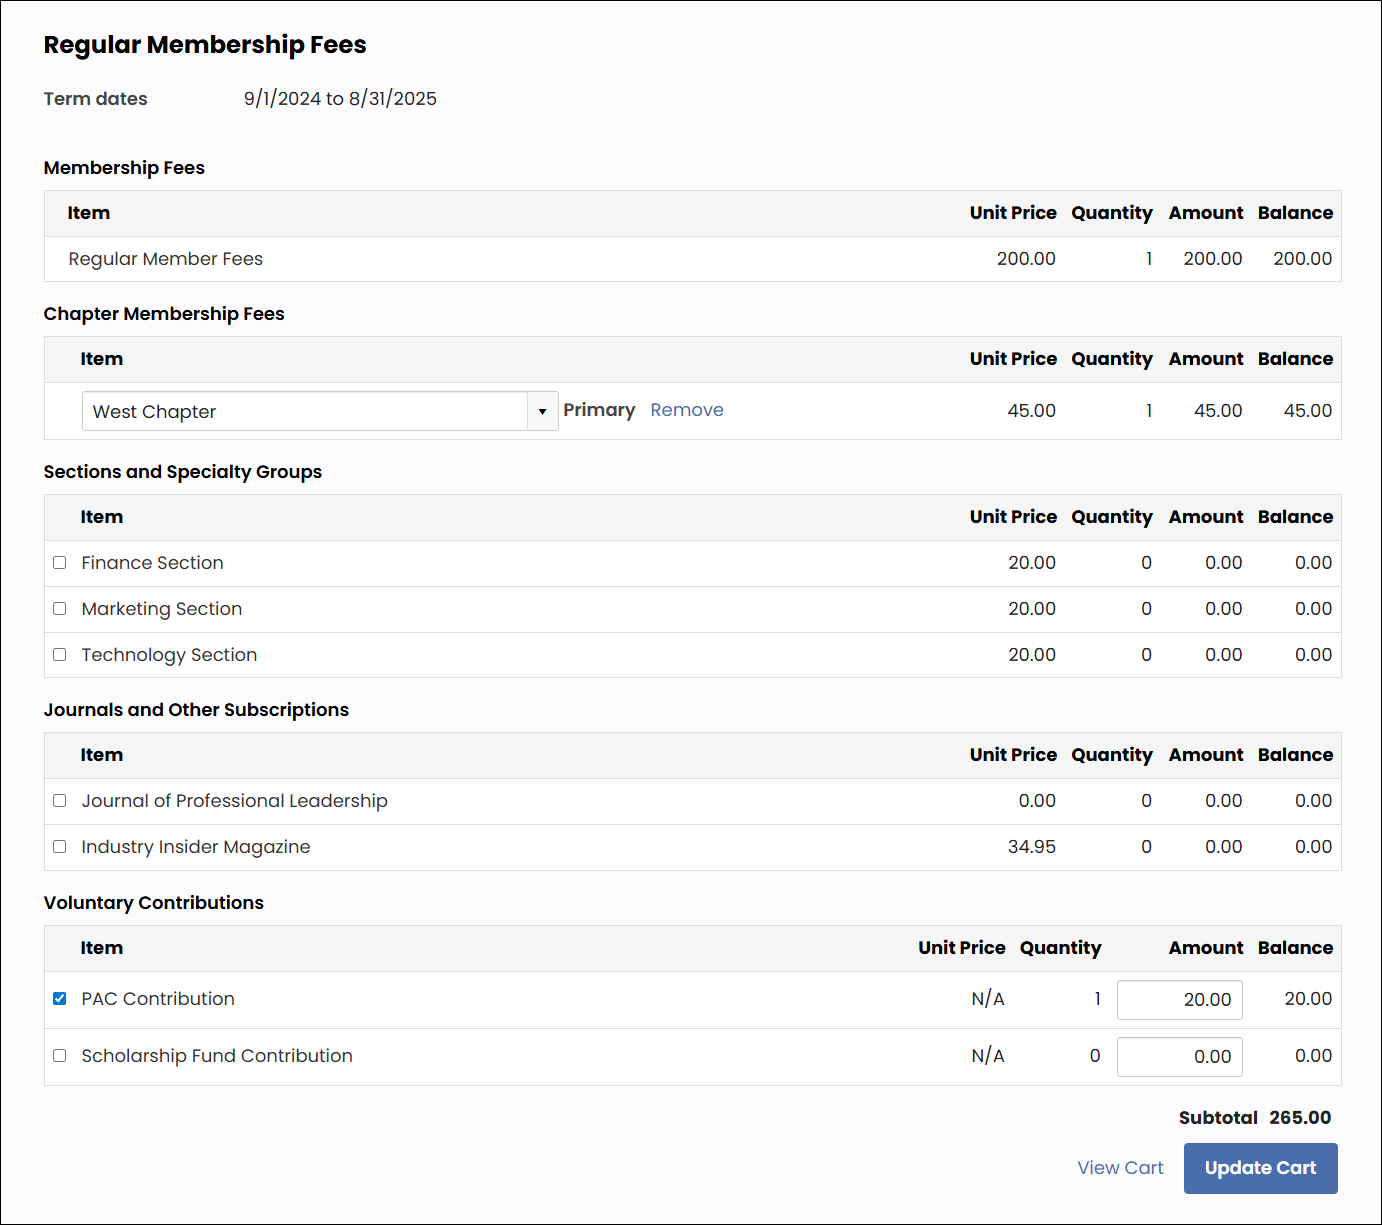
The member is taken one of two places, depending on if the Use to display itemized renewals checkbox is enabled on the billing cycle that was used to generate the renewal invoice:
-
When disabled, the member is taken directly to the cart.
-
When enabled, the member is taken to the itemized renewal page where they can review and update the items defined in their membership (except the primary fee).
-
-
When ready, the member purchases the membership and is automatically sent an order confirmation email.
Event tasks
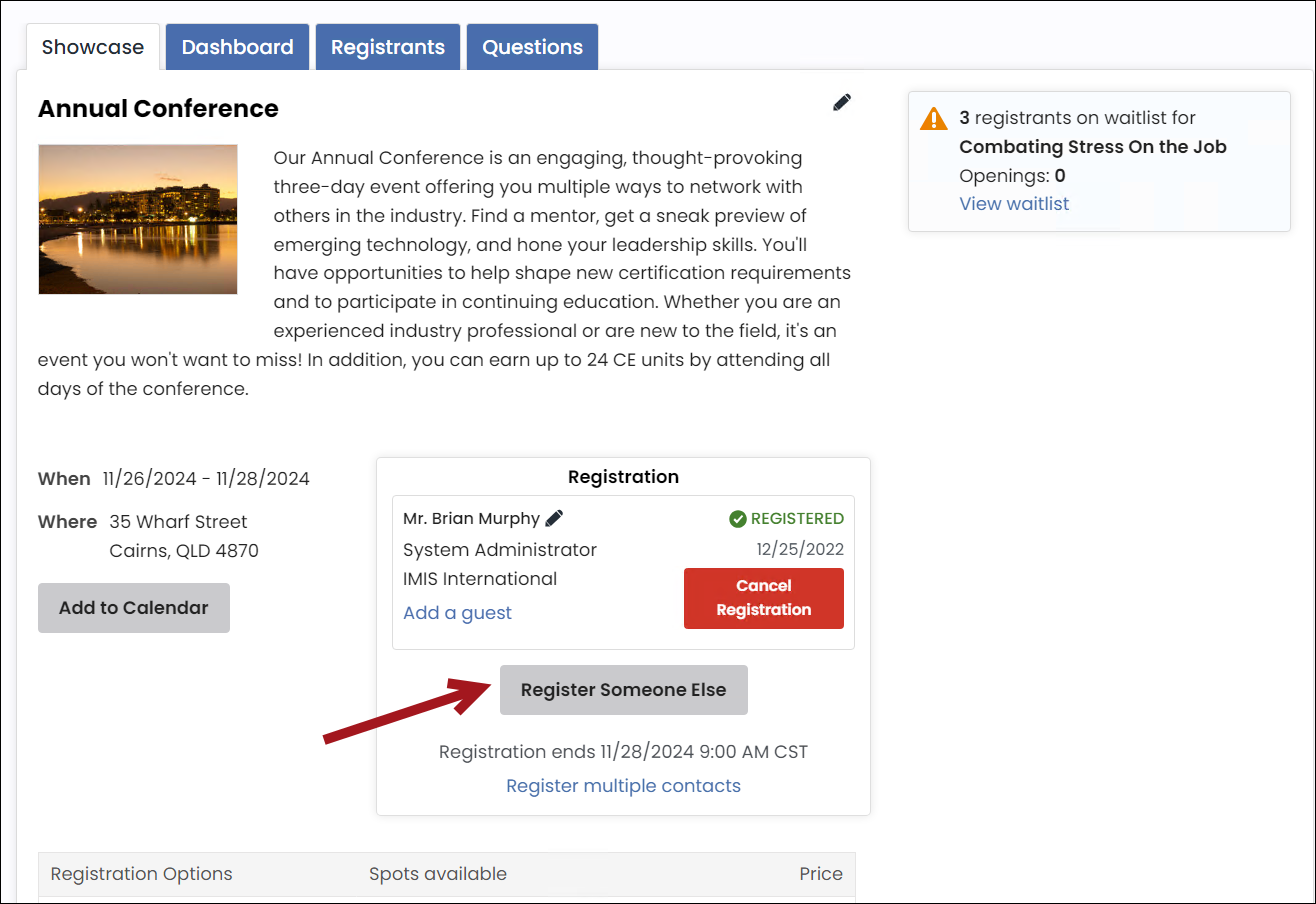
Registering for an event
Public users can register for an event by doing the following:
-
Navigate to the public website.
-
Sign into the website using the user's username and password. If the user does not have an account, create an account by selecting Create account.
-
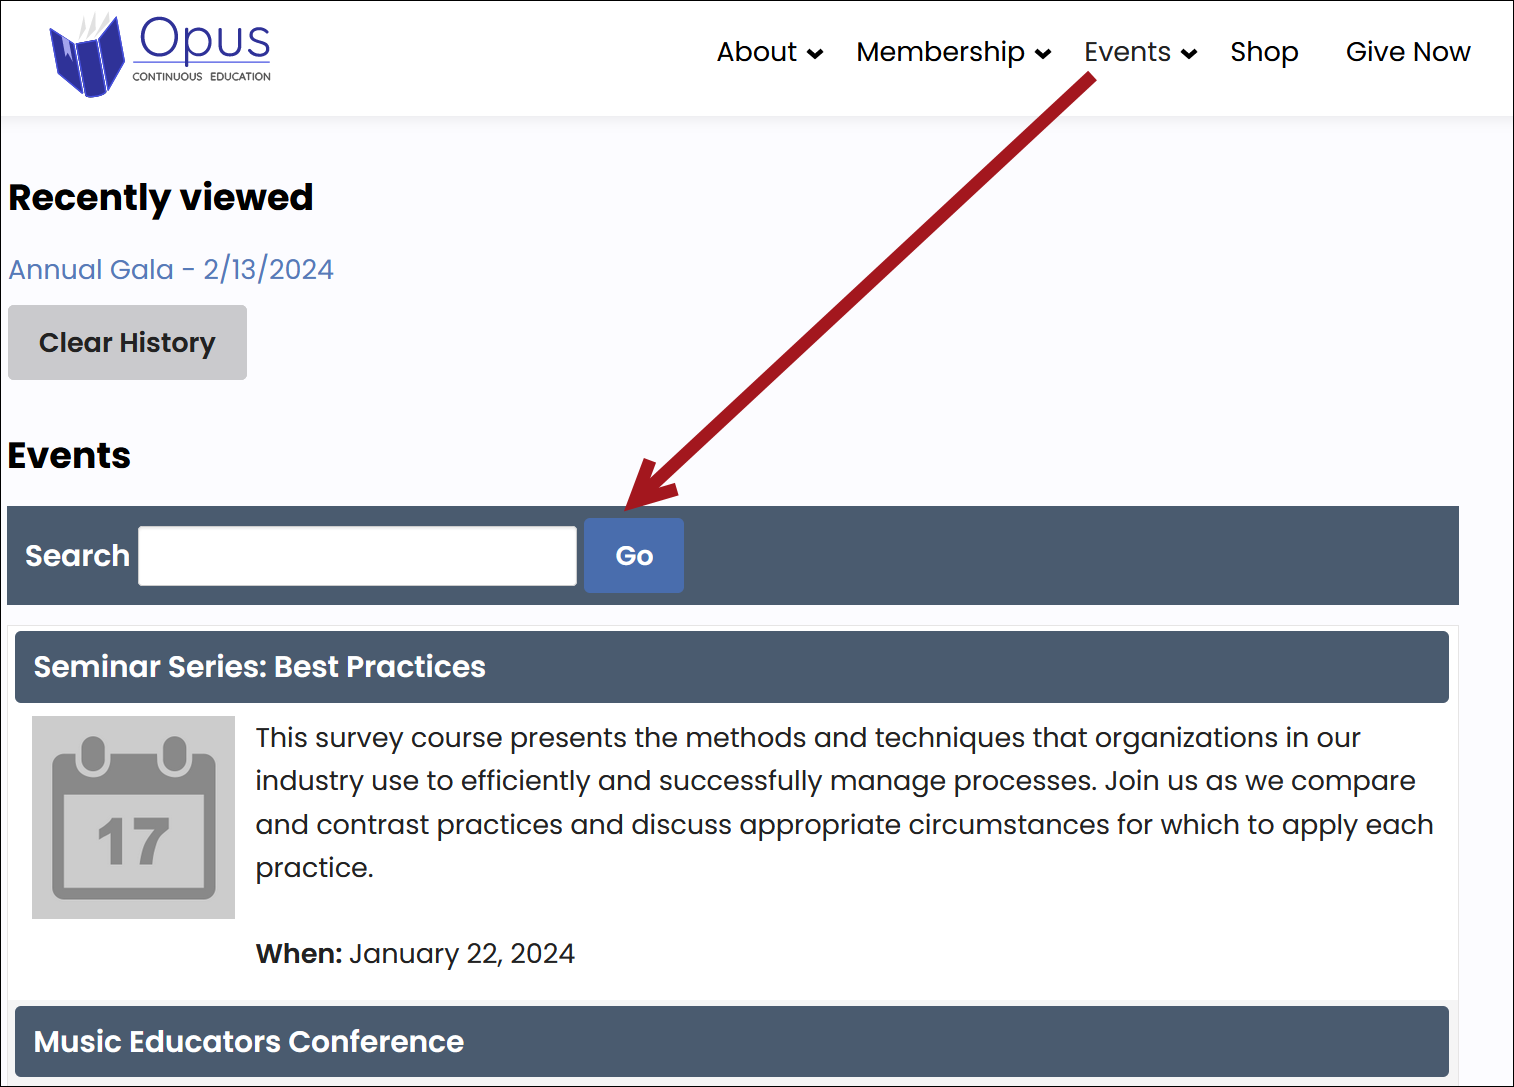
Click the Events navigation item.
-
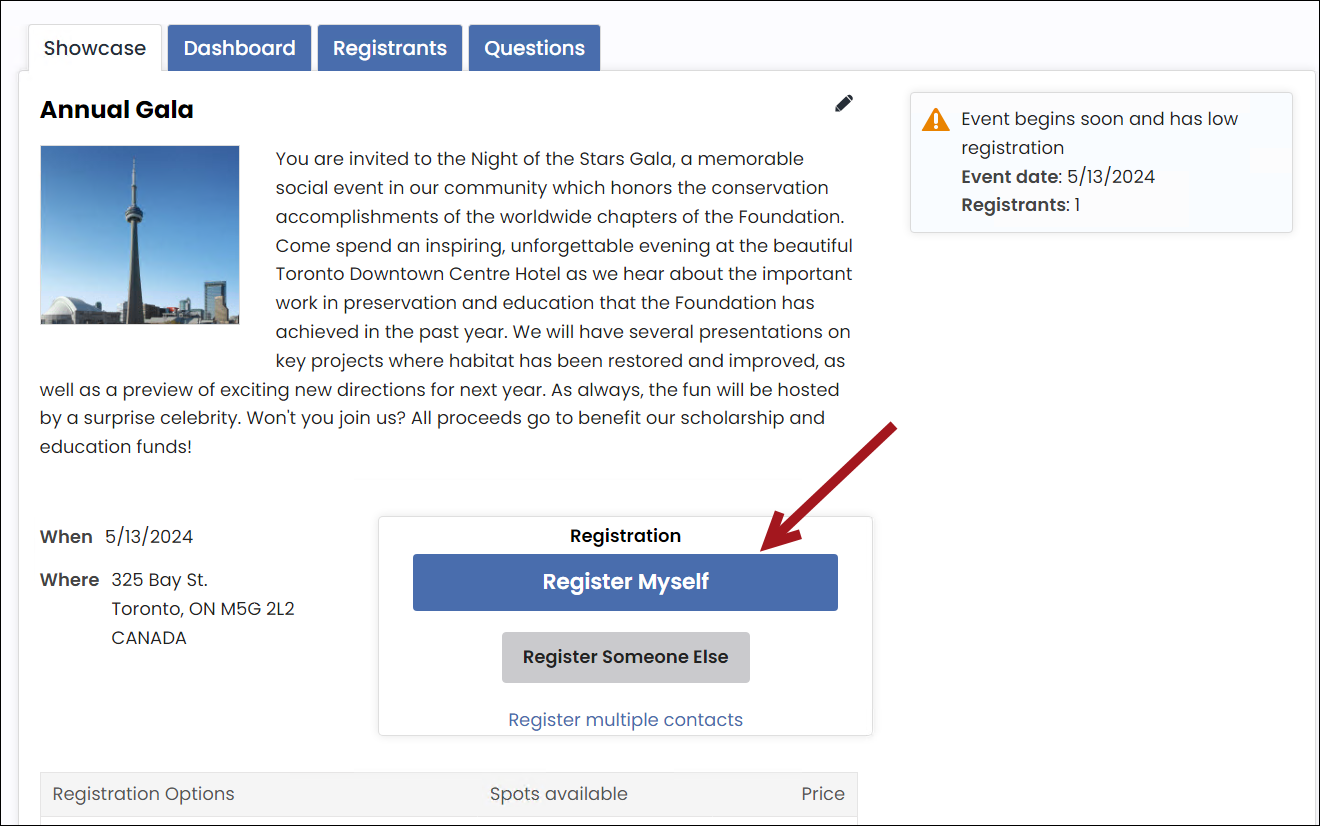
Locate the event, then select the event to open it.
-
Click Register Myself.
- Select an admission option. If there is only one admission option defined for the event, then there are no registration options to choose from.
Note
The first option is selected by default. To change this, go to the Info tab of the admission option and enter a Sort sequence. See Defining event pricing and registration options.

-
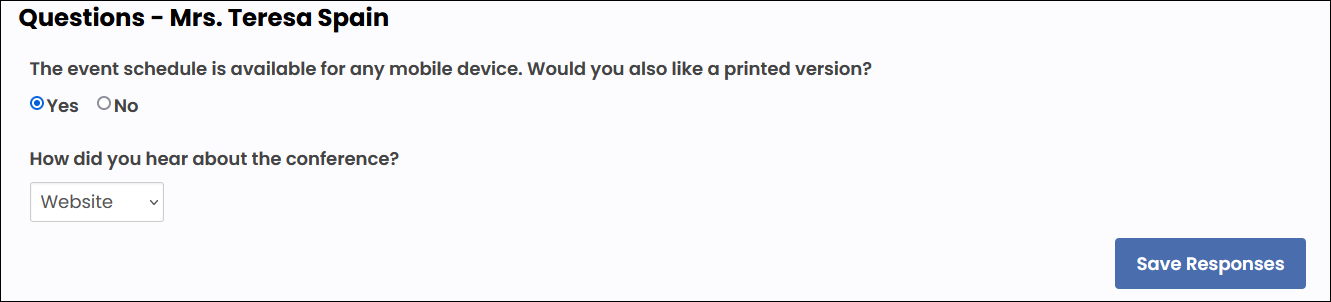
If there are questions associated with the event, answer those and be sure to click Save Responses.
-
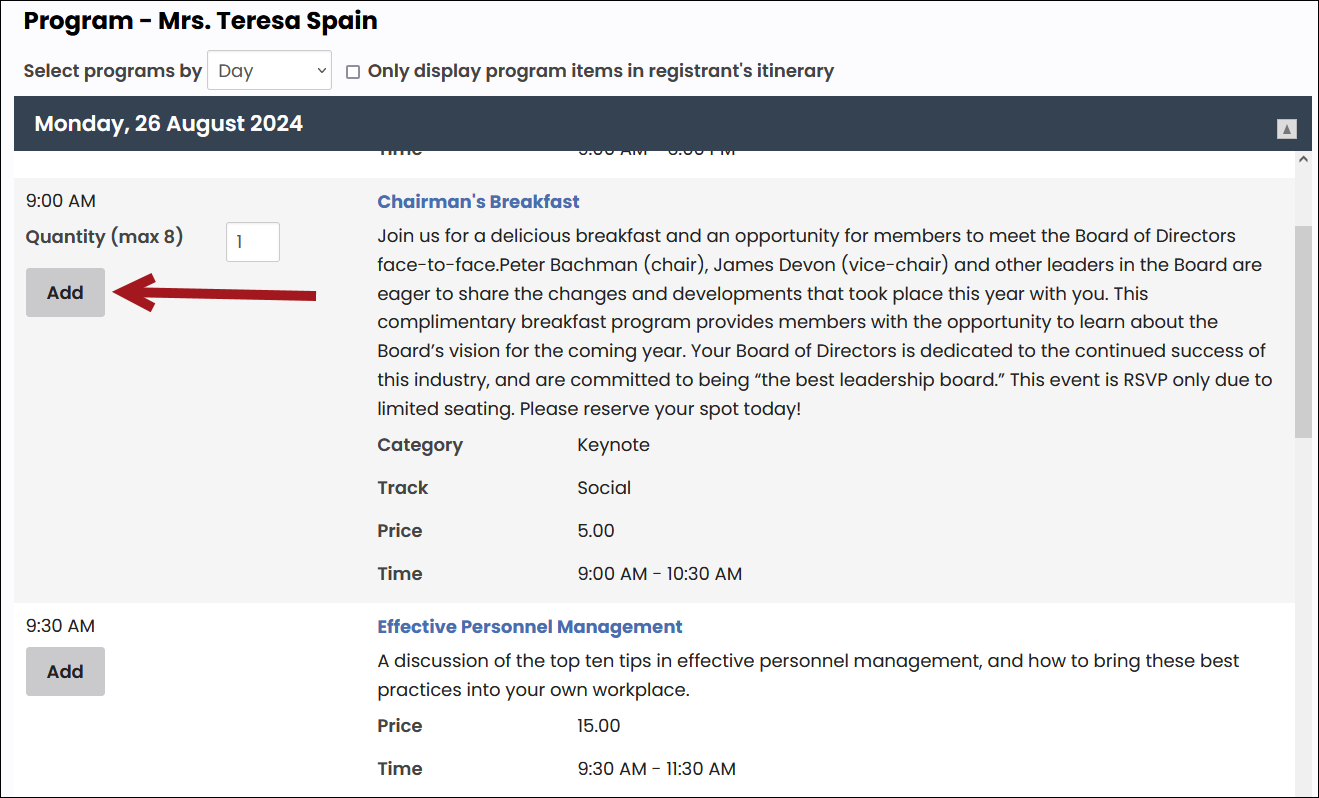
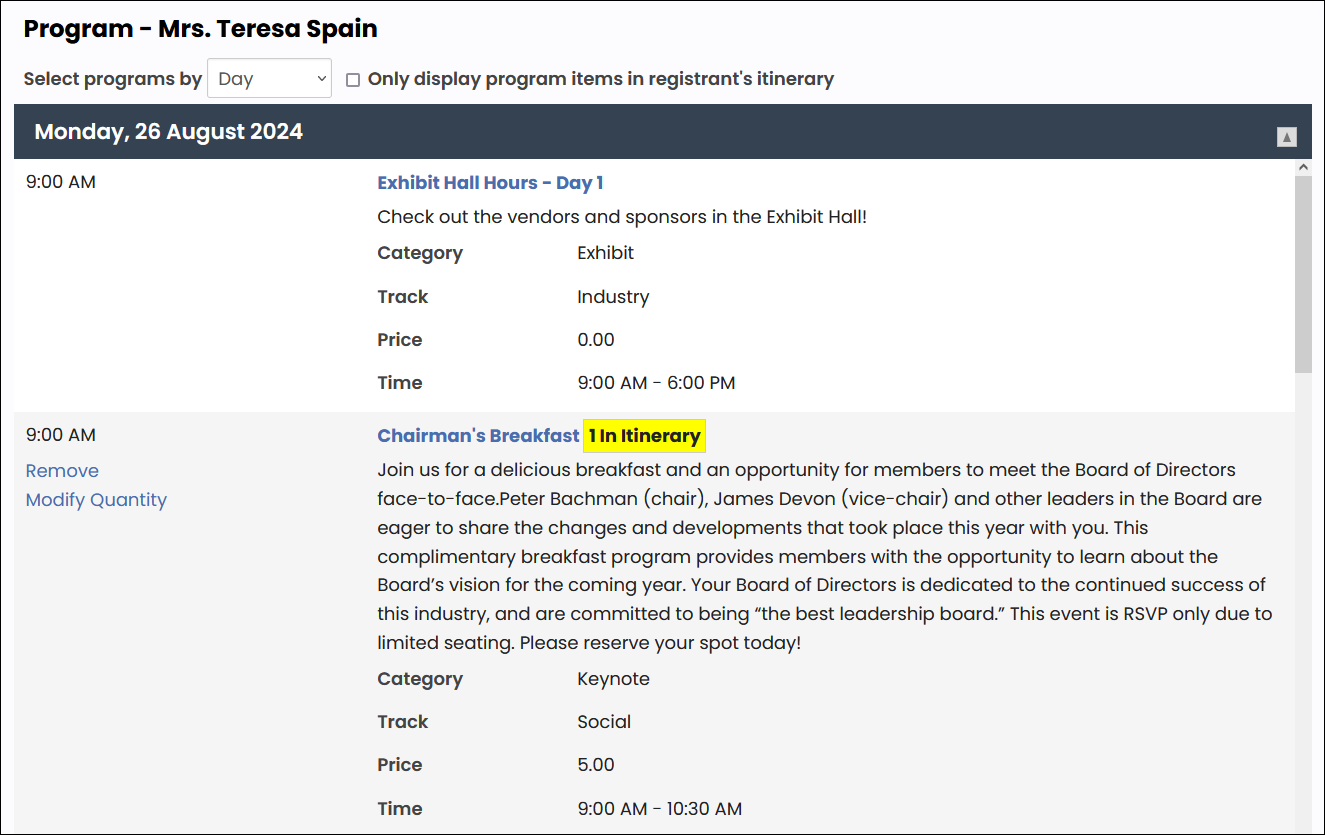
If there are program items defined, click the Add button next to add program items to the registration. Program items are typically available with events that span multiple days.
-
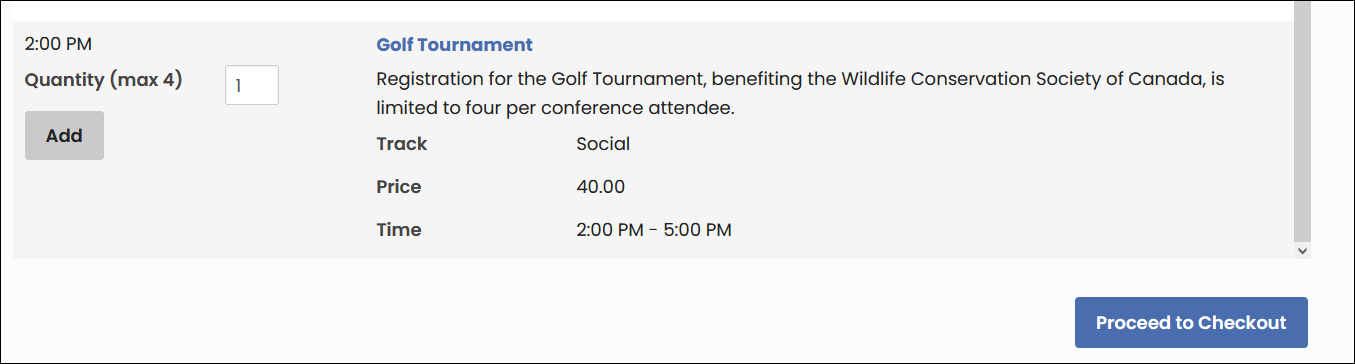
Scroll down, then click Proceed to Checkout.
-
From the Cart, enter payment details.
-
Click Submit Order. The registration is not complete until the cart is submitted.
-
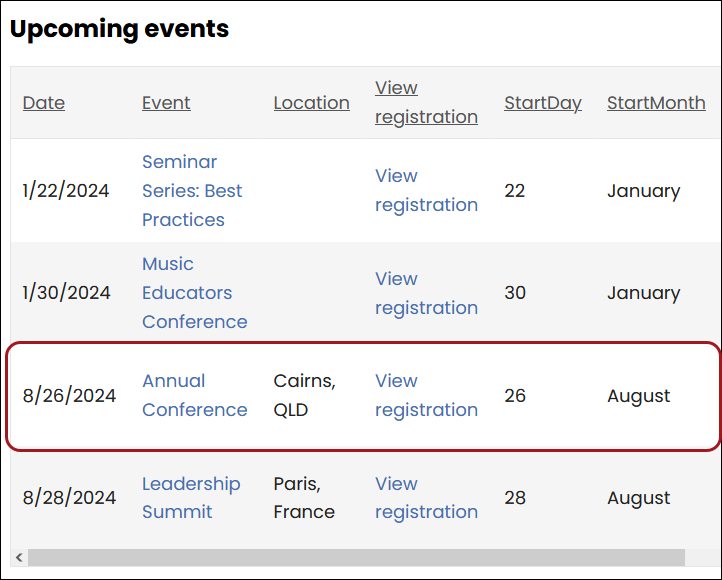
To review the registration, navigate to the user's account page, then click the My Participation tab. Registrations appear under the Upcoming events area.
Changing an event registration
Public users cannot change their event registration option after they have already checked out; however, they are able to remove or add program item registrations if Allow itinerary changes after checkout is enabled.
To change or modify the program items on an event registration, do the following:
- Navigate to the public website.
- Sign into the website using your username and password.
- Navigate to the event.
- In the program area of an event you have already registered for, add, remove, or update the quantity for any program item.
- After completing all desired changes to program items, click Proceed to Checkout.
- The Cart will contain a line for the adjusted event with the total charge or credit for all adjustments. Enter the payment details.
- Click Submit Order. An Order Confirmation page will appear, reflecting all registration and program item details.
Registering someone else for an event
If the event is configured to Allow registering others, public users have access to register someone else for an event. There are two options when registering someone else:
- Select an existing contact – This search returns everyone who belongs to the same organization as the registrant.
- Add new contact – Allows the registrant to create a new contact, which creates an account page for the new contact.
Do the following to register someone else for an event:
- Navigate to the public website.
- Sign into the website using your username and password.
- Navigate to the event.
- Click Register Someone Else.
- Select an existing contact or add a new contact. If adding a new contact, add as much information as you can about the contact.
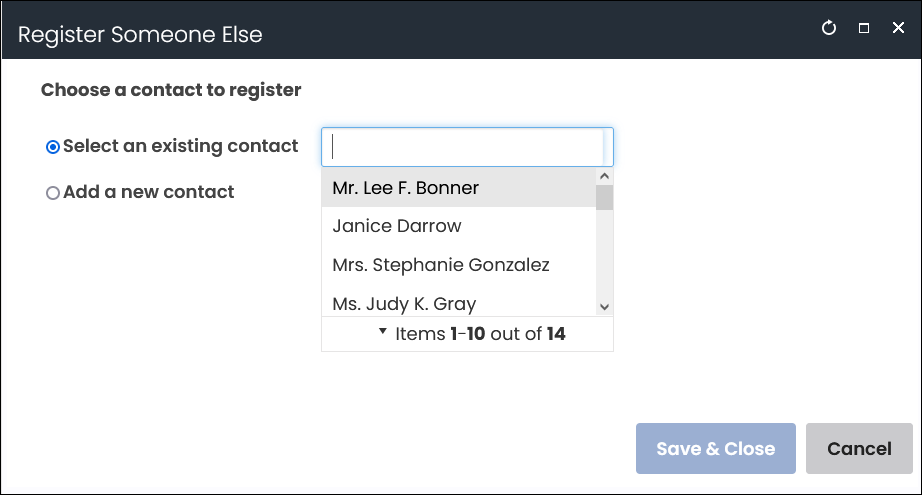
- Click Save & Close.
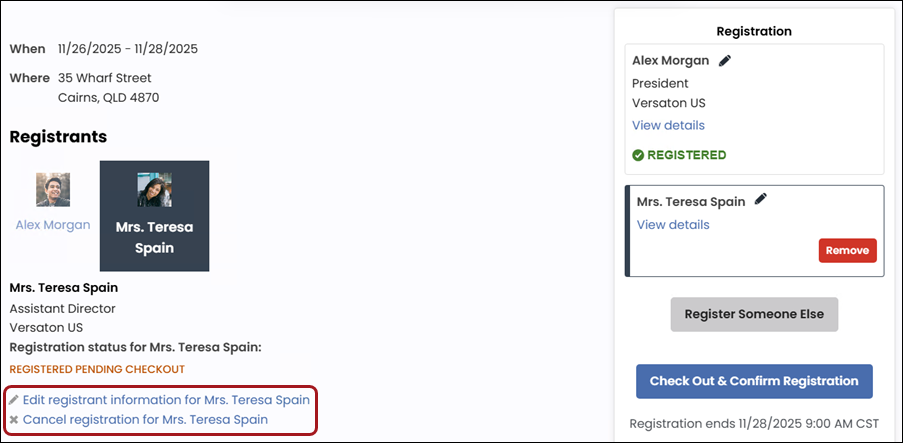
- The registrant appears under the Registrant area. There are available links to edit or cancel the registration before checking out.
- Continue through the registration process:
- Select a registration option
- Add program items
- Answer required questions
- Click Proceed to Checkout.
- From the Cart, enter the payment details.
- Click Submit Order. The registration is not complete until the cart is submitted.
Transactional tasks
Paying an outstanding invoice
Public users can pay outstanding invoices directly from their account pages.
Do the following to pay an outstanding invoice:
- Navigate to the public website.
- Sign into the website using your username and password.
- Navigate to your account page.
- Click the Transactions tab.
- Scroll down to the Open invoices area.
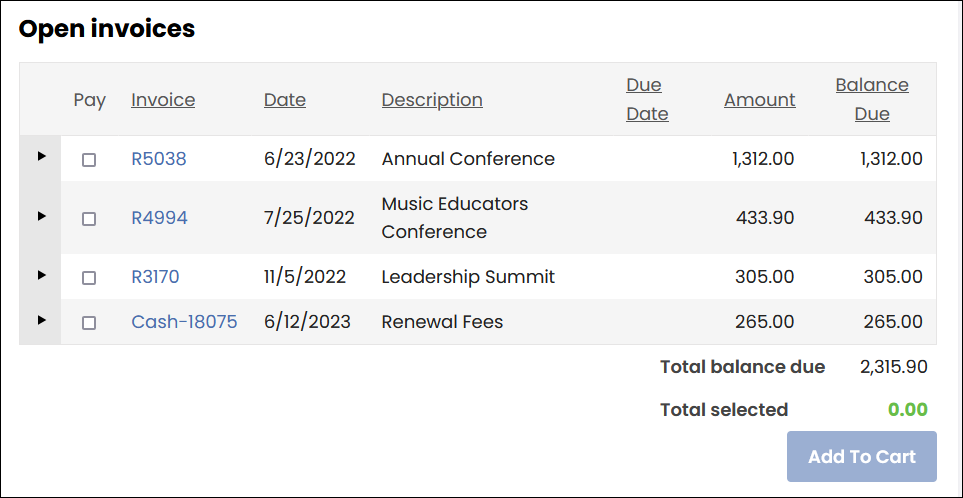
- Select the checkbox for the open invoice you wish to pay.
- Click Add To Cart. You are taken directly to the cart.
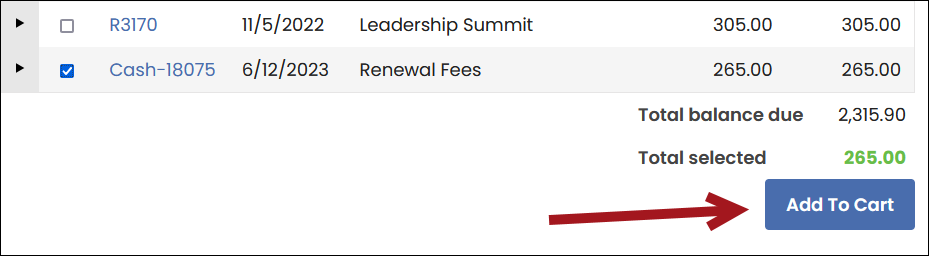
- Enter the payment details.
- Click Submit Order.
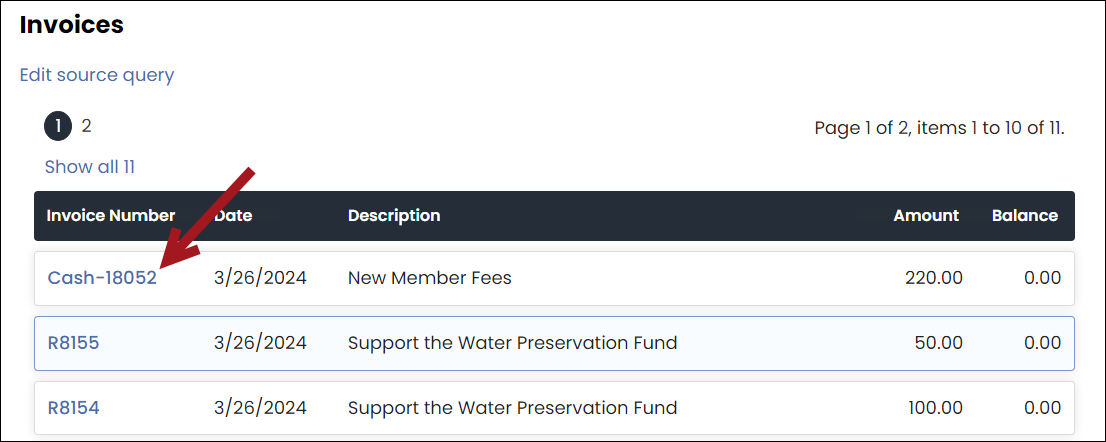
Getting a copy of an invoice
Public user can review paid and unpaid invoices, as well as print a copy of an invoice.
Do the following to print a copy of an invoice:
- Navigate to the public website.
- Sign into the website using your username and password.
- Navigate to your account page.
- Click the Transactions tab.
- Scroll down to the Invoices area.
- Select the Invoice Number for the desired invoice.
- The invoice detail information displays. Click the Print tab. This tab may take a few minutes to load.
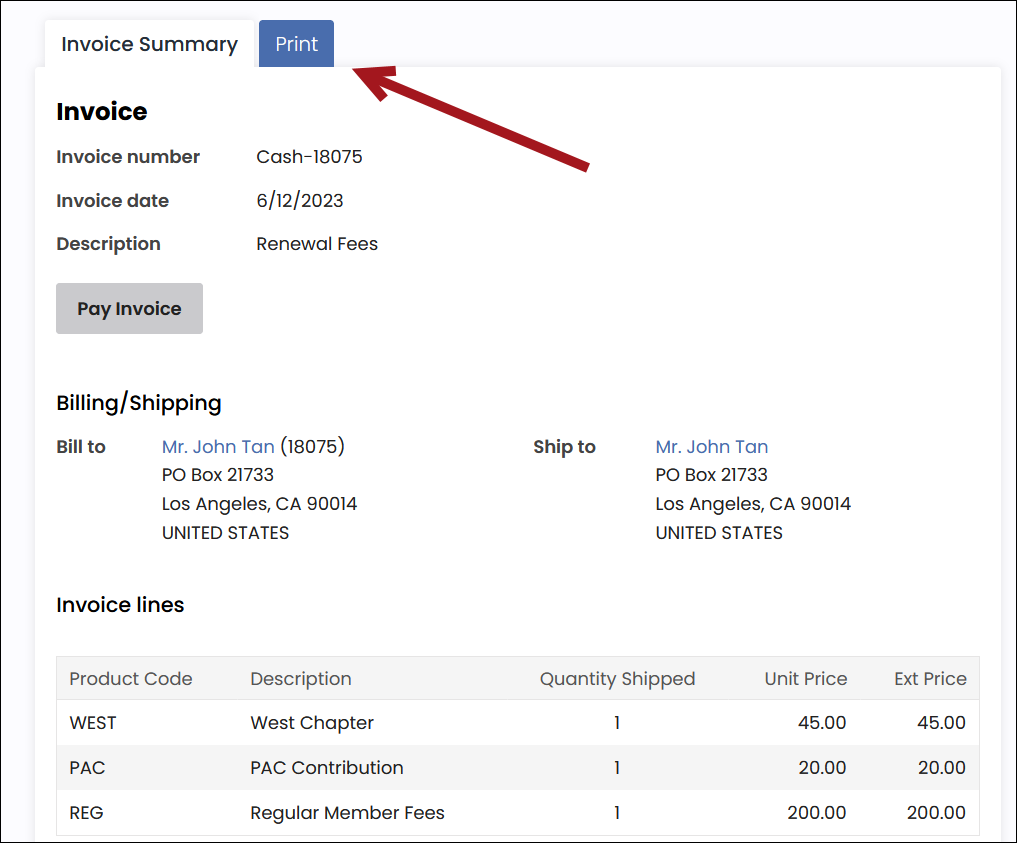
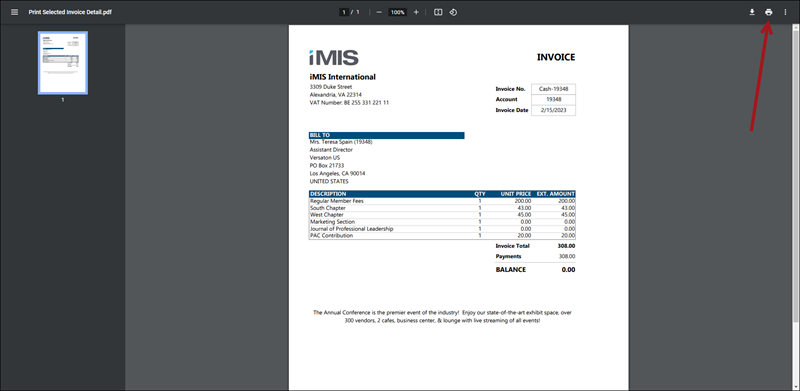
- Click Export, then select PDF.
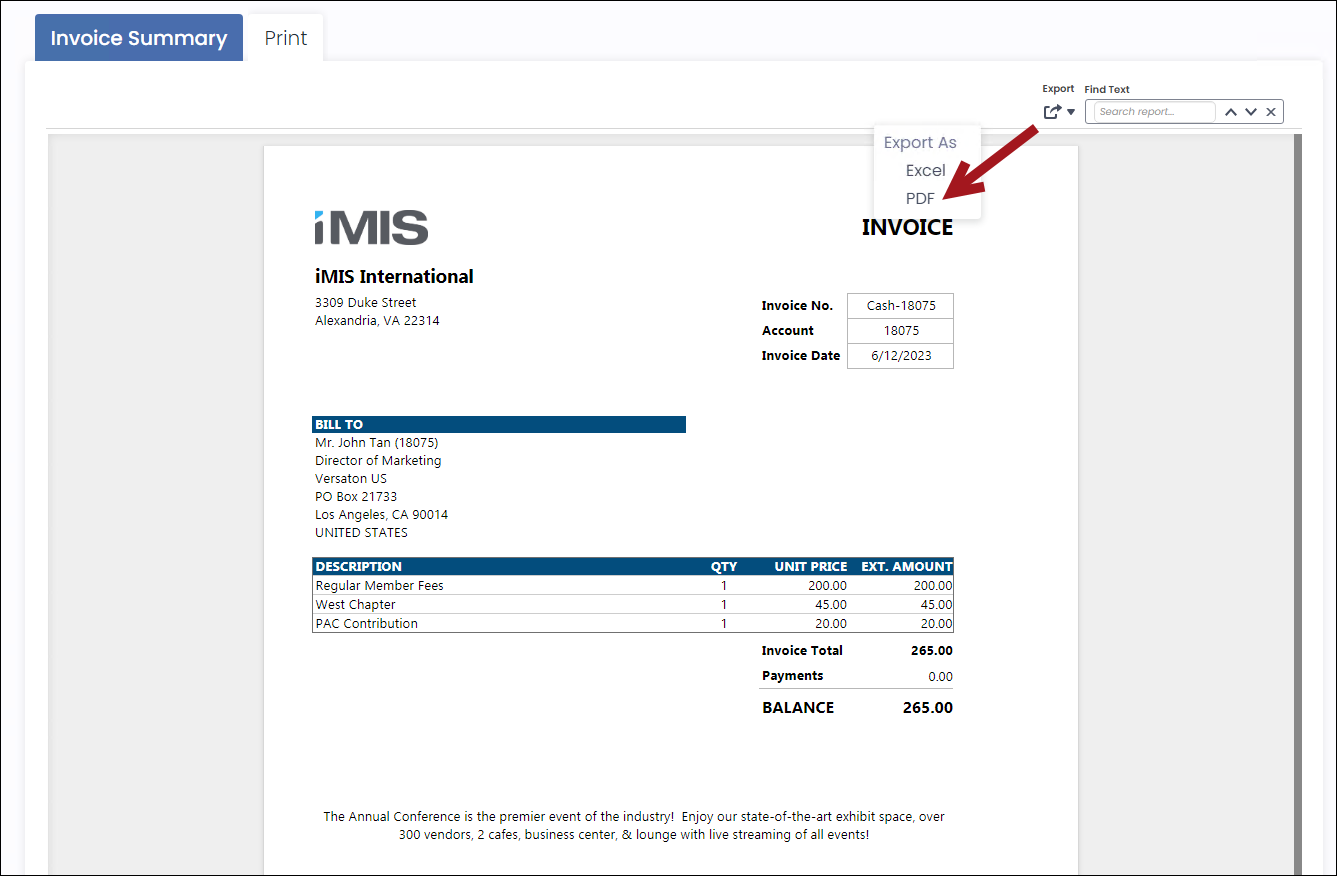
- The PDF downloads locally. Open the PDF, then print from your browser.
Purchasing a product
Public users can purchase products available in the online store.
Do the following to purchase a product:
- Navigate to the public website.
- Sign into the website using your username and password.
- Click the Shop navigation item.
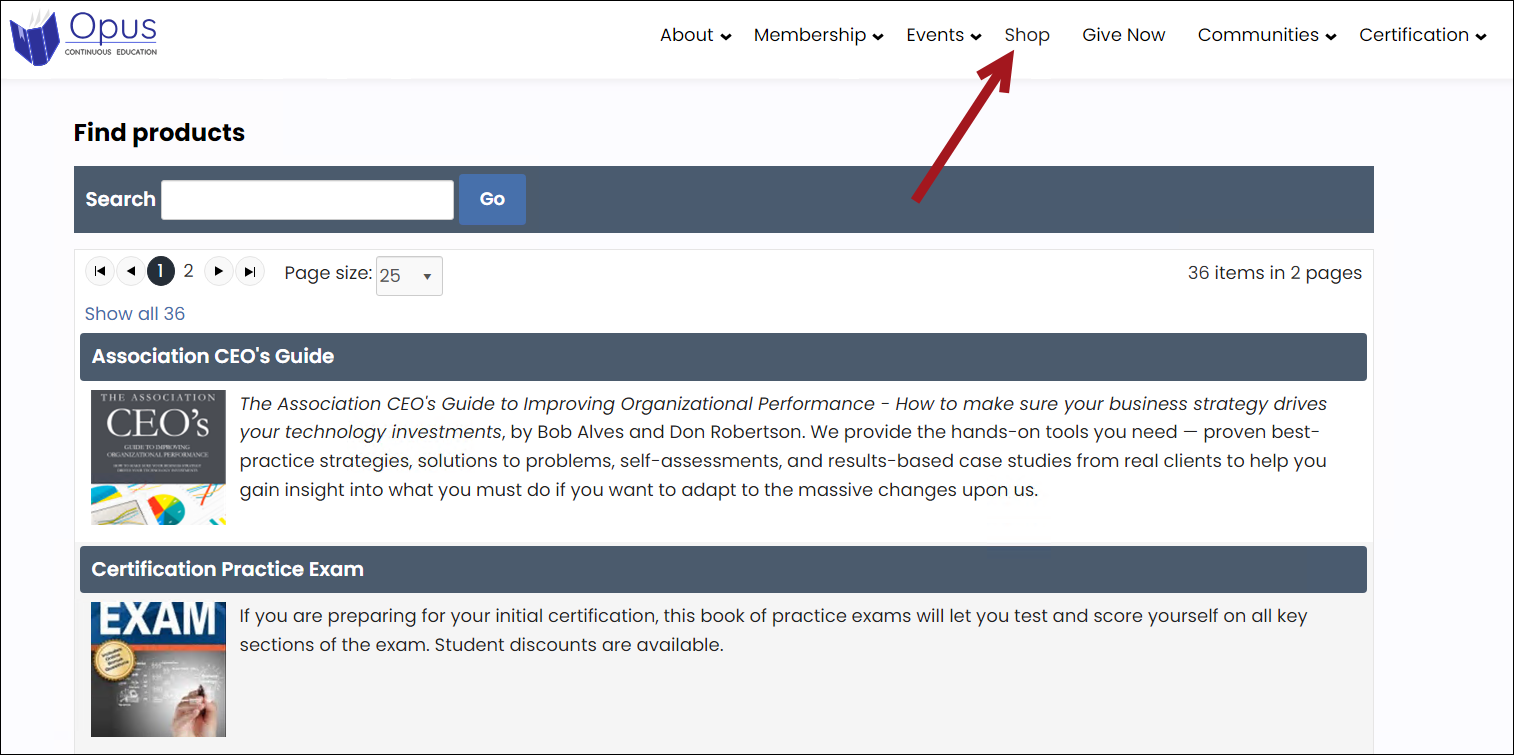
- Search for the product, then select the product name.
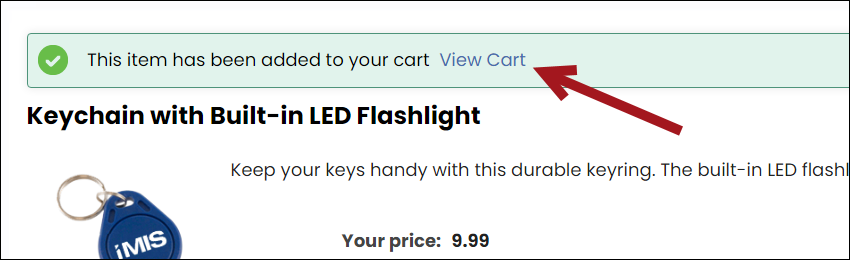
- Click Add to Cart.
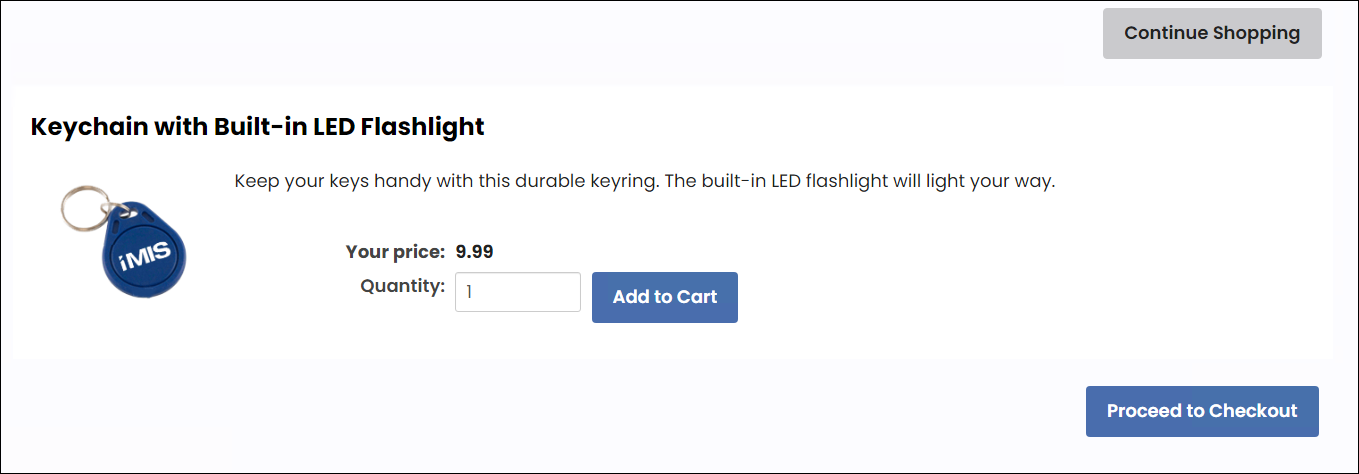
- Select View Cart.
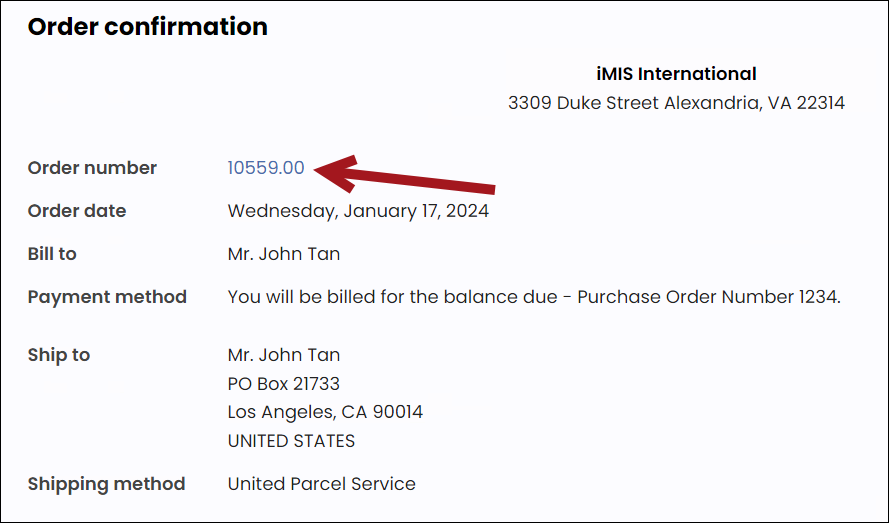
- From the cart, enter the payment details.
- Click Submit Order.
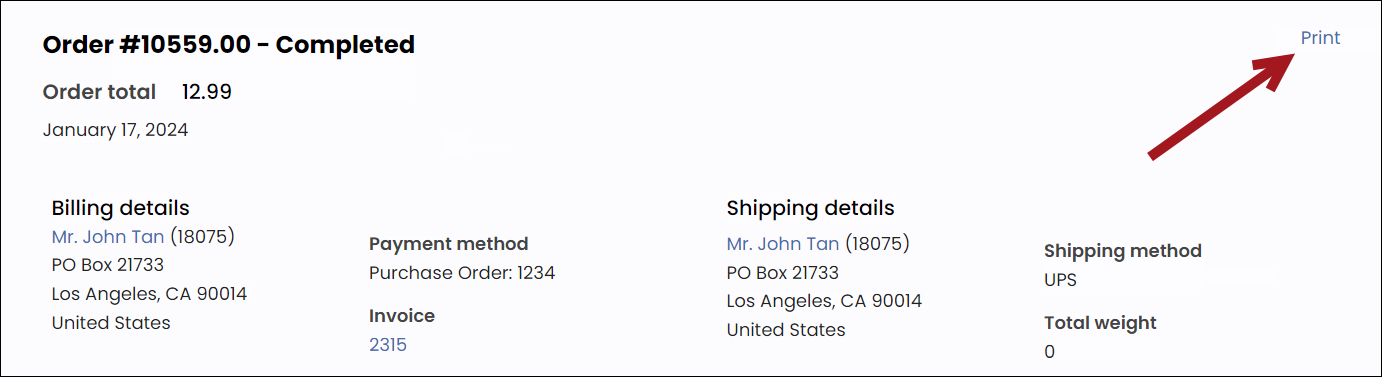
- The Confirmation displays a link to the Order number.
- Select the Print link to print the order details.
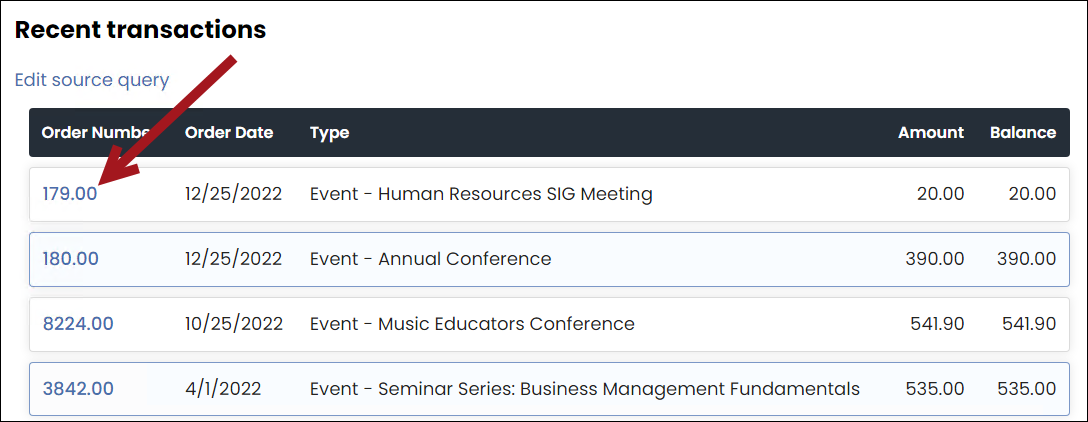
- To locate the order later, navigate to your account page:
- Click the Transactions tab.
- Under Recent Transactions, select the Order Number.
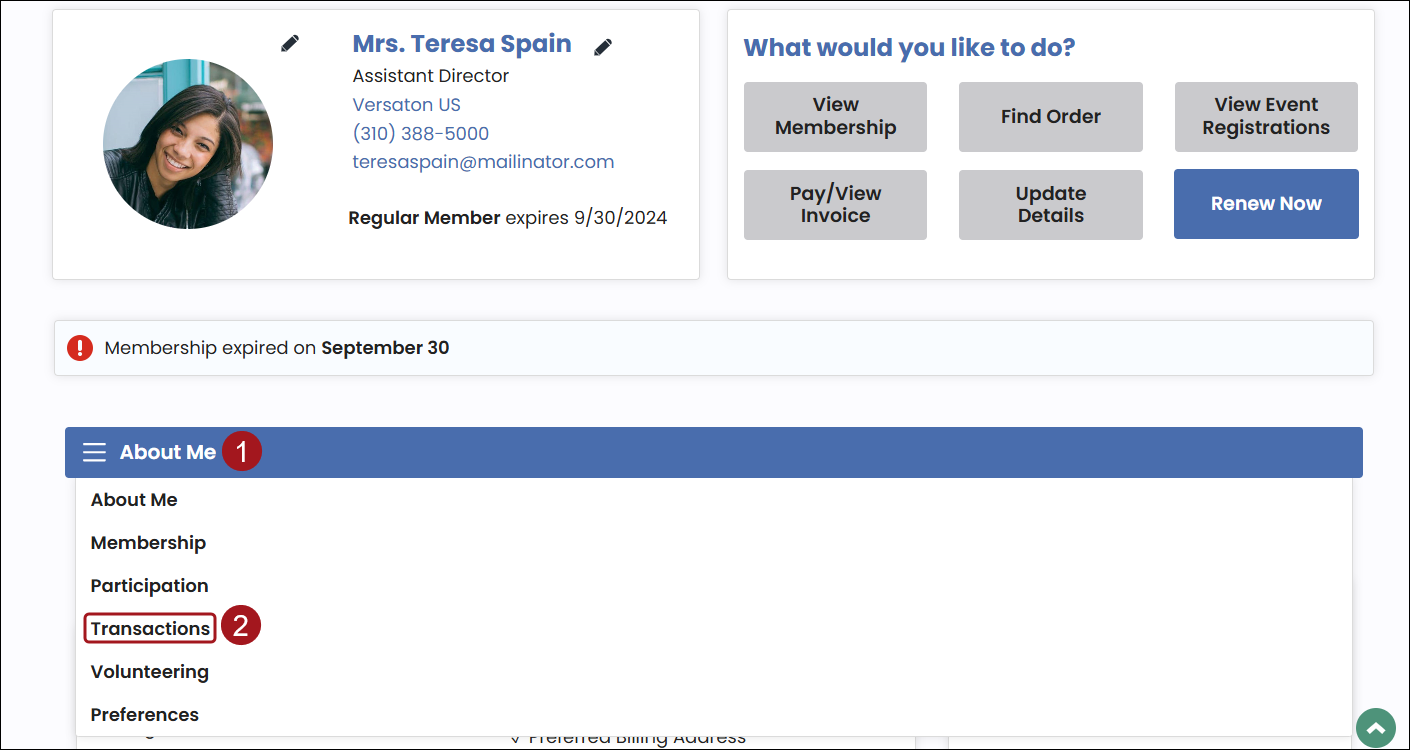
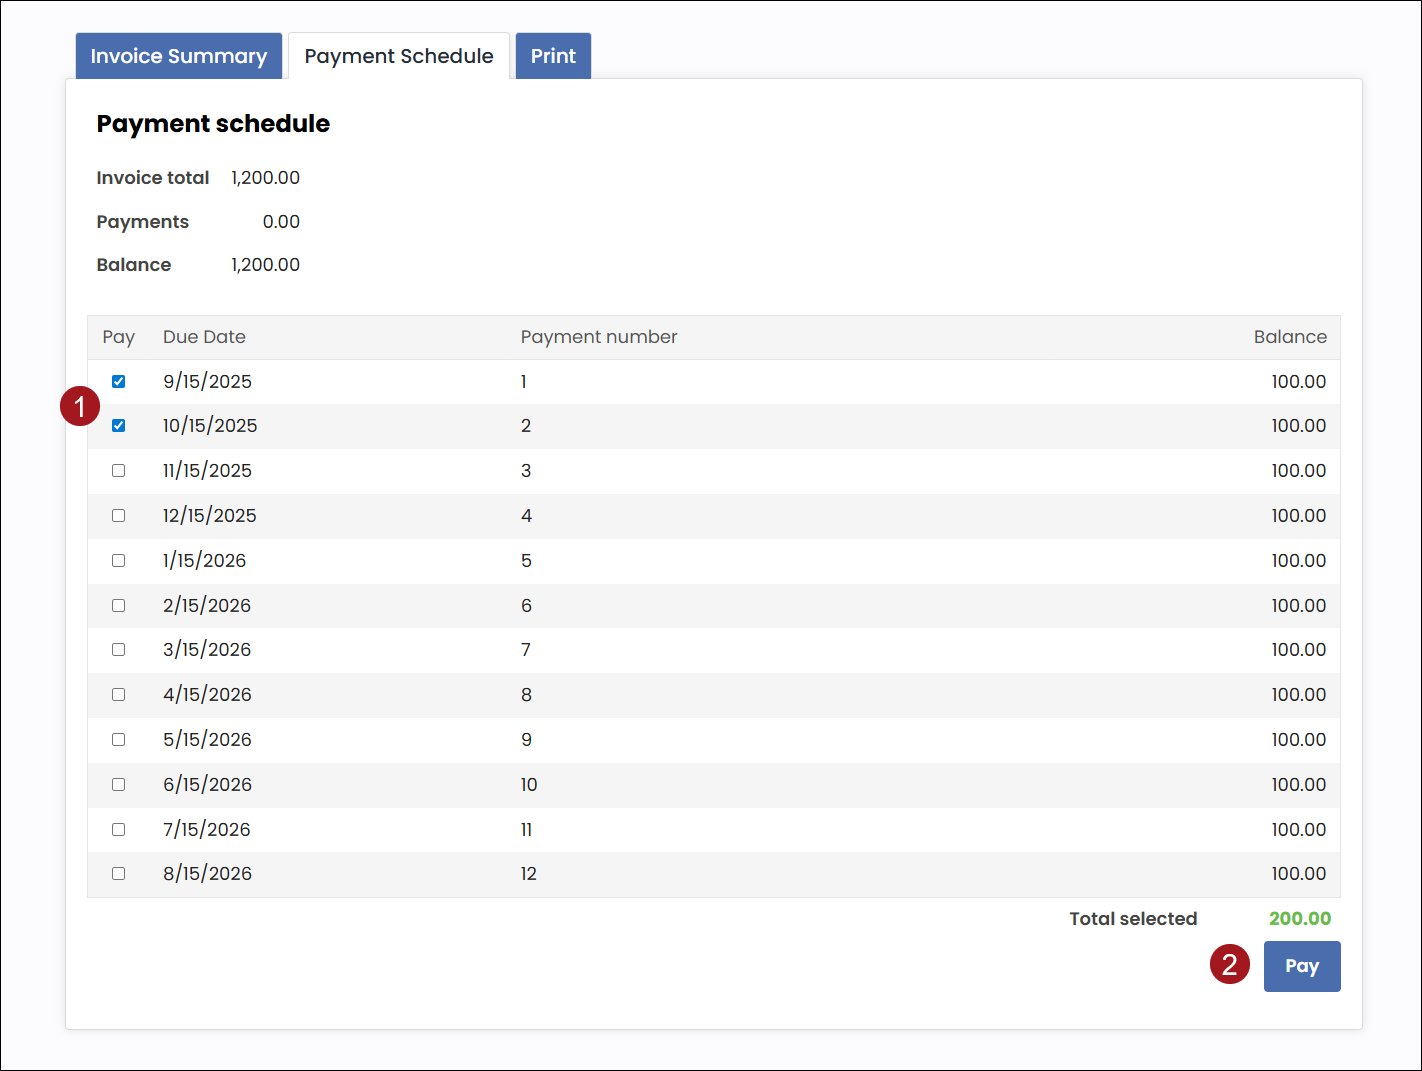
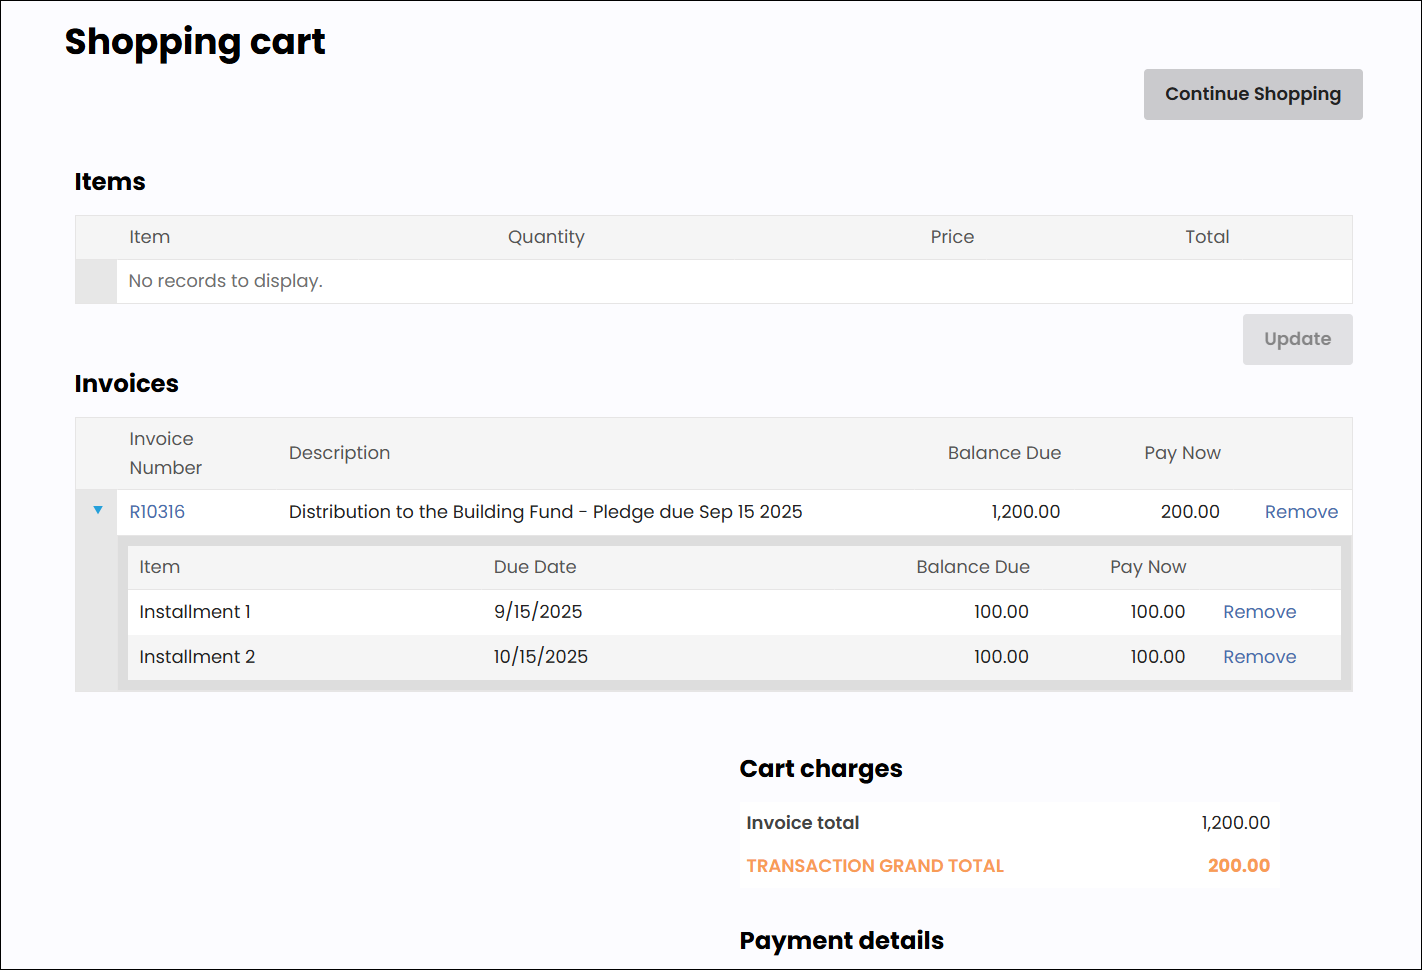
Paying installment pledges as a public user
Public users can pay installment pledges from their account page. Do the following:
-
Log in to the public site and go to your account page.
-
Navigate to the Open Invoices panel by doing one of the following:
-
Click Pay/View Invoice.
-
Select the Transaction tab from the drop-down menu.
-
-
Locate the pledge invoice, and do one of the following:
-
Open Invoices panel:
-
Click the arrow to expand the pledge installment information.
-
Enable the checkbox for installments you want to add to the cart.
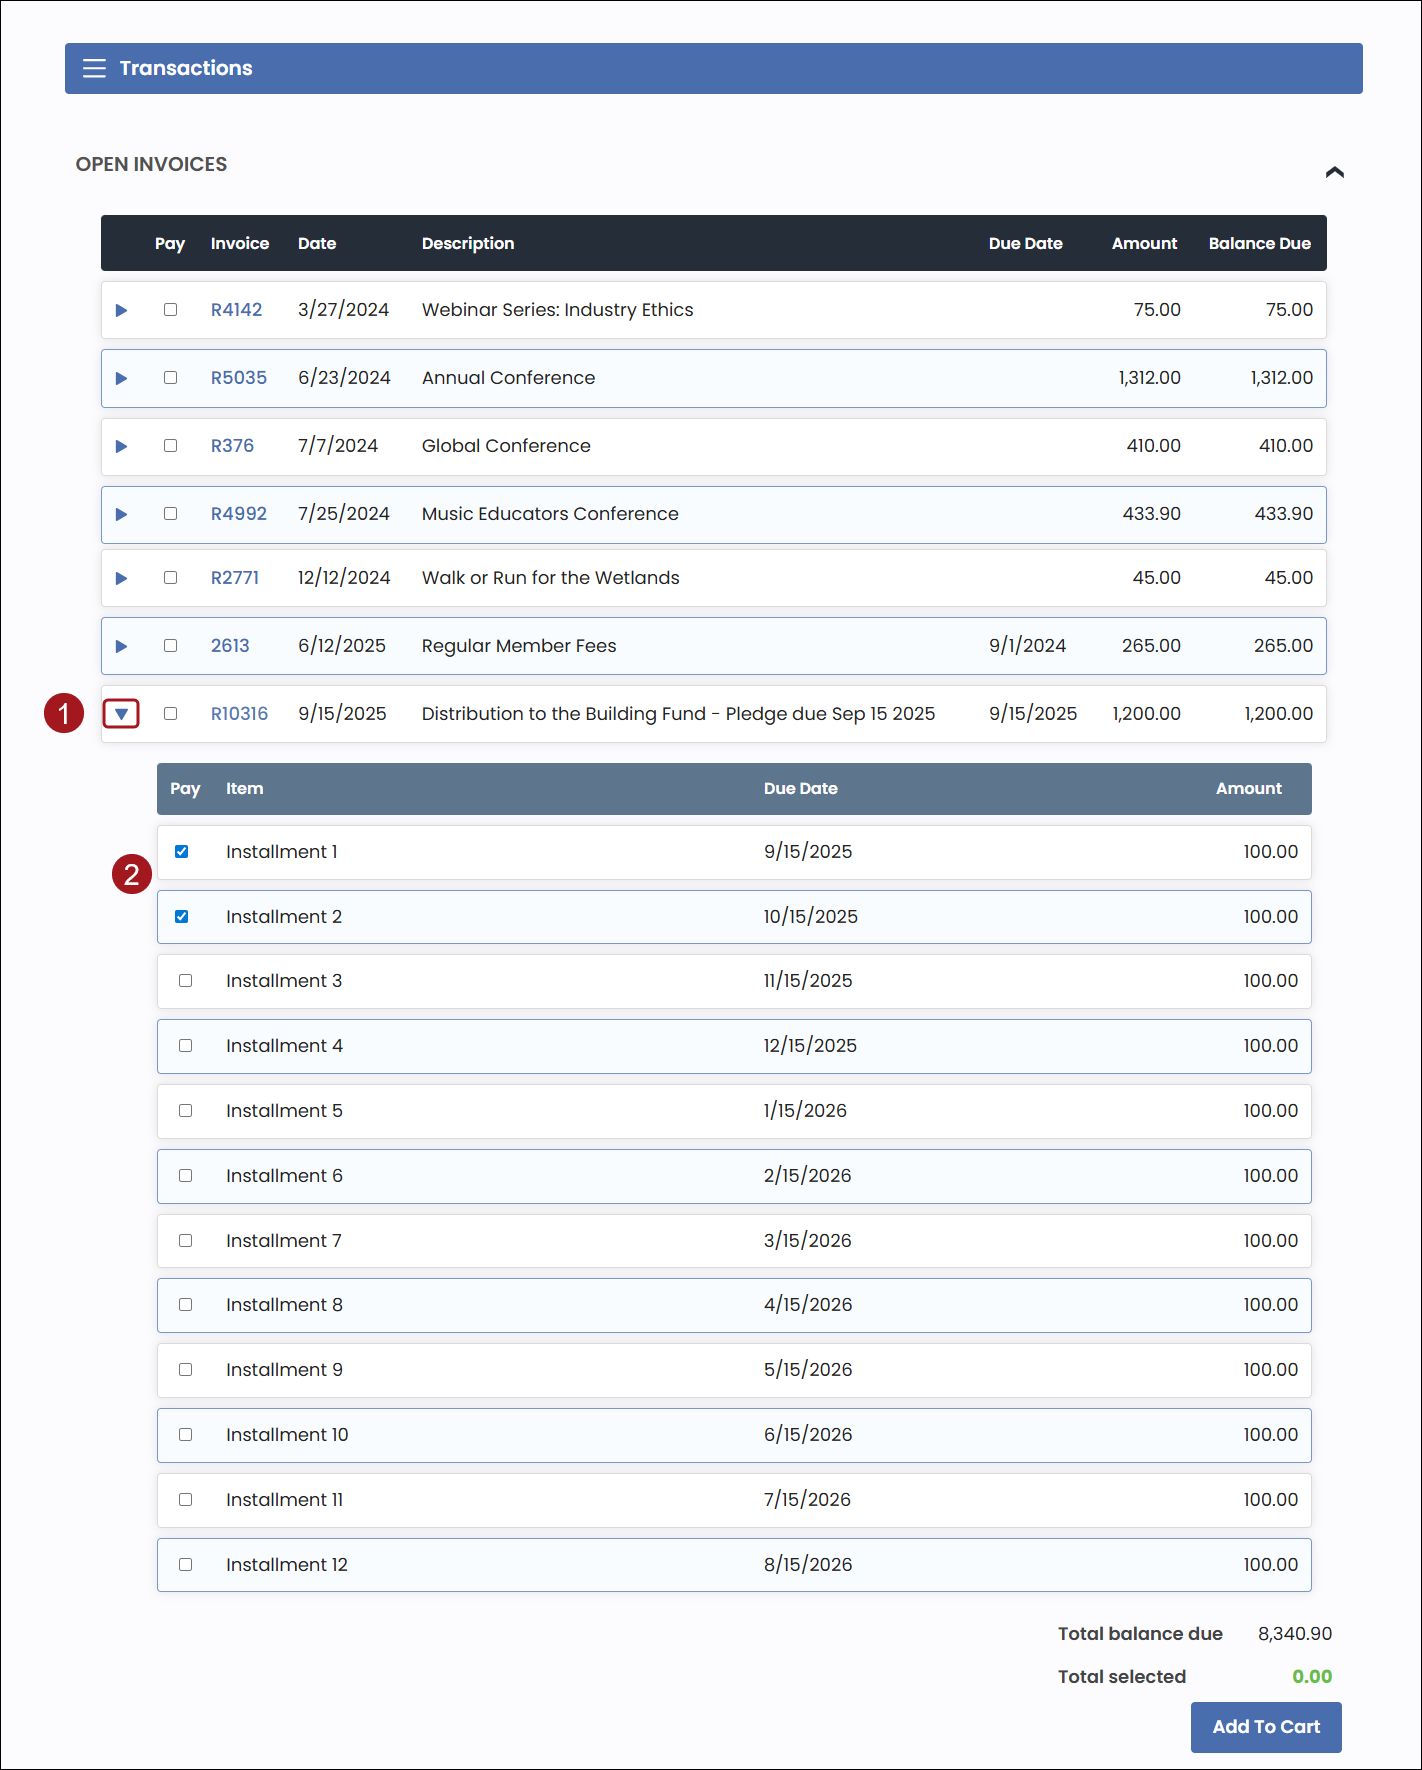
- Click Add To Cart.
-
-
Pledge Invoice Detail:
-
Select the Invoice number to open the Pledge Invoice Detail page.
-
From the Payment Schedule tab, enable the checkbox for installments you want to add to the cart.
-
Click Pay.
-
-
-
Enter your payment details and Submit the order.
AutoPay tasks
Signing up as a recurring donor
Do the following to sign up as a recurring donor:
- From the public website, navigate to the Give Now page.
- Enters the recurring donation amount.
- Select Yes, please make this a recurring gift.
- Choose the frequency from the Select a frequency drop-down.
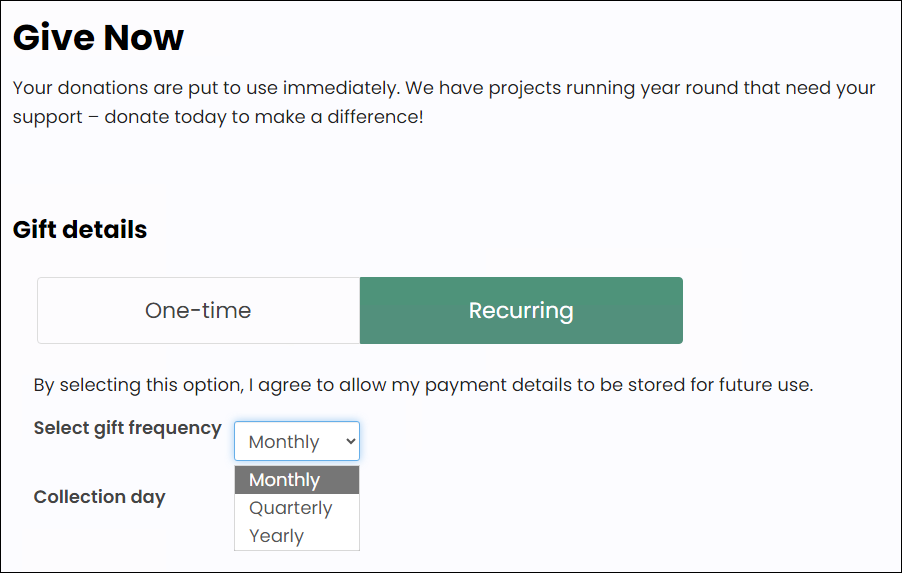
- Enters the credit card details, then click Submit Donation.
Signing up as a recurring member
Do the following to sign up as a recurring member:
- Navigate to your account page and click Renew Now.
- From the Cart, select Automatically pay future renewals.
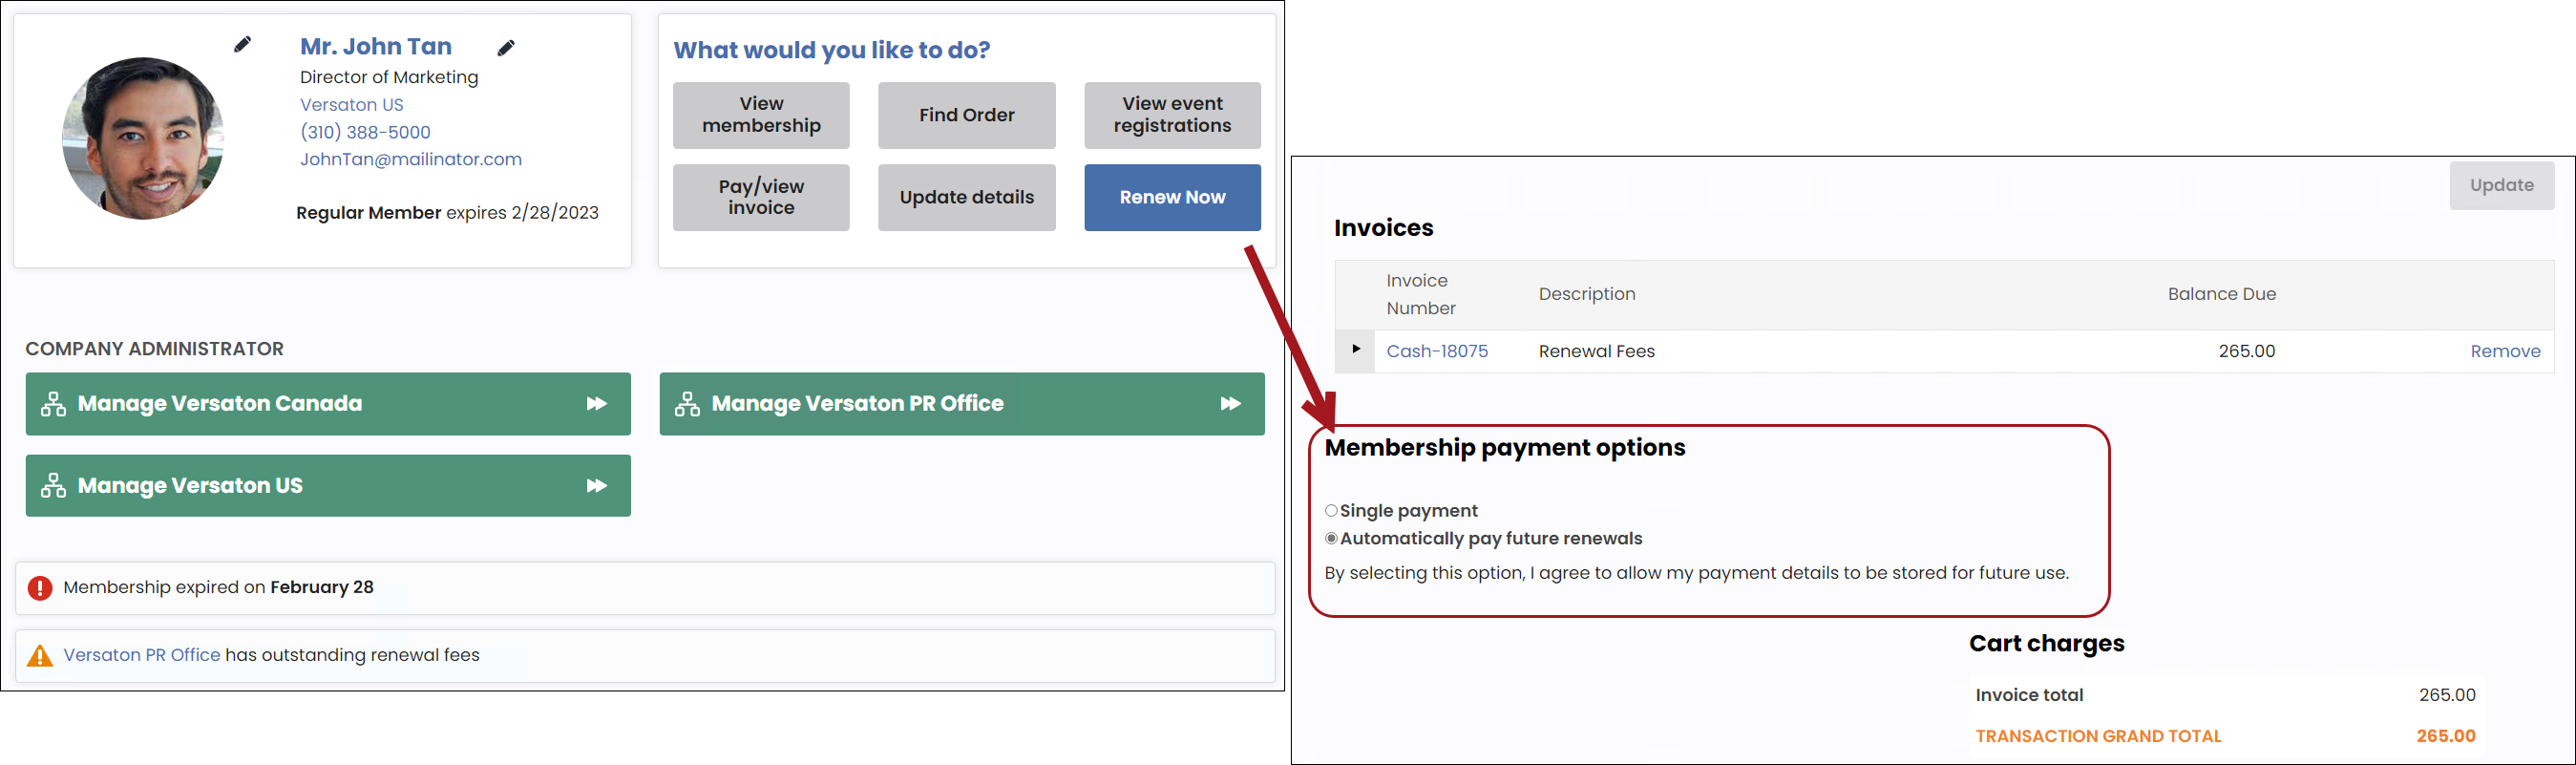
- Enter the credit card details. This is the card that is charged on the recurring cycle.
- Clicks Submit Order.
Cancelling a recurring payment enrollment
To cancel a recurring payment enrollment, do the following:
- Navigate to the public website.
- Sign into the website using your username and password.
- Navigate to your account page.
- Click the My Participation tab.
- Do one of the following:
- Recurring membership: From the Membership tab, Locate the Automatic renewal table, and select View membership.
- Recurring donation: From the Transactions tab, Locate the Recurring donation table, and select View donation.
- Select the cancellation link and complete the remaining steps.
Changing the amount of a recurring donation
To change the amount of a recurring donation, do the following:
- Navigate to the public website.
- Sign into the website using your username and password.
- Navigate to your account page.
- Click the Transactions tab.
- Scroll down to the Recurring donations area, then select View donation.

- From the Amount field, enter the new amount.
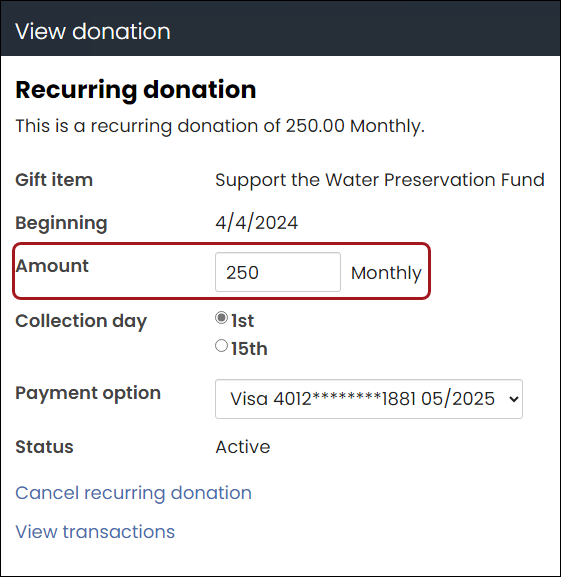
- Click Save.
Adding a new payment method to an AutoPay enrollment
To add and use a new payment method for an existing AutoPay enrollment, do the following:
- Navigate to the public website.
- Sign into the website using your username and password.
- Navigate to your account page.
- Click the Preferences tab.
- From the Saved payment options area, select Add a new payment option.
- Enter the credit card details, then click Save & Close.
- Click the My Participation tab.
- Do one of the following:
- Donors: From the Transactions tab, Locate the Recurring donations area and select View donation.
- Members: From the Membership tab, Locate the Automatic renewal area and select View membership.
- From the Payment options drop-down, select the new payment method.
- Click Save & Close.
- Click the Preferences tab.
- From the Saved payment options area, delete the existing payment method.
- Click OK.