Updating the account page banner
The following options allow you to change the account page banner:
- CSS classes - Enable users to change the banner color on account pages.
- Layout - Enable users to use the out-of-the-box banner on account pages.
NoteOnly one class can be used at a time.
Using CSS classes to change the banner color
The following table outlines the available CSS classes and the associated hex code color.
Table 1: Class names and related colors
| Class to enter in the 'Page contain CSS class' field | Hex code |
|---|---|
| account-banner-bg-color-1 | #ffffff |
| account-banner-bg-color-2 | #413d6b |
| account-banner-bg-color-3 | #6b458f |
| account-banner-bg-color-4 | #9b4c81 |
| account-banner-bg-color-5 | #ca4d48 |
| account-banner-bg-color-red | #d03528 |
| account-banner-bg-color-orange | #e98300 |
| account-banner-bg-color-yellow | #e8d92d |
| account-banner-bg-color-green | #68bd49 |
| account-banner-bg-color-blue | #00a9e0 |
| account-banner-bg-color-purple | #413d6b |
| account-banner-bg-color-mps-1 | #007fa8 |
Do the following to update the account page banner to use a color:
-
Navigate to a contact account page and enable Easy Edit.
-
Select Open in Content Designer.
-
Click the Properties tab.
-
From the Page contain CSS class field, add the desired class.
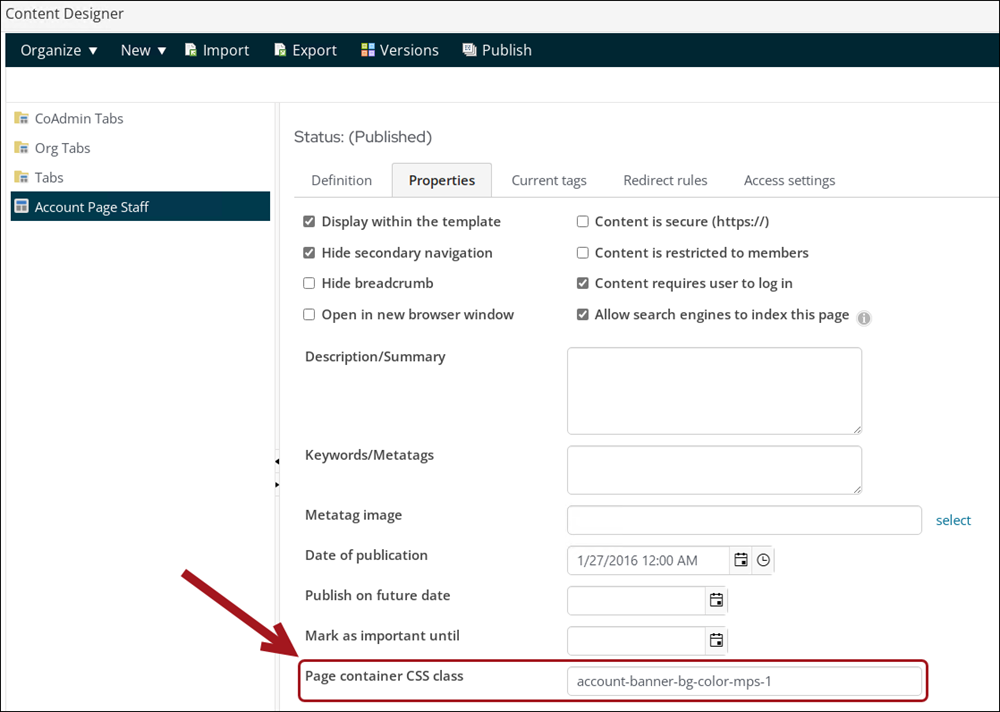
- Click Save & Publish.
Updating the Layout to use the out-of-the-box banner
The out-of-the-box account pages use a banner that is controlled by a page layout.

Do the following to update the account page to use the out-of-the-box banner:
-
Go to RiSE > Page Builder > Manage content.
-
Open the custom account page.
-
From the Layout drop-down, choose AccountPageBannerOverContent.
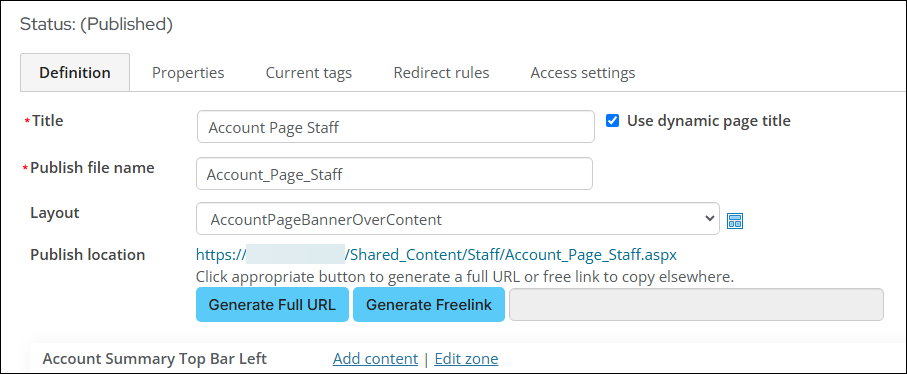
- Click Save & Publish.
Customizing the query to display different contact properties
The out-of-the-box account pages use a query to display the contact properties in the banner.

Do the following to customize the query to display different contact properties:
- Go to RiSE > Intelligent Query Architect.
- Navigate through the following path: $/ContactManagement/DefaultSystem/Queries/Advanced/Contact
- Copy the Account page banner query and Paste it in the desired location.
- Open the copied query and make the desired changes.
- Click Save.
- Open the Account Page Staff content record for edit.
- From the Contact Properties content, select Configure.
- From Select an IQA query, choose the query you modified.
- Click OK, then click Save & Publish.