

Creating a panel that allows multiple entries
Multi-instance panels allow users to enter multiple items for a single property. For example, you could allow your users to enter more than one degree in an Education panel. Multi-instance panels are also created in order to use Activity types.
NoteThe Panel Designer uses the values in the Maximum number of results returned by IQA queries and multi-instance panels (Settings > RiSE > Quick setup) field to determine the number of results to display for a Multi-instance panel.
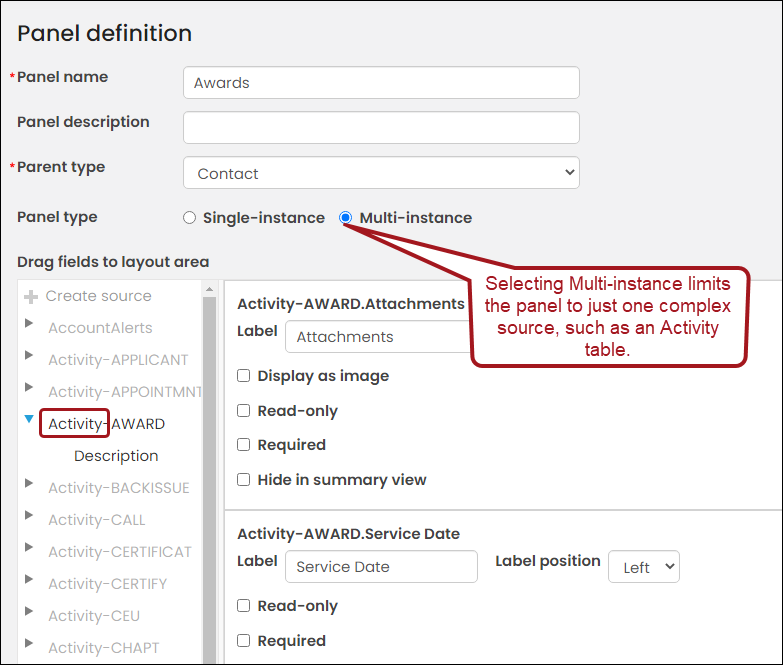
Building a multi-instance panel with an activity type
Do the following to create a new panel with an activity type:
- Go to RiSE > Panel Designer > Panel definitions.
- Select Add panel definition.
- Enter a Panel name and Panel description.
- From the Parent type drop-down, select Contact.
- Select Multi-instance as the Panel type.
- Select the drop-down arrow for the desired activity type from the left column.
- Drag-and-drop the activity properties to the white space. The properties will appear in the Add window in the order you arrange them in here.
- Click Save & Continue.
- (optional) Continue creating panels for activity types.
- Navigate to the RiSE page to which you want to add the activity data.
- Open the content record for edit.
- Click Add content.
- Open the Content gallery, then do one of the following:
- If you have one panel you want to add to the content record, select the Panel Editor content item. From the Panel drop-down, select the panel you just created.
- If you have two or more panels you want to add in a tabbed format to the content record, select the Panel Collection Editor content item. Choose the desired activity-type panels from the Panel field. The activity types will appear in a tabbed format.
- (optional) Enable Multi-instance panel options:
-
First column sort order - Select how you want to sort the initial column in your panel. Options include Ascending or Descending.
-
Limit grid size - Select this checkbox to set a height and width for a multi-instance panel. If the panel exceeds the set dimensions, scrolling is enabled.
- Grid width - Enter the width in pixels.
- Grid height - Enter the height in pixels.
-
Enable scrolling for cells - Select this checkbox to enable a vertical scrollbar for cells whose values are greater than 100 characters.
-
(Panel Editor only) Allow users to add - When enabled, users can manually add data to the panel.
-
Allow users to delete - When enabled, users can delete entire rows of data from the panel.
-
Allow users to edit - When enabled, users can edit the panel data. For Panel Collection Editor, enabling this option allows users to edit and add data to the panel.
-
(Panel Collection Editor only) Open single-instance panels in edit mode by default - Select this checkbox to always display a single-instance panel in edit mode for website users who have permission to edit the panel data.
- (available when Open single-instance panels in edit mode by default selected only) Save buttons – You can select where you want Save buttons to be displayed in your panel. Options include Use page-level buttons (bottom of the page) and Include in panel.
-
(Panel Collection Editor only) Commit sequence - Allows you to explicitly define the execution order of multiple content items in a content record. The number in this field indicates the processing order for this content item, relative to the other content items in the same content record. The value must be 0 or greater. You can leave the default value of 0 if the execution order of content items is not a concern. Content items with a value of 0 are processed after any other content items with a non-zero Commit sequence value that are on the same content record.
-
Edit window width - Enter the default width, in pixels, of the pop-up edit window for a multi-instance panel. If your panel contains multiple columns, consider increasing the width for better visibility.
-
Edit window height - Enter the default height, in pixels, of the pop-up edit window for a multi-instance panel.
-
-
- Click OK.
- Click Save & Publish.
Building a multi-instance contact panel
This example details how to build a multi-instance contact panel from a new panel source.
Do the following to build a Training table:
- Go to RiSE > Panel Designer > Panel definitions.
- Select Add panel definition.
- Enter a Panel name and Panel description. For this example, name the panel Training.
- From the Parent type drop-down, select Contact.
- Select Multi-instance as the Panel type.
- Click Create source and enter a unique Source name.
- For this example, create five properties. These properties are the Training panel rows:
- Class
- Date
- Hours
- Certificate
- Notes
- Click Add property. For each property you want to add, use the following values, then OK:
- Property name = Class and Property type = Text.
- Property name = Date and Property type = Date.
- Property name = Hours and Property type = Text.
- Property name = Certificate and Property type = File upload.
- Property name = Notes and Property type = File upload.
- Drag the properties you created into the table. The first property is the first row in the panel.
- Click Save & Exit.
- Navigate to any content record and add the Panel Editor content item to the page.
- From the Panel drop-down, select the Training panel.
- Select Allow users to add, Allow users to edit, and any other content item configuration options you want to enable, then click OK.
- Click Save & Publish.
Adding attachments to a multi-instance panel with an activity type
This example details how to add attachments to an activity multi-instance panel. Users can add up to fifty attachments to a panel.
Adding the Attachment property to a panel
Do the following to enable adding attachments:
-
Go to RiSE > Panel Designer > Panel definitions.
-
Edit or create a new multi-instance panel. The following configurations are required:
- Parent type: Contact
- Panel type: Multi-instance
-
Open the related activity type.
-
Drag the Attachments property to the layout area.
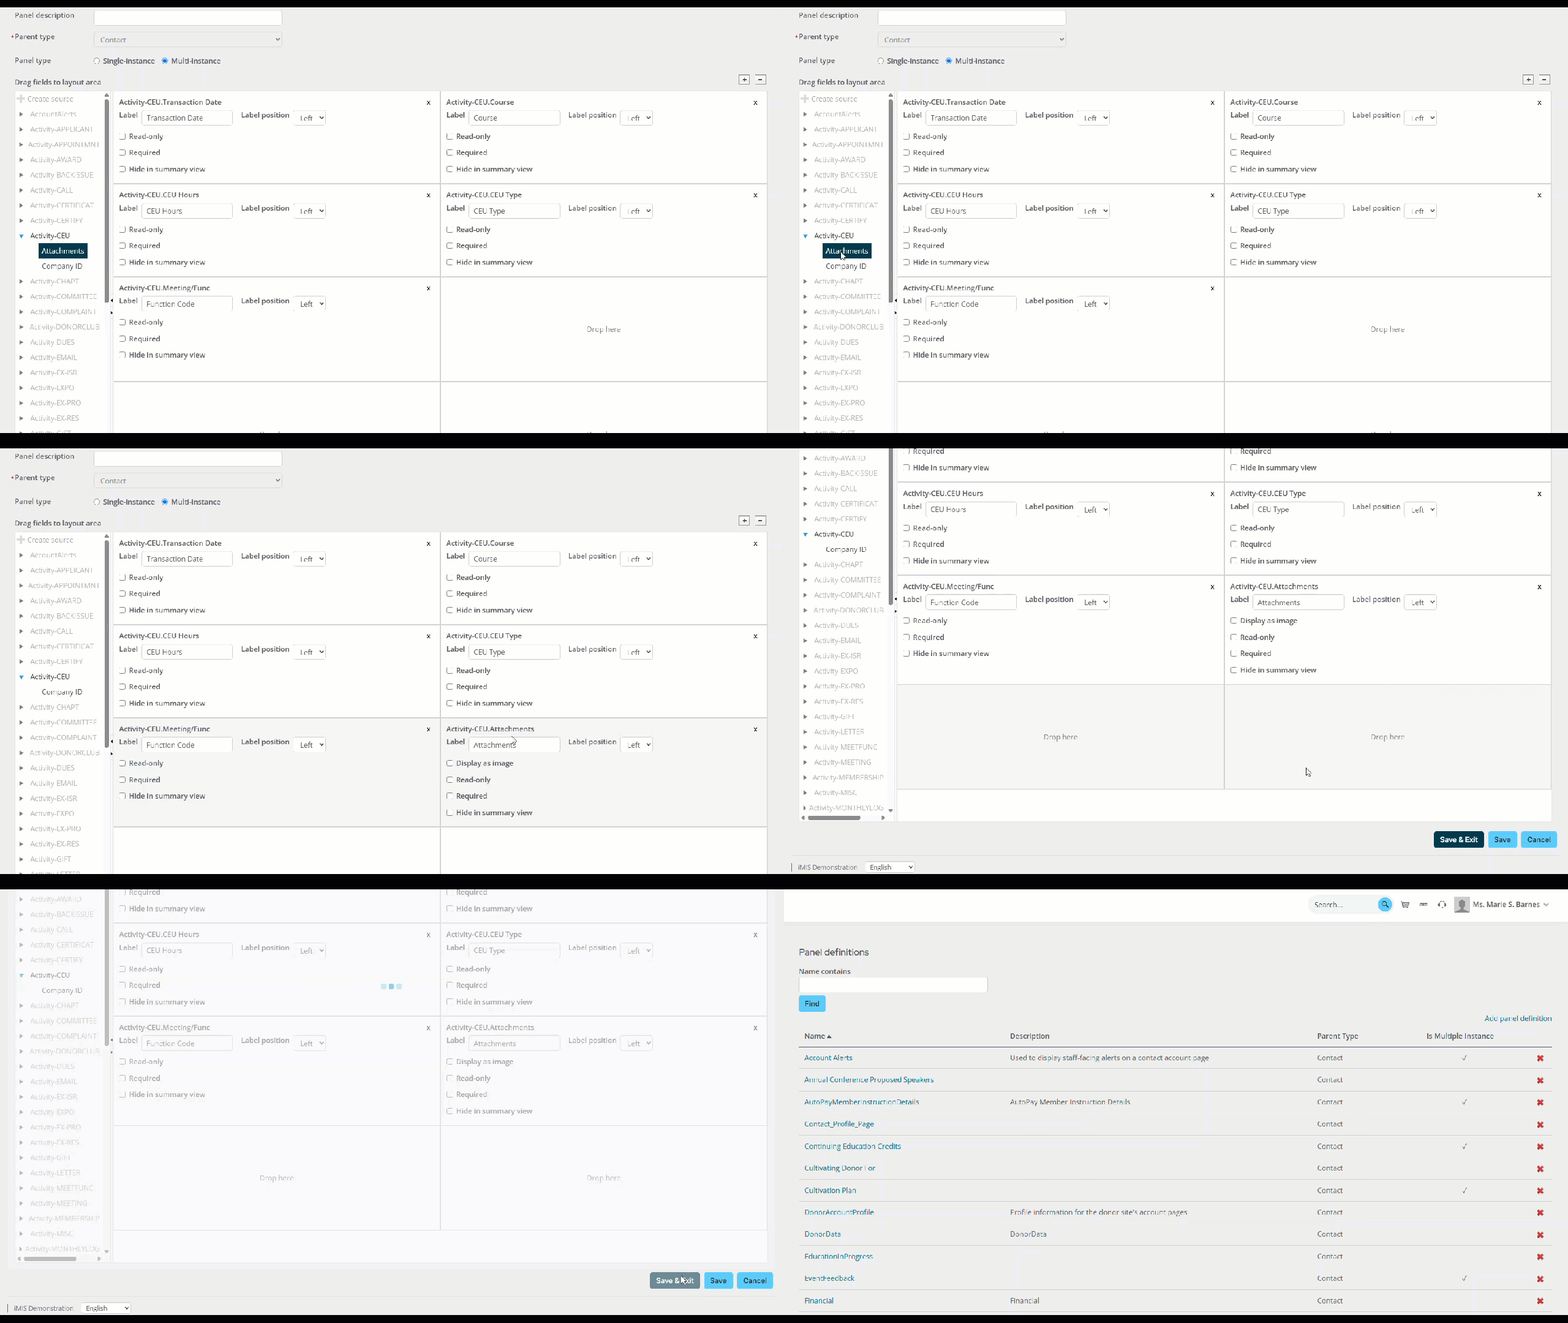 Tip
TipMost activity types have an Attachments property. This process must be repeated for any activity panel that requires attachments.
- Click Save & Exit.
Uploading documents to the property
After the Attachment property is added to the panel, you can upload attachments:
-
Navigate to the account page and locate the panel. To learn how to add a panel to an account page, see Creating a panel and adding it to account pages.
-
Click the + icon to add a new row.

-
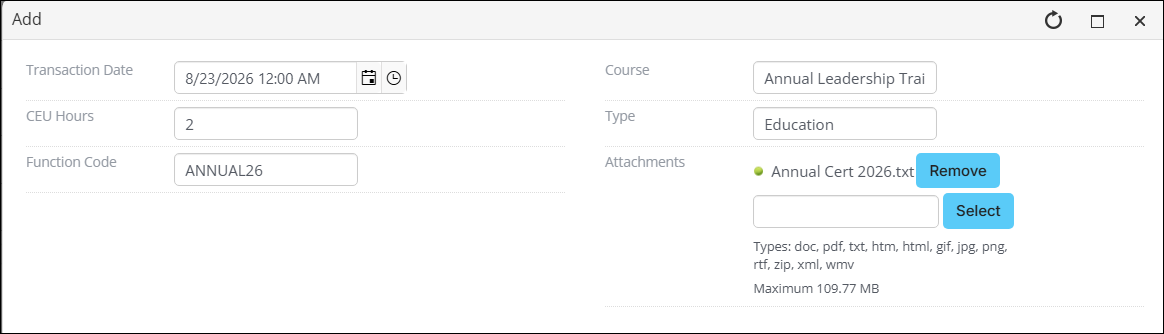
From the Attachments property, click Select and choose the attachment.
NoteAllowed file formats for attachments are specified in the Quick setup settings.
-
To continue adding attachments, click Select and choose the next attachment. The maximum amount of attachments is 50.
-
Click Save & Close.
-
Download the attachments by clicking on the file. Edit the attachment by clicking the pencil icon for the desired row.

Updated 27 days ago