

Applying late and reinstatement fees in bulk
Staff users can apply late fees or reinstatement fees to multiple users at once, instead of adding a fee to each member's account individually.
Before you begin
Make sure the following are true before applying late or reinstatement fees:
- You are a system administrator or a staff user with Dues: 5 module authorization.
- The billing run has at least one unpaid invoice to reverse.
- The billing run has not already been reversed and rebilled. Reverse and rebill can be used only once per billing run.
Creating the fee billing products
Do the following to create the late- or reinstatement-fee billing product:
-
Go to Membership > Billing products.
-
Select Add new billing product.
-
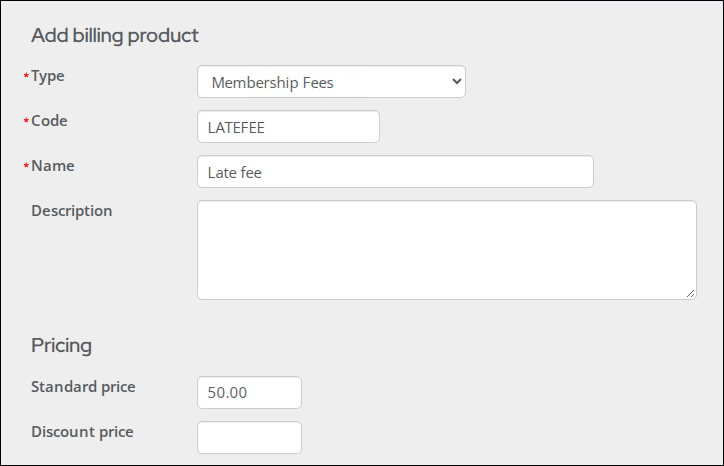
Choose a product Type.
-
Enter a Code, for example LATEFEE or REINSTATE. The code cannot be the same as a product type name, such as DUES or SUB.
-
Enter a descriptive Name, for example Late fee. Members see this name on their invoice.
-
Under Pricing, enter the fee amount as the Standard price.
-
Under Accounting, select the General Ledger account(s) for the fee.
-
Click Save.
-
If the fee is taxable, repeat these steps to create a separate tax billing product, such as GST. Membership billing products are not taxed automatically, so the tax is billed as its own line item.
Adding the fee to the customer type
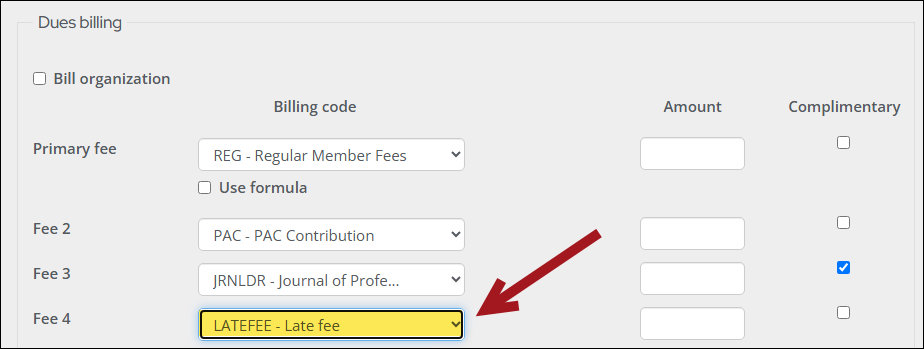
Adding the billing product to the customer type ensures that iMIS bills it to every member of that type when the renewal is rebilled.
Do the following to add the billing product to the customer type:
-
Go to Settings > Contacts > Customer types.
-
Select the customer type whose members need the fee.
-
Under Dues billing, add the fee billing product.
-
If you created a tax billing product, add it as well.
-
Click Save.
-
Repeat for each customer type included in the billing run that needs the fee.
Reversing and rebilling the billing run
Reverse and rebill works on a whole billing run, so every unpaid invoice in the run gets the fee in one pass. Repeat these steps for each billing run that needs the fee.
Do the following:
-
Go to Membership > Renewals > Generate renewals, then select the Logs tab.
-
Select the Billing run link for the renewal run that needs the fee.
-
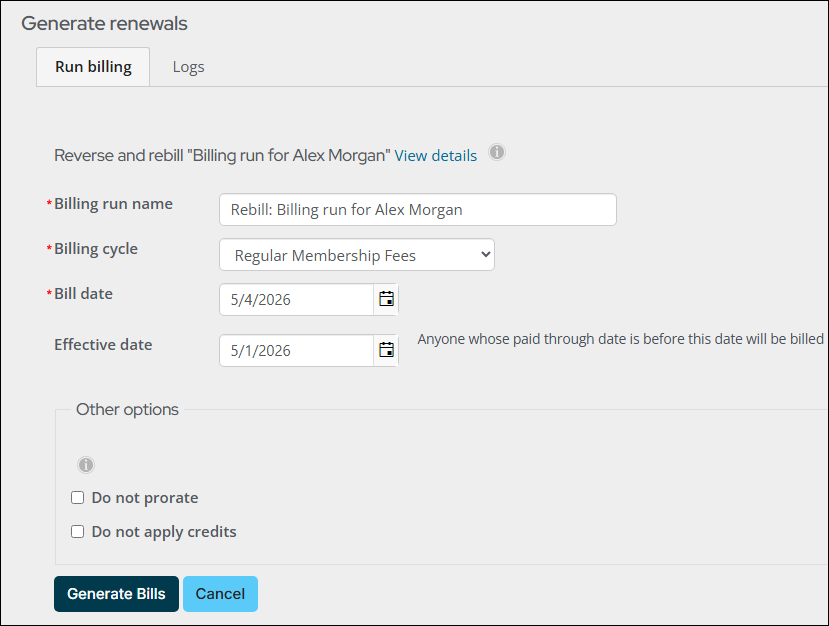
From the Billing run summary page, click Reverse and rebill. The Generate renewals page opens with the original billing details filled in.
-
Enter a Billing run name that identifies the rebill, for example, Rebill: 2026 renewals with late fee.
-
Review the remaining options, then click Generate Bills.
When the rebill runs, iMIS does the following:
-
Reverses each invoice from the original run that has not been paid.
-
Clears the Renewed through date for those members.
-
Generates new invoices that include the fee, only for the contacts in the original run.
-
Leaves paid invoices unchanged.
-
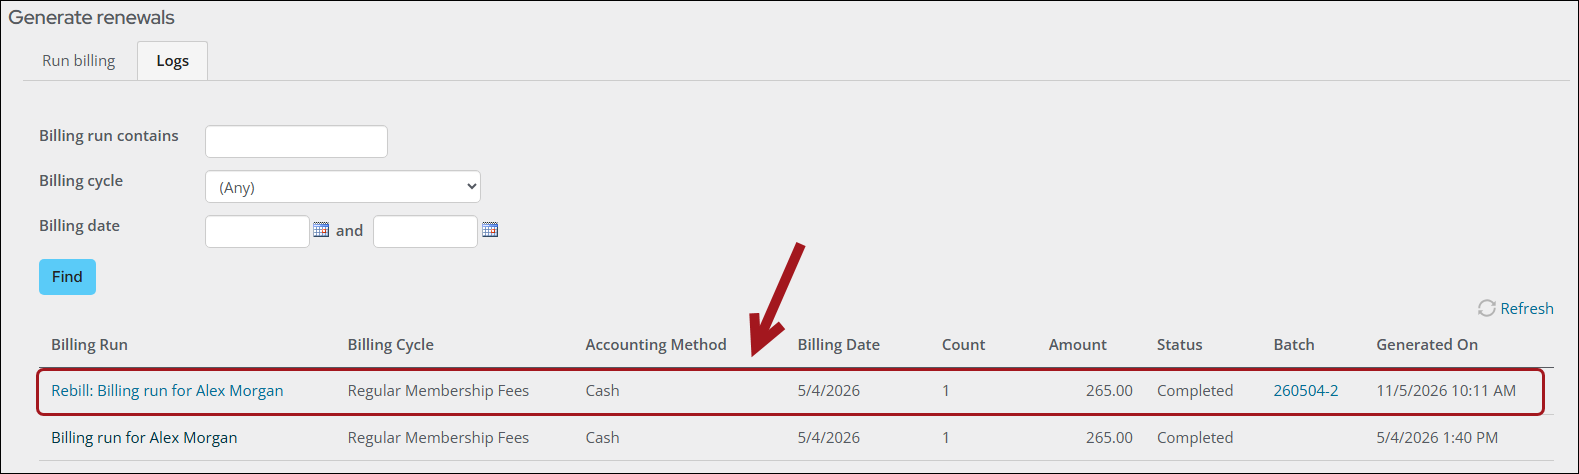
The rebilled run appears in the Logs tab.
-
Reviewing the invoices after rebill
Check the results, then remove the fee from the customer type so it is not billed again.
Do the following:
- Open two or three members from the rebilled run and confirm the following on their account pages:
-
Membership tab - The fee appears underneath Membership fees.
-
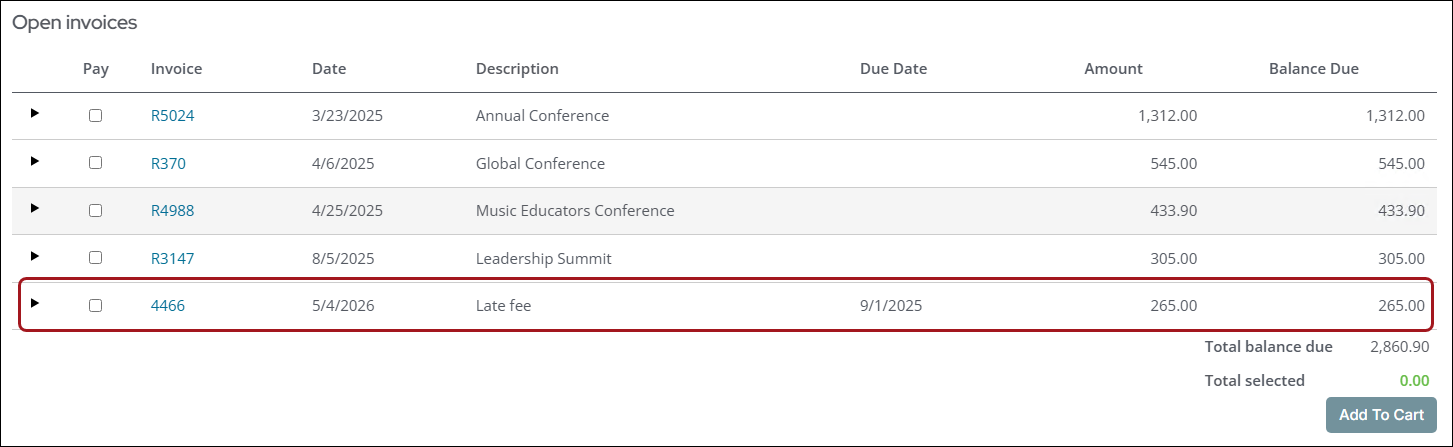
Transactions tab - The original invoice is reversed, and a new open invoice includes the fee line item, plus tax if applicable.
-
- Open a member who had already paid and confirm their invoice is unchanged.
- Post the batch for the rebill, if one was created:
- Accrual billing - Post the batch.
- Cash billing - No posting necessary. Invoices not paid through AutoPay are posted automatically and appear in a separate billing run.
- Go to Settings > Contacts > Customer types.
- Select each customer type that changed.
- Remove the fee product and the tax product.
- Click Save.
Updated about 3 hours ago