Configuring Entra ID for Open ID Connect (OIDC)
Review and complete the following sections before configuring the iMIS OIDC settings.
IMPORTANTEach user must have a first and last name in Entra ID. This is the name that is synchronized with iMIS after OIDC is enabled. The user’s first and last names cannot be updated in iMIS after OIDC is enabled, since the name is being pulled from the external directory.
(New apps only) Add a platform
If you created a new app registration, you must populate the Redirect URI:
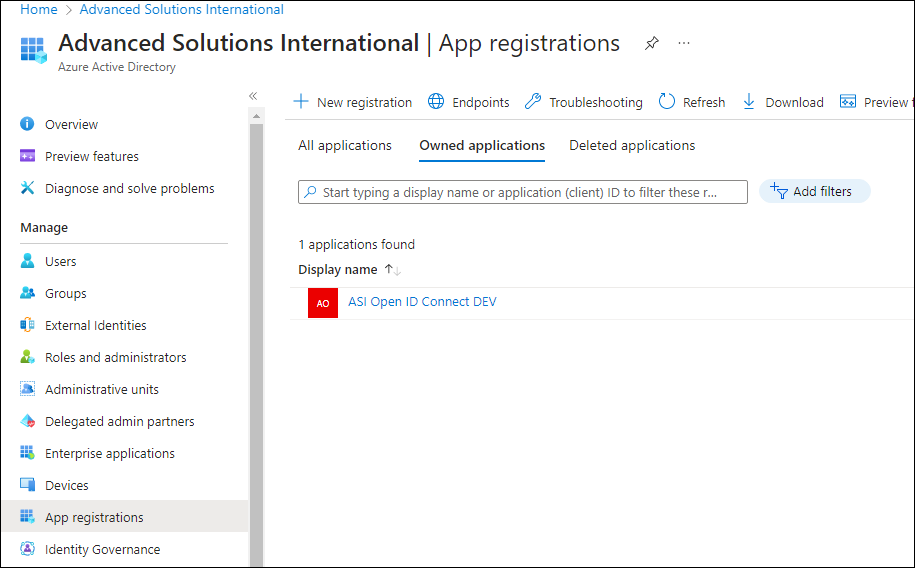
- From the navigation, select App registrations, then choose the application.
- From the navigation, select Authentication.
- Click Add a platform.
- Click Web.
- Redirect URIs - Enter the iMIS website (for example,
https://example.imiscloud.com/staff). - From-channel logout URL - Enter the iMIS website (for example,
https://example.imiscloud.com/staff). - Enable Access tokens (used for implicit flows) and ID tokens (used for implicit flows and hybrid flows).
- Click Configure.
(Existing apps only) Ensure access tokens & ID tokens are enabled for the application
If you are using an existing app registration and did not create a new one, ensure the application has access tokens and ID tokens enabled:
- From the navigation, select App registrations then choose the application.
- From the navigation, select Authentication.
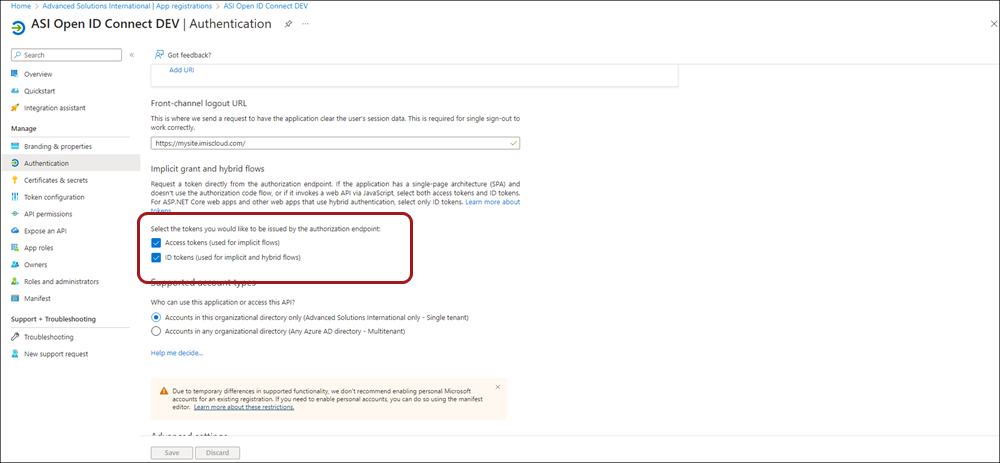
- Scroll down to the Implicit grant and hybrid flows section.
- Enable Access tokens (used for implicit flows) and ID tokens (used for implicit flows and hybrid flows).
NoteThese options will not appear if there is no platform defined. See Add a platform.
- Click Save.
Create a new role & assign the role to users
The iMIS setup requires a Claim value, which is a Role defined in Entra ID. You can use any role, but ASI recommends creating a new role for the iMIS OIDC connection.
Creating the app role
Do the following to create the role:
- From the navigation, select App registrations then choose the application.
- From the navigation, select App roles.
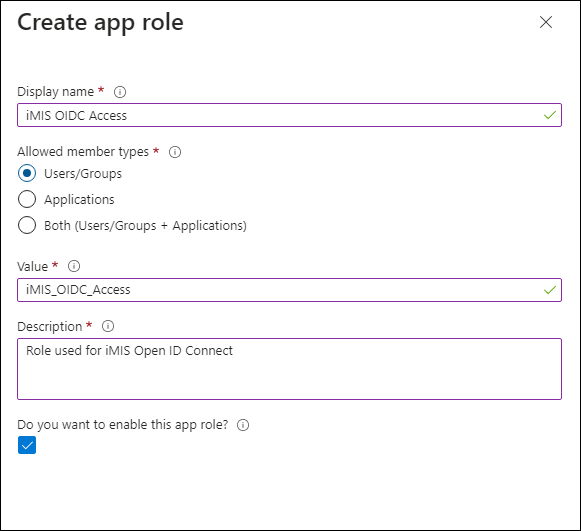
- Click Create app role:
- Display name - iMIS OIDC Access
- Allowed member types - Users/Groups
- Value - iMIS_OIDC_Access
- Description - Role used for iMIS Open ID Connect
- Do you want to enable this app role - Checked
- Click Apply.
Assigning the role
Do the following to assign the role to the required users or groups:
- From the navigation, select Enterprise applications then choose the application.
TipMake sure you are working in the Enterprise applications navigation and not the App registrations navigation.
- Select Users and groups.
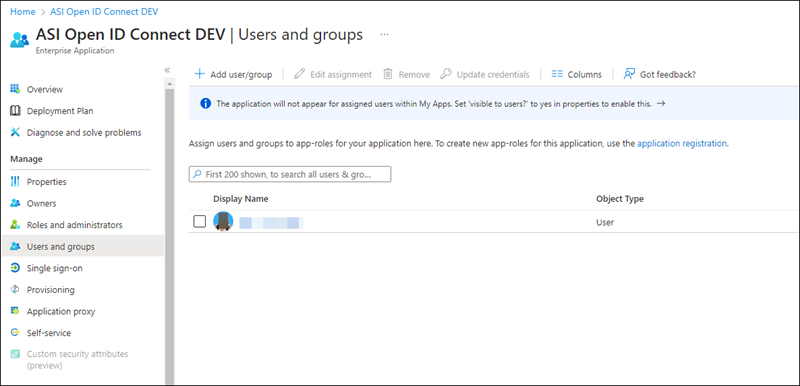
- Select the checkbox next to the users and/or groups.
- Click Edit assignment.
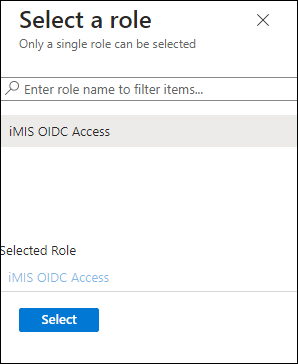
- Under Select a role, click None Selected.
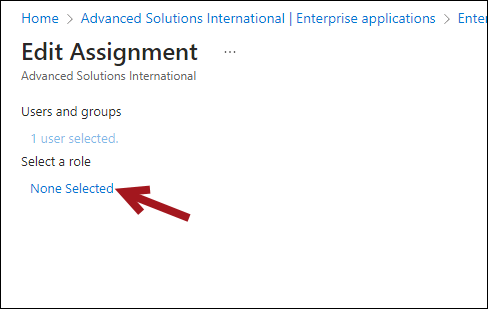
- Choose the iMIS OIDC Access role, then click Select.
- Click Assign.
Adding the required claims
IMPORTANTTo use OIDC for both staff and public users, you must have claims for each group. A claim for staff users is required. Creating a claim for public users is optional but is recommended as a best practice. For more information, see Configure optional claims. We recommend setting up claims per group. See Configure groups optional claims for more information.
Do the following to add the required claims:
- From the navigation, select App registrations then choose the application.
- From the navigation, select Token configuration.
- Click Add optional claim.
- From the Token type, choose ID.
- Enable the required tokens:
- family_name
- given_name
- login_hint(only required if Set login hint is enabled in the iMIS OIDC settings)
- upn (only required if Set login hint is enabled in the iMIS OIDC settings)
- Click Add.
NoteBe sure to create claims for System Administrators, regular Staff users, and public users. For more information, see Configure optional claims.
Updating the API permissions
Do the following to add the required API permissions:
- From the navigation, select App registrations then choose the application.
- From the navigation, select API permissions.
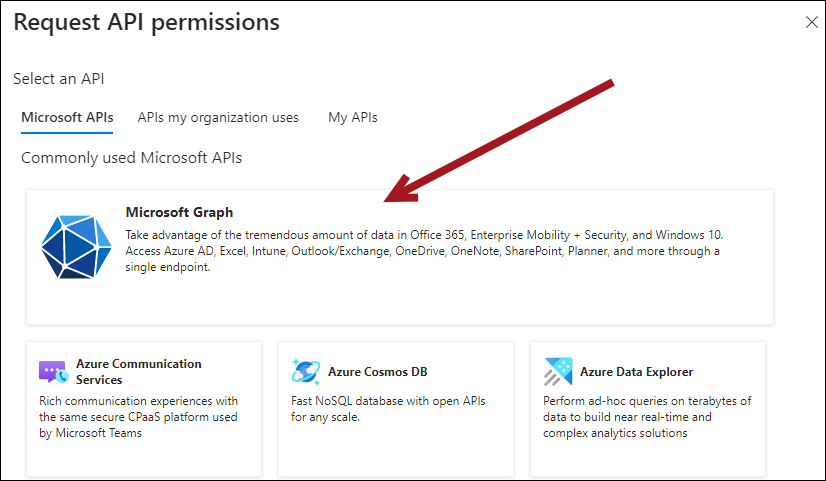
- Click Add a permission.
- Click Microsoft Graph.
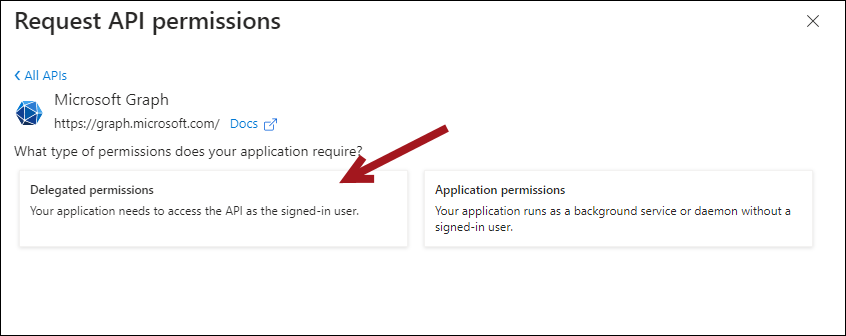
- Click Delegated permissions.
- Enable the following:
- openid
- profile
- User.Read.
- Click Add permissions.
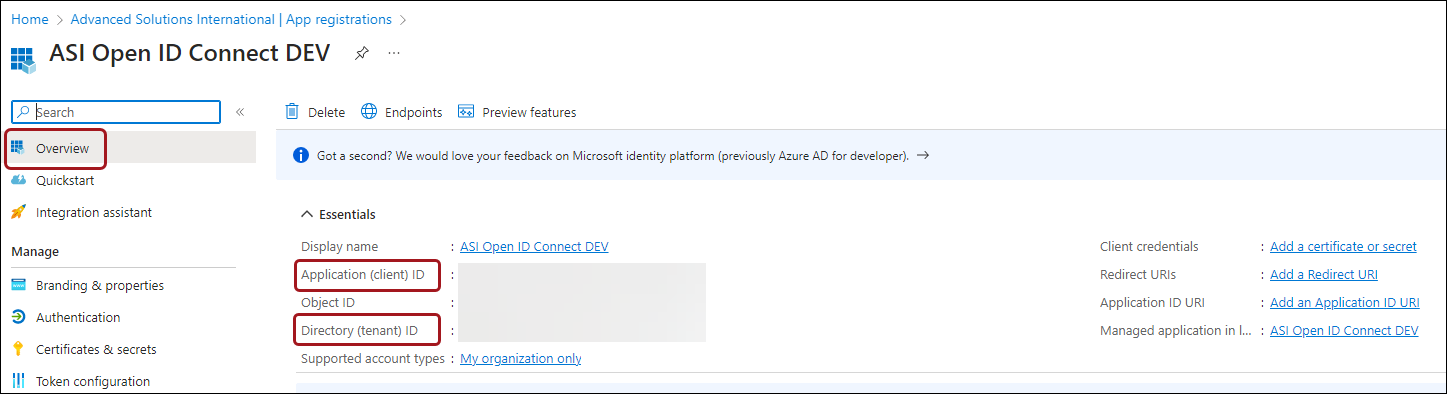
Obtaining the Client ID and Tenant
iMIS requires a Client ID and Tenant from Entra ID. Do the following to obtain these values from Entra ID:
- From the navigation, select App registrations then choose the application.
-
From Overview, copy the following:
- Application (client) ID - The Client ID required for the iMIS configuration.
- Directory (tenant) ID - The Tenant required for the iMIS configuration.
-
Paste the values in iMIS or in a safe location where you will have access to them later when you configure iMIS.
Configuring iMIS for OIDC settings
After configuring Entra ID, review and follow Configuring and troubleshooting OIDC settings in iMIS.