Creating and using a custom payment receipt
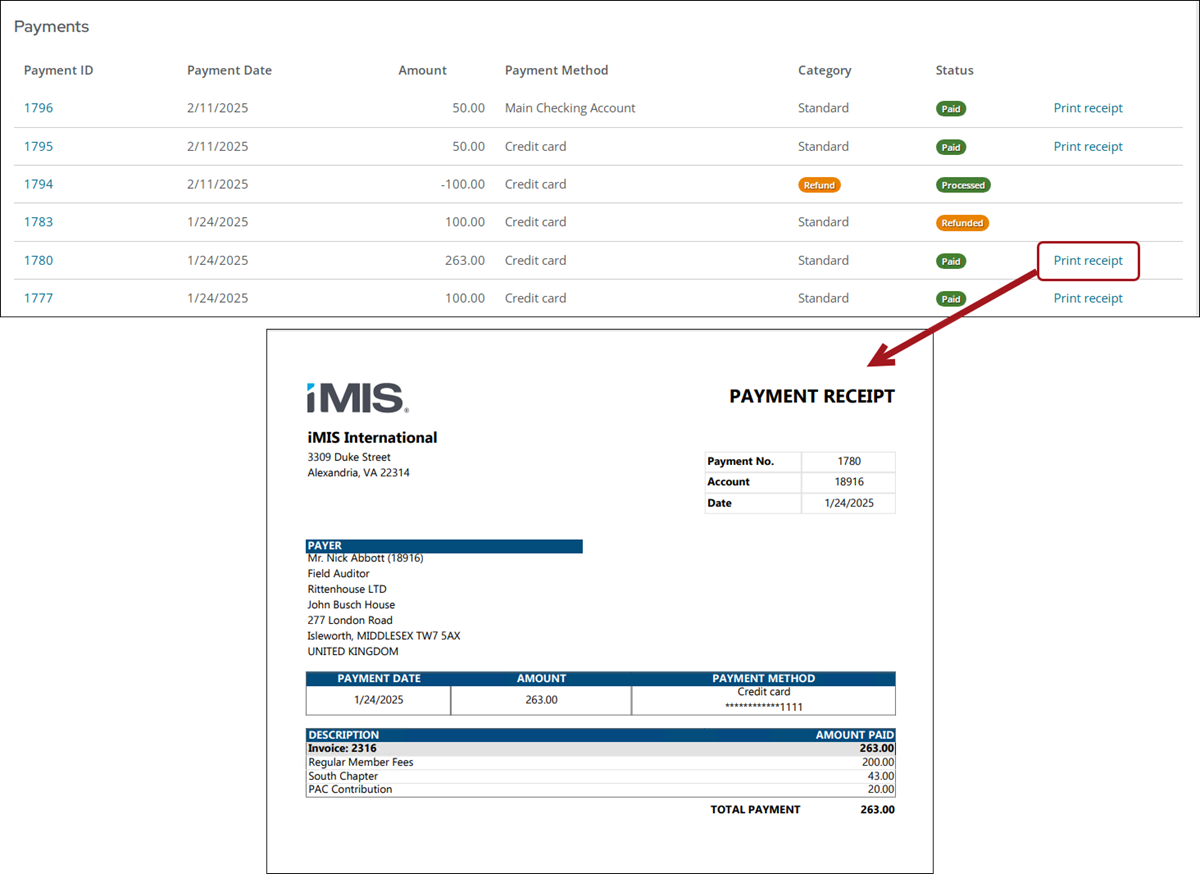
Out-of-the-box, the payment receipt is accessible from the Print receipt link in the following locations:
-
Staff user account pages on the Transactions tab
-
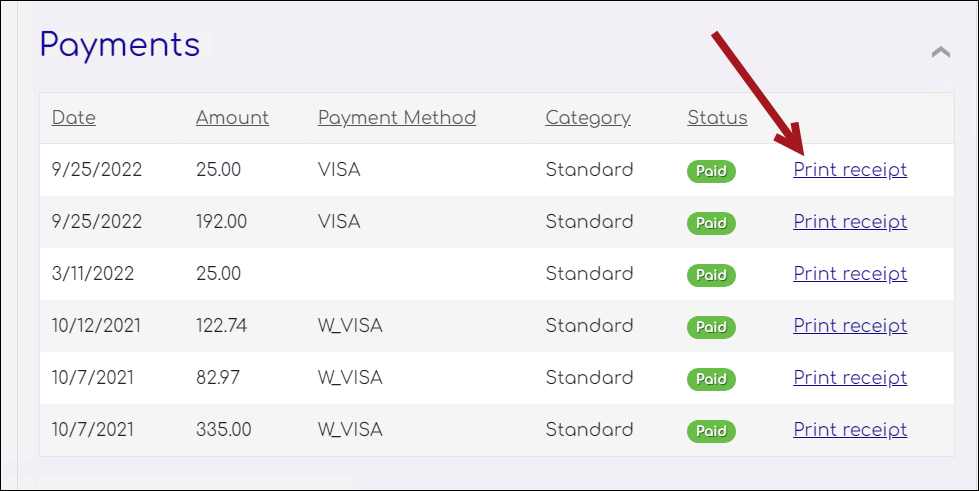
Public user account pages on the Transactions tab
-
Find payments query on the Finance > Pay Central > Find payments window

To use a custom payment receipt in the above locations, the related content and shortcut must be updated.
Customizing the payment receipt
Do the following to customize the payment receipt:
-
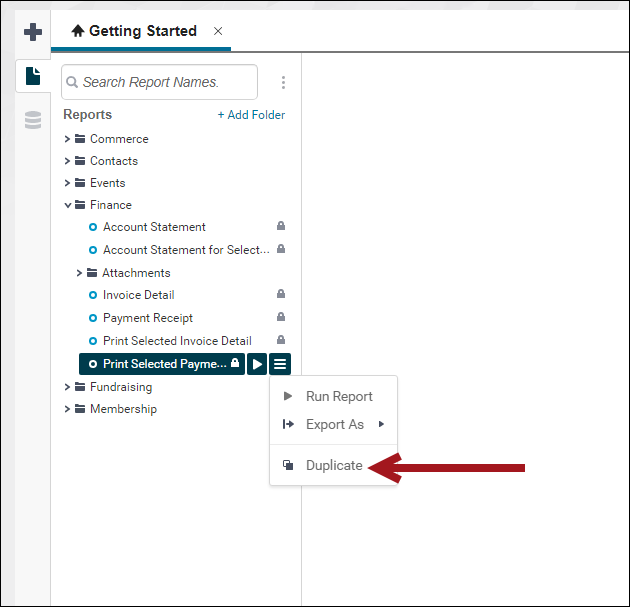
Go to Reports > Report Writer.
-
Expand the Finance folder, then select the Print Selected Payment Receipt report.
-
Click the menu icon for the report, then select Duplicate.
- Enter a name for the report and choose a folder, then click Okay.
- Make the desired customizations, then Save.
Updating the related content
Do the following to updated the related content:
-
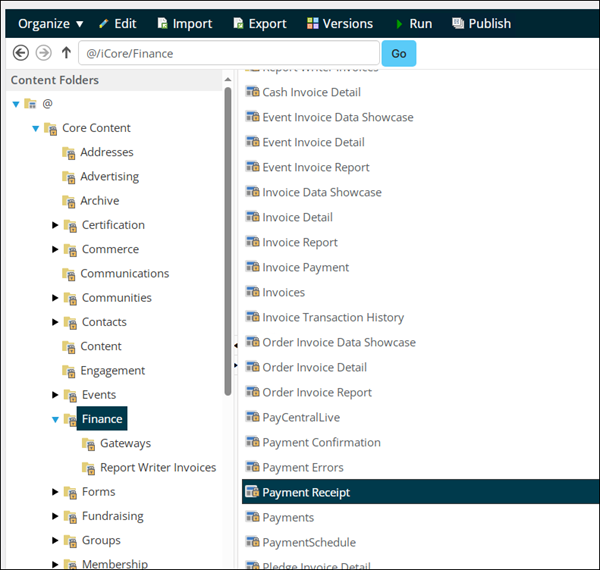
Go to RiSE > Page Builder > Mange content.
-
Navigate through the following folder path: @/iCore/Finance
-
Select and copy the Payment Receipt content record (Organize > Copy).
-
Paste (Organize > Paste) the content record in a non-system folder.
-
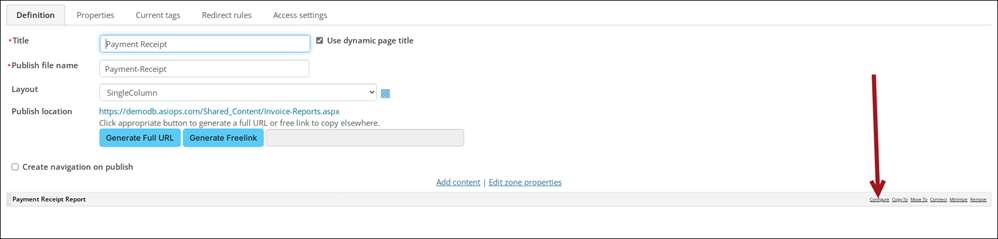
Open the content record for edit.
-
From the content item configuration, select Configure.
-
From the Report document path, select the report you created. Report Writer reports are in the following folder: $/Common/Report Writer/Reports.
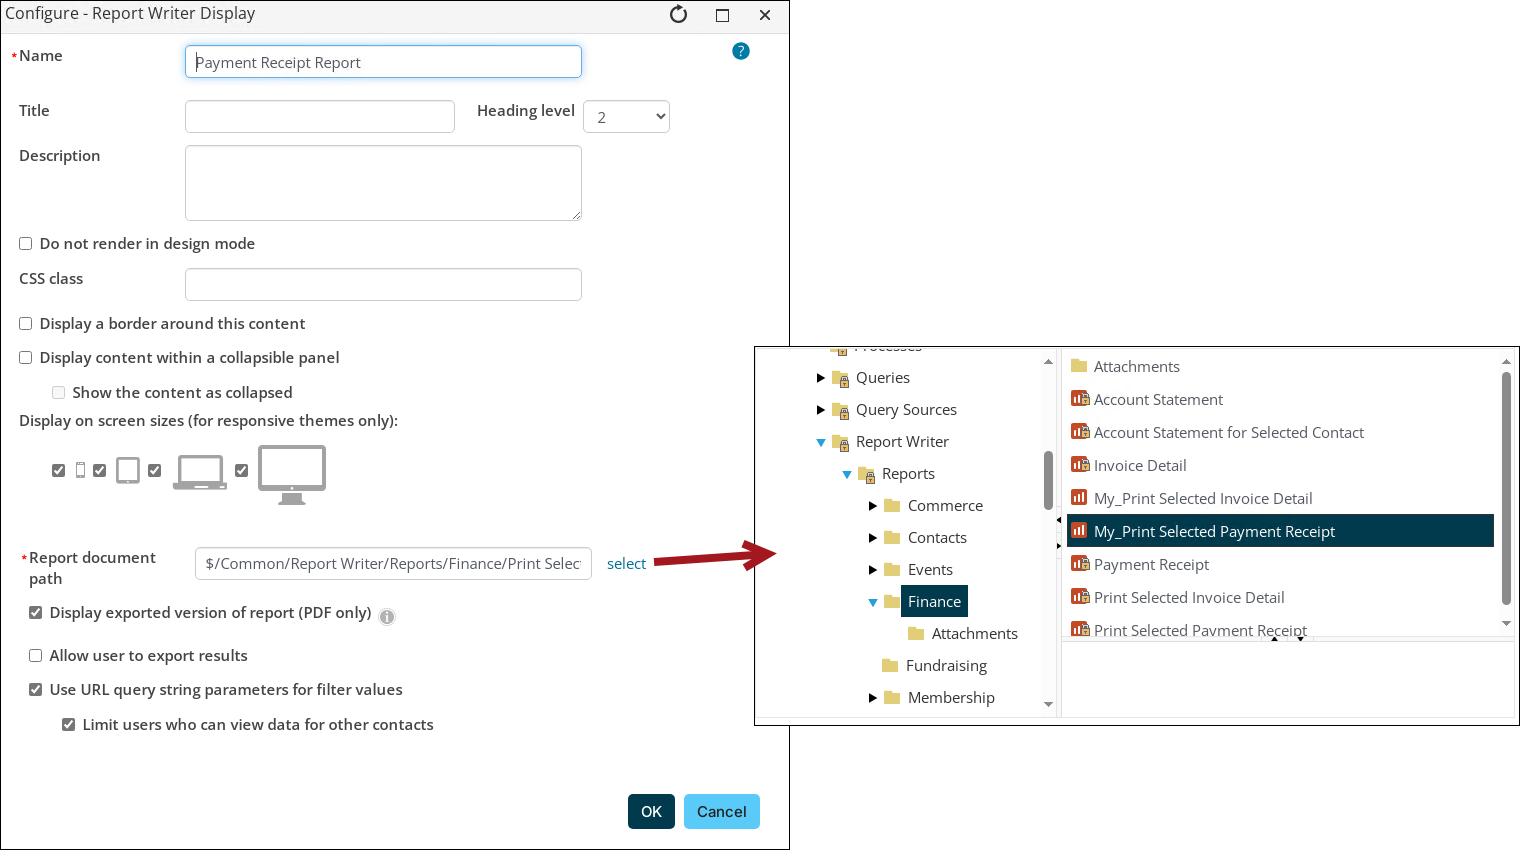
- Click OK, then click Save & Publish.
Updating the related shortcut
Do the following to update the related shortcut:
-
Go to RiSE > Site Builder > Manage shortcuts.
-
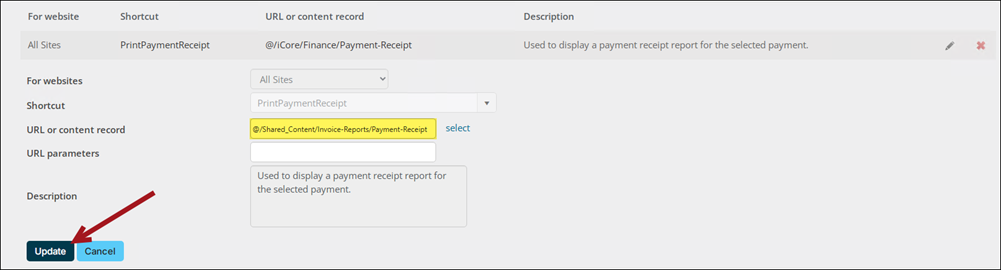
Locate the PrintPaymentReceipt shortcut.
-
Select the edit icon.
-
From the URL or content record field, select the content record you created.
-
Click Update.
-
Confirm the payment receipt is now using the custom version.
