

Communication checklist
Before you go live with iMIS, you must make sure all of the out-of-the-box communications you intend to use have been properly updated and no longer contain sample ASI and iMIS information:
Default communication template
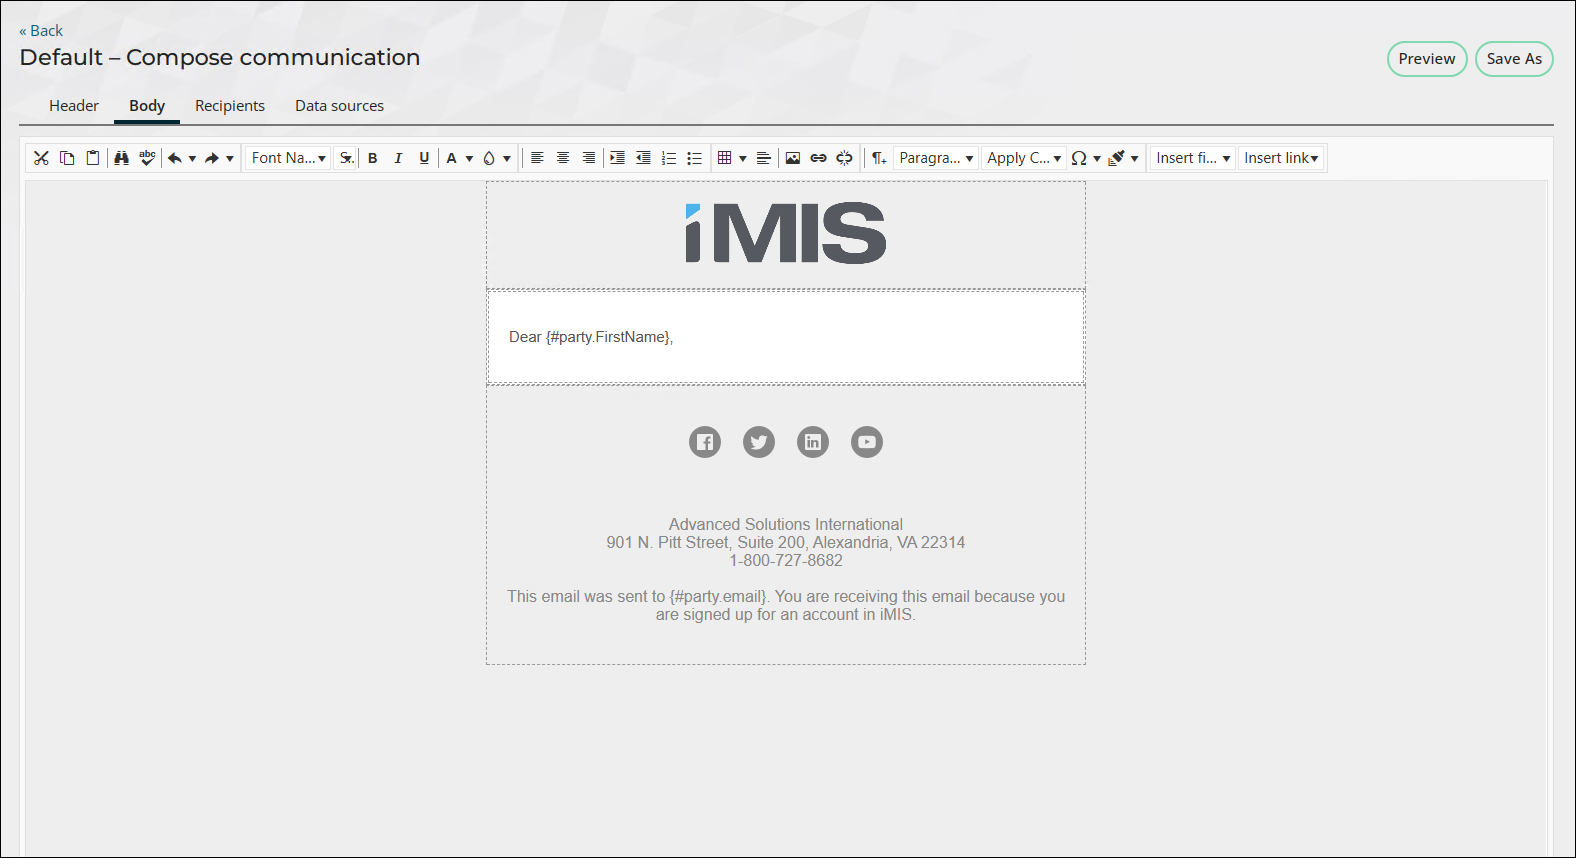
The Default template automatically opens when composing new communications or when sending a communication directly to an individual.
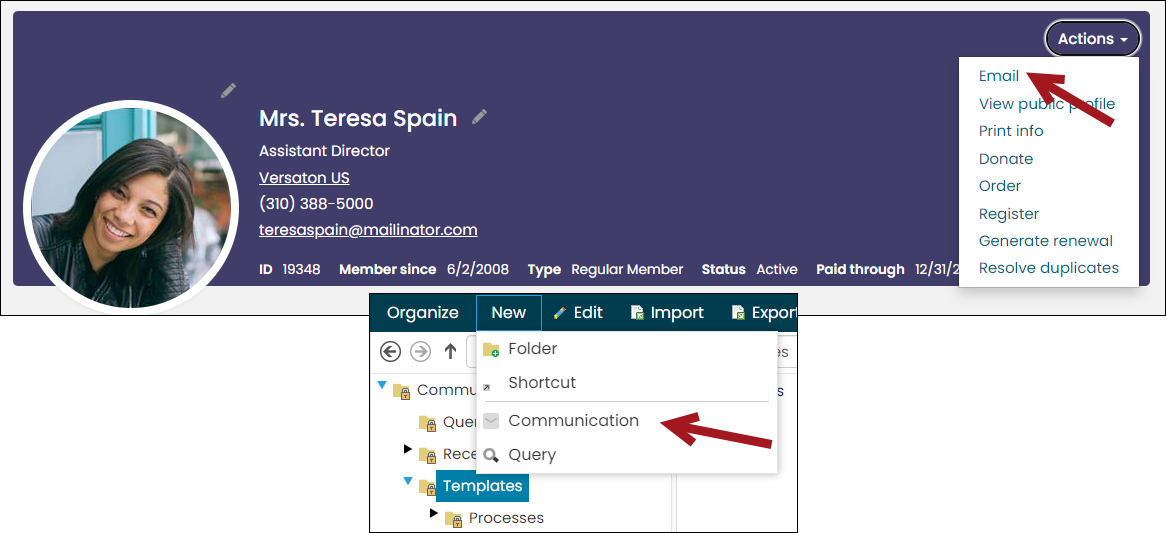
Do the following to define your own Default template:
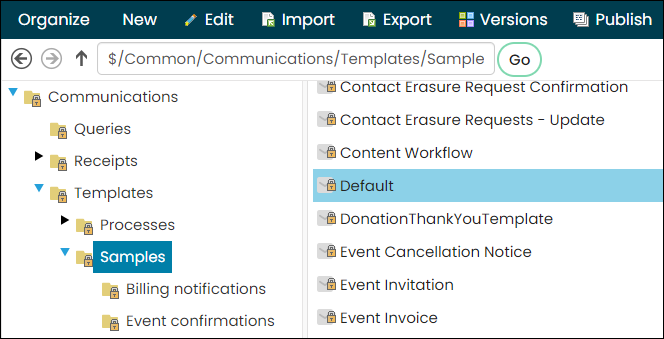
- Navigate to Marketing > Communication templates > Templates > Samples.
- Select the Default template.
- Copy and Paste the template to the Templates folder in order to avoid having your template overwritten during an upgrade. If a Default template is not defined in the Templates folder, the standard message will be used for new communications.
- Edit the template as needed, such as removing the sample ASI and iMIS content.
- Save the template.
- Select New > Communication to view your new default communication template.
🚧 Warning
Do not rename the template. In order for the template to be set as the default template, it must be titled “Default.” There should only be one template titled “Default” within the Templates folder. If there are multiple templates entitled “Default,” then the most recently created default template will be used.
Account Statement
Send this communication to those who have an outstanding balance with your organization. Account statements can be emailed to contacts by attaching the Account Statement or Account Statement Report Writer reports to the communication template.
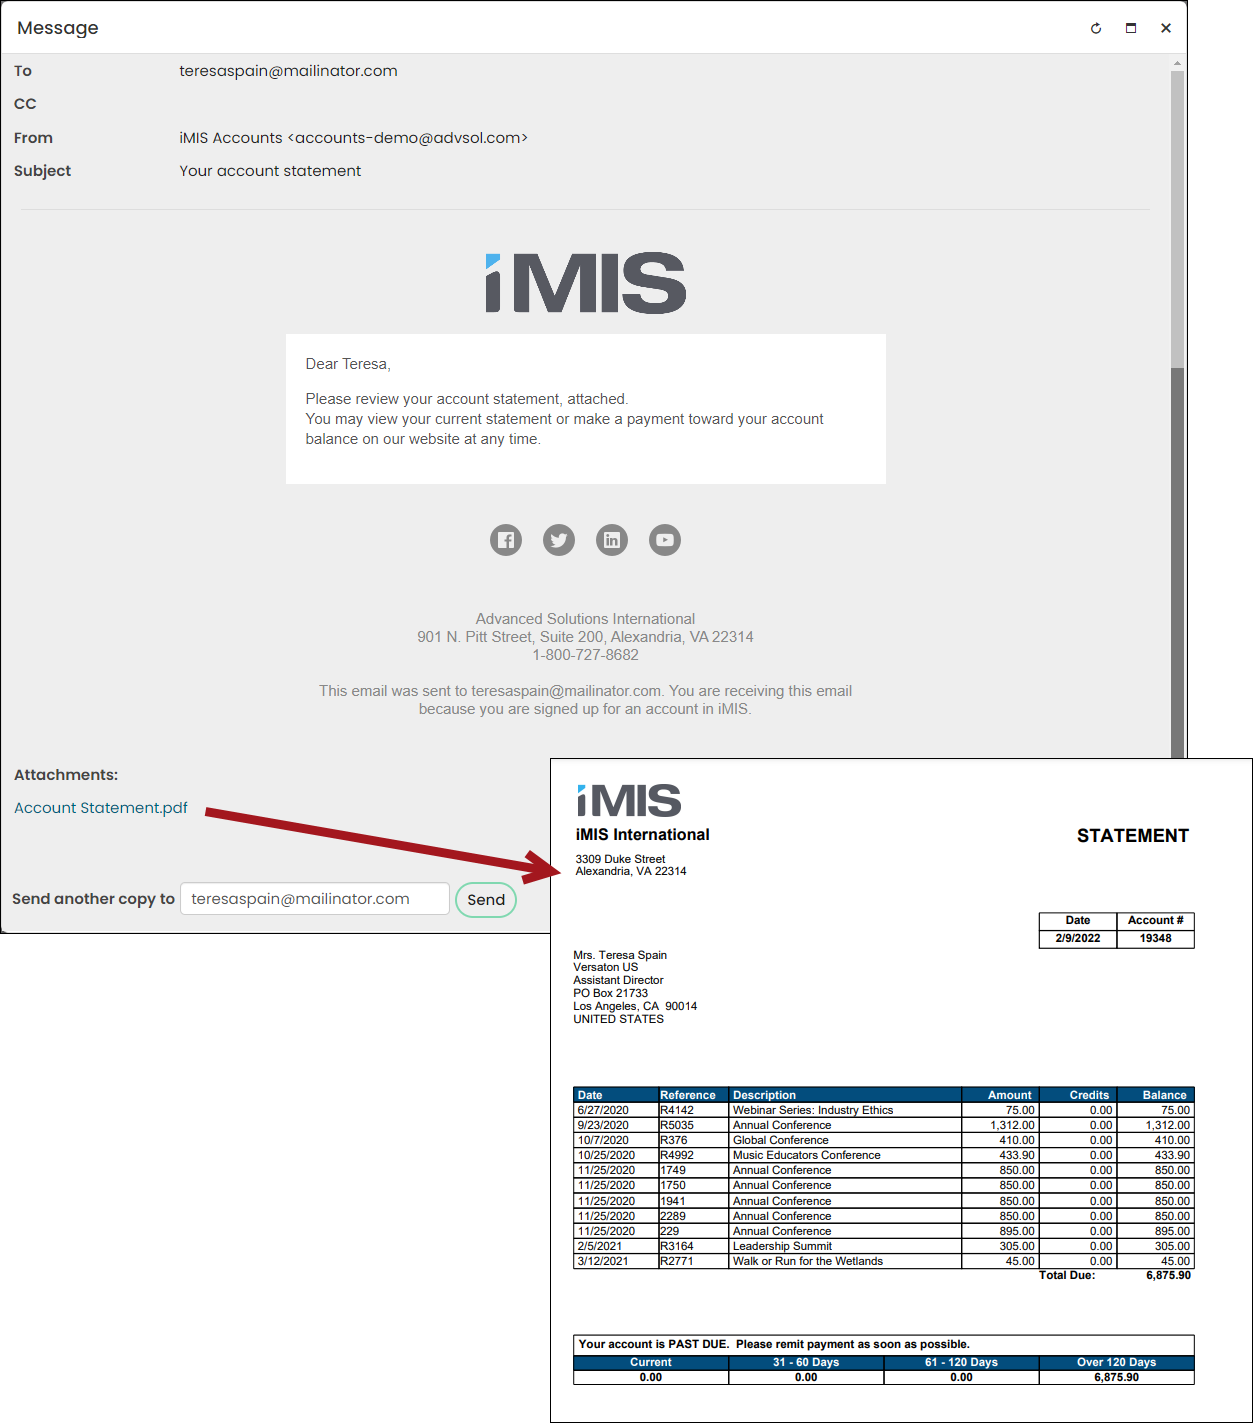
Out-of-the-box, the Account Statement and Account Statement Report Writercommunication templates comes preconfigured with the Account Statement orAccount Statement Attachmentreport attached. Before emailing account statements, you must create your own account statement template. The actual communication template must be tailored, but the attached Account Statement or Account Statement Report Writerreport does not need to be tailored.
To create a tailored Account Statement communication template, do the following:
- From the Staff site, go to Marketing > Communication templates > Templates > Samples.
- Select the Account Statement or Account Statement Report Writertemplate, then select Organize > Copy.
- Select the Templates folder, then select Organize > Paste.
- Open the new template, and make the desired edits, such as removing and updating all of the ASI and iMIS sample information.
- Click Save.
The Account Statement and Account Statement Report Writer reports contain information defined in the Financial Entity, such as the organization name and address. Before sending this report, make sure your financial entity information is updated and does not contain the sample ASI and iMIS information. For more information, see Financial entity.
Renewal Invoice and Renewal Template
The Renewal Invoice and Renewal Template communication templates are similar in that both communications are sent to members to remind them that their membership is due for renewal soon. The Renewal Invoice serves as the first attempt at notifying members that their membership dues are up for renewal and contains an attachment that details their renewal fees. The Renewal Template serves as a second reminder that the member's dues are up for renewal in 30 days and does not contain the attachment.
Renewal Invoice
Out-of-the-box, the Renewal Invoice communication template comes preconfigured with the Invoice Details report attached. Before emailing renewal invoices, you must create your own renewal invoice communication template. The actual communication template must be tailored, but the attached Invoice Details report does not need to be tailored.
To create a tailored Renewal Invoice communication template, do the following:
- From the Staff site, go to Marketing > Communication templates > Templates > Samples.
- Select the Renewal Invoice template, then select Organize > Copy.
- Select the Templates folder, then select Organize > Paste.
- Open the new template, and make the desired edits, such as removing and updating all of the ASI and iMIS sample information.
- Click Save.
The attached Invoice Details report contains information defined in the Financial Entity, such as the organization name and address. Before sending this report, make sure your financial entity information is updated and does not contain the sample ASI and iMIS information. For more information, see Financial entity.
Renewal Template
To create a Renewal Template, do the following:
- From the Staff site, go to Marketing > Communication templates > Templates > Samples.
- Select the Renewal Template, then select Organize > Copy.
- Select the Templates folder, then select Organize > Paste.
- Open the new template, and make the desired edits, such as removing and updating all of the ASI and iMIS sample information.
- Click Save.
Membership Cancellation Notice
This out-of-the-box communication template is used to inform members that you have cancelled their membership renewal.
To create a tailored Membership Cancellation Notice communication template, do the following:
- From the Staff site, go to Marketing > Communication templates > Templates > Samples.
- Select the Membership Cancellation Notice template, then select Organize > Copy.
- Select the Templates folder, then select Organize > Paste.
- Open the new template, and make the desired edits, such as removing and updating all of the ASI and iMIS sample information.
- Click Save.
Contact erasure communications
The following contact erasure communications are available:
- Contact Erasure Request Confirmation - The communication sent to contacts when they have requested to be erased from your system.
- Contact Erasure Request Update - The communication sent to system administrators detailing how many contact erasure requests are pending and how many contacts are marked for erasure.
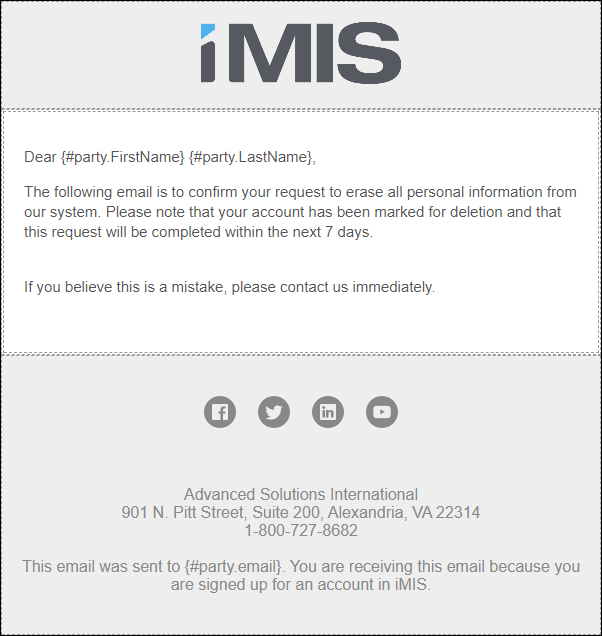
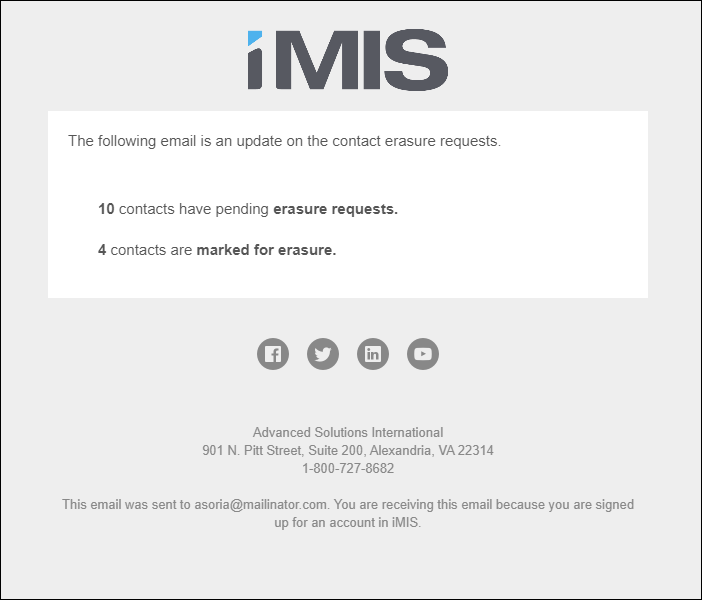
See Erasing a contact's personal data for more information about contact erasure.
Each communication is associated with a process automation scheduled task. Do the following before using the communication templates and scheduled tasks:
- Go to Marketing > Communication templates > Templates > Samples.
- Select the Contact Erasure Request Confirmation template, then select Organize > Copy.
- Select the Templates folder, then select Organize > Paste.
- Repeat steps 2 and 3 for the Contact Erasure Request Update template.
- Open the new templates, and make the desired edits, such as removing and updating all of the ASI and iMIS sample information.
- Click Save.
- Go to RiSE > Process automation.
- Locate the Contact erasure request confirmation task, and open it for edit.
- Click the Actions tab.
- Select the pencil icon.
- From the Communication line, Remove the existing template, then Select your copy of the Contact Erasure Request Confirmation template.
- To enable the task and begin sending out emails immediately, select Enabled.
- Save the task.
- Repeat steps 8-13 for the Contact erasure requests - Update email task and associated Contact Erasure Request Update communication template.
Welcome to new system
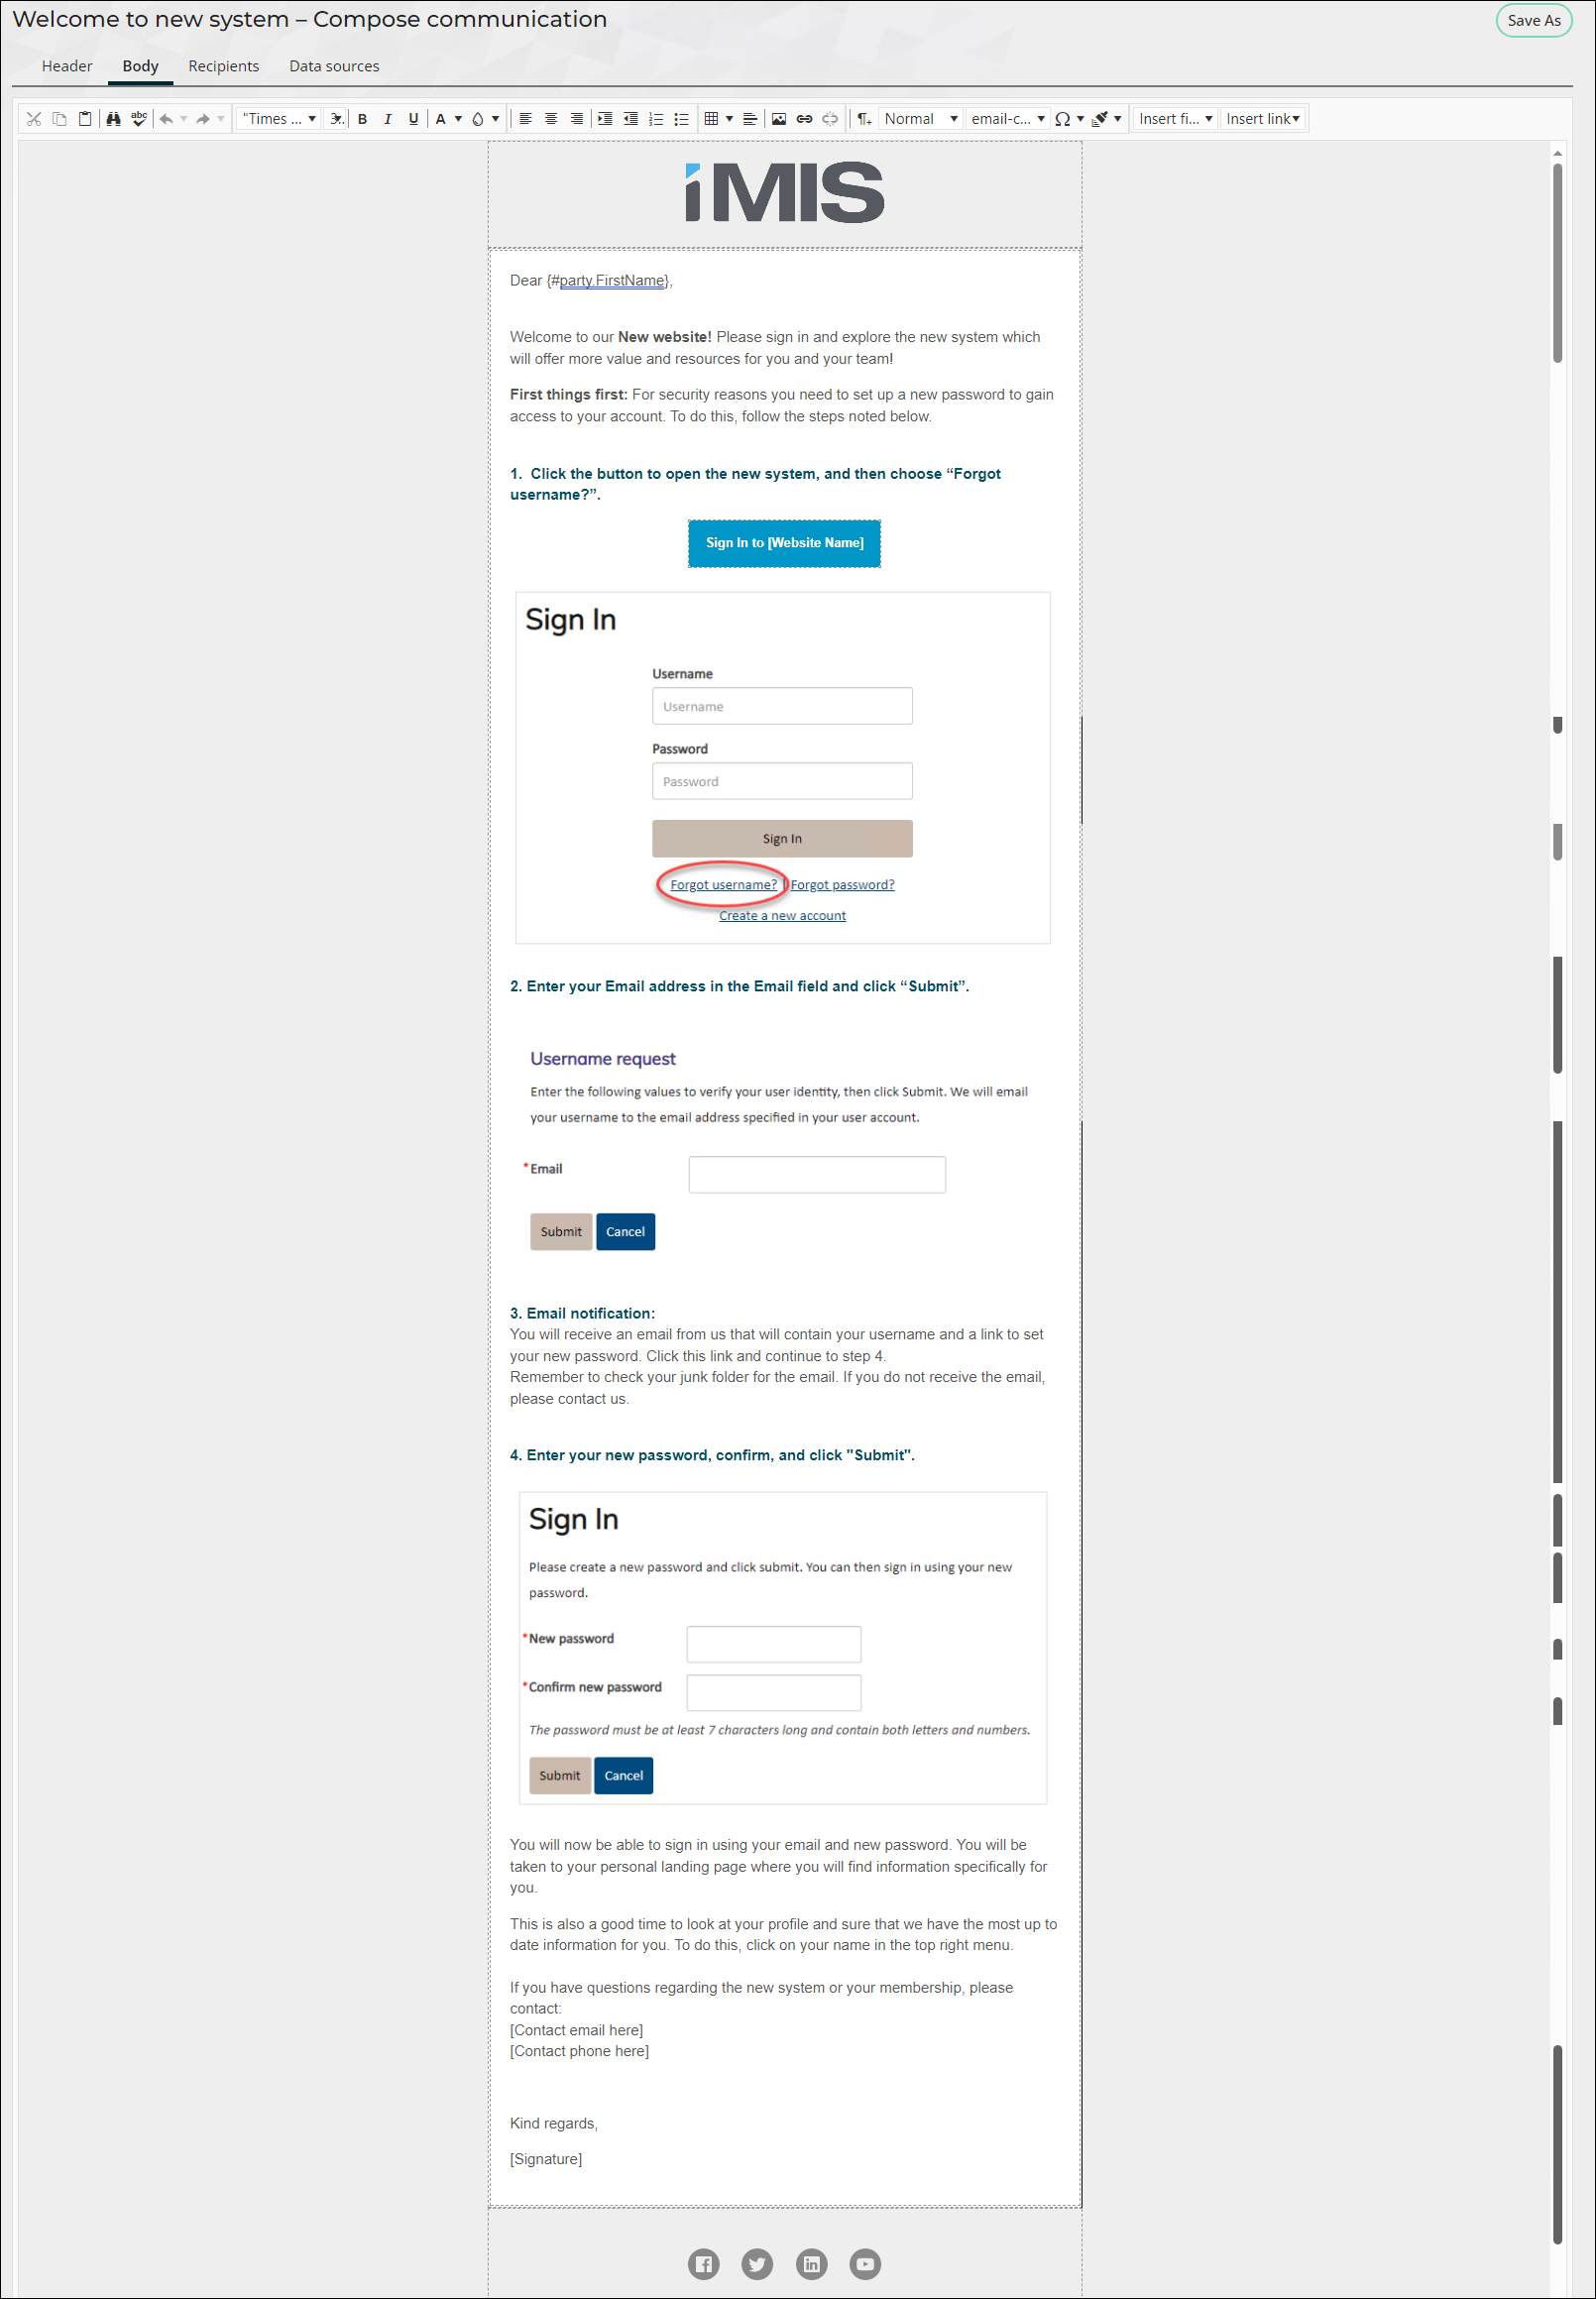
The Welcome to new system communication template lets you send out a welcome email to new members complete with instructions on how to create and login to their system.
Updated 5 months ago