

Editing custom account pages
Out-of-the-box, iMIS comes with pre-built account pages that users are encouraged to make copies of, so they can customize the account pages. See Understanding and modifying account pages to learn how to create custom account pages.
Once you begin working with custom account pages, you can continue to edit aspects of the account pages.
Editing panels on account pages
When editing panels, you can add or remove properties or change property labels.
Adding and removing properties
- From the Staff site, go to the account page you want to edit.
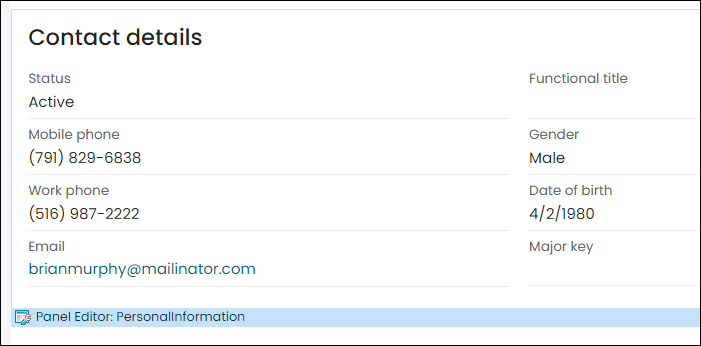
- Enable Easy Edit. Content items available for customization have a blue bar underneath each item.
- Click the edit icon located in the blue edit bar of a Panel Editor content item.
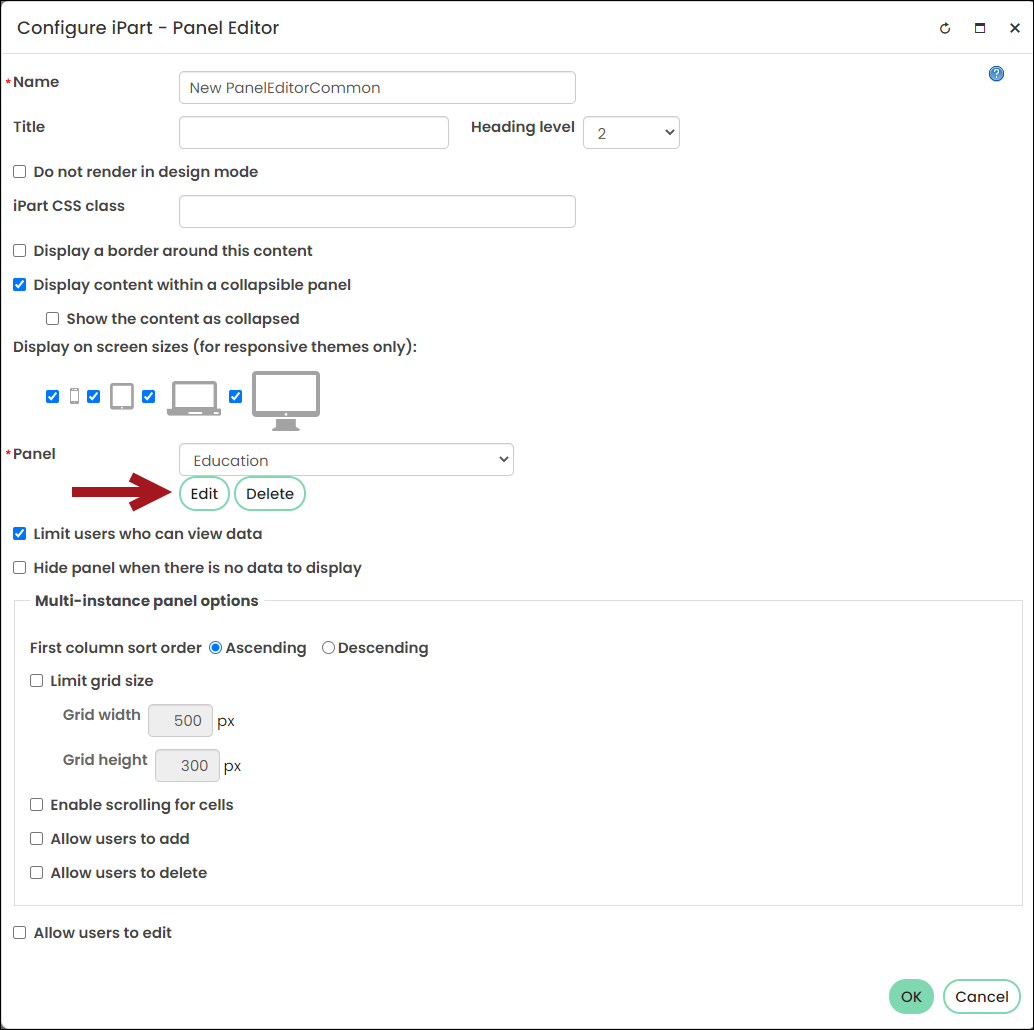
- Next to the Panel option, click Edit.
-
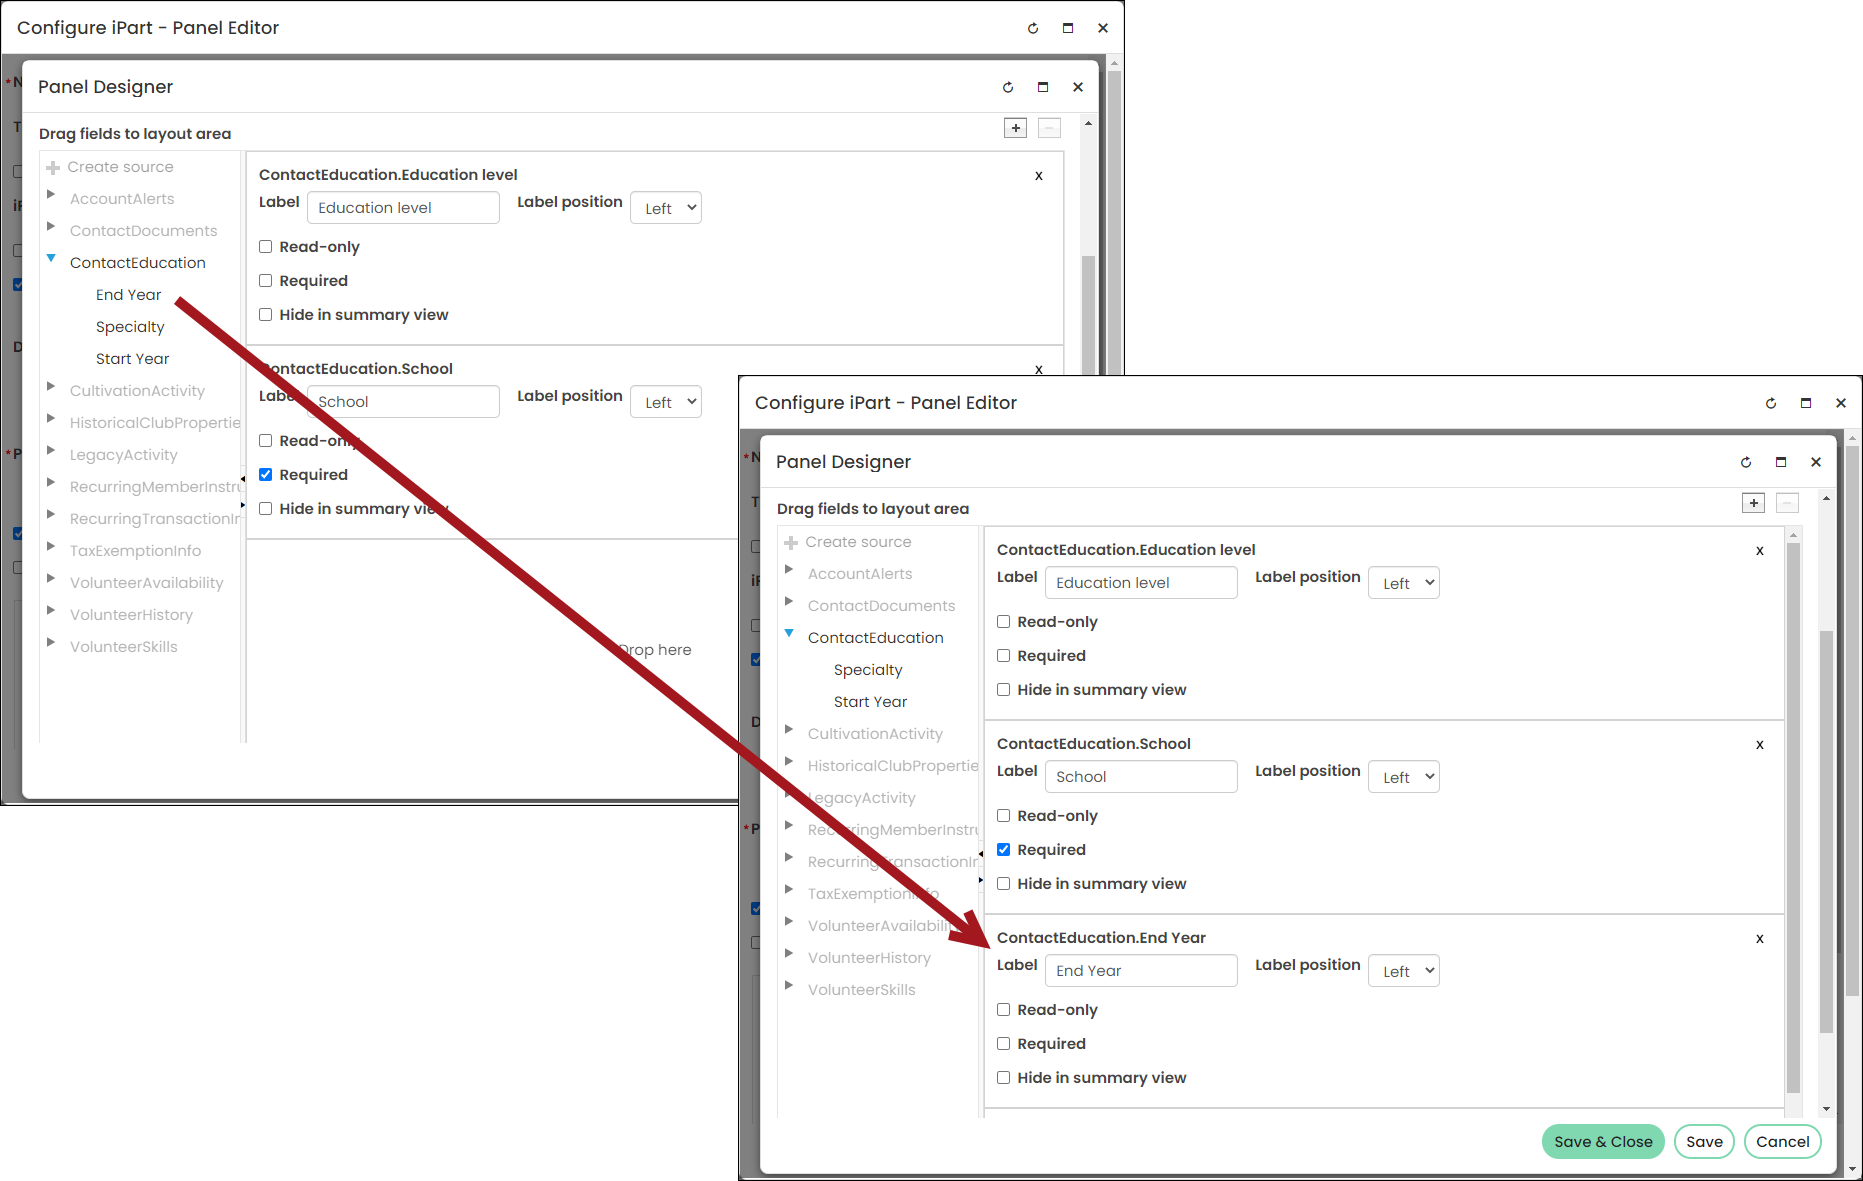
Click and drag additional properties to the layout area to add new properties.
- Click the X on each property in the layout area to delete unwanted properties.
- Click Save & Close.
- Click Save & Publish.
Changing property labels
Do the following to change a property label:
- From the Staff site, go to the account page you want to edit.
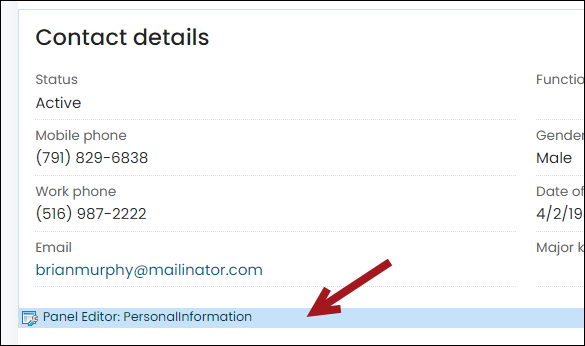
- Enable Easy Edit. Content items available for customization have a blue bar underneath each item.
- Click the edit icon located in the blue edit bar of a Panel Editor content item.
- Next to the Panel option, click Edit.
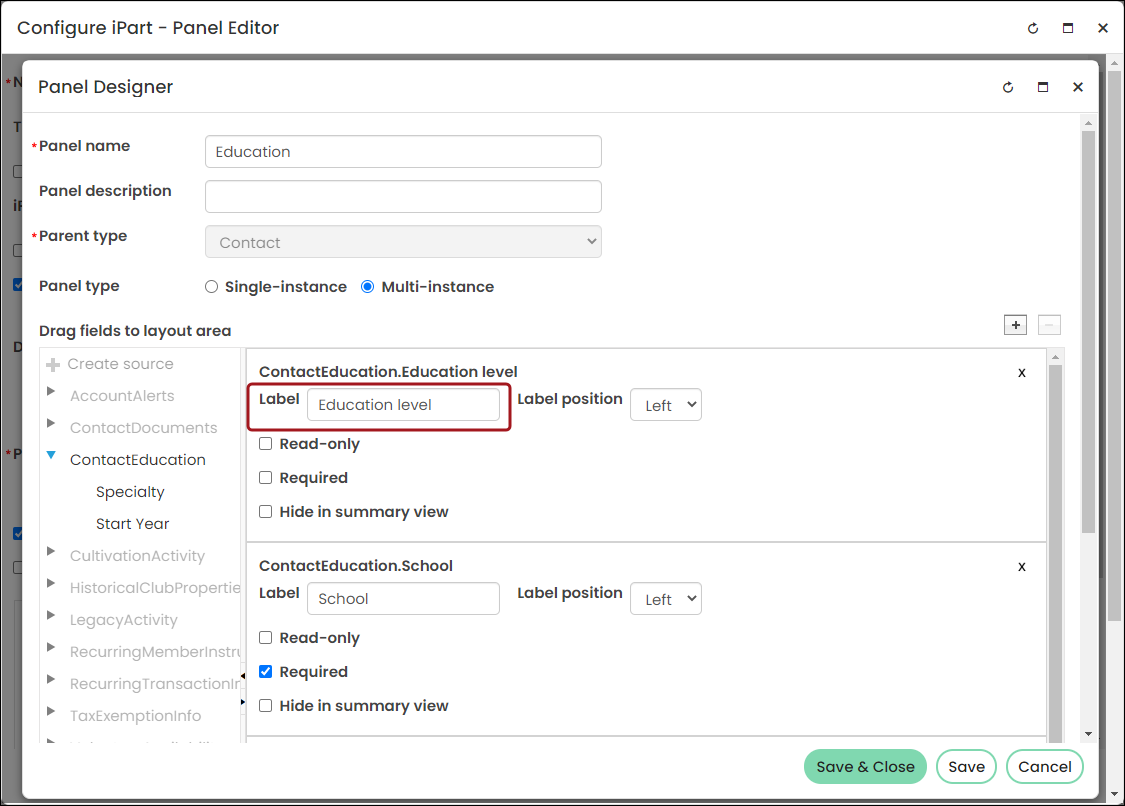
- Scroll down to find the property Label you wish to change, delete the current label, and type the new one.
- Click Save & Close.
- Click Save & Publish.
If you wish to add a new panel to an account page, see Creating a panel and adding it to account pages.
Editing the layout of an account page tab
Do the following to edit the layout of an account page tab:
- Go to RiSE > Page Builder > Manage content.
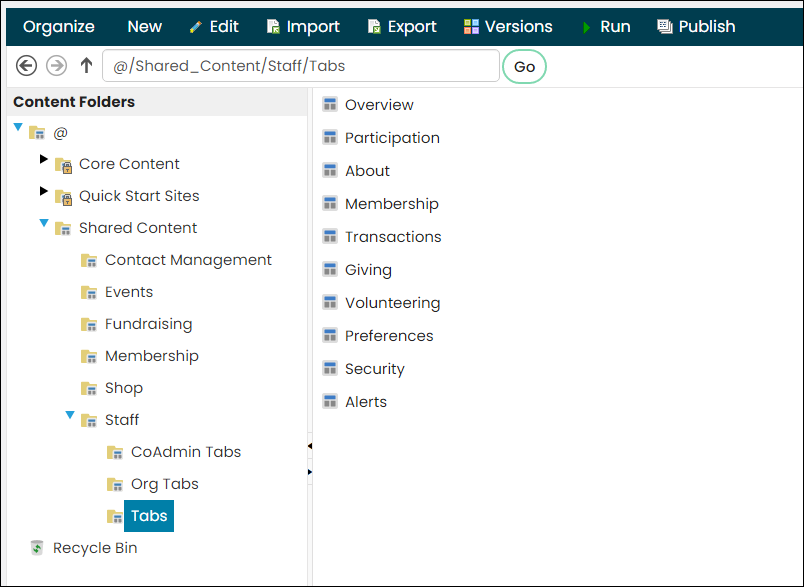
- Navigate to @/Shared_Content/Staff/Tabs.
- Double click on the tab you want to rearrange.
- Click and drag the various content items to their new locations you want them to display at. Available areas to move the content item to highlight in gray.
- Click Save & Publish.
📘 Note
Your custom account pages may be in a different folder. If your account page tabs are not located in the Shared Content folder, locate the account page tabs.
Editing the name and order of account page tabs
- If you have not already done so, copy and paste each content record in the @/iCore/Contacts/Account/Staff/Tabs folder to the @/Shared_Content/Staff/Tabs folder. For more details on this step, see Staff view: Creating custom account pages for individuals.
- Open the content record of the tab for edit.
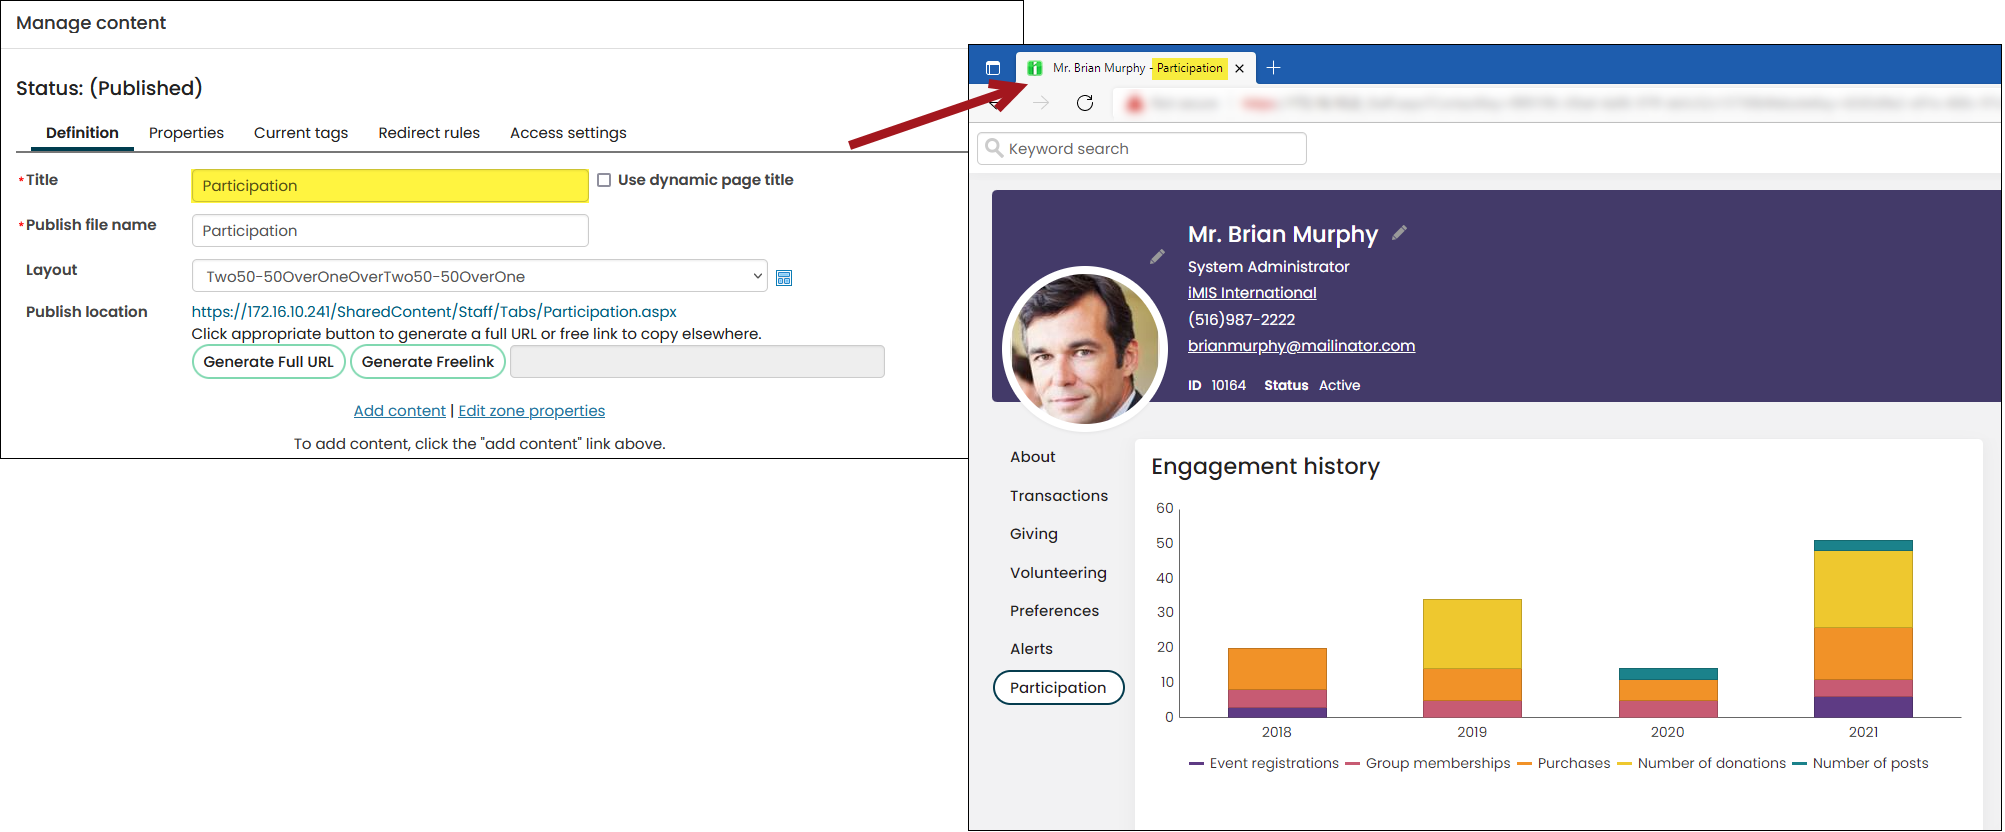
- Enter the new name in the Title field. This field specifies what is displayed in the title of a browser window or browser tab.
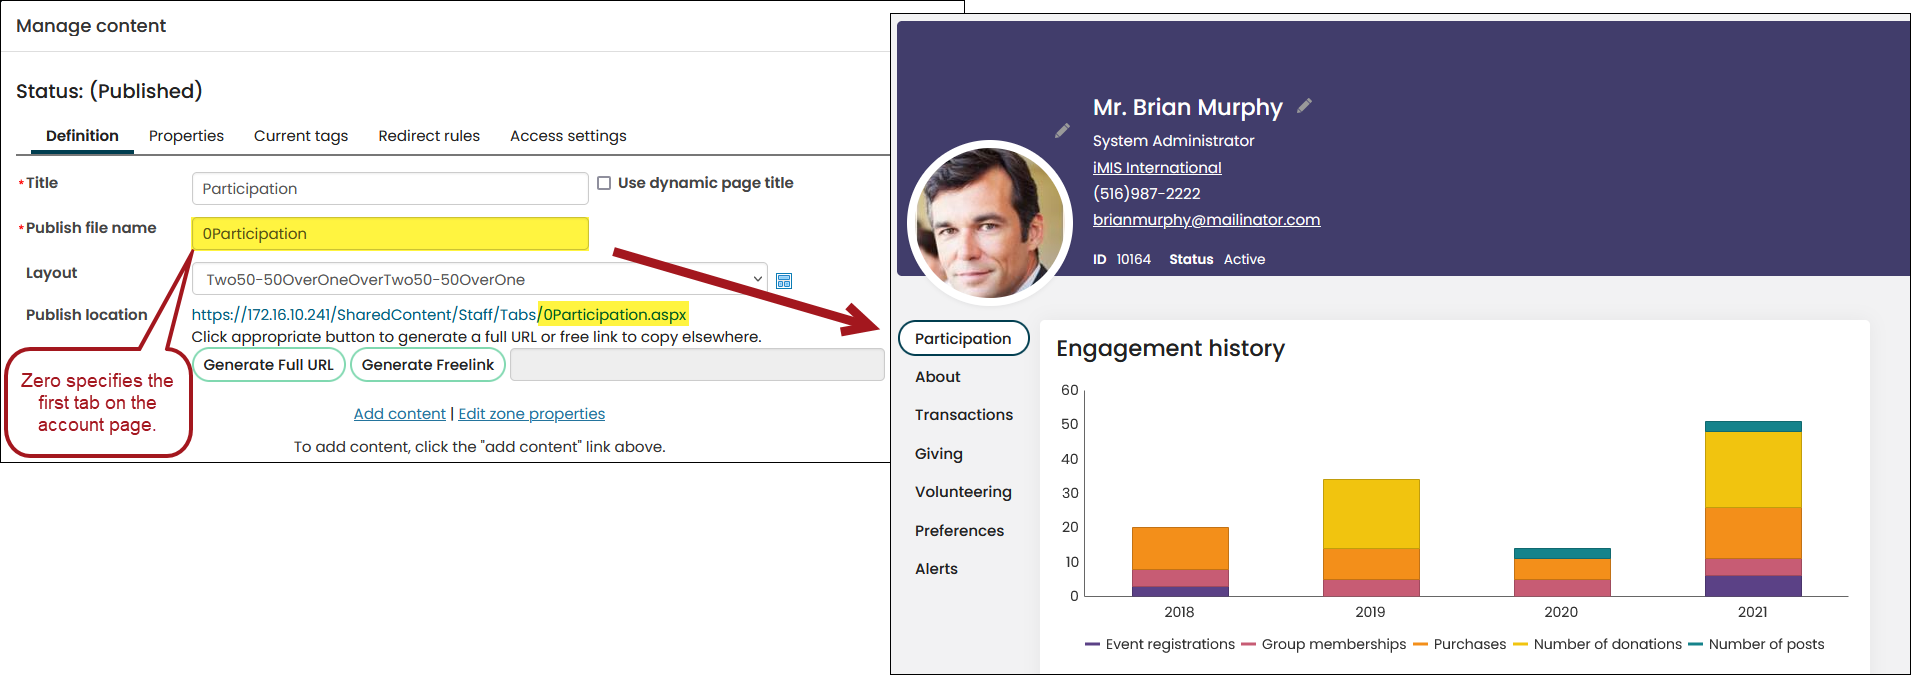
- Enter the new name in the Publish file name field. This specifies the name of the .aspx file to which this content record is published. Entering a number as the first character of the Publish file name will specify the order the tab appears on an account page, beginning with zero.
-
Click Save & Publish.
Deleting a tab from an account page
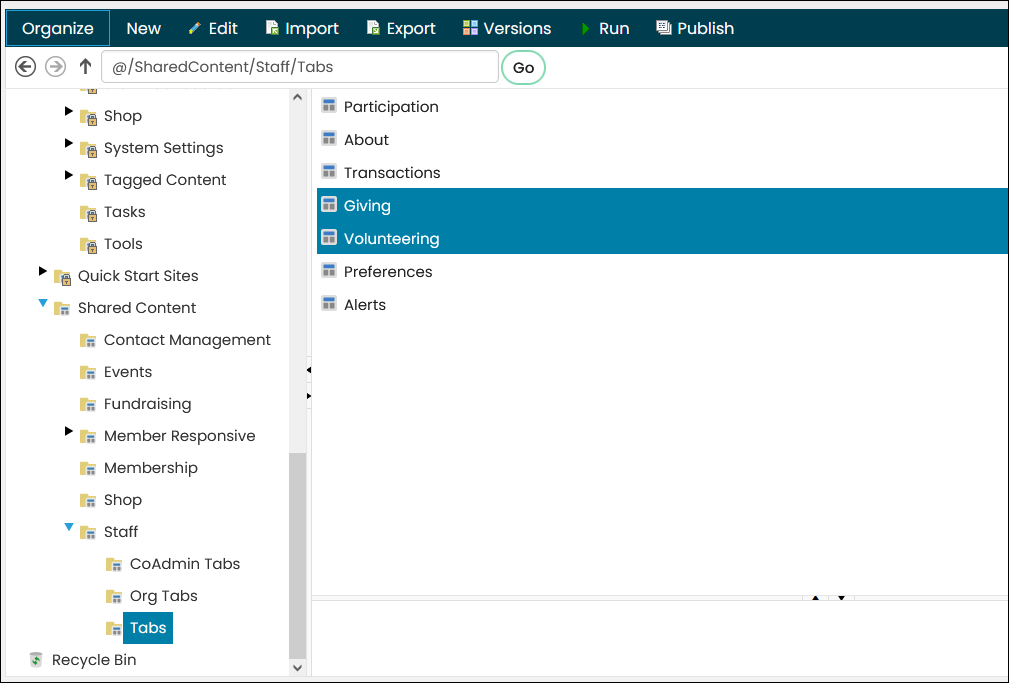
To delete a tab you do not want or need to use, simply delete the related content record from the @/Shared_Content/Staff/Tabs folder:
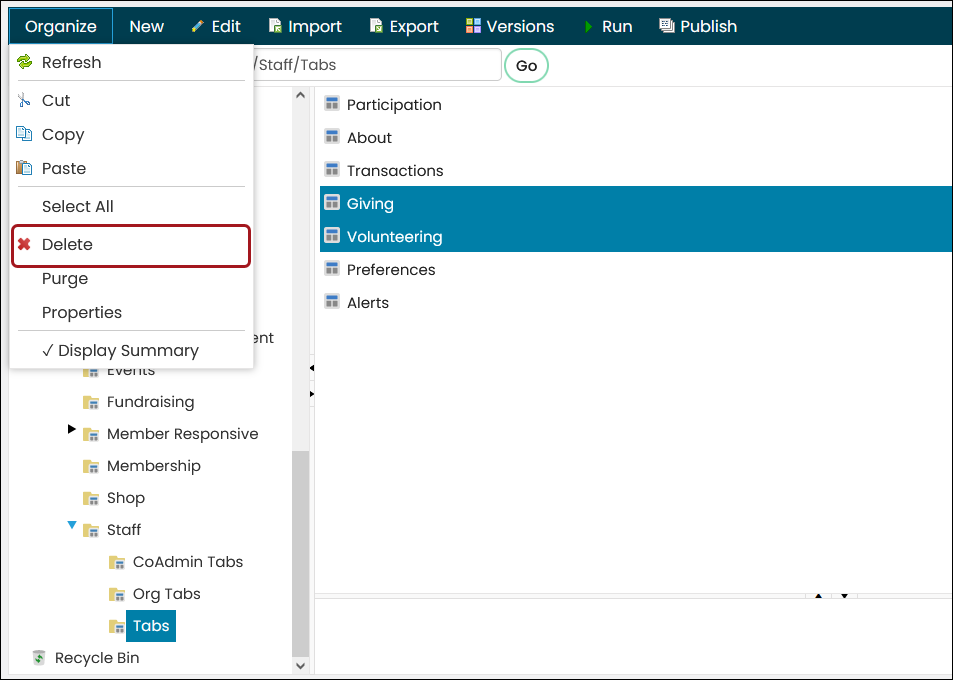
- Select the content records, for example, Volunteering and Giving.
- Go to Organize > Delete.
📘 Note
To select multiple content records at once, hold down Ctrl on your keyboard, then click each content record.
Editing queries on account pages
Even after copying the out-of-the-box account pages, you are still using out-of-the-box queries on the copied pages. If you need to edit a query on one of the account page tabs, you will need to do the following:
- Make a copy of the query - On each iMIS upgrade, the out-of-the-box content, including queries, is overwritten. Any changes made to out-of-the-box content are not preserved on upgrades, so it is best practice to make a copy of the content, then make changes to the copy.
- Make changes to the copied query
- Update the custom account page to point to the updated query
👍 Example
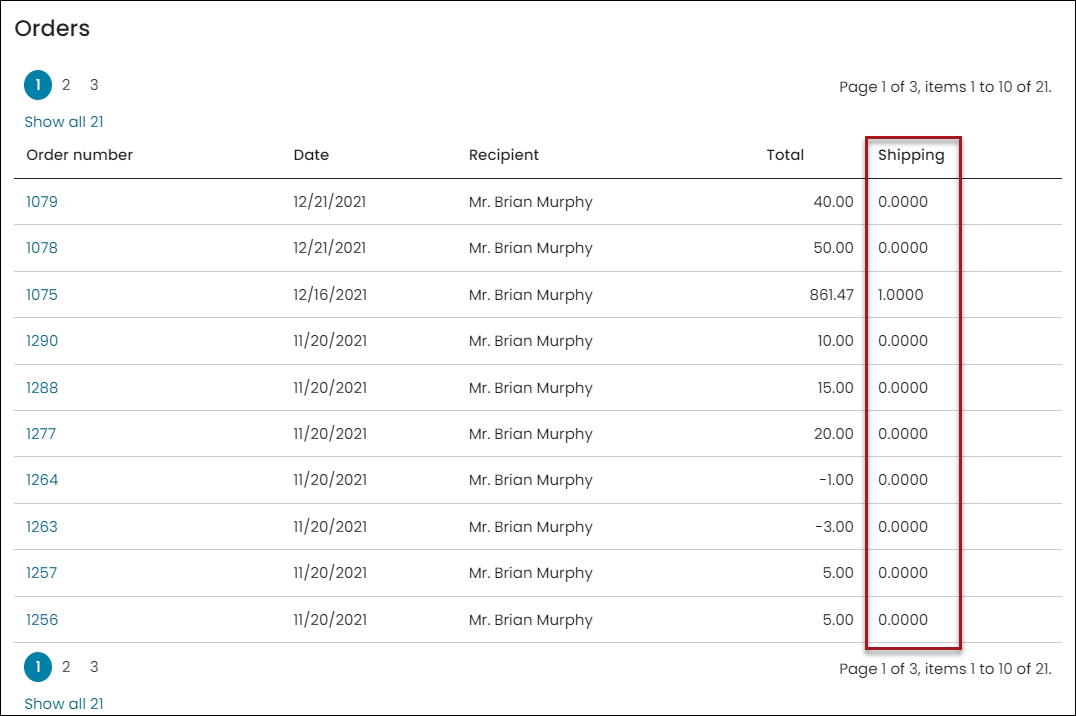
You need to display the shipping costs associated with Orders located on the Transaction tab of account pages.
Determining the query's location
Do the following to determine where the query exists in the Document System:
- Go to an account page.
- Enable Easy Edit.
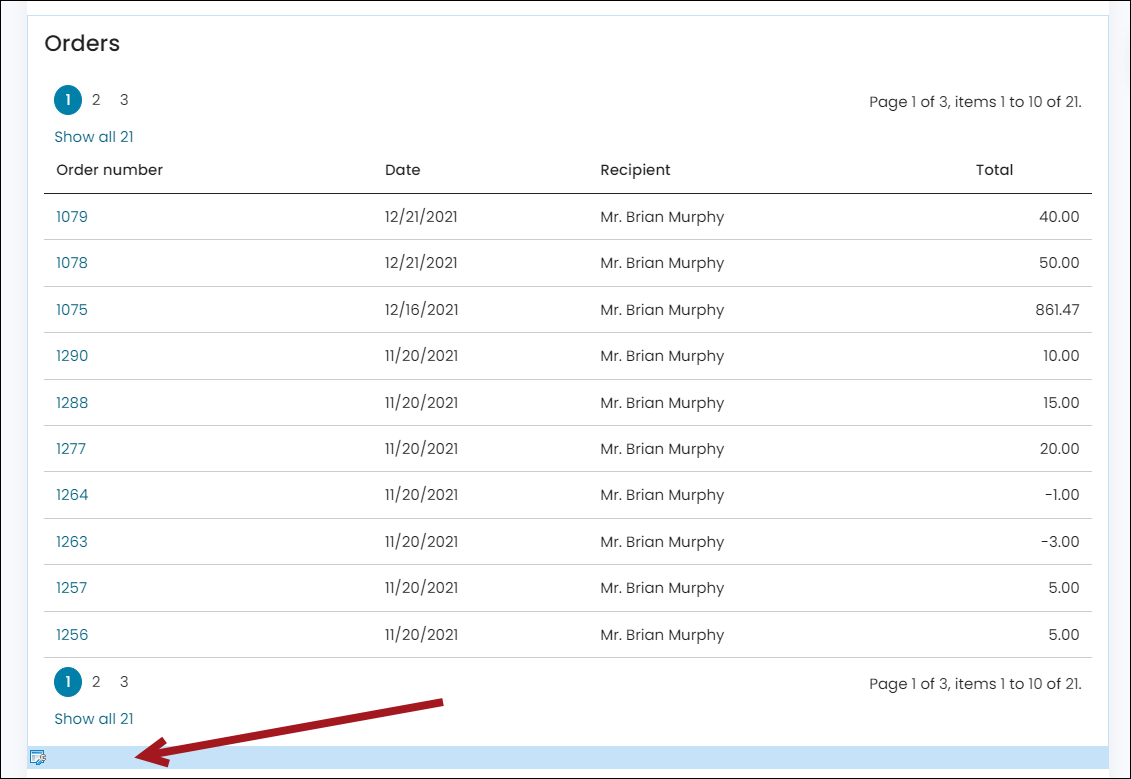
- Locate the query you need to edit. For this example, it is the Orders query.
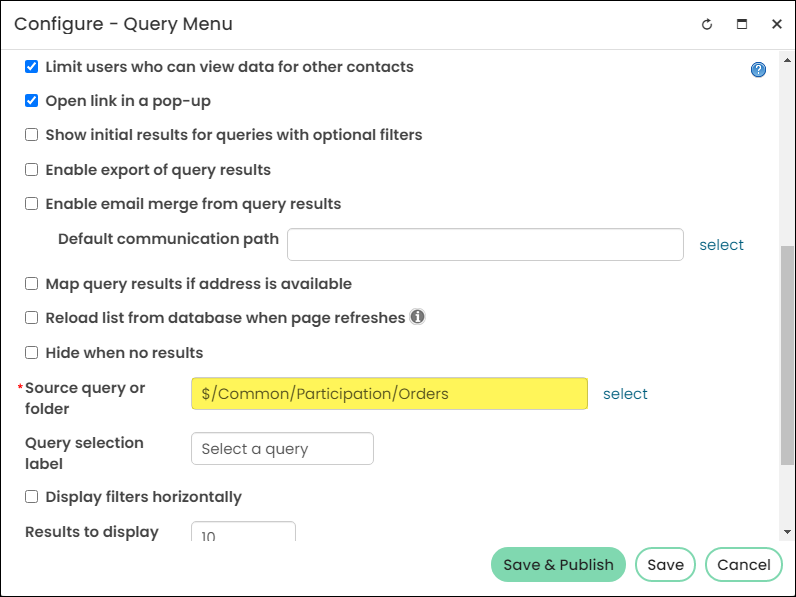
- Select the content item configure bar below the Orders list.
- Make note of the query path in the Source query or folder field.
Editing the query
Do the following to edit the query:
- Go to RiSE > Intelligent Query Architect.
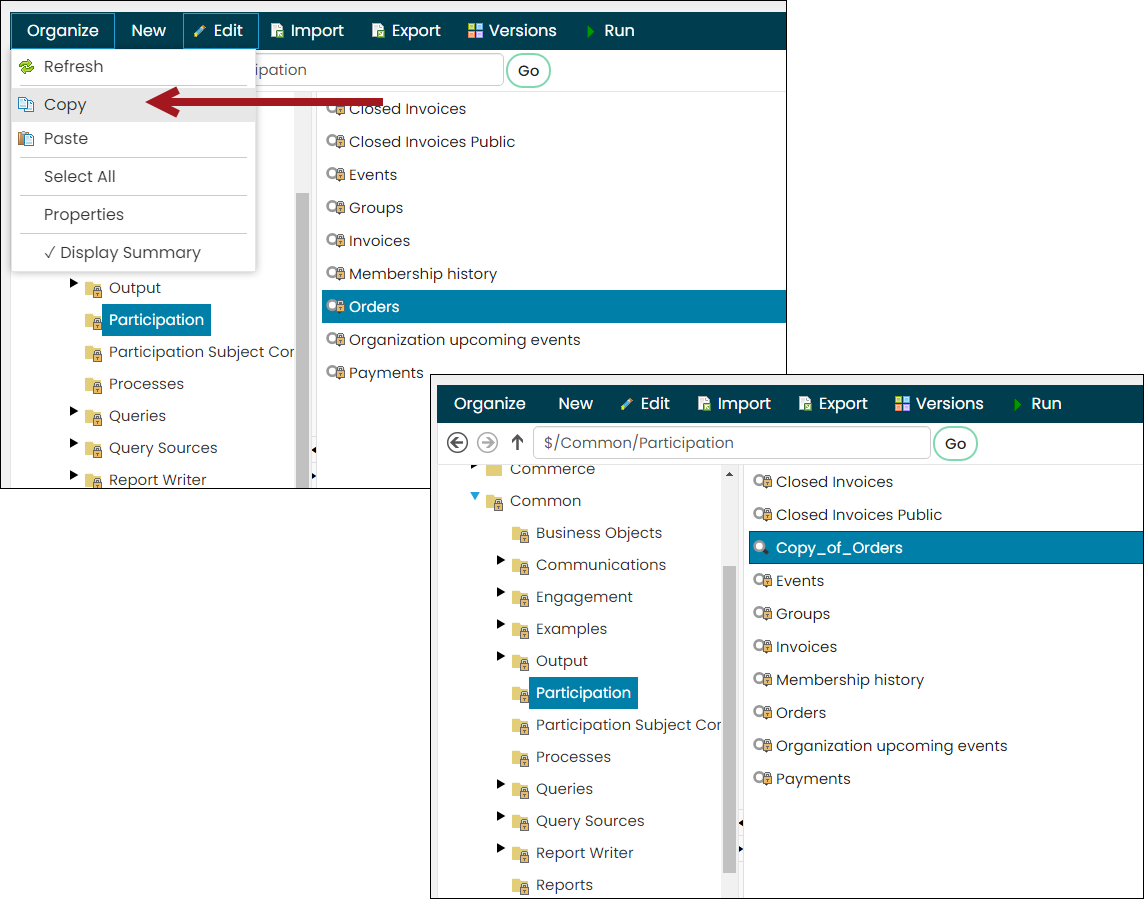
- Navigate through the query path. For this example, the path is the following:$/Common/Participation/Closed Invoices.
- Make a copy of the query and paste it into the same folder or any folder you want. If pasting the query in the same folder, the name of the query is prepended with "Copy_of".
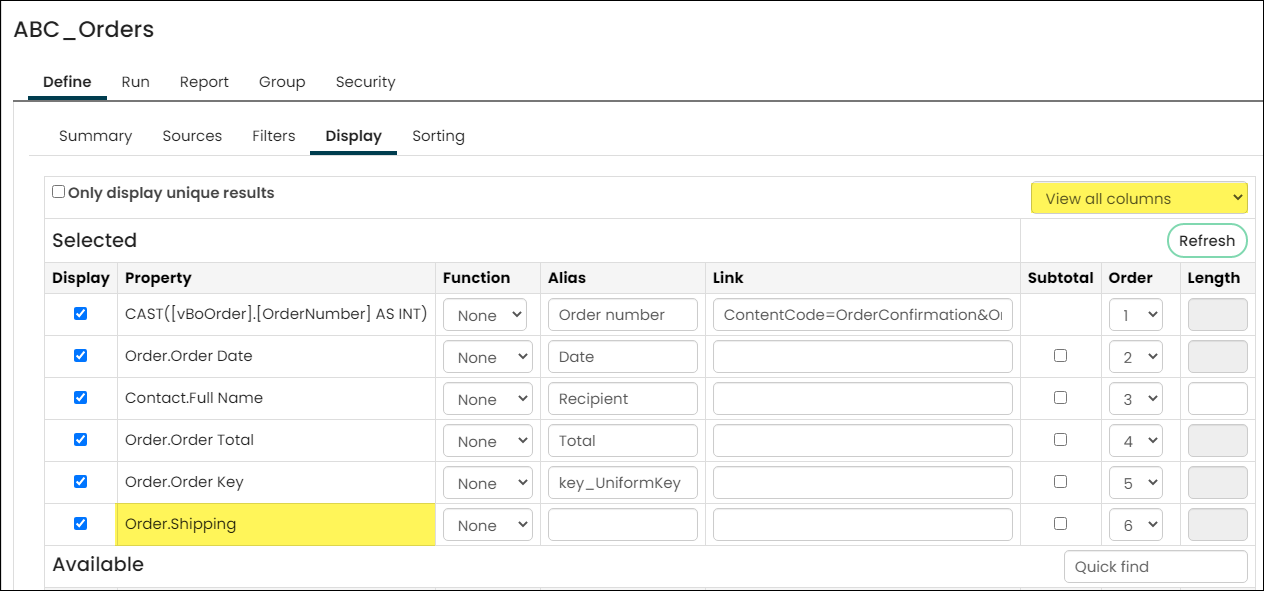
- Open the query and edit as needed. For this example, click the Display tab.
- From the Display tab, select the drop-down on the right-side of the screen and choose View all columns.
- Enable the Display checkbox for the Order.Shipping property.
- Continue editing the query as needed, then click Save.
Updating the account page to use the edited query
Do the following to update the account page to use the edited query:
- Navigate back to the account page and locate the query.
- Select the content item configuration bar below the query.
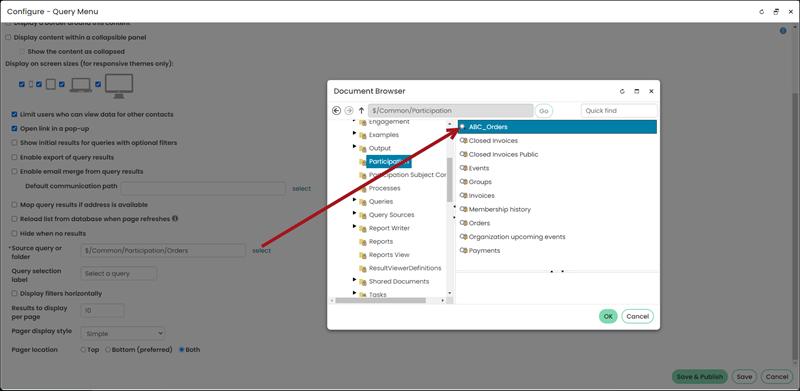
- Scroll down to the Source query or folder field, and select the new query.
- Click OK, then click Save & Publish.
The account pages now display the newly updated query.
Updating the account page banner color
There are out-of-the-box CSS classes that enable users to change the banner color on account pages.
📘 Note
Only one class can be used at a time.
| Class to enter in the 'Page contain CSS class' field | Hex code |
|---|---|
| account-banner-bg-color-1 | #ffffff |
| account-banner-bg-color-2 | #413d6b |
| account-banner-bg-color-3 | #6b458f |
| account-banner-bg-color-4 | #9b4c81 |
| account-banner-bg-color-5 | #ca4d48 |
| account-banner-bg-color-red | #d03528 |
| account-banner-bg-color-orange | #e98300 |
| account-banner-bg-color-yellow | #e8d92d |
| account-banner-bg-color-green | #68bd49 |
| account-banner-bg-color-blue | #00a9e0 |
| account-banner-bg-color-purple | #413d6b |
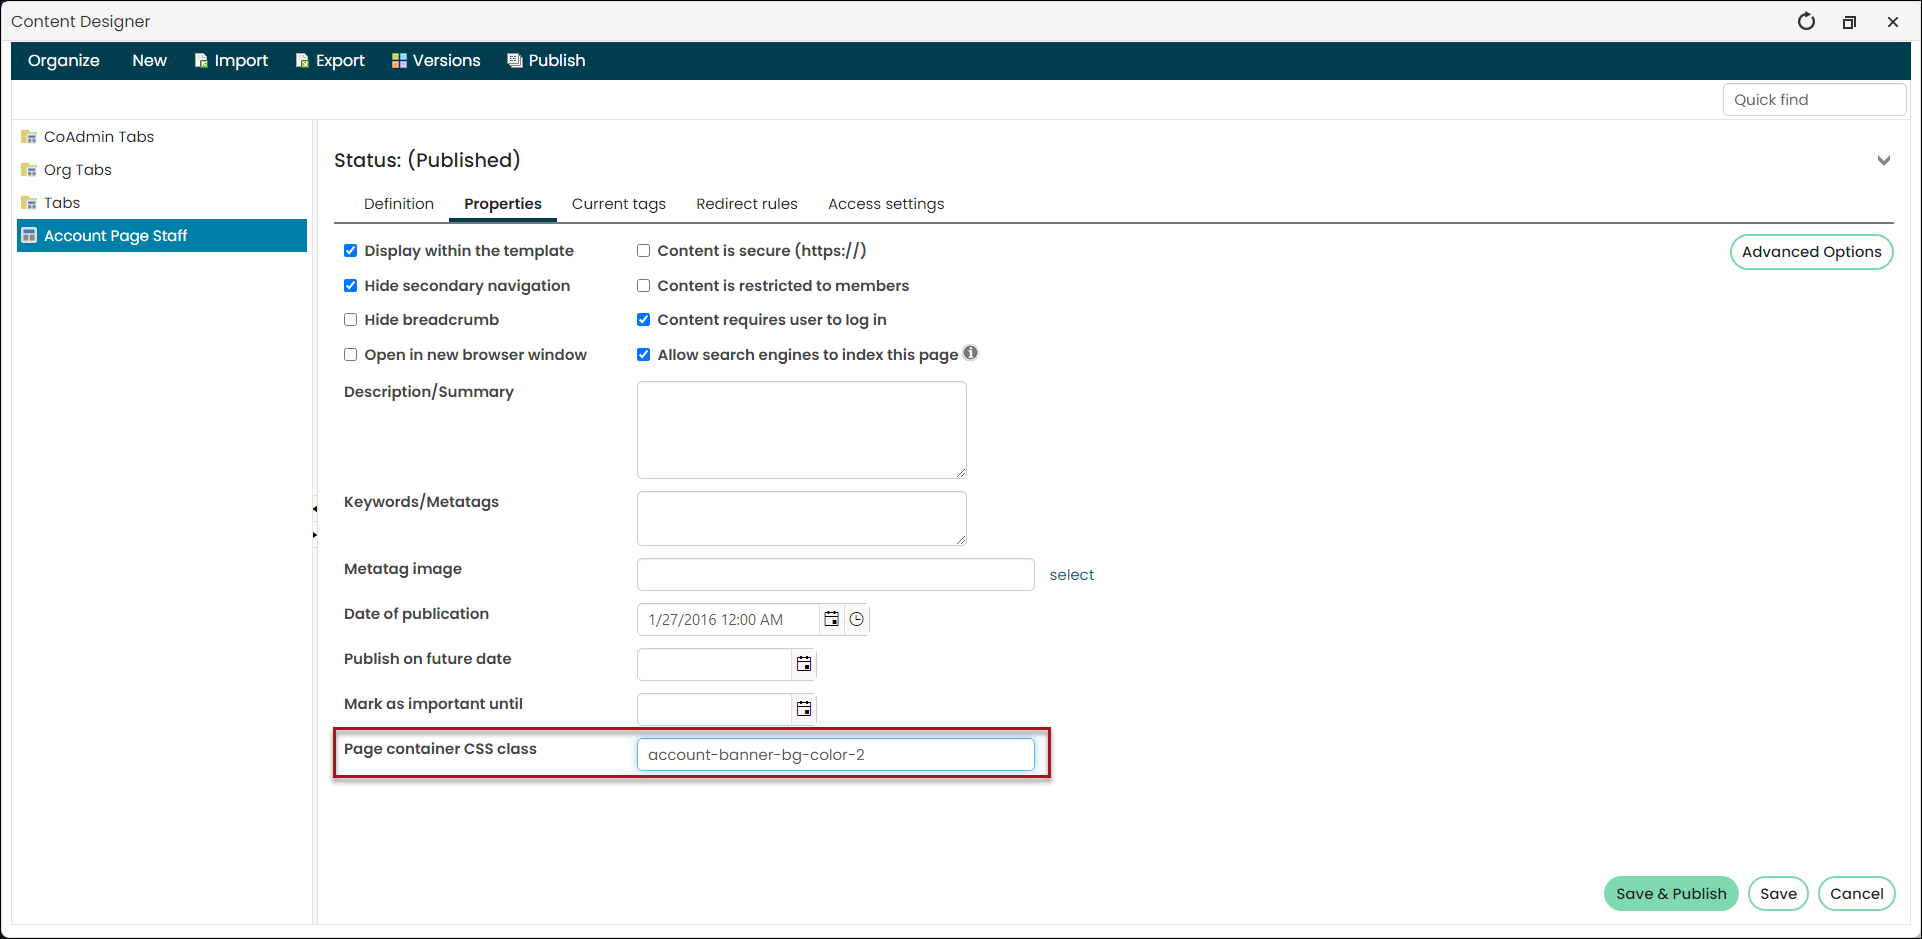
Do the following to update the account page banner color:
- Navigate to a contact account page and enable easy edit.
- Select the edit bar at the bottom of the page.
- Click the Properties tab.
- From the Page contain CSS class field, remove the account-banner-bg-color-2 class and add the new class.
- Click Save & Publish.
Adding out-of-the-box content to custom account pages
After you start using custom account pages, any new content added to the out-of-the-box account page tabs is not automatically added to your custom account pages.
To add the new content on out-of-the-box account pages to your custom account pages, do the following:
- Go to RiSE > Page Builder > Manage content.
- Navigate to the out-of-the-box account page tabs:
- Individuals: @/iCore/Contacts/ContactLayouts/Staff/Tabs
- Organizations: @/iCore/Contacts/OrganizationLayouts/Staff/Tabs
- Open the content record that contains the new content you want to use. For example, if there is content on the Membership tab that you want to use on your Membership account page tab, open the Membership content record.
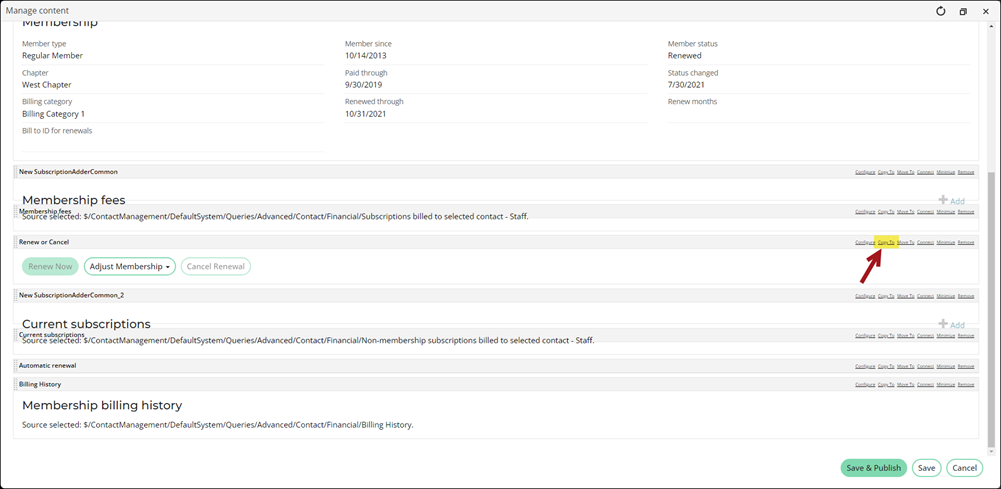
- Find the content item, then click Copy To.
- From the Document Browser, navigate to the page you want to move the content to.
- Click OK.
- Continue that process for each content item you want to use, then close the content record.
- Navigate to the page you moved the content to, then open it for edit.
- Move the content item around to the desired location, then click Save & Publish.
📘 Note
If you would like to use all content on a tab, copy the entire content record, then paste it in the same location as the other account page tabs.
Updated 3 months ago