

Working with Club programs
NoteYou must be licensed for Clubs to use a club-related functionality. Contact ASI for more information.
Configuring and managing a club program is simple and easy to do. From the Club Staff site, you can manage program items, registration options, check individuals in and out, and more!
NoteWhile creating your program, use the Show in search fields to hide your unfinished event from public users.
Defining programs
Before defining a program, make sure the clubs are available as an event location. To add a club as a location, see Adding locations for events.
To define a program, do the following:
-
From the Staff site, go to Events > Add event.
-
Select one of the following options:
-
Create a new event
-
Choose a template - From the Template drop-down, select an event template. Fields defined in the event template will automatically populate for the new event. To learn more about event templates, see Managing event templates.
-
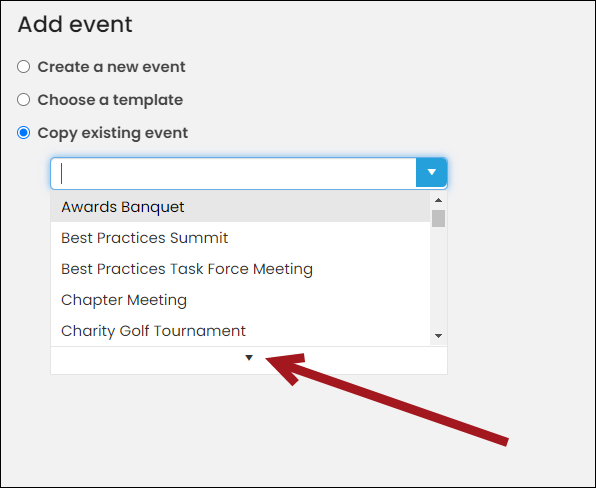
Copy existing event - Select an event to copy and use as the basis for the new event. All information including registration options, program items, and questions are copied into the new event. Begin typing the event name, or select an event from the drop-down. Clicking the down arrow will load more results that you can scroll through. Copied events will have a status of Pending.
-
-
Click Next.
-
(Info tab):
-
(required) Enter an Event name.
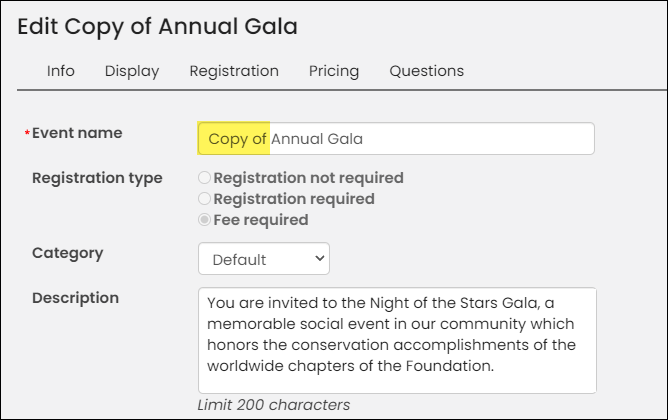
NoteWhen copying an event, "Copy of" is added to the beginning of the Event name. Be sure to delete "Copy of" and enter a new Event name.
-
Choose one of the following registration types:
- Registration not required – Users view the program for information purposes only.
- Registration required – Users see a Register button on the program page. When the user registers for a program, they become a member of the group of registrants.
- Fee required – Users see a Register button and will be charged a fee for the program or its program items. If you are planning to add Registration Options, you must select Fee required at this point.
-
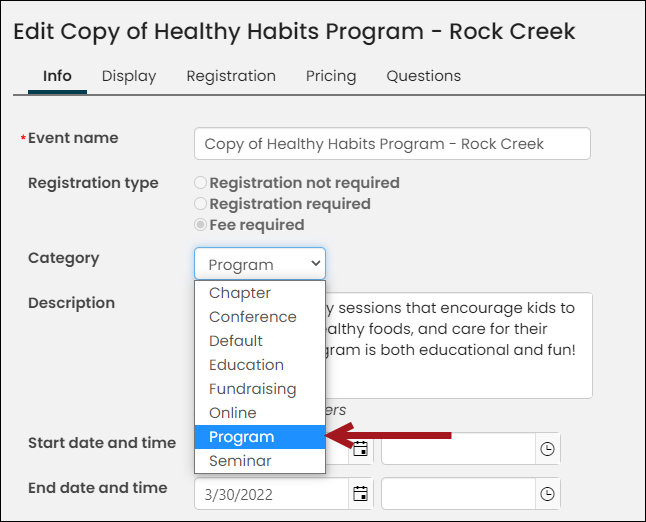
From the Category drop-down, select Program.
-
Select a Registration Type: A program item can only require a registration or a fee if the parent event required it.
-
Enter a Description of the event.
-
Specify the Start/End dates and times.
For charitable events, a Start date is required for receipting purposes. If an End date is not defined, the Start date will be used as both the Start and End dates. -
Specify the Event time zone. You can choose to not show this information by selecting the Hide time zone checkbox.
NoteThe event time zone is displayed in the event showcase if Hide time zone is not enabled and at least one Start date and time or End date and time time field has a value.
If a new event does not have an Event time zone defined, the event will use the system Time zone setting.
The Event time zone applies to the following for an event:
-
Show in search Beginning and Ending dates and times on the Display tab.
-
Registration opens and Registration closes times on the Registration tab.
-
(optional) Enter a Virtual meeting URL if the event is a virtual, such as Zoom or Microsoft Teams. A Join Meeting Now button appears on the event page 30 minutes before the start time for registered users and displays for the duration of the event.
If you are using Zoom specifically, the meeting's status and password will show under the Join Meeting Now button if you set up the Zoom API information under the Event Settings page. See Event settings for more information.
-
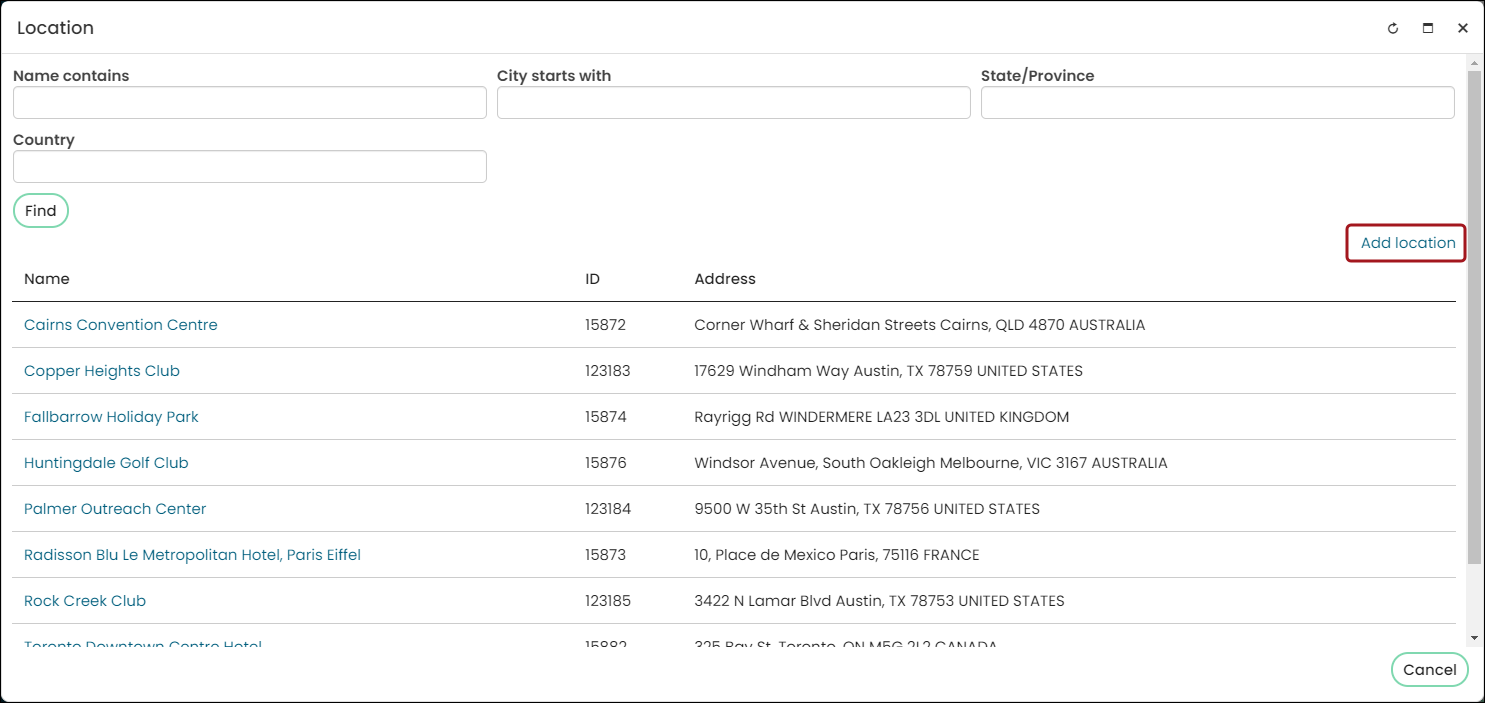
Select a Location. Choose or search for a previously used location, or select Add location.
 Note
NoteLocations can also be managed from Events Locations on the Staff site.
- Any location added from this window is automatically added to the Locations group.
- New queries added to the $/Events/DefaultSystem/Queries/Locations folder will display for selection.- Select event Tags by clicking the Modify link.
-
-
(Display tab) Display Information:
-
Select an image from the Image Selector, or upload a new one to the Document system. When an image is selected, a preview displays.
- Enter in the Image alt text field the text that will display when your image cannot be viewed.
-
Select a Default program sort to set the initial sort order of the event’s program items. You can choose Day, Category, Track, or View all. Website users can change the program items’ sort order when viewing the event.
-
Enable Display program item availability to non-staff registrants to display the program item’s availability. The Availability is only displayed if there is a Capacity defined for the program item.
-
Specify the Show in search Beginning and Ending dates and times. The time displayed for the date and time fields is determined by the Event time zone setting on the Info tab:
- If these fields are left blank, the event will display in search results and on the calendar for non-staff users to see.
- If the date range includes the current date, the event will display in search results and on the calendar for non-staff users to see.
- If the date range does not include the current date, only staff users will see the event in search results and on the calendar.
- When an event date is changed, each of the associated program items will need to be reconfigured as well.
-
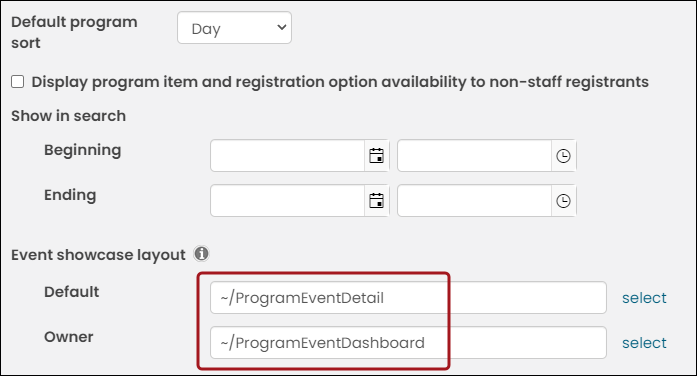
The Event Showcase Layout fields allow you to display separate event content records to public and Staff users. Select the content record to display for each view, or enter a shortcut. The default view for public users (Default) is the event Showcase (~/ProgramEventDetail), and the default view for Staff users (Owners) is the event Dashboard (~/ProgramEventDashboard). See Configuring system content for more information.
 Note
NoteThese shortcuts have the Event Display content item configured to use contacts who are in the selected user’s household and are members for Register Someone Else. They also use the Program Item Occurrences display to display both recurring and non-recurring program items in a calendar view.
NoteThese options will only be used when the event is reached through theEvent.aspx redirector.
- Additional information - Enter HTML text in the editing panel. There is no limit on size. See Understanding the toolbar icons for more information about how to use the Additional information HTML editor.
-
-
(Registration tab) Registration Information:
-
Enter a Capacity if you want to limit the number of registrations to accept.
-
In the Registration opens and Registration closes fields, enter the registration date and time range. The registration date and time range is based on the system Time zone setting.
NoteStaff users and system administrators can always register themselves and other contacts for the event, regardless of the date or time.
-
In the Registration closed message field, enter a message to display on the event Showcase page after the registration has closed to public users. The default message is Registration is closed.
-
Enable Allow registering others to allow users to Register Someone Else.
NoteThis only applies if Fee required is the selected Registration Type.
Click for details
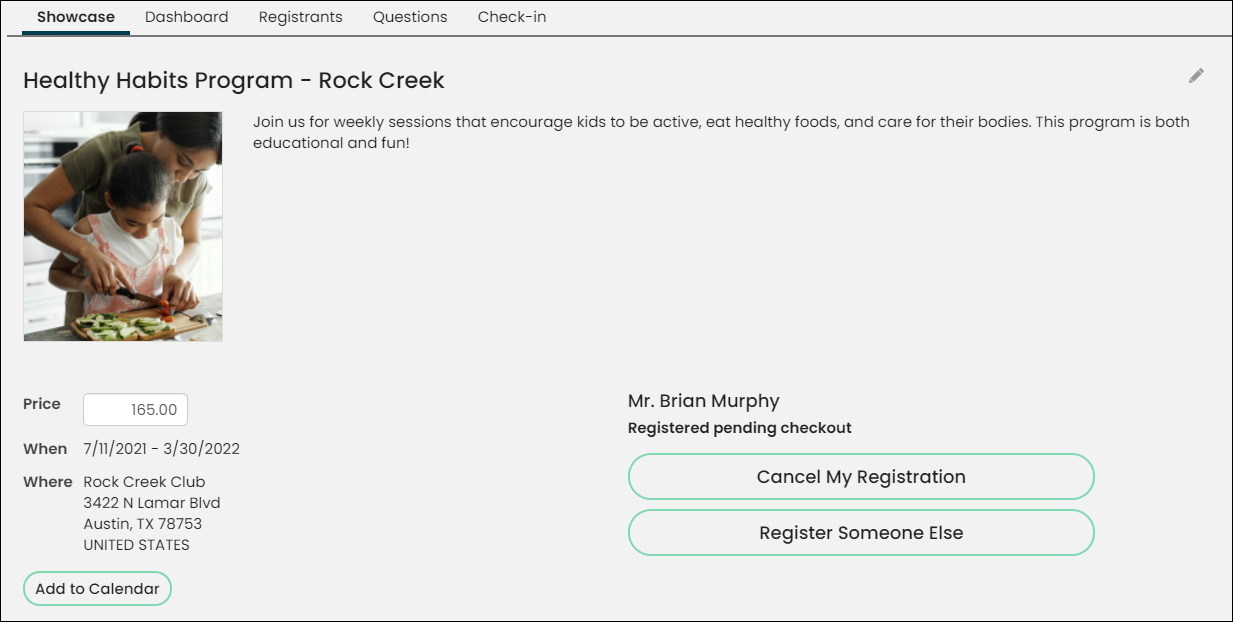
- When Registering Someone Else, Staff and authorized members are able to search for an existing contact to register, or add a new contact.
- The ability to add a new contact when Registering Someone Else is not configurable. If you select Allow registering others, staff and authorized members can always add a new contact.
- The user who pays for the registrant's event fees is listed as the Bill To party on those registrations. All accounting and invoice transactions are tracked under the Bill To ID.
-
-
Note
Make sure that the contacts available in your Register Someone Else query (configured in the Event Display content item) are also included in the Contact security query for All authenticated users. Otherwise, users who attempt to register someone else could receive an error if they do not have access to the contact they are trying to register.
- Enable time-based itinerary conflicts in program items by default - When enabled, all new program items for the event will have the option Enable time-based itinerary conflicts selected by default. When registrants register for program items containing conflicting time schedules, they will be alerted. The warning will appear in the event registration window and again in the cart.
- Allow non-staff registrants to complete registration with conflicts in their itinerary - When enabled, registrants are allowed to checkout of the cart even when itinerary conflicts are present. If this option is not enabled, registrants will not be able to checkout until the conflict is resolved.
-
(Pricing tab) Define event pricing. This tab is enabled when Fee required is chosen on the Info tab.
-
(Questions tab) Add all relevant questions for the event. This tab is enabled when Registration required is selected on the Info tab.
-
Click Save & Exit.
NoteYou can also create a program to have recurring sessions. A calendar and list of recurring sessions can be shown on the event page by using the Program Item Occurrences Display content item instead of the Event Program Display content item. See Creating recurring sessions for events for more information.
Finding programs in the Club staff site
To find an already existing program in the Club Staff site, go to Programs > Find. Only programs categorized as Programs and a location matching the currently selected club will appear.
NoteYou can customize the Programs > Find area of the Club Staff site by copying the content and making your changes in the copy, pointing the ClubFindPrograms shortcut to your new copy, and publishing the Programs > Find navigation item.
Registering for programs
Use On behalf of to view individuals' programs and register them for programs. If the program is available on a public website, public users can register themselves or others.
If a staff user has specified a time range that the program is open for registration, potential program attendees can only register for the program if the current date falls within the date range. Staff users and System Administrators can always register themselves and other individuals for the program at any time.
Do the following to register for a program:
- Select Program > Find or Search for the program.
- Select the program. You automatically arrive on the Showcase page.
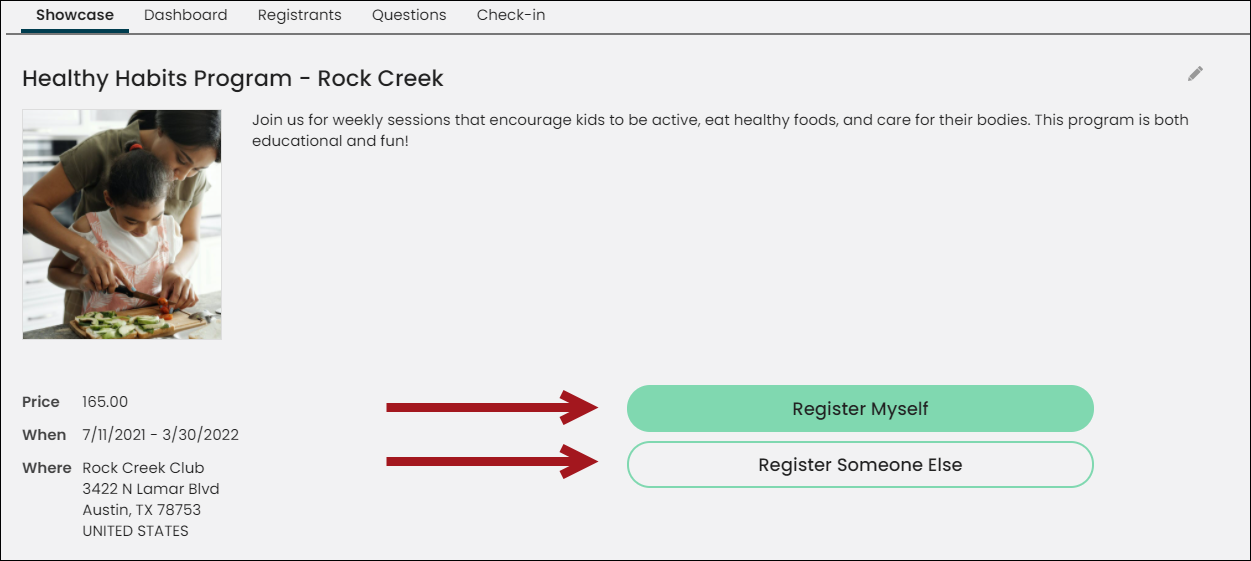
- Click Register Myself or Register Someone Else if you would also like to register On behalf of someone else.
Note
If Register Someone Else is available for the program, the contacts who can be registered using this button depend on the configuration of the Event Display content. By default, the ~/ProgramEventDetail and ~/ProgramEventDashboard shortcuts used to display a program allow members who belong to the same household as the On Behalf Of contact or public user to be registered using Register Someone Else. This can be customized by using your own custom content to display the event, and changing the configuration of the Event Display content item to use a different IQA query for Register Someone Else.
📘 Note
If no registration button appears, then registration is currently disabled because of the registration time range. When a registration period is defined, notification messages display. The messages inform the user when a registration period begins or ends.
- Answer any questions that appear below your registration status and click Save Responses.
- If the program has registration options, select one for the registrant.
Note
If items in the itinerary are no longer available based on the selected registration option, they are removed from the itinerary. A message is displayed indicating which items have been removed. Hidden program items are not included in the displayed message.
📘 NoteIf a registration is removed from the cart, the selected program items are still in the itinerary. They can be removed on the program page.
- Select the program items the registrant will attend.
- The Cart will contain your registration checkout details.
- After you have completed a registration for yourself or someone else, you can return to the program and view registration details.
For more information, see Registering for events.
Updated 5 months ago