

Creating a wizard for membership joins
A wizard simplifies the membership-join process and allows the new member to focus on only the information presented to them on each tab. This step-by-step process ensures that all of the necessary information is presented to the new member while they are selecting their membership preferences.
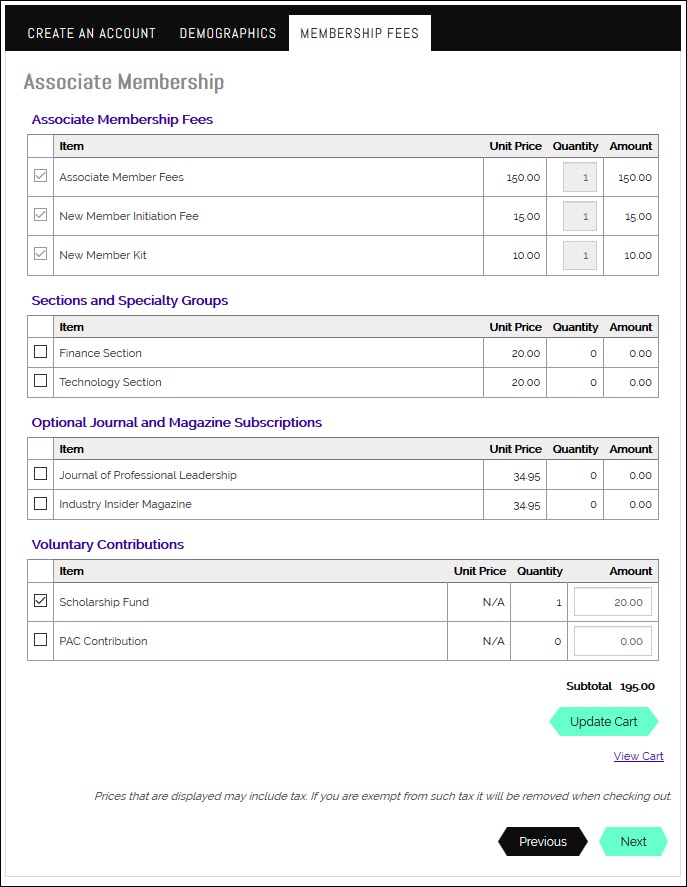
Before creating a wizard for membership joins, you must already have membership products and groups defined. See Setting up Join Now for more information.
Step 1: Create the content to display in each tab
Each tab in the wizard is a content record, so you must create the content records that will display in the tabs before you create the wizard.
For this example each tab will display the following content:
- Tab 1: Create an account - It is recommended that the first tab in a membership-join wizard is a Create an account tab. This tab is recommended because a person must have an account before they can join as a member.
- Tab 2: Demographics - This tab enables the contact to fill out some basic demographic information that appears on their profile page.
- Tab 3: Membership fees - This tab is required in all membership wizards. This is where the contact defines the specifics of their membership and adds the membership to their cart.
Tab 1: Create an account
It is recommended that the first content record in the wizard contains a Contact Account Creator content item.
Do the following to create the Create an account content record:
- From the Staff site, go to RiSE > Page Builder > Manage content.
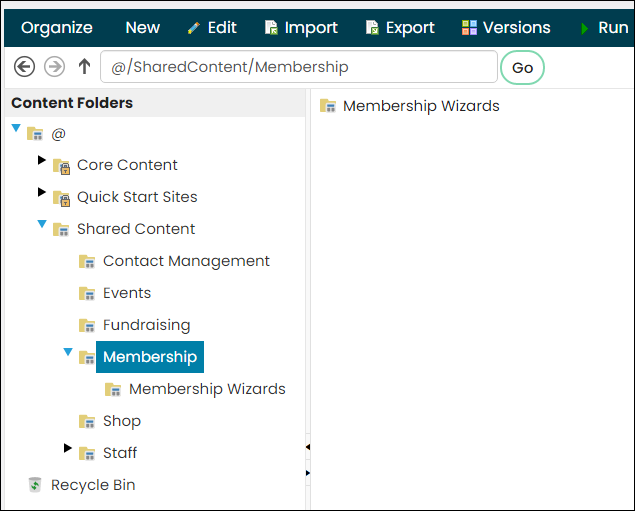
- From the Shared Content folder, create a new folder for the wizard's content. In this example, the folder is called Membership Wizards.
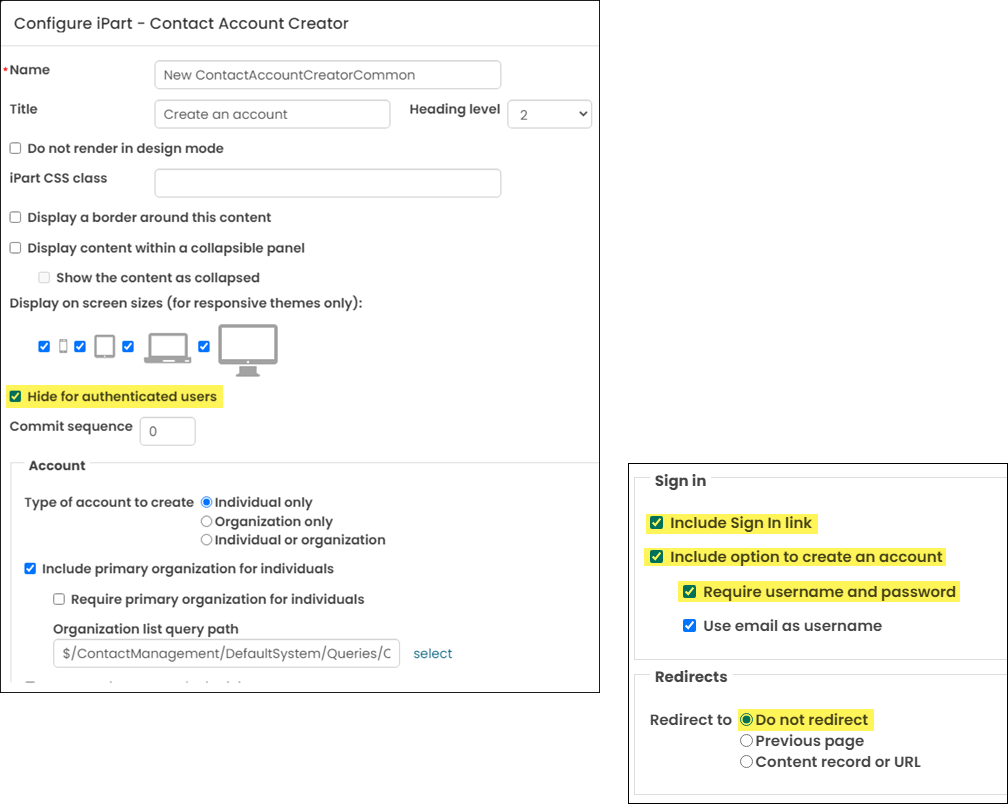
- From this folder, create a new content record (New > Website Content), and add the Contact Account Creator content item to the page. Make sure the following options are enabled on the content item:
- Hide for authenticated users
- Include option to create an account
- Include Sign In link
- Require username and password
- Set the Redirect to option to Do not redirect
- Click OK.
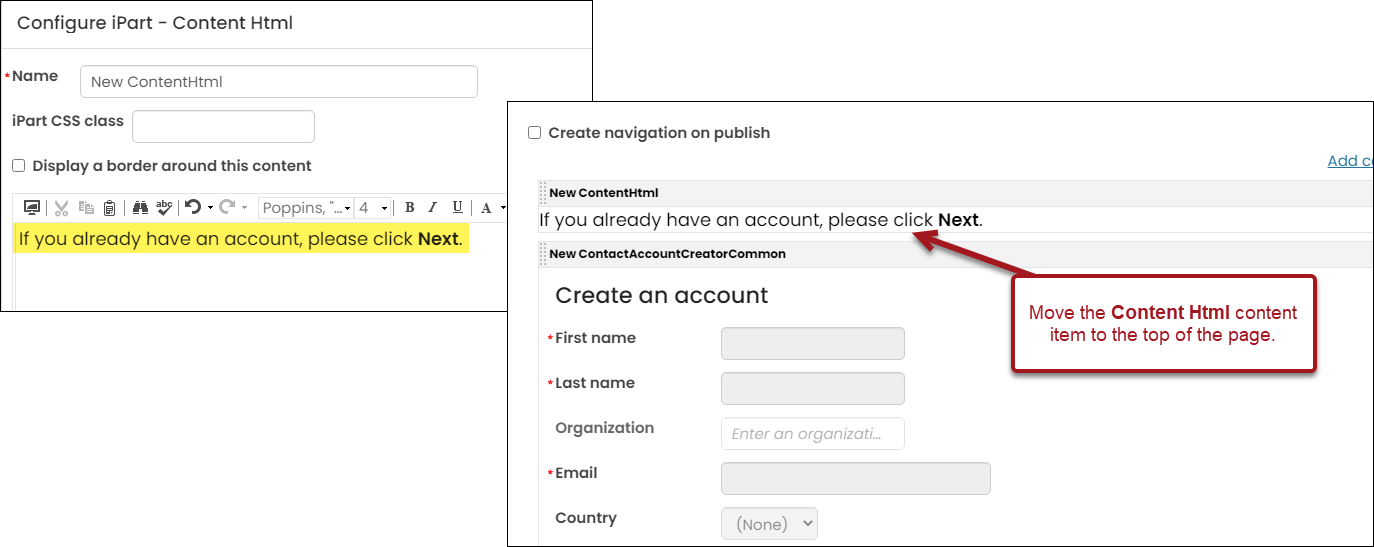
- Add a Content Html content item to the page that tells the users to click "Next" in the wizard if they are already logged in. Make sure to move the content item to the top of the page.
- Save & Publish the content record.
Tab 2: Demographic information
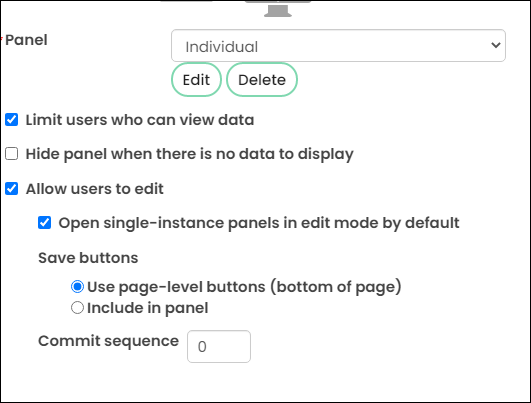
The next tab in the panel is up to your organization's needs, for example, a panel that collects demographic information about a member. If you want to use a panel that members are able to add information to, make sure the panel has the following options enabled:
- Allow users to edit
- Open single-instance panels in edit mode by default
- Use page-level buttons (bottom of page)
📘 Note
It is important to have this option enabled if you have required fields in the panel. The user can skip required fields if Open single-instance panels in edit mode by default is not enabled.
Tab 3: Membership fees
The membership fees are required in this wizard. This tab is where the contact defines and tailors their membership.
📘 Note
Membership fees must be configured before creating the wizard. See Setting up Join Now for more information.
For this step, create a new content record in the Membership Wizard folder with a Title of Join Now, then add the General Product Display content item to the page. Be sure to Save & Publish the content record.
Step 2: Create the wizard
Do the following to create the membership wizard:
- From the Membership Wizards folder, create a new content record with a Title of Wizard.
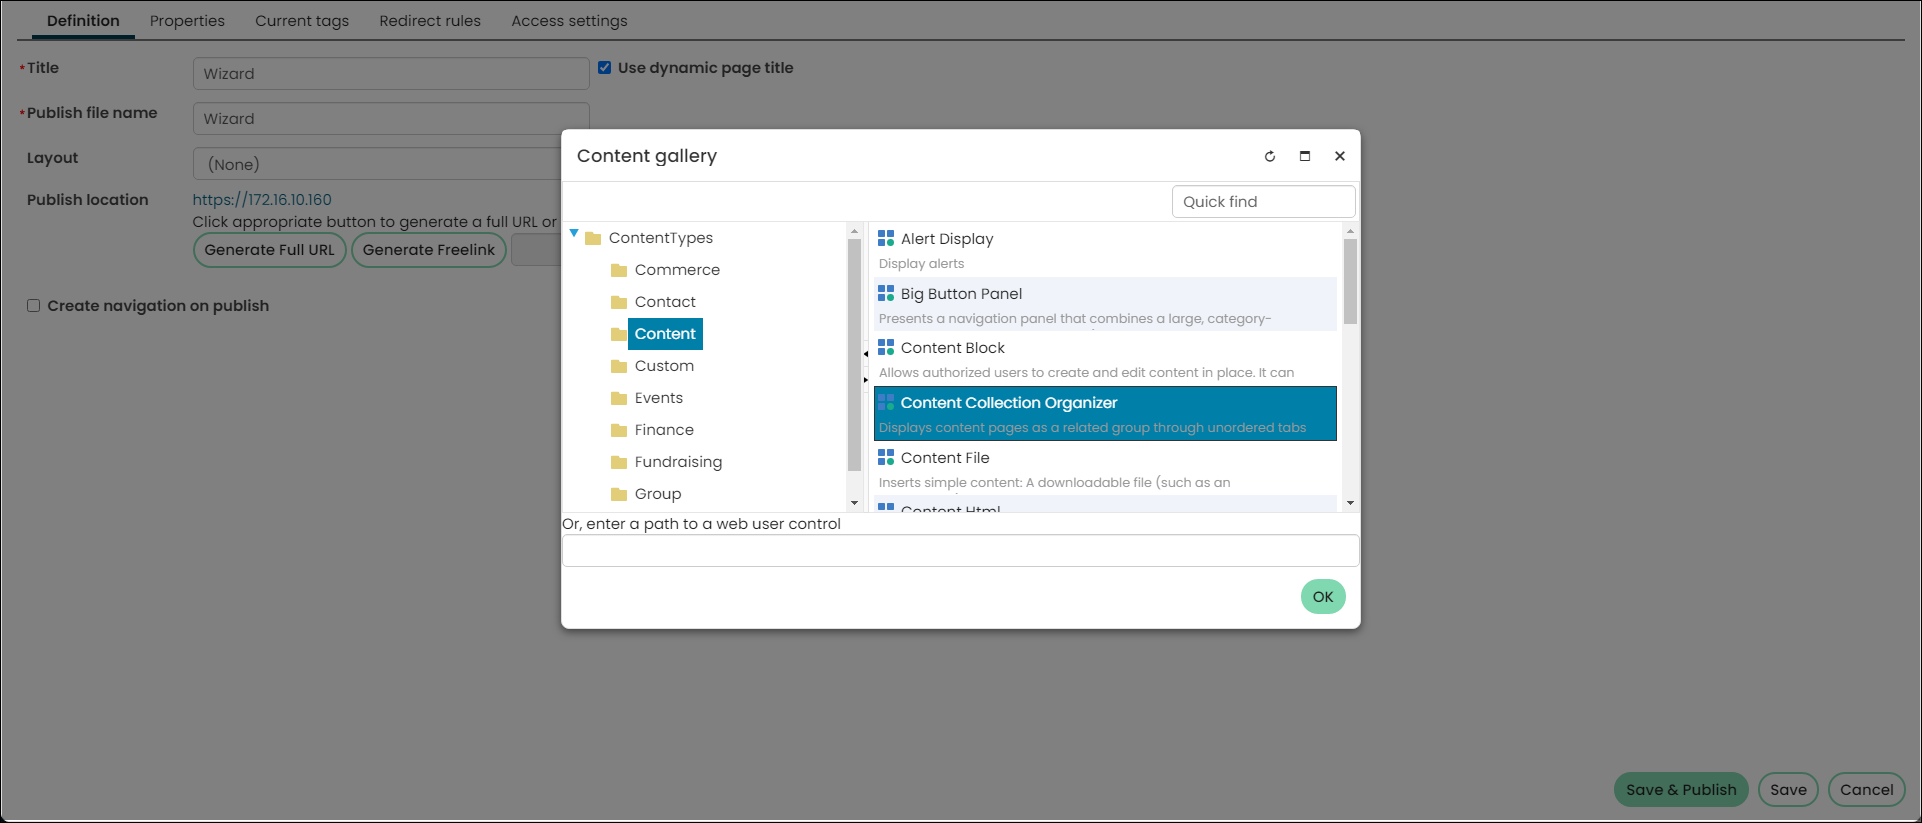
- Add the Content Collection Organization content item to the page.
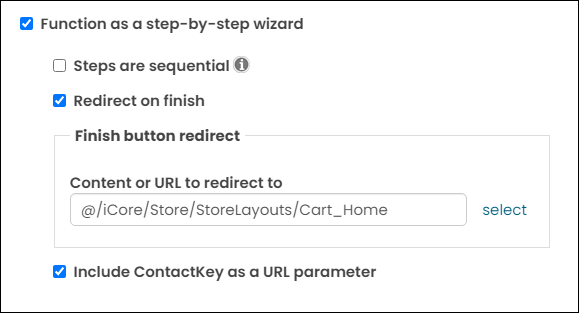
- Enable Function as a step-by-step wizard:
- Enable Redirect on finish. In the Content or URL to redirect to field, enter the following path: @/iCore/Store/StoreLayouts/Cart_Home
- Enable Include ContactKey as a URL parameter.
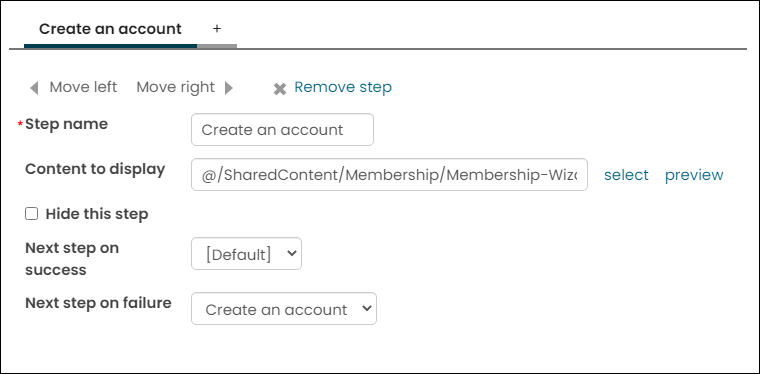
- Create the Create an account step:
- In the Step name field, enter Create an account.
- From the Content to display field, select the Create Account content record (@/SharedContent/Membership/Membership-Wizards).
- Add a second tab, then add the information for your Demographics step.
- Add a third tab, then add the information for your Membership Fees step.
- Click OK, then click Save & Publish.
Step 3: Create a Membership Options page
In this example, all of the membership options appear on one page. Contacts are able to view all available membership options, click their preferred membership, then walk through the wizard.
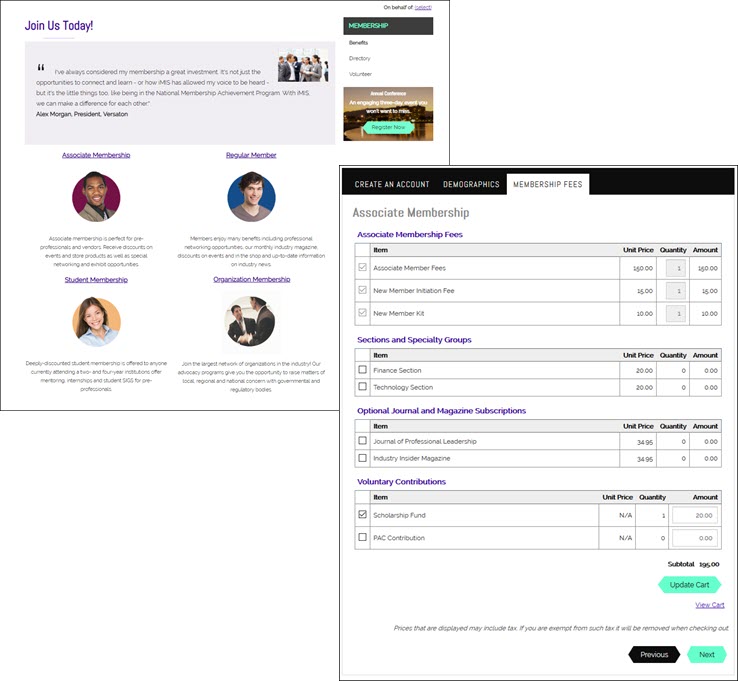
There are many different ways you could configure your membership options page. This example teaches you how to configure a membership options page using links in the Content Html content item. Do the following to configure your membership options page:
- Navigate to the Membership Wizard folder you created in Step 1.
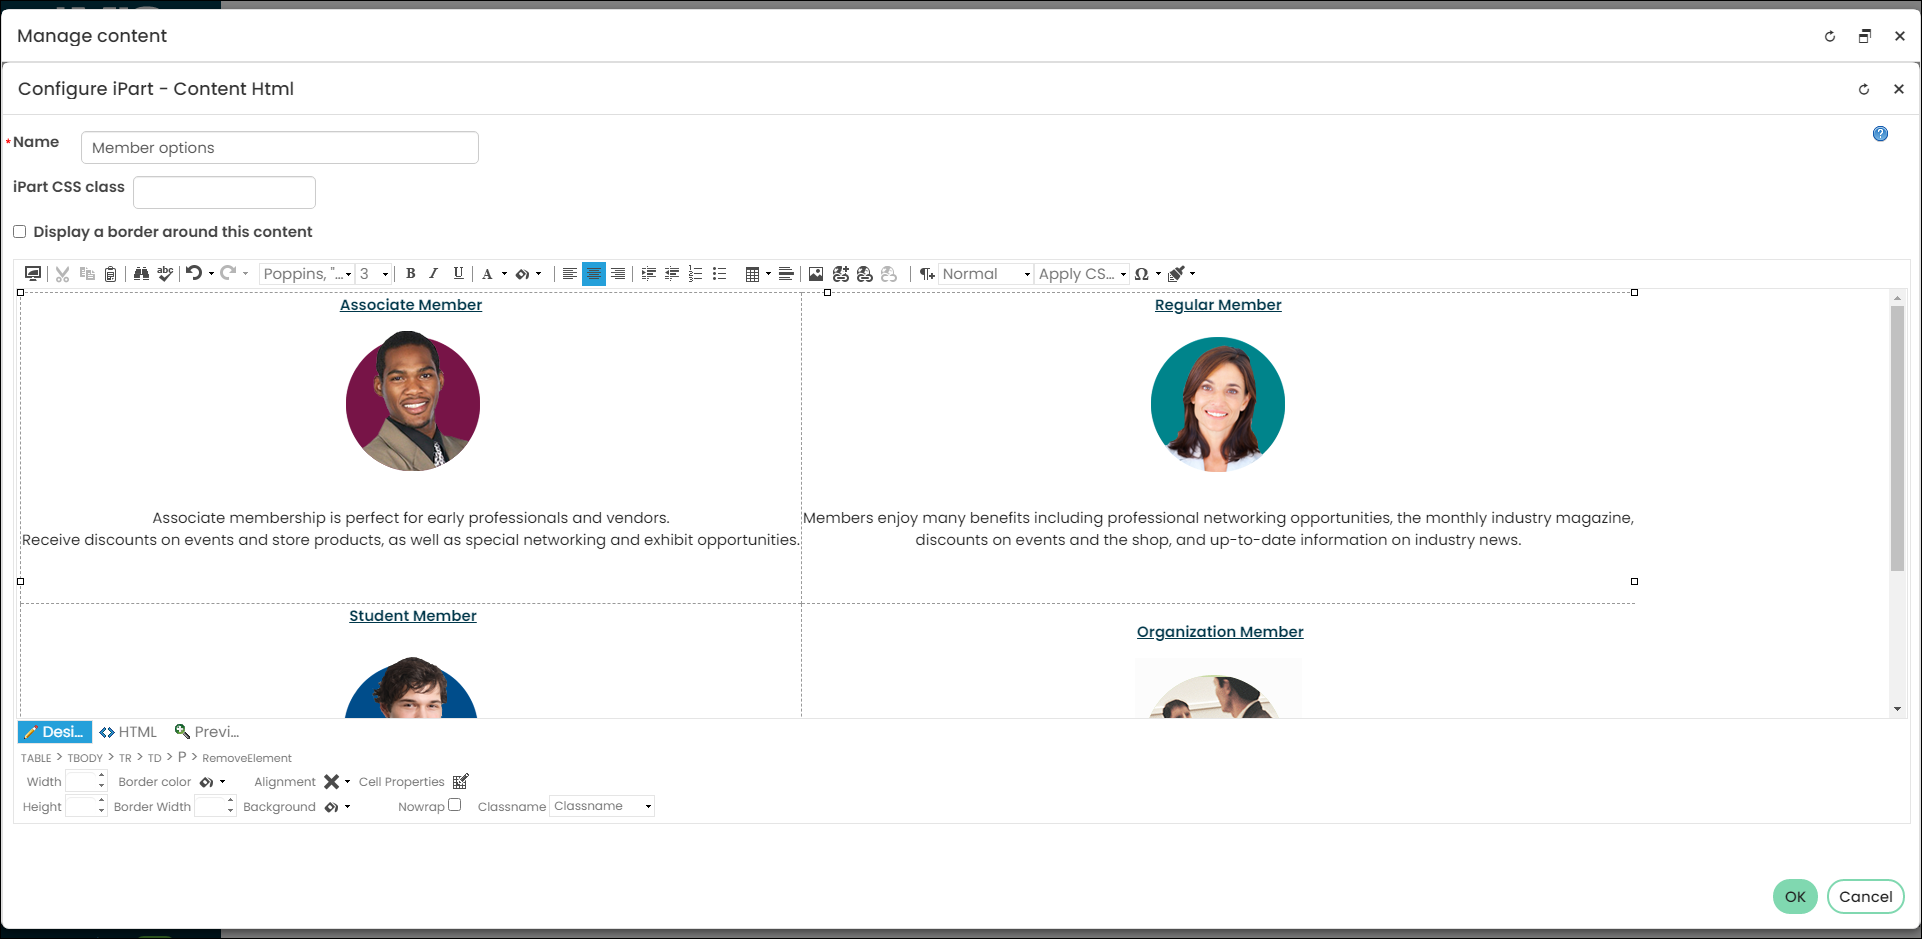
- Create a new content record with a Title of Membership Options, then add the Content Html content item to the page.
- Enter the name of each of your membership options.
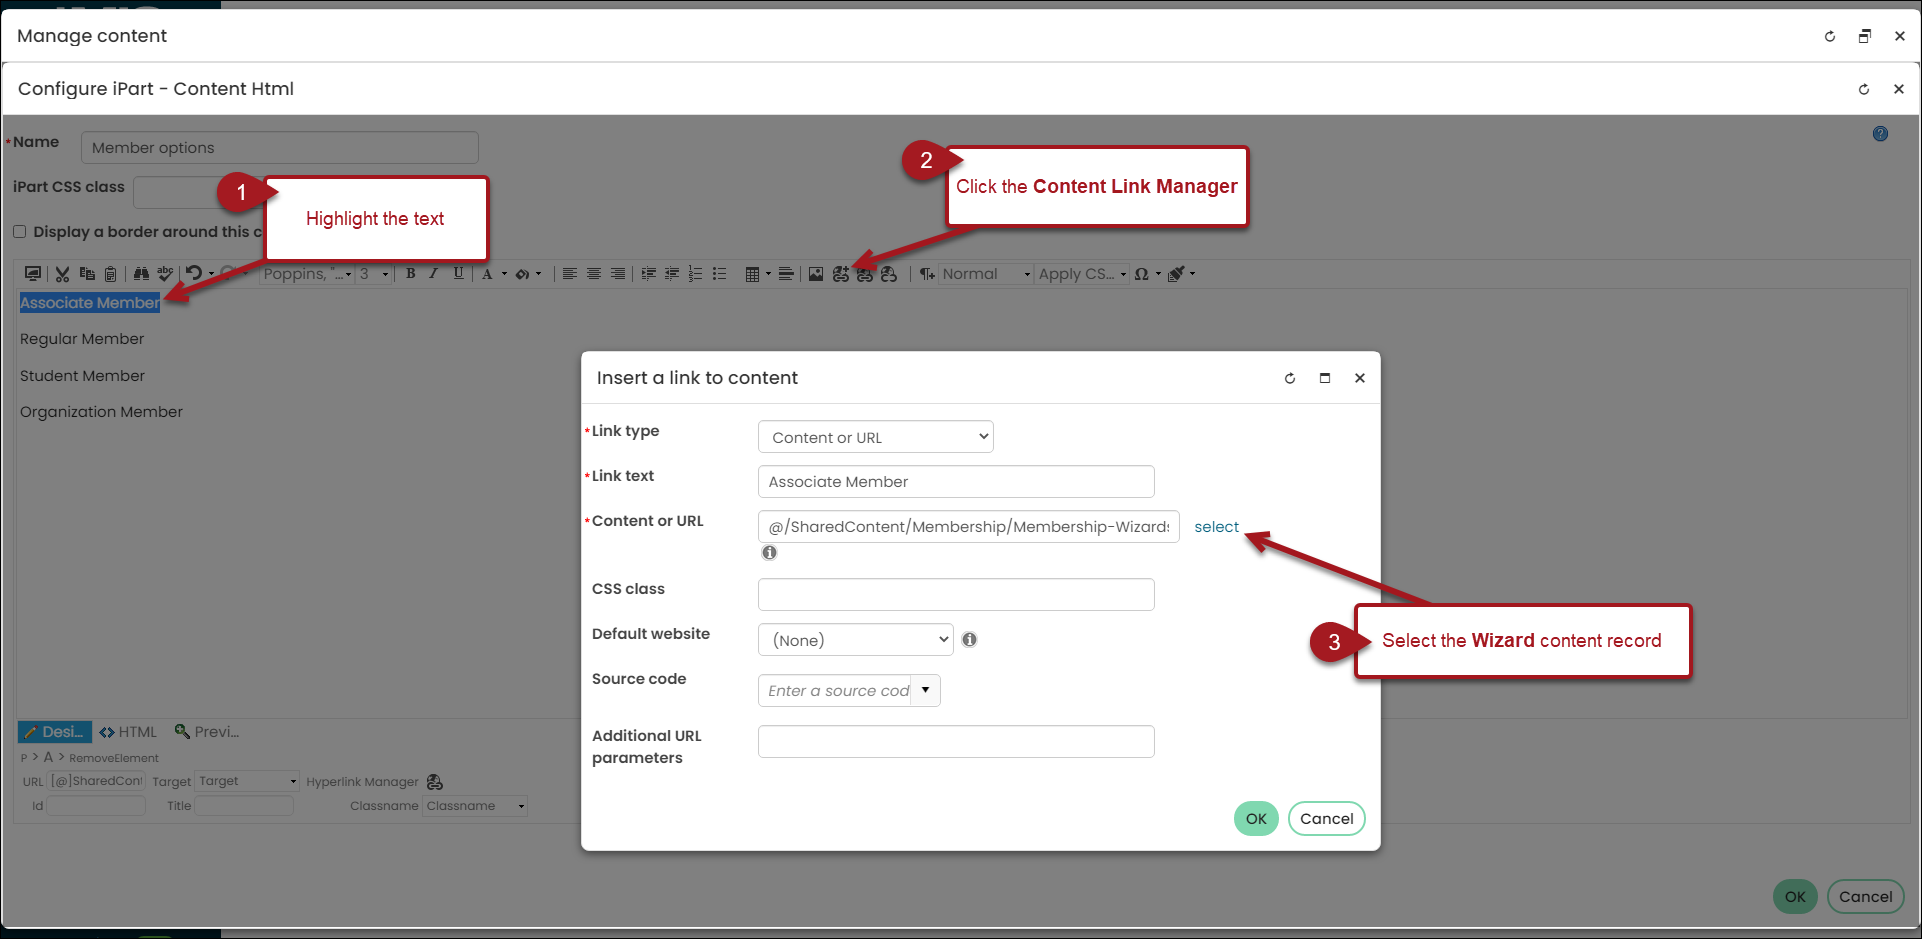
- Link each of the membership options to the Wizard page you created in step 2:
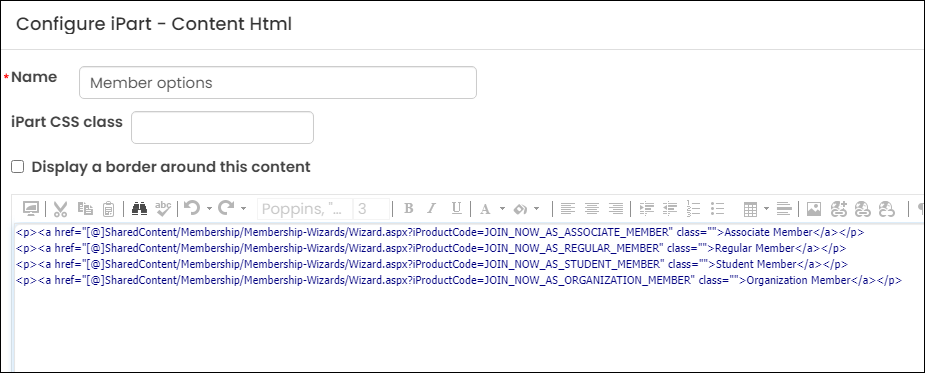
- Click the HTML icon toward the bottom of the Content Html content item.
- Locate the links you just created. The links will look similar to the following:
<a href="[@]SharedContent/Membership/Membership-Wizard/Wizard.aspx">
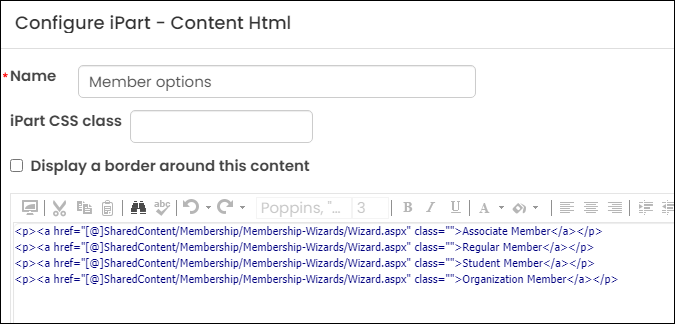
- At the end of each link (directly after aspx), add the membership option's Item code in the following format:
- Continue adding the Item code to each product's link.
- Click OK.
- (optional) Configure the Membership Options page to contain information about your membership options, and add any other styling options you see fit.
- Click Save & Publish.
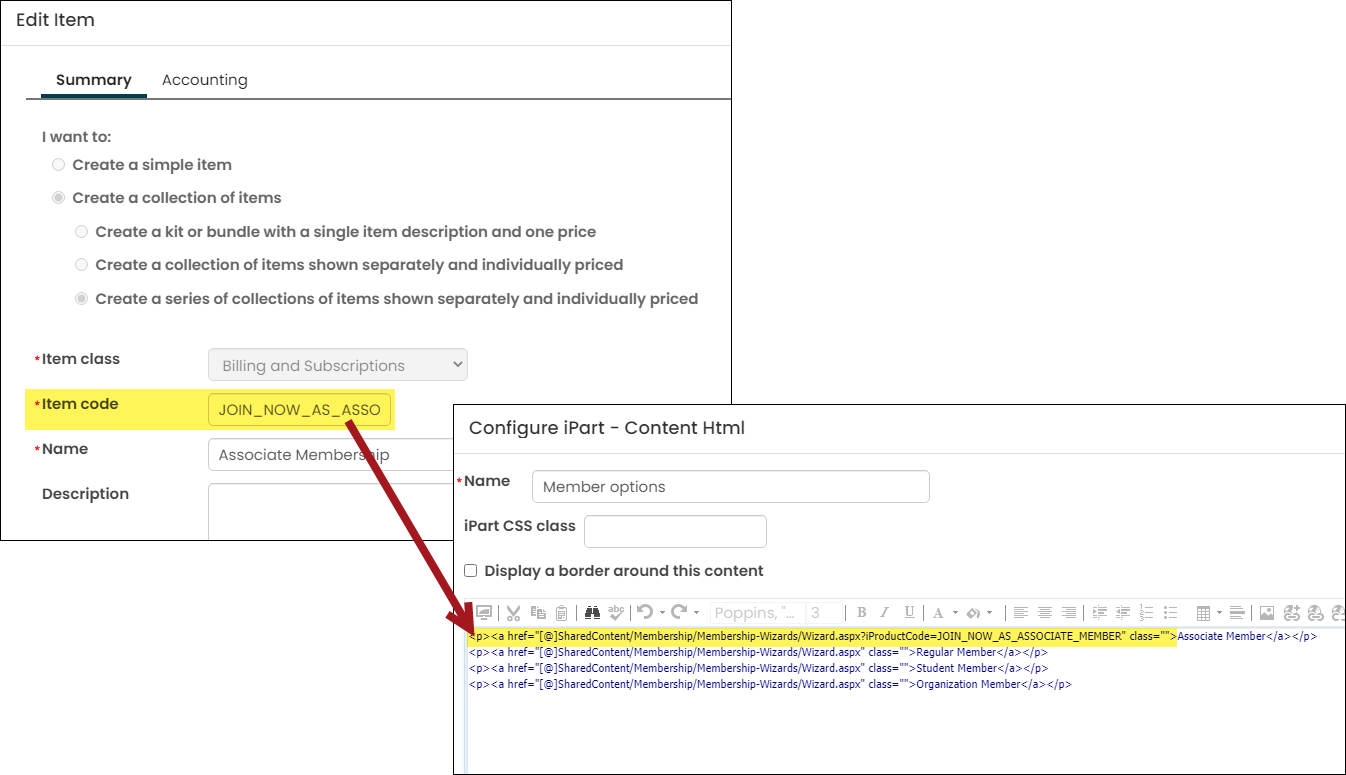
<a href="[@]SharedContent/Membership/Wizard.aspx?iProductCode=JOIN_NOW_AS_ASSOCIATE_MEMBER">
📘 Note
To find a product's Item code, go to Commerce > Find products. Search for the product and open it for edit.
Step 4: Add the page to the sitemap
The last step is to add the Membership Options page to your sitemap:
- From the Staff site, go to RiSE > Site Builder > Manage sitemaps.
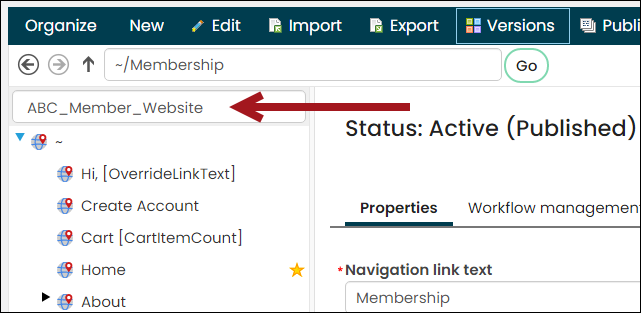
- Select your member site from the drop-down.
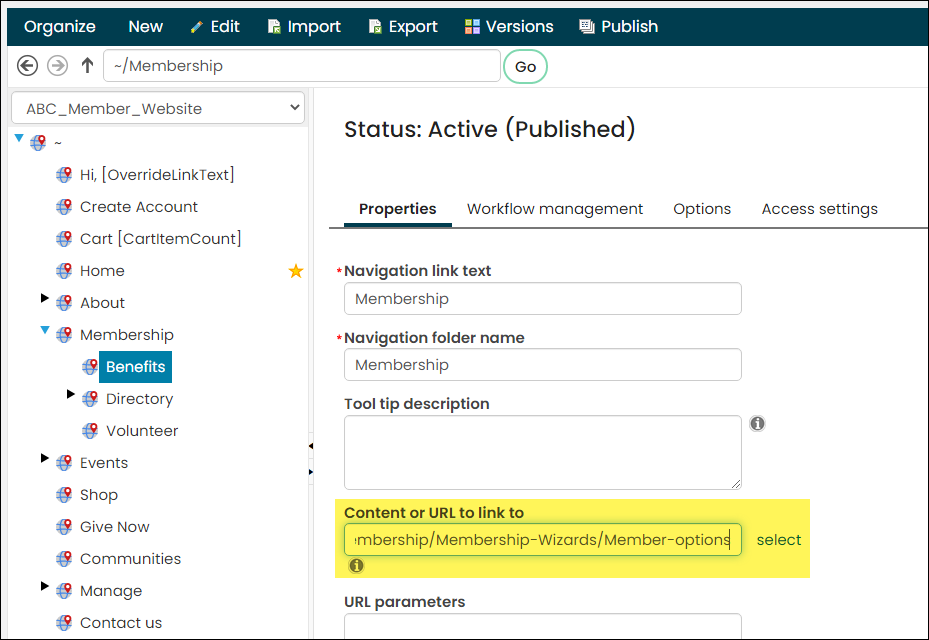
- Add a new website navigation item, or update an existing navigation item.
- From the Content or URL to link to field, select the Membership Options page you created in Step 3.
- Click Save, then click Publish.
Updated 5 months ago