

Setting primary organization
Contacts can hold memberships in multiple organizations. For example, a person could be a volunteer for Central Hospital, a member of the National Systems Foundation, and an employee of Versaton US. You can designate which is the primary organization that is to be used in a number of places by default, such as on event badges and reports.
Adding a contact to an organization
Add a contact to an organization from the contact's or organization's account page.
Adding a contact to an organization from the contact account page
Contacts can add themselves to an organization from their account page or a staff user could do it for them
Instruct the contact to add themselves to an organization through the following steps:
- Navigate to your account page.
- Select the edit icon next to your name.
- From the Primary organization field, search for the organization.
- Click Save & Close.
Staff user adding the contact to the organization
📘 Note
Administrators cannot add contacts to an organization using this method and must add a contact from the organization account page.
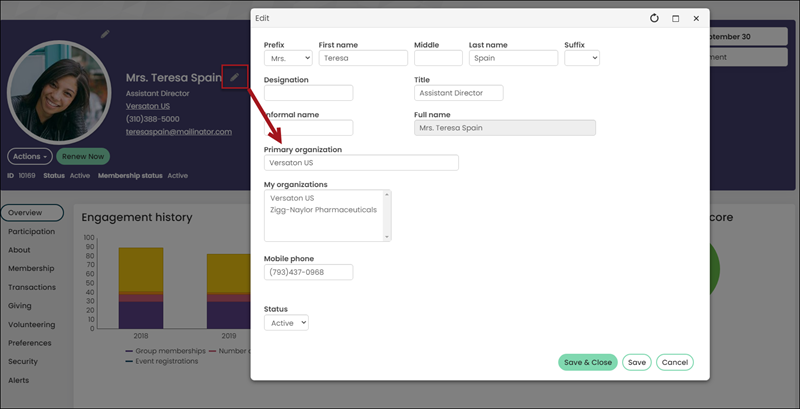
Do the following to add a contact to an organization from the contact's account page:
- As a staff user, navigate to the contact's account page.
- Next to the contact's name, select the edit icon.
- From the Primary organization field, do one of the following:
- If the organization already has a contact record, you can begin typing the organization name in the Primary organization field and then select the organization name from the drop-down.
- If the organization has a contact record but the person is not in the organization’s roster, find the organization in the drop-down. This will create a default membership (default role and current date), and mark that organization as the person’s primary organization.
- If the organization does not have a contact record, create the organization record first, then return to the contact's account page to add the Primary organization. If adding a contact record for the organization is not desired, you can simply type the name of the organization into the Primary organization field.
- Click Save & Close.
Since a person can be a member of several organizations, changing or removing the primary organization here does not remove them from the organization's roster. You can remove people directly from the organization's page.
📘 Note
To clear out an existing name or filter, delete all of the characters in Primary organization.
Adding a contact to an organization from the organization account page
📘 Note
Administrators can only add contacts to an organization using this method.
Do the following to add a contact to an organization from the organization account page:
- As an administrator or staff user, navigate to the organization's account page.
- Click the Contacts tab.
- Select Add contact.
- (Staff users only) Search for the contact or add a new contact, then click Save.
- (Administrators only) Add a new contact using the available fields, then click Save.
📘 Note
As a security precaution, administrators cannot search for contacts. This ensures they do not have access to all contact records in iMIS, including those they should not have access to. When an administrator is adding a new contact, no duplicate checking is performed, so the method above may cause duplicate contact account pages to be created. To avoid duplicate records, have the contact add themselves to the organization from their account page.
Changing the displayed Primary organization name
Staff users can change the displayed Primary organization for a contact without altering the contact's Primary organization ID. Contacts will continue to be a member of their primary organization but display a different organization name on their record.
Public users can change the company name for their record or other records for which they have edit permissions if the option Allow all users to link to an organization is selected (Settings > Contacts > General).
To change the way an organization's name is displayed on a contact's record, do the following:
- Navigate to a contact's account page.
- Edit the Contact Mini Profile.
- In the Organization display name field, enter the desired organization name to be displayed for the contact.
- Click Save & Close.
Changing organization membership information
To change a member's role or dates, do the following:
- Navigate to the organization profile page.
- Click the Contacts tab.
- Locate the member you would like to edit, then select their current role.
- From the Group member detail window, you can edit the Role and Begin or End dates.
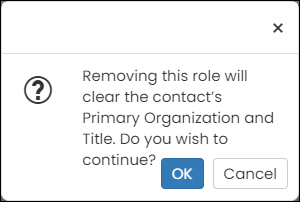
Removing a contact from an organization also removes their defined Title. The following confirmation message displays. For more information on how to remove a primary organization from a contact’s account page, please see Changing the displayed Primary organization name.
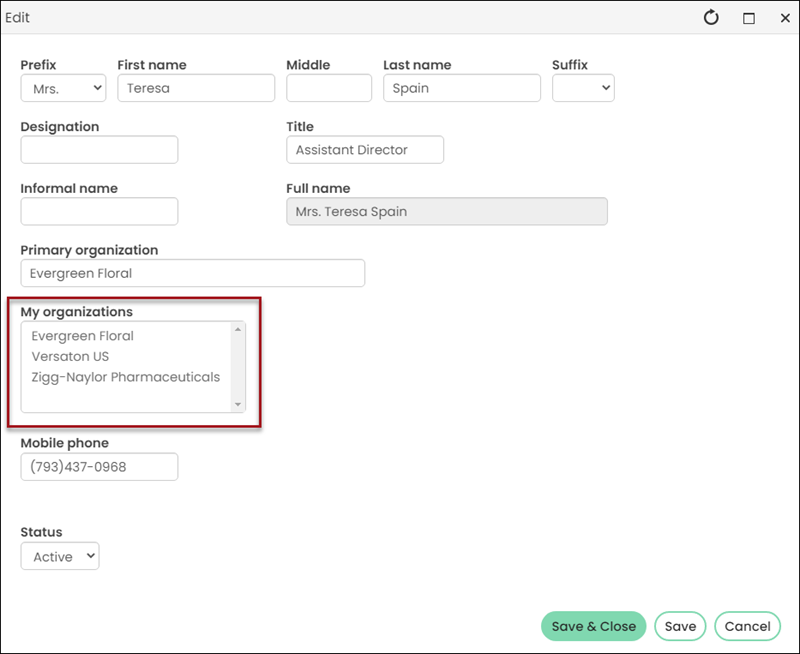
The My organizations list includes any organizations which the contact is a member of, whether an Active or an Inactive member. Removing the contact from the roster will remove the organization from the My organizations area.
📘 Note
Creating and editing memberships does not set the Primary Organization.
Updated 3 months ago