

Setting up tax information
You have the power to set up tax schedules, categories, exemptions, and authorities to best meet your specific requirements.
The process to set up taxation for your commerce system includes:
- Set up tax schedules
- Set up tax categories
- Set up tax authorities and define the tax rate for each tax category
- Set up tax exemption reasons
- Set up the invoice report
Setting up tax schedules
A tax schedule consists of all tax authorities that apply to particular situation (such as the purchaser, the location, the item class, or the individual item) and the order in which taxes are calculated when more than one tax applies.
- Select Settings > Finance > Taxes.
- Edit an existing schedule or click Add new item for a new one.
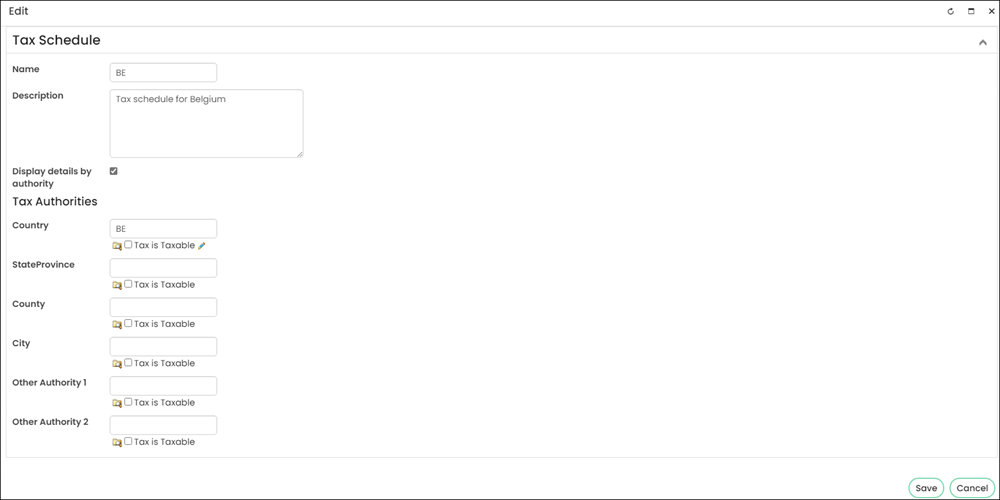
- Enter the Name, Description, and Authorities for the schedule.
- Click Save.
Each order line selects a tax schedule for use with the following logic:
- Use the product's tax schedule, if present.
- Else, use the product class's schedule, if present.
- Else, use a schedule that matches the ship-to address for the order: CountryCode_StateProvince_City. For example, if you are trying to ship to Austin, Texas, then iMIS will try to match your address with a tax schedule named US_TX_Austin.
- Else, use a schedule that matches the ship-to address for the order: CountryCode_StateProvince.
- Else, use a schedule that matches the ship-to address for the order: CountryCode.
Setting up tax categories
A tax category is a general collection of items that have common taxation rules. For example, certain items are taxable, others non-taxable, and taxes on shipping and handling charges vary.
- Select Settings > Finance > Taxes.
- Select the Categories tab.
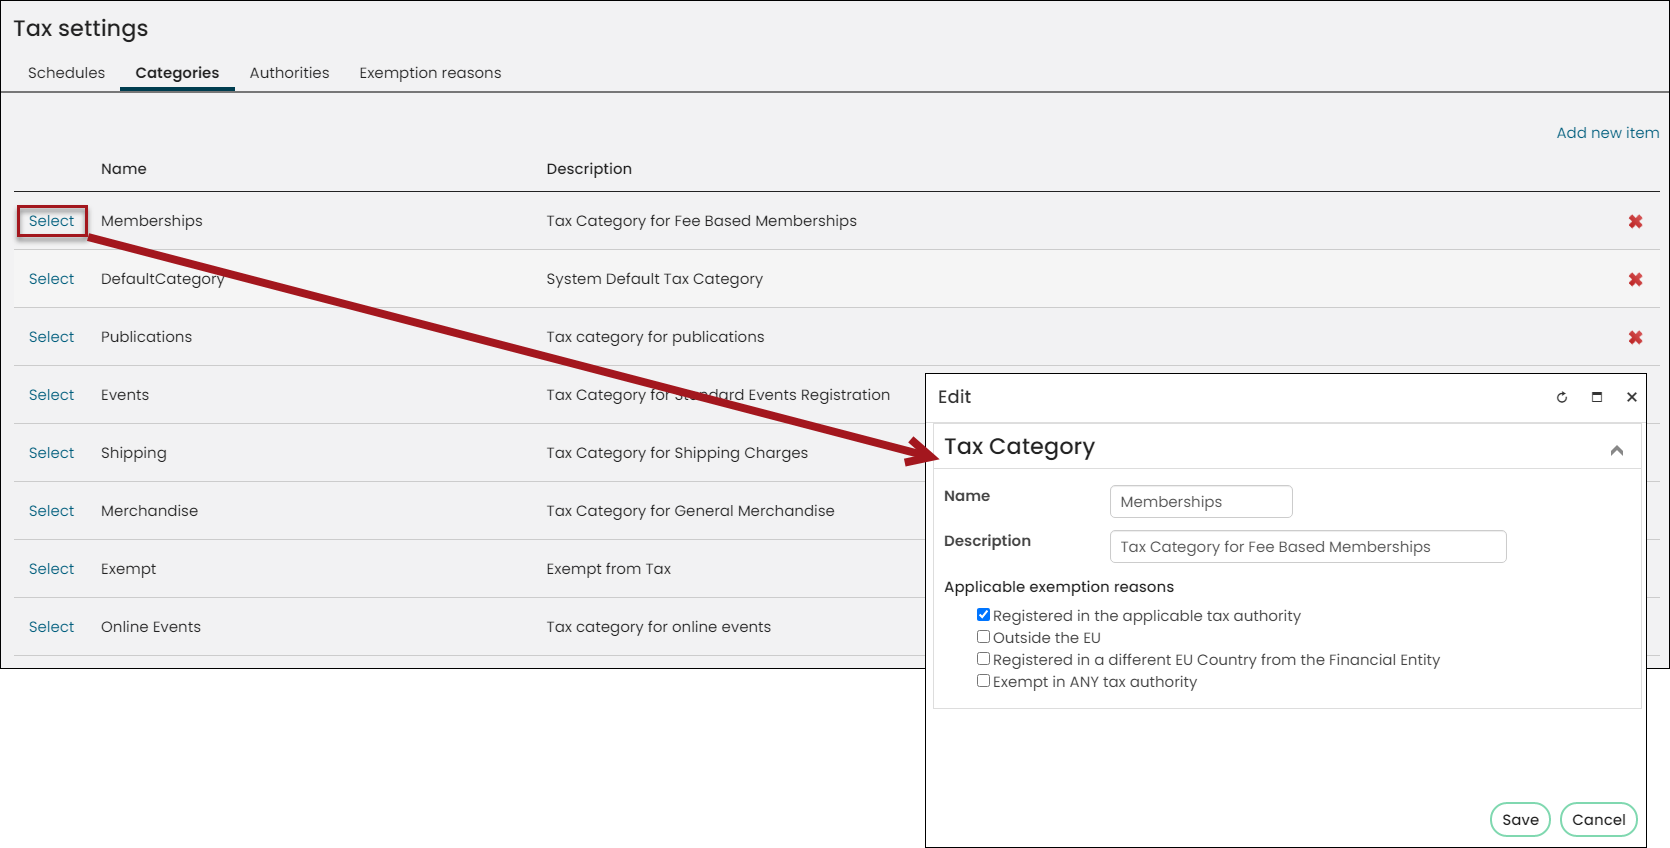
- Edit an existing category or click add for a new one.
- Enter the Name and Description for this category.
- (optional) Select any of the Applicable exemption reasons.
- Click Save.
📘 Note
Exemption reasons are defined when setting up tax exemption reasons. Only the exemptions reasons that have been previously defined will display as an option. See Setting up tax exemption reasons for more information.
Setting up tax authorities
A tax authority is a geographical area to which a set of specific taxing rules apply.
- Select Settings > Finance > Taxes.
- Select the Authorities tab.
- Edit an existing authority or click add for a new one.
- (Define tab) Define the following:
- Enter the Name and Description for this tax authority.
- Select the Level at which to apply this tax.
- (optional) Select the EU Country to be associated with this tax authority.
- (optional) Enter the Authority Code. This is the abbreviation you want to assign to the tax category, such as a state or province abbreviation.
📘 Note
Any value you enter in the Authority Code field will be displayed in the cart as part of a tax-included statement. For example, if you enter GST in the Authority Code field, then if you purchase a product for which the GST is included, a message similar to the following is displayed in the cart:(includes 0.85 GST)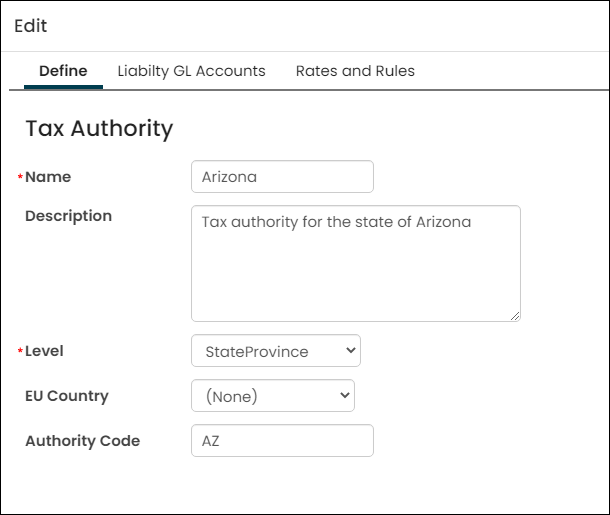
- (Liability GL Accounts tab) Define the following:
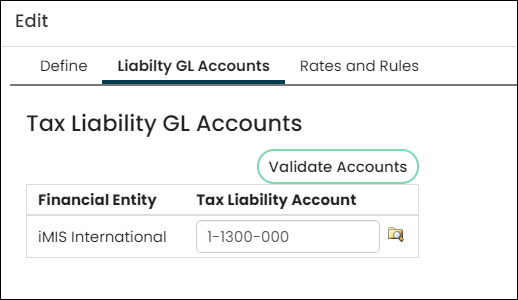
- Select the Tax Liability Account you would like to associate with your Financial Entity. See Financial entity for more information.
- Select Validate Accounts for the system to verify that the selected GL account entered exists on the GL Accounts table.
- (Rates and Rules tab) Define the following:
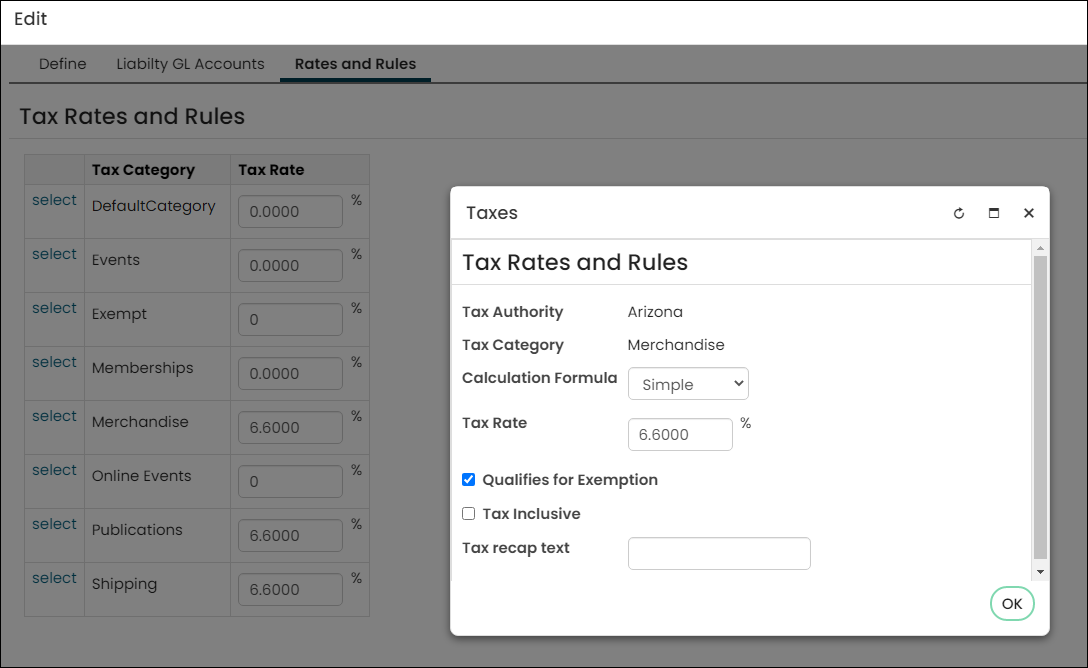
- Click select to edit the Tax Rates and Rules of each Tax Category.
- Select either Simple or Advanced for the Calculation Formula.
- Define the Tax Rate. Make sure to enter the rate as a percentage and not as a decimal.
- (optional) Enable Qualifies for Exemption.
- (optional) Enable Tax Inclusive.
- (optional) Enter theTax recap text that displays on the Invoice Tax Recap. The text is restricted to a maximum of 100 characters.
- Click Save.
Setting up tax exemption reasons
Staff members can enter tax exemptions both globally or on behalf of contacts who cannot grant themselves exemptions. It is exemptions on Bill To contacts that affect the calculation of sales tax.
Global
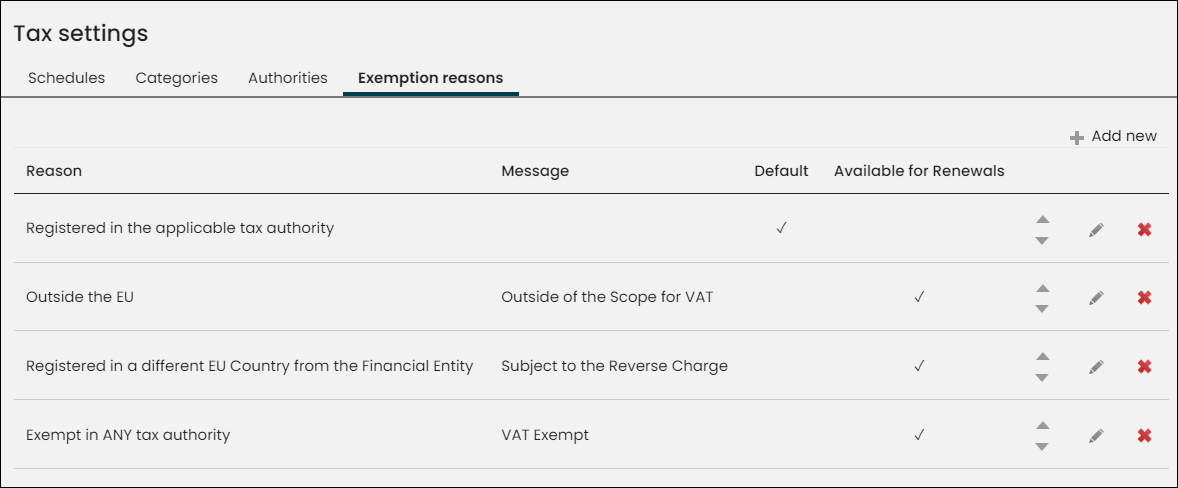
To enter a global exemption, go to the Staff site and select Settings > Finances > Taxes. Select the Exemption Reasons tab.
When you add a new reason or edit an existing reason:
- Select Add New and choose from one of the six reasons provided in the Reason drop-down:
- Registered in the applicable tax authority: For customers that are registered to collect taxes within the primary tax authority and are exempted from paying taxes on purchases made within that tax authority’s region. This reason is for a common scenario when sales are made to an organization that is registered to resell goods (for example, issued a Resale Certificate) within the taxing authority and are exempt from being charged tax.
- In a different country from the Financial Entity: Applies when the transaction scenario is such that only customers whose location is within the same country as that of the financial entity should be charged tax. Although it is common to not create tax schedules for taxing authorities for which no tax should be collected (for example, no tax authorities or schedules would be defined for taxing authorities in a different country) this exemption reason would typically be used when tax is based upon a fixed location (for example, the financial entity’s location) and that fixed location is represented by a tax schedule assigned directly to a product. However, the fixed location’s tax should only apply to transaction situations where the customer’s address is within the same country as the financial entity.
- Outside the EU: For European organizations that need to exclude charging VAT to customers with addresses outside of the European Union. With this exemption reason, no tax will be charged if the country within the customer’s address is not assigned an EU country code.
- Registered in a different EU Country from the Financial Entity: For customers who are registered in a location that is in a different EU country from that of the seller. This exemption reason is for when VAT is not charged due to a Reverse Charge scenario (when a vendor in an EU country that sells to a VAT registered customer and that customer's address is in a country different than that of the vendor and the customer holds a VAT Registration in that different EU country, then no VAT tax is charged).
- Exempt in ANY tax authority:For customers that do not need to formally register with a tax authority, but are exempt from being charged tax. For example, a charitable organization who is not required to register with the taxing authority, but who qualifies for an exemption when they prove that they are a qualified charitable organization. This reason would apply to any customer who has a tax exemption with an exemption type of Exempt and in which the tax authority for the exemption is set to any authority.
- Exempt in the applicable tax authority: This is similar to the reason Exempt in ANY tax authority, except this reason restricts the exemption to only those customers that carry a tax exemption with an exemption type of Exempt and the primary tax authority for the tax schedule is assigned to the transaction that matches the tax authority assigned to the tax exemption.
- (optional) Provide a custom message to communicate why a tax was not charged. This message will display on all invoices where the exemption applies.
- (optional) Enable the exemption reason as Default. When a new tax category is defined, the list of applicable tax exemption reasons for this new tax category will default to include all exemption reasons that are selected as default.
- Click Save. The following columns appear:
- Available For Renewals - If there is a check in this column, the related Reason is considered when processing renewals. Reasons of Registered in the applicable tax authority and Exempt in the applicable tax authority are not supported for renewals.
- Up/Down arrows - Use the Move Up or Move Down arrows to define the exemption reason priority. The first listed exemption reason has the highest priority.
On behalf of
To enter an exemption on behalf of a customer, go to the contact’s About tab and edit the financial information in the Tax exemptions panel.
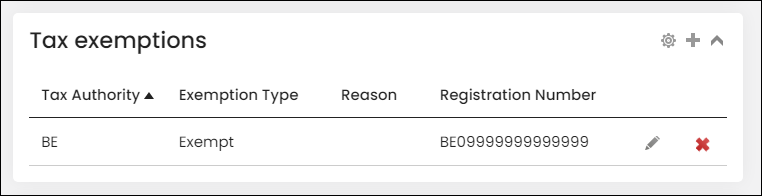
When you add an exemption, you specify a Tax Authority, Exemption Type, Reason, and Registration Number (which is not validated).
These exemptions honor the structure of your tax authorities; for example:
- Exemption from city taxes does not affect state taxes owed.
- Any Tax Category that you disqualify from exemption overrides a contact-level exemption.
- The Registered exemption type registers an organization or member with a particular tax authority and populates a registration number, whereas the Exempt exemption type does not assign a registration number and is not required to supply a registration number.
📘 Note
A registration number is required if an exemption type is selected and you can only have one exemption type for a specific authority.
Deleting tax authorities
System Administrators can go to Settings > Finance > Taxes and select the Authorities tab. Select delete to safely remove any tax authority that is not the default or in use (referenced by an existing schedule, account, or exemption).
iMIS prevents you from deleting a tax authority when it is in use, which includes these situations:
- It is part of an existing tax schedule.
- It has specific liability accounts associated with a financial entity.
- A user has a tax exemption defined for that authority.
Setting up the invoice report
From the Staff site, go to Finance > Invoices and select an invoice. View the printable invoice report by selecting the Print tab.
iMIS includes two alternate invoice reports that you can use in the Print tab of an invoice formatted for either VAT or GST taxation.
Do the following to use one of these out-of-the-box invoice reports:
- From the Staff site, go to RiSE > Site Builder > Manage shortcuts.
- Select the InvoicePrint shortcut and select the Edit icon.
- Adjust the URL or content record path to point to one of the out-of-the-box invoice reports:
- @/iCore/Finance/Invoices/Detail/VAT_Invoice_Report.aspx
- @/iCore/Finance/Invoices/Detail/GST_Invoice_Report.aspx
Do to following to adjust the invoice report:
- From the Staff site, go to RiSE > Page Builder > Manage content.
- Navigate to @/iCore/Finance/Invoices/Detail.
- Copy the Invoice Report and Invoice Print content records by selecting Organize > Copy.
- (optional) Select New > Website Content Folder and supply a Title and click Save.
- Paste the copied content records into your new website content folder by selecting Organize > Paste.
-
Edit the copied Invoice Report content record:
- Select Configure to edit the Report Display content item.
- Edit the path to point to your customized report.
- Click OK.
- Save & Publish the content record.
-
Edit the Invoice Print content record:
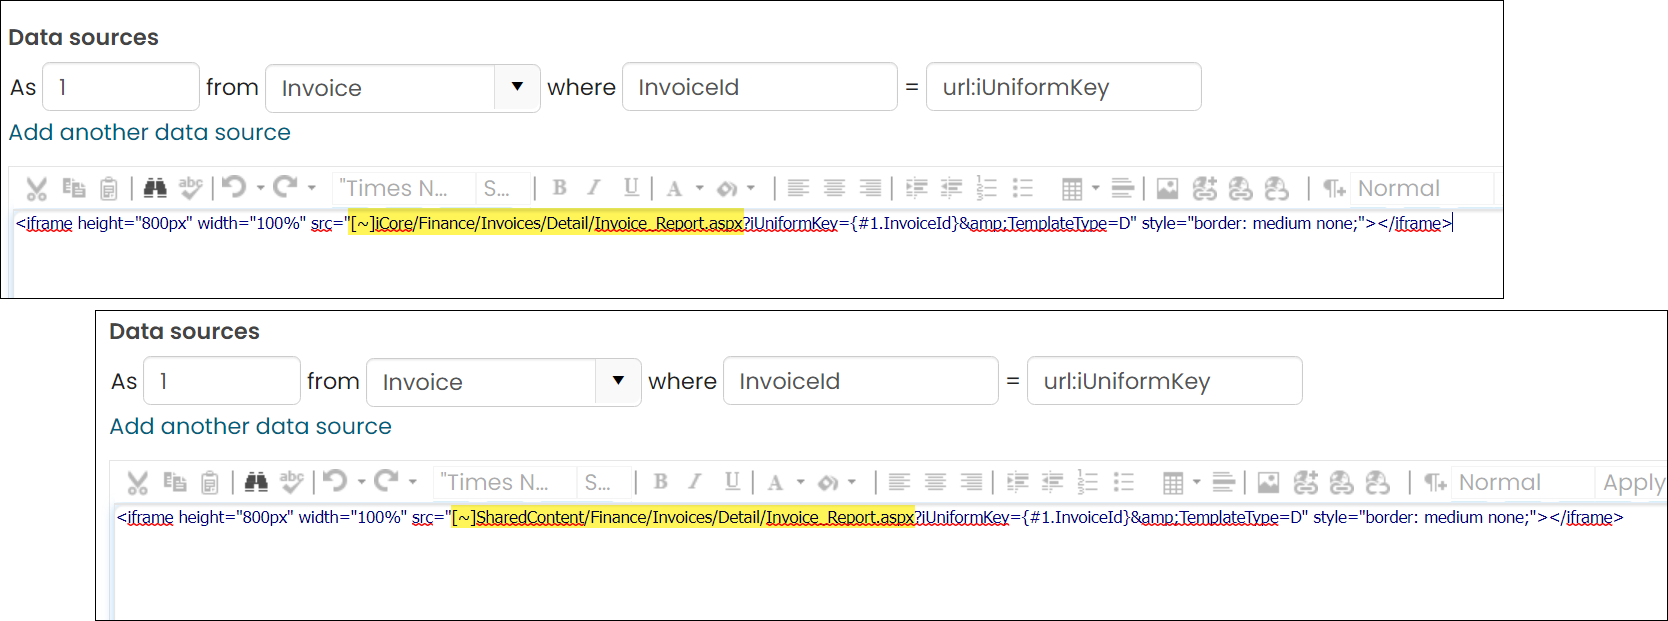
- Select Configure to edit the Data Showcase content item.
- Edit a portion of the HTML by replacing the path iCore/Finance/Invoices/Detail/Invoice_Report.aspx with Path to new website content folder/Invoice_Report.aspx.
- Click OK.
- Save & Publish the content record.
- Publish the new website content folder.
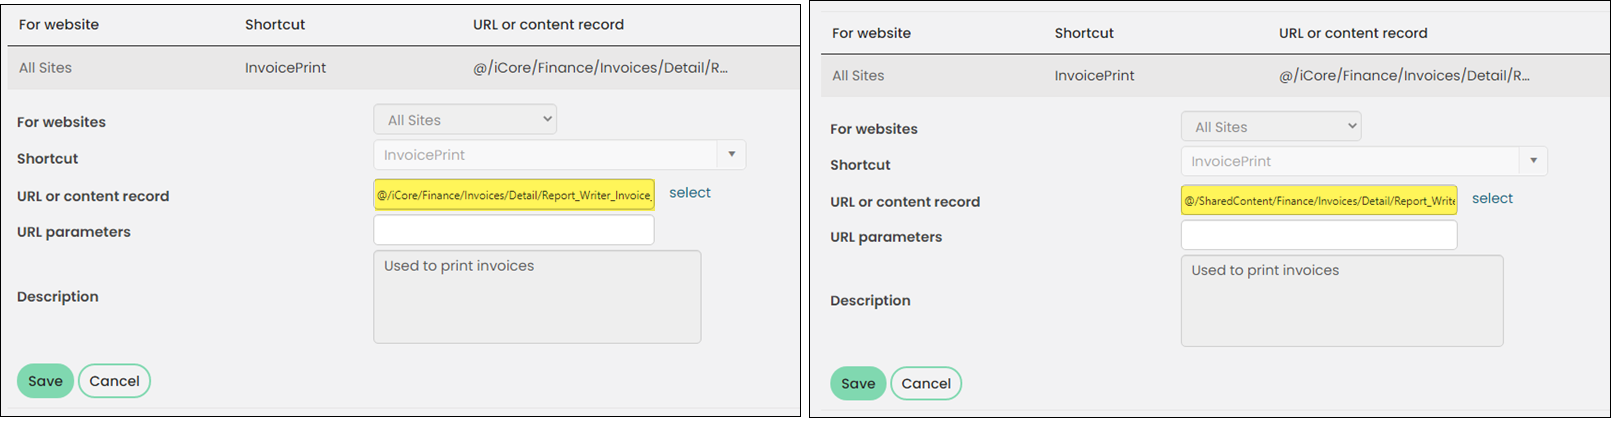
- Edit the shortcut:
- Navigate to RiSE > Site Builder > Manage shortcuts.
- Select the InvoicePrint shortcut and click Edit selected.
- Adjust the URL or Content Record path to @/Path to new website content folder/Invoice_Print.
- Click Save.
📘 Note
You can paste the copied content records into any folder that will not be overwritten on upgrade.
To generate a periodic report that summarizes all of the tax and exemption invoice activity over a specified time span for required tax return summary information, navigate to Reports > Accounting reports > Tax Activity Recap ($/Accounting/DefaultSystem/Reports).
Updated 5 months ago