

Setting up Canadian taxation (GST and HST)
iMIS supports calculation for Canadian federal taxes (GST and HST). This allows you to tailor your organization’s taxation method for both Canada and specific Canadian provinces. Applicable taxes are calculated automatically based on the default Canadian tax authority and customer province.
The tax codes for the GST/HST calculation method need to be set up in iMIS before they can be used.
For more information on taxes, see Setting up tax information.
Setting up the financial entity, currency, and country
Do the following to configure the financial entity, currency, and country:
- Go to Settings > Finance > Financial entity:
- From the Country drop-down, choose Canada.
- Click Save.
- Go to Settings > Finance > General:
- From the Default currency drop-down, select Canadian dollar.
- From the Default country drop-down, select Canada.
- Click Save.
📘 Note
Once products are defined in the system you can no longer change the default currency – this needs to be set up first using an empty database.
Setting up tax information
The tax schedules, categories, authorities, and exemption reasons must be set up at Settings > Finance > Taxes.
Taxation schedules
A tax schedule consists of all tax authorities that apply to particular situation (such as the purchaser, the location, the item class, or the individual item) and the order in which taxes are calculated when more than one tax applies.
Setting up tax schedules
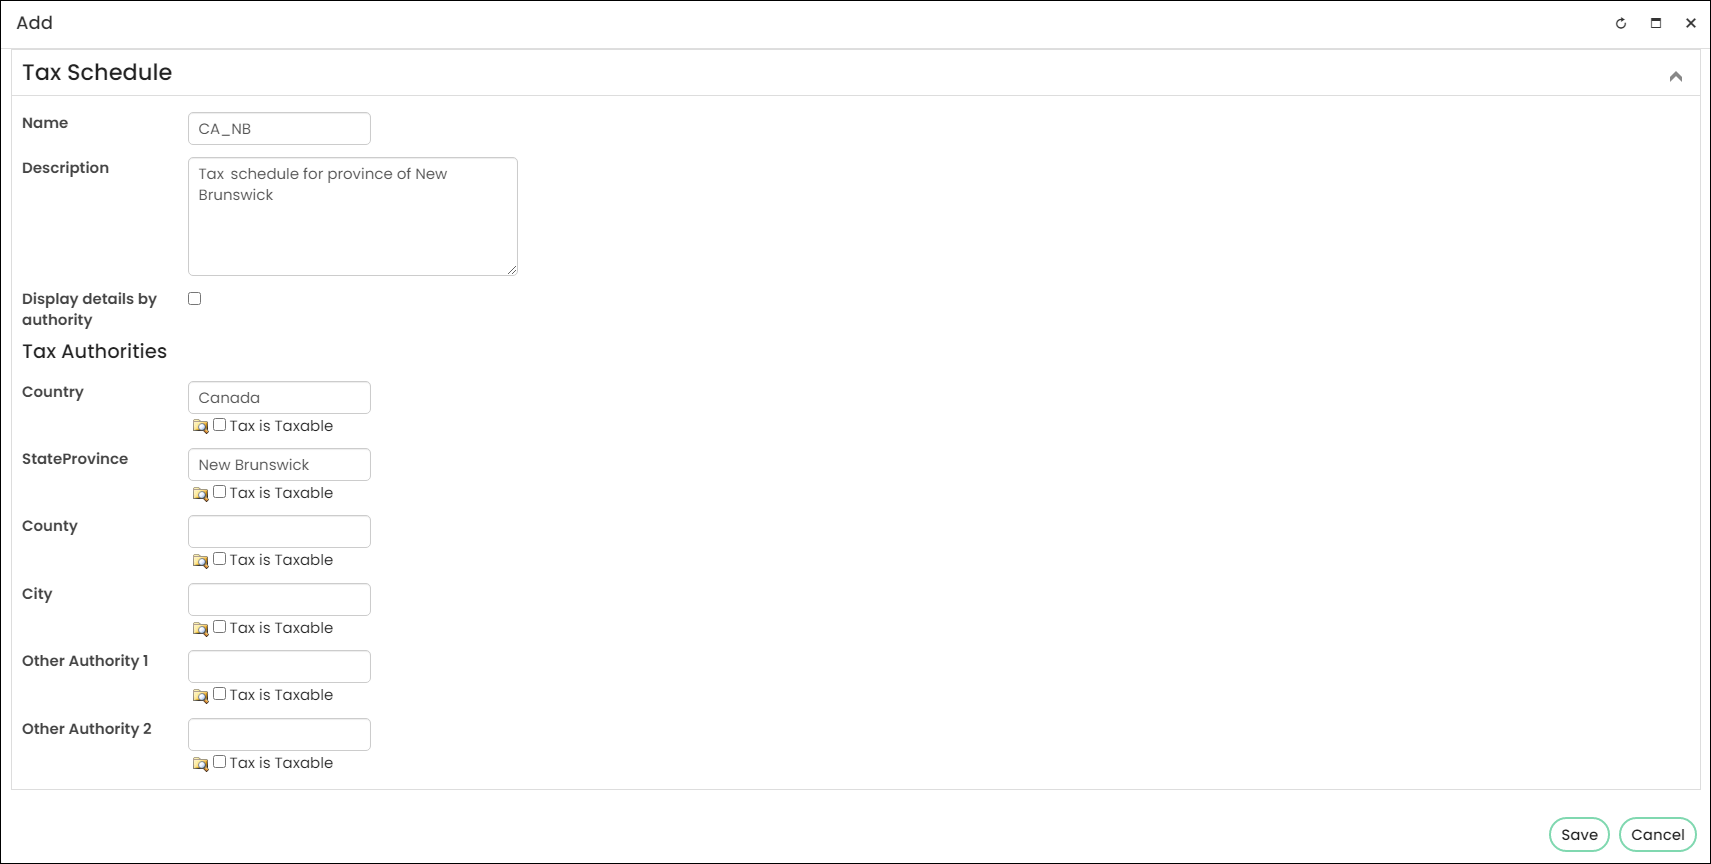
Do the following to set up a tax schedule for Canada:
- Go to Settings > Finance > Taxes.
- On the Schedules tab, edit an existing schedule or click Add new item for a new one.
- Enter a Name. For example, "CA_NB" represents the New Brunswick province in Canada.
- Enter a Description. For example, “Tax schedule for province of New Brunswick”.
- Enable Display details by authority.
- Enter “Canada” for Country under Tax Authorities.
- Enter the StateProvince.
- Click Save.
- Repeat this process for all provinces.

Setting up taxation categories
A tax category is a general collection of items that have common taxation rules. For example, certain items are taxable, others non-taxable, and taxes on shipping and handling charges vary.
Adding a taxation category
Do the following to add a taxation category for Canada:
- Go to Settings > Finance > Taxes.
- Click the Categories tab.
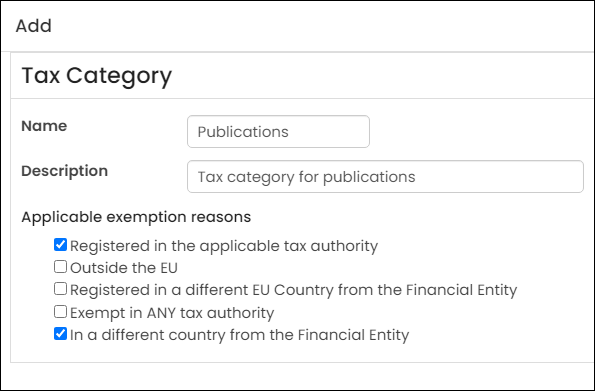
- Edit an existing category or click Add for a new one.
- Enter the Name and Description for this category.
- (optional) Select any of the Applicable exemption reasons.
- Click Save.
📘 Note
Exemption reasons are defined when setting up tax exemption reasons. Only the exemptions reasons that have been previously defined will display as an option. See Setting up tax information for more information.
Editing taxation categories
Do the following to edit the existing tax categories, so the exemption reasons are all current:
- Go to Settings > Finance > Taxes.
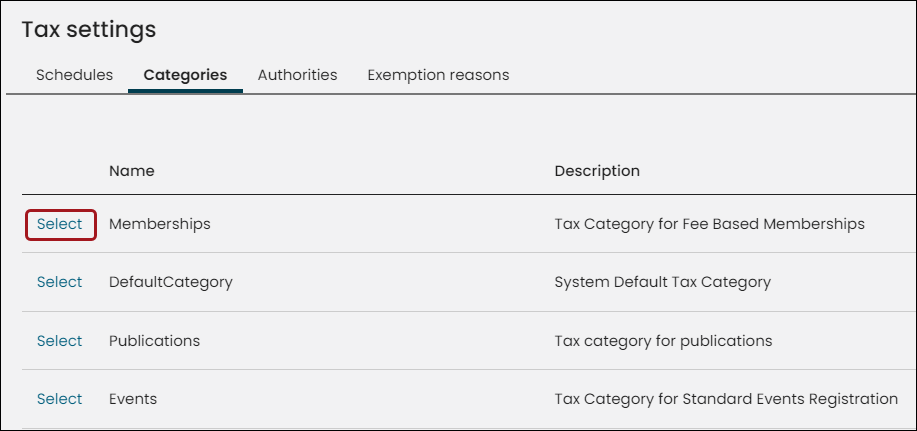
- Click the Categories tab.
- Click Select next to the category you wish to edit.
- Make the necessary changes.
- Click Save.
Deleting taxation categories
Do the following to delete a taxation category:
- Go to Settings > Finance > Taxes.
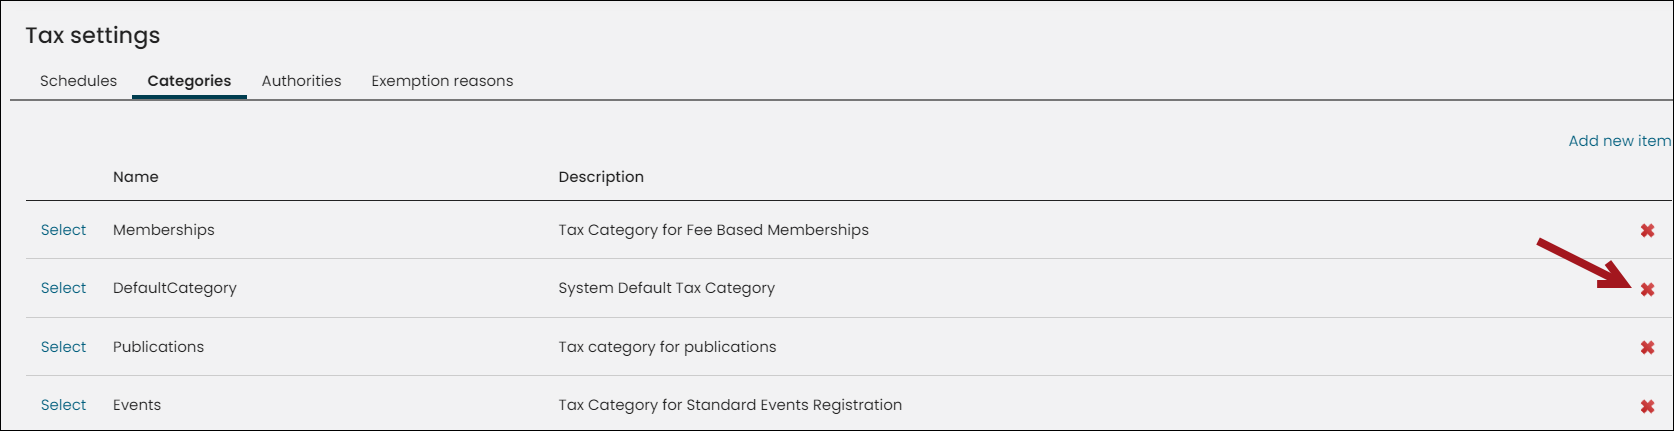
- Click the Categories tab.
- Click the red X next to the category you wish to delete.
- Click OK when asked Delete this item?
Setting up taxation authorities
A tax authority is a geographical area to which a set of specific taxing rules apply.
Do the following to set up a tax authority for Canada:
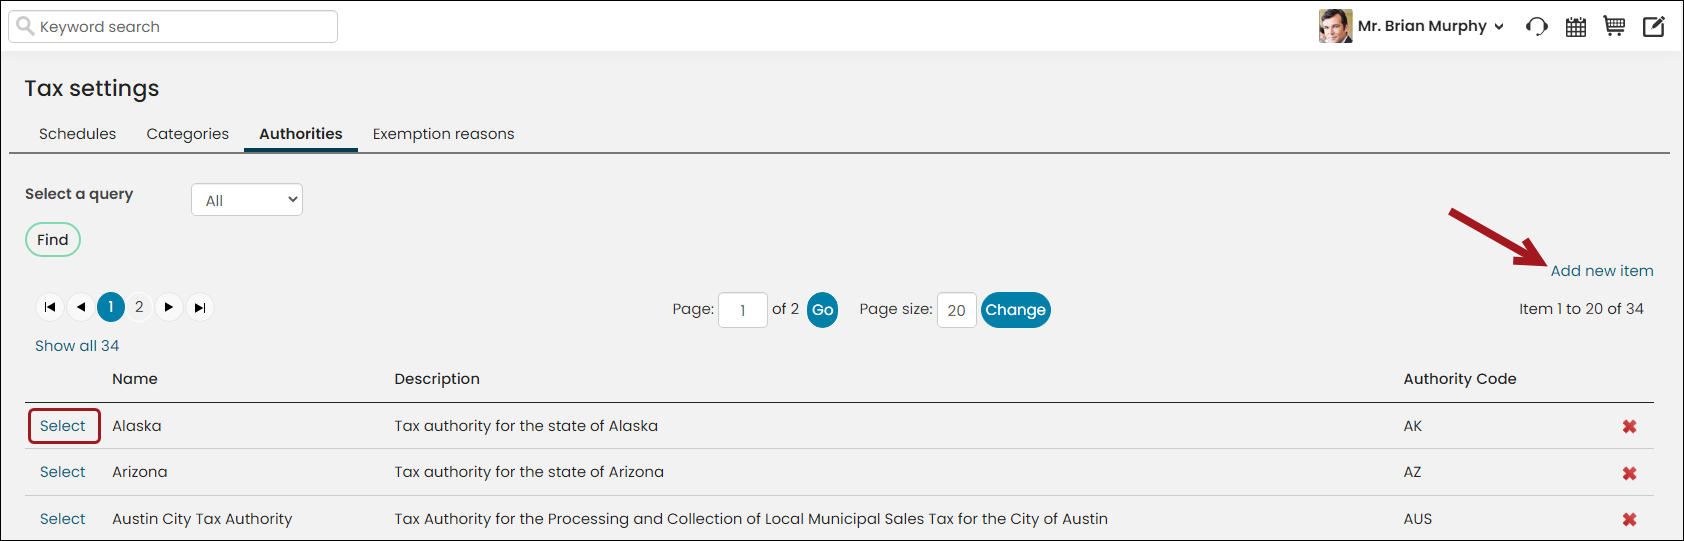
- Go to Settings > Finance > Taxes.
- Select the Authorities tab.
- Select an existing authority or click add for a new one.
- (Define tab) Define the following:
- Enter the Name and Description for this tax authority.
- Select Country as the Level at which to apply this tax.
- (optional) Enter the Authority Code. This is the abbreviation you want to assign to the tax category, such as a state or province abbreviation.
📘 Note
Any value you enter in the Authority Code field will be displayed in the cart as part of a tax-included statement. For example, if you enter GST in the Authority Code field, then if you purchase a product for which the GST is included, a message similar to the following is displayed in the cart:(includes 0.85 GST)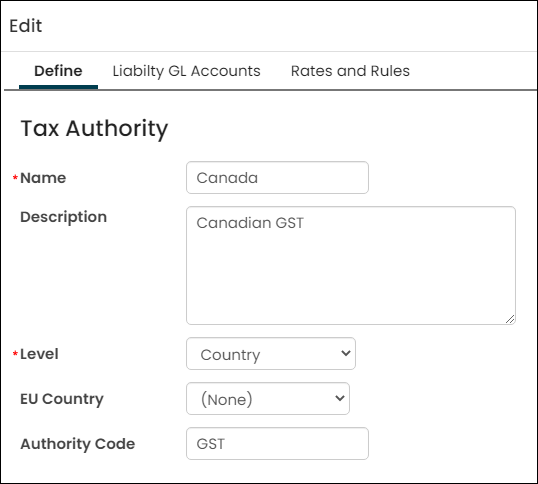
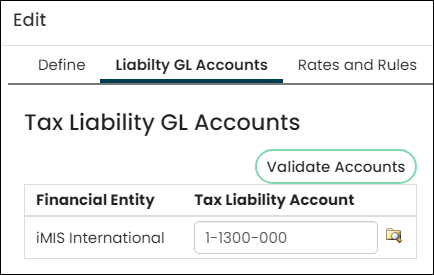
- (Liability GL Accounts tab) Define the following:
- Select the Tax Liability Account you would like to associate with your Financial Entity. See Financial entity for more information.
- Select Validate Accounts for the system to verify that the selected GL account entered exists on the GL Accounts table.
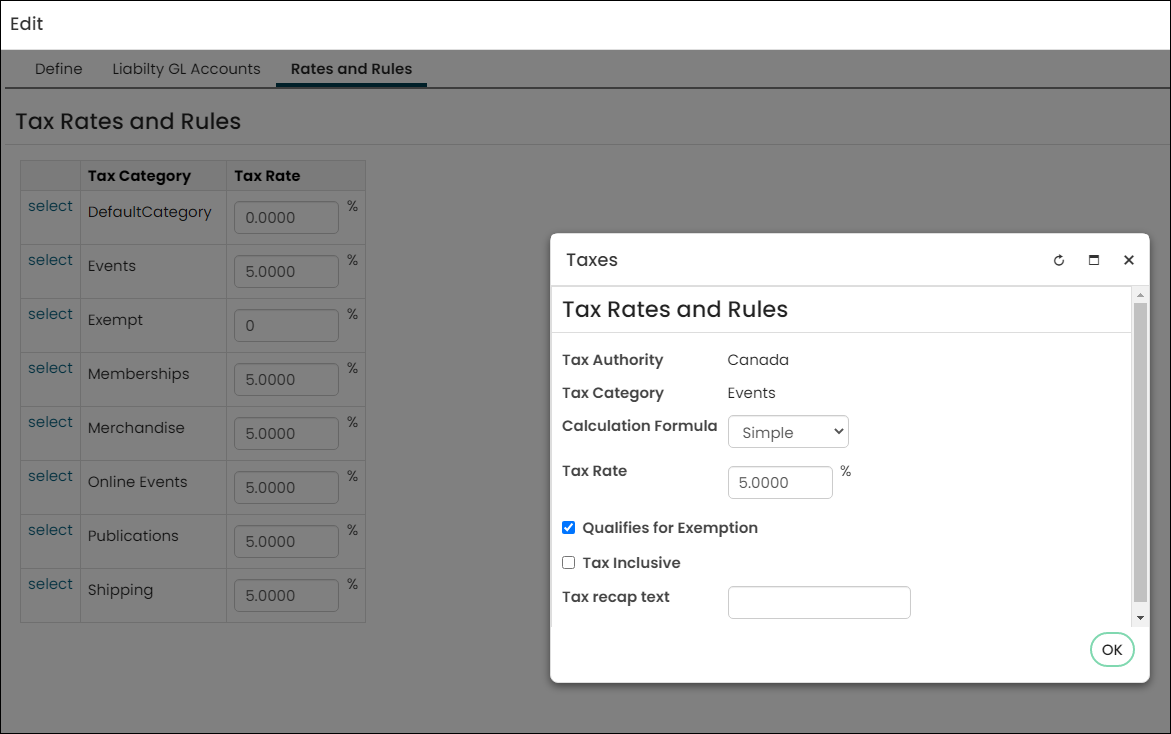
- (Rates and Rules tab) Define the following:
- Click select to edit the Tax Rates and Rules of each Tax Category.
- Select either Simple or Advanced for the Calculation Formula.
- Define the Tax Rate. Make sure to enter the rate as a percentage and not as a decimal.
- (optional) Enable Qualifies for Exemption.
- (optional) Enable Tax Inclusive.
- (optional) Enter theTax recap text that displays on the Invoice Tax Recap. The text is restricted to a maximum of 100 characters.
- Click Save.
Setting up taxation exemptions
Tax exemptions exempt certain customers from paying taxes; for example, if you sell products to customers outside of Canada, you would create a tax exemption for them, so they are not paying Canadian taxes.
Do the following to create tax exemptions for Canada:
- Go to Settings > Finance > Taxes.
- Click the Exemption reasons tab.
- Delete the out-of-the-box exemption reasons.
- Select Add new.
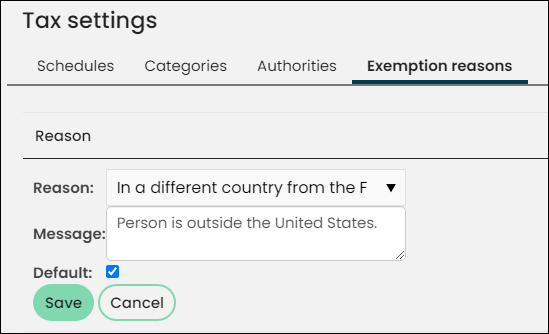
- Select In a different country from the Financial Entity from the Reason drop-down.
- (optional) Provide a custom Message to communicate why a tax was not charged. For example, “Person is outside of Canada”. This message will display on all invoices where the exemption applies.
- (optional) Enable the exemption reason as Default. When a new tax category is defined, the list of applicable tax exemption reasons for this new tax category will default to include all exemption reasons that are selected as default.
- Click Save.
- Available For Renewals - If there is a check in this column, the related Reason is considered when processing renewals. Reasons of Registered in the applicable tax authority and Exempt in the applicable tax authority are not supported for renewals.
- Up/Down arrows - Use the Move Up or Move Down arrows to define the exemption reason priority. The first listed exemption reason has the highest priority.

📘 Note
Any customer purchasing a product with a ship-to address outside of Canada is not charged tax.
Configuring events for specific taxation
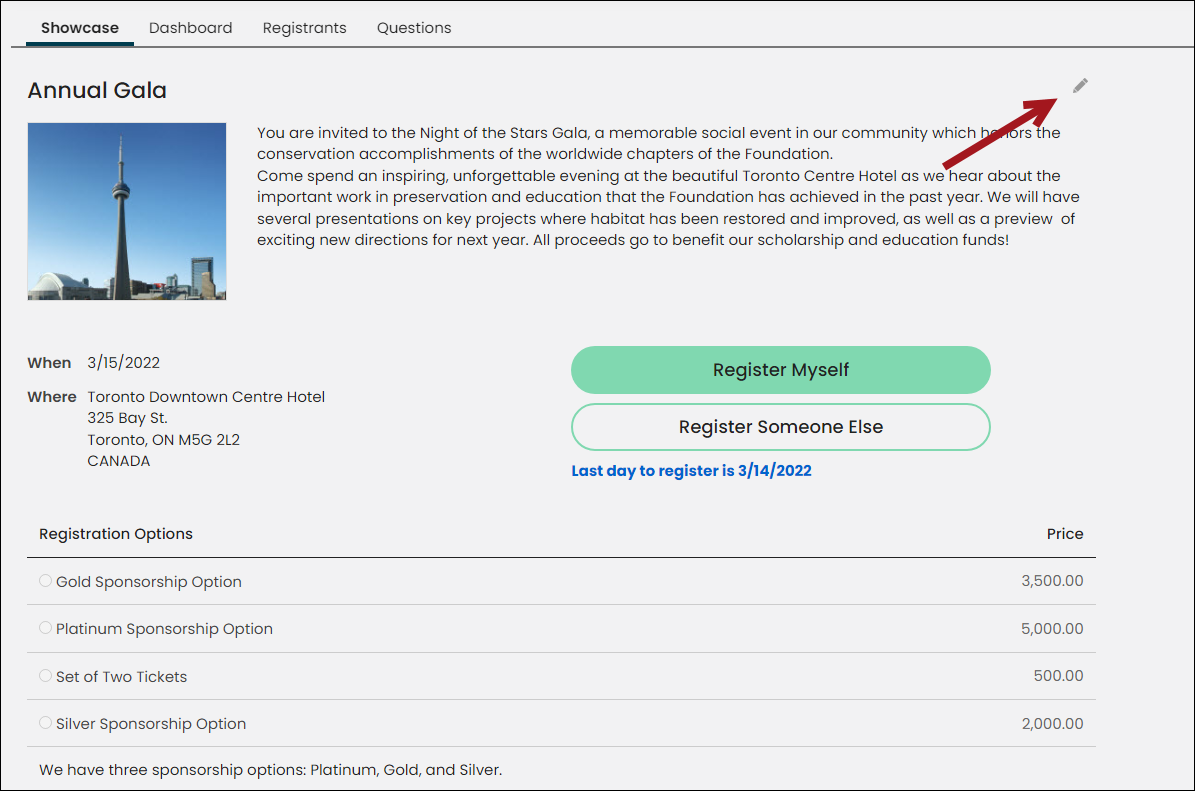
Events are taxed according to the location of the event. Do the following to configure taxation for specific registration options:
- Go to Events > Find events.
- Click the event you wish to configuration taxation for.
- Click the edit button on the Showcase tab.
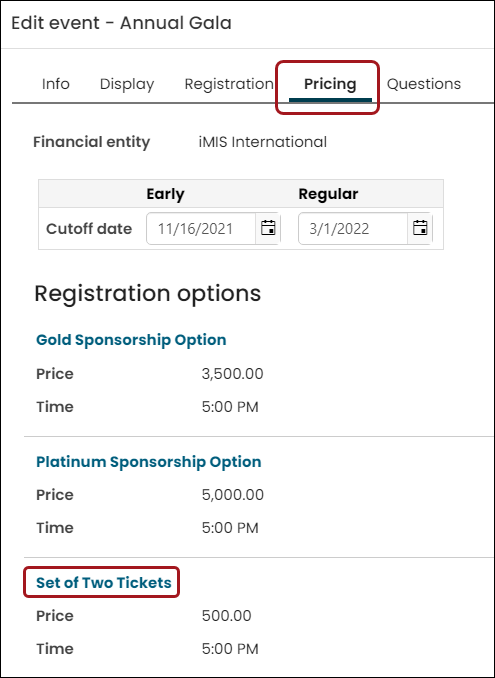
- On the Pricing tab, click the registration option you wish to configure taxation for. This example is for a Set of Two Tickets.
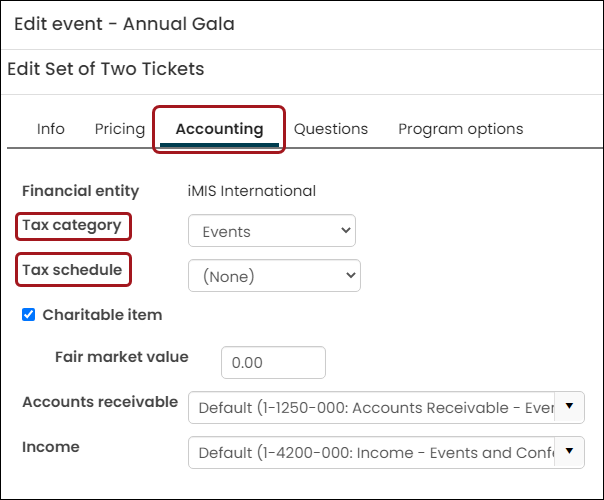
- On the Accounting tab, select Events from the Tax category drop-down.
- Select the tax schedule from Tax schedule.
- Click Save & Close.
Configuring products for specific taxation
Commerce products are taxed based on the ship-to address of the customer. If you are selling products to customers, you can rely on the ship-to address to be used to calculate taxes. Customers outside of Canada are exempt, if you configured the exemption reasons.
Do the following to configure products for specific taxation:
- Go to Commerce > Find products.
- Click the product you wish to configure taxation for.
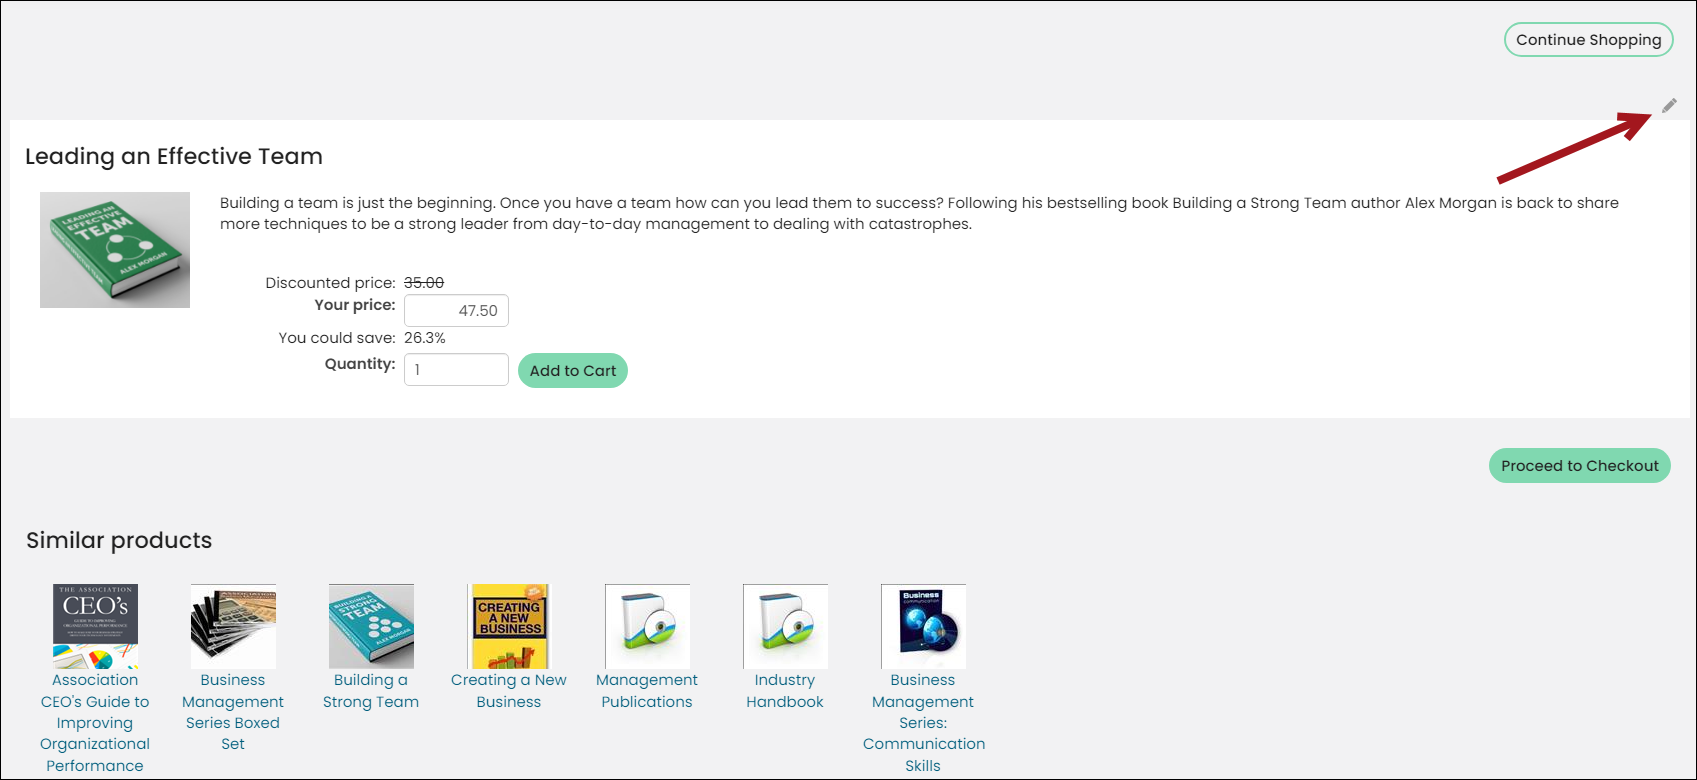
- Click the edit icon.
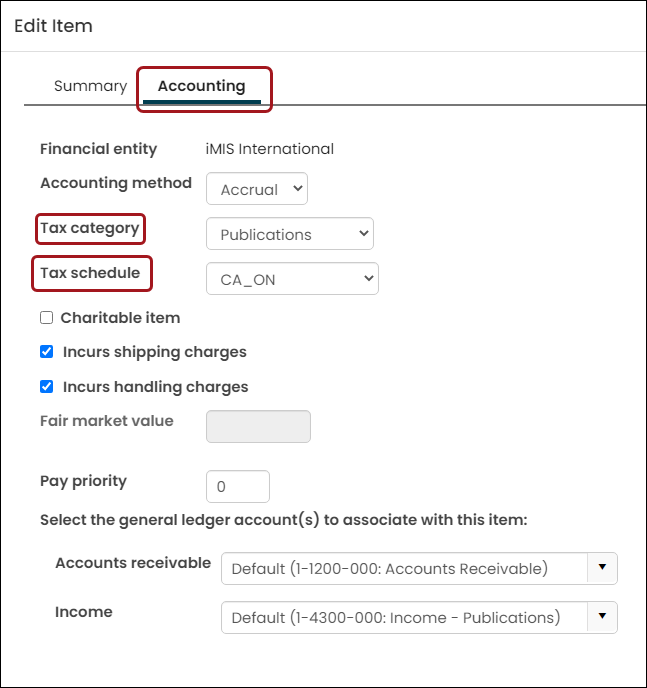
- On the Accounting tab, select the appropriate category from the Tax category dropdown.
- Select the tax schedule from Tax schedule.
- Click Save & Close.
Updated 5 months ago