

Content Html
Using the Content Html content item, you can add simple content to your website anywhere you want. In addition to the WYSIWYG functionality, you can switch to HTML mode to insert JavaScript to embed other sites, display web widgets, and use variables to create relative paths.
WarningDue to the Content Security Policy (CSP), certain integrations from external websites, such as script imports of iframes, are not permitted on payment pages for credit card security purposes.
Notes
- The Content Html content item does not support server-side code; any server-side code entered into the editor is automatically removed upon save.
- The
<form>tag cannot be placed on any page in RiSE, as every page already has a<form>tag enclosing all items on the page, and<form>tags cannot be nested inside one another. - The editor will automatically attempt to correct invalid and improperly formatted HTML, such as missing end tags, or unsupported tags and attributes. Note that according to HTML standards, some tags cannot be placed inside of others. For example,
<div>tags cannot be placed inside of<span>tags.
NoteWe recommend using an online validator tool to help correct or validate any errors.
- Content added to an https web page using an
<iframe>must match the protocol of the parent page. If the URL is invalid, cannot be found, or is insecure based on iMIS site protocols, the following will happen:- The iFrame content will not load.
- Error messages will be displayed based on the relevant scenario:
- The content can't be included because the requested information can only be loaded on: [URL Entered] — The URL entered in the
<iframe>cannot be loaded on a domain other than the original domain. - The content can't be embedded because the security protocols do not match. Frame URL provided — The embedded content is not secure (http), but was loaded in an https iMIS site.
- The content can't be embedded ([URL Entered]). Please verify the URL entered — The page cannot be reached. The page might be down, or the URL is invalid.
- The content can't be embedded because the requested information has been moved for: [URL] — The page URL included within the
<iframe>is being redirected to another location (server 301 redirect, permanent redirect).
- The content can't be included because the requested information can only be loaded on: [URL Entered] — The URL entered in the
Using the Content Html content item
Understanding the toolbar icons
| Icon | Function |
|---|---|
 | Full screen mode |
 | Cut, Copy, Paste |
 | Find and replace, Spell check, Undo, Redo |
 | Font name, font size |
 | Bold, Italics, Underline |
 | Font color, Font highlight color |
 | Left-align, Center-align, Right-align |
 | Indent, Outdent, Insert numbered list, Insert bulleted list |
 | Insert table, Insert horizontal line, Image Manager — You cannot paste images into the editor. You must upload images using the Image Manager. If you manually enter a link to an image that does not exist or an incorrect file path for an image, your content might not be able to be saved correctly. To ensure you do not have issues saving content that includes references to images, use the Image Manager to upload and manage image files. It is recommended that you save and Preview your HTML to ensure all content is being saved correctly. |
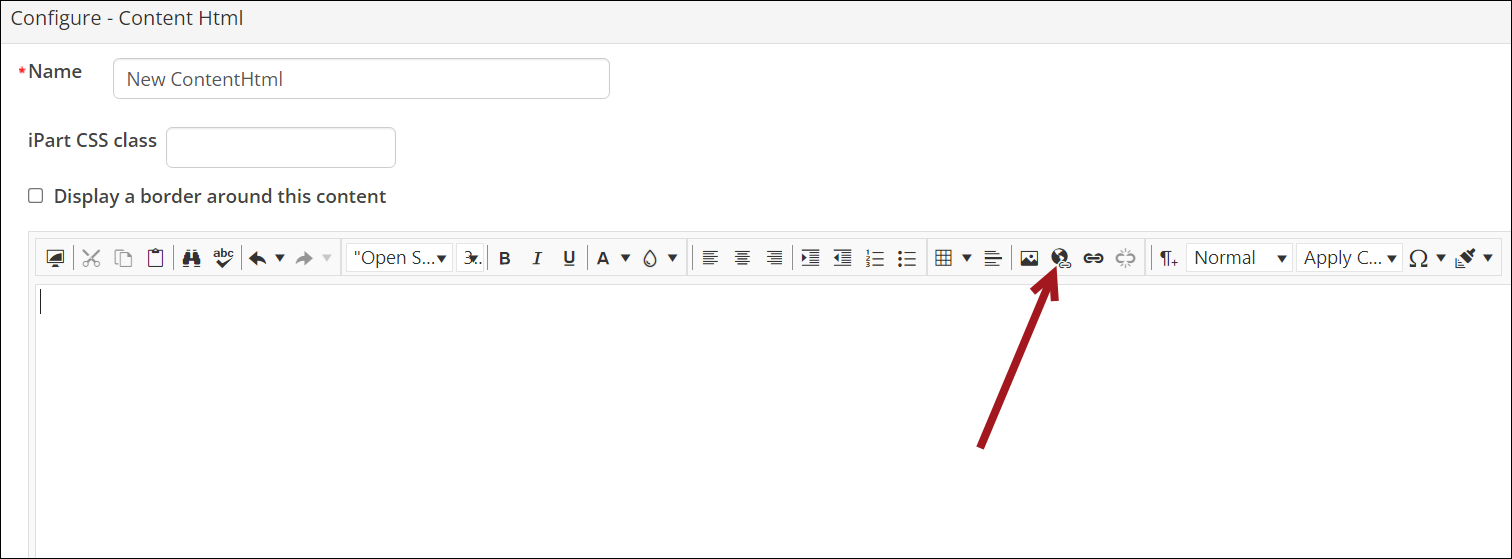
 | Content Link Manager, Insert link (hyperlink, anchor, or email), Remove link |
 | Insert new paragraph, Paragraph style |
 | Apply CSS Class, Insert symbol, Format Stripper: Apply CSS Class - You can use the Apply CSS Class drop-down to apply styling and formatting to specific portions of the content. Select the area you want to style and select a CSS class from the drop-down. Format Stripper - Removes any applied formatting. You have the option to select the type of formatting you want to remove from any highlighted content: All, Css, Font, Span, or Word. |
Embedding external sites
To embed any external page into an iMIS site, you can use an <iframe>. Do the following:
-
Go to RiSE > Page Builder > Manage content and create a new content record.
-
Click Add content and add a single Content Html content item.
-
Show the source by clicking the <> HTML tab, and type in an
<iframe>tag:<iframe width="100%" height="652" frameborder="0" src="//help.imis.com/"></iframe> -
Go to RiSE > Site Builder > Manage sitemaps and create a new navigation item that points to the new content record.
-
If appropriate, restrict the navigation item's Access Settings, such as to Authenticated User Full Control.
Inserting links
Do the following to insert a direct link to any content in iMIS or to an external site using the Content Link Manager:
-
Create a new content record with the Content Html content item, or edit an existing record to insert a link.
-
From the editor toolbar, select the Content Link Manager icon:
-
Choose a Link type:
-
Content or URL — This link allows users to navigate to a separate web page. Do the following:
-
Enter the Link text.
-
Define the Content or URL:
- Select content from the Document browser.
- Enter a content record's direct path. For example, @/iCore/DefaultStaff.
- Enter a shortcut URL. This will preserve the link even if the content is moved in the document system. The shortcut must conform to the format ~/Shortcut.
- Enter a direct link. For example, http://www.help.imis.com.
-
Enter a CSS class that will be applied to the link.
-
If the Content or URL is pointing to a content record, select a Default website.
-
Enter or select a Source code to associate this link with a marketing campaign.
-
Enter Additional URL parameters to include in the link. To add multiple URL parameters, follow the format:
param1=value1¶m2=value2¶m3=value3
-
-
Downloadable document — This link allows users to download a document. Do the following:
-
Enter a link description for Link text.
-
From Document, select the desired file. If the content record you are working with is new, you must save the content record before you are able to upload a new file.
-
Select the Link behavior:
- Download — The file is downloaded to your computer.
- Link in new tab — The file opens in a new browser tab.
Any file that cannot be opened in a new browser tab will download as before. The browser will open a new tab even if the file cannot be opened.
-
Click OK.
-
(optional) Enter a CSS class for the link.
-
-
-
Click OK.
Displaying web widgets
You can install and display JavaScript-based web widgets (plugins, gadgets) in your websites using the Content Html content item. A web widget is a small program that your users can execute within a web page and that can provide a wide range of functionality.
For example, Google Gadgets offers thousands of free web widgets including mini applications, games, news feeds, maps, and a wide range of other types of content. Many other websites also provide free widgets that can access data from their site. For example, X (Twitter) provides widgets that let you display X (Twitter) updates on your website. LinkedIn provides plugins that display information such as company profiles, member profiles, and links to share on LinkedIn. You just have to search the web to see what you can find that meets your needs.
WarningOnly embed widgets from authors you trust. Malicious code can damage your computer or violate your privacy.
Adding a JavaScript-based web widget to a web page
Do the following to add a JavaScript-based web widget to a web page:
- Go to RiSE > Page Builder > Manage content.
- Create a new content record or edit an existing one.
- Click Add content and add a Content Html content item.
- Click < > HTML to switch to HTML mode.
- Copy the JavaScript embed code for the widget you want to add and paste it into the HTML area.
- Click OK, then Save and Publish your content record. The widget is displayed when that content record is rendered on a web page.
Creating relative paths using variables
The Content Html content item does not support the use of the ~/ (tilde slash) shortcut, often used to automatically build the correct paths when a control is rendered in different domains. However, several variables are available in this content item that allows you to enter paths for links and resources that are automatically resolved to various folders in your website:
- [Website] and [@] — Both variables resolve to the root of the website and contain the website name. For example, [Website]Home.aspx resolves to http://mydomain/Staff/Home.aspx.
- [~] and [Root] — Both variables resolve to the root of the website. For example, [~]Home.aspx resolves to http://mydomain/Home.aspx.
- [Common] — Resolves to the AsiCommon directory of the website. For example, [Common]images/image.png resolves to http://mydomain/AsiCommon/images/image.png.
- [iMIS] — Resolves to the iMIS directory of the website. For example, [iMIS]images/image.png resolves to http://mydomain/iMIS/images/image.png.
- [Theme] — Resolves to the website's theme folder. For example, [Theme]images/image.png might resolve to http://mydomain/App_Themes/Orion/images/image.png. This variable can be used to access theme resources such as images and CSS.


NoteImages that use relative paths do not render in Design mode because the variable is not transformed until the content record is published.
Content HTML variables
You can use a variation of HTML variables to surface information in a piece of content.
Below the available content variable examples:
- ContentTitle - [ContentTitle]
- MetaImagePath - [MetaImagePath]
- UpdatedOnShort - [UpdatedOnShort]
- UpdatedOnLong - [UpdatedOnLong]
- UpdatedTimeShort - [UpdatedTimeShort]
- UpdatedTimeLong - [UpdatedTimeLong]
- CreatedBy - [CreatedBy]
- UpdatedBy - [UpdatedBy]
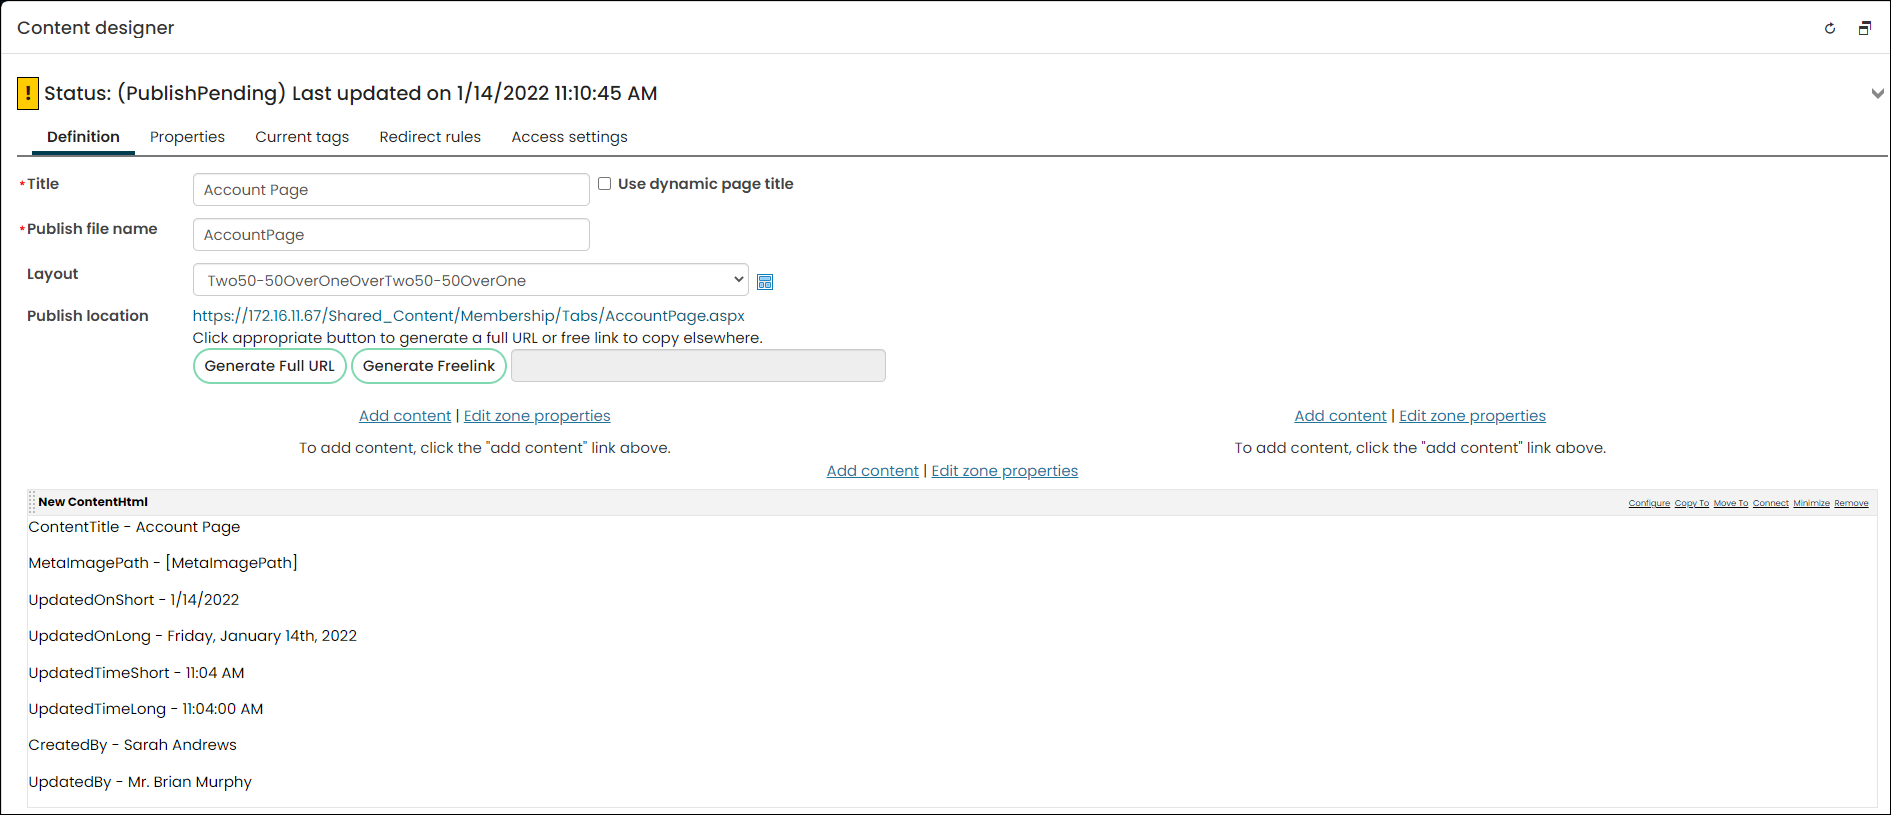
Another example of a content variable is the following:
<strong>[ContentTitle]</strong> <img src="[MetaImagePath]"> <p> Last updated by [UpdatedOnShort] at [UpdatedTimeLong] by [UpdatedBy]</p>
User-defined content properties are also available for use in the HTML. To use user-defined content properties, review the following example:
-
Go to RiSE > Maintenance > User defined fields.
-
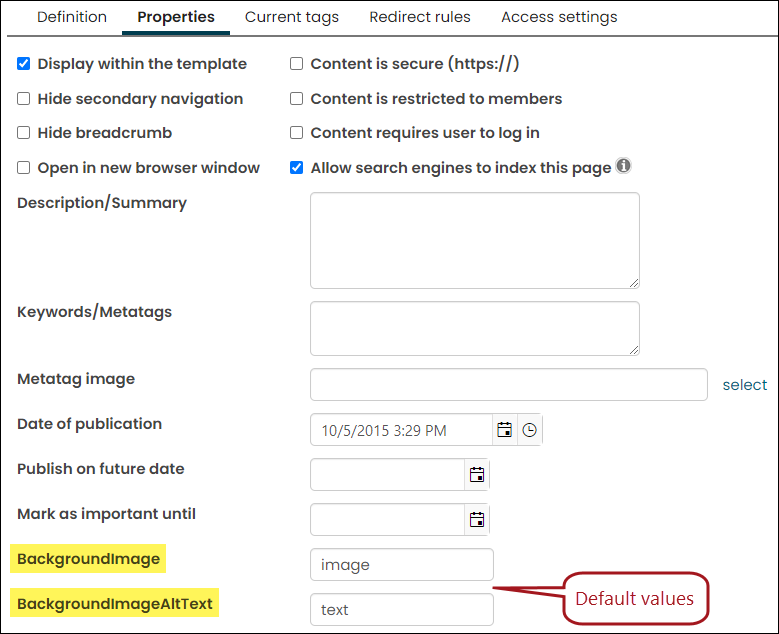
Create the new user-defined field, such as BackgroundImage and BackgroundImageAltText. Ensure you define default values for these fields.
-
From a content record, click the Properties tab.
-
Enter a value for BackgroundImage and BackgroundImageAltText, such as /images/MyImage.webp and Wildflowers in summer.
-
The BackgroundImage and BackgroundImageAltText property is now available for use in the HTML, for example: <img src="[BackgroundImage]" alt="[BackgroundImageAltText]">.
-
When the content is displayed, you will see that the variables have been replaced with the values you set in the content properties. In this example, the defined image will display.
NoteWhen replacement variables are used within a Content Area, they display the values for the content being viewed, rather than for the Content Area content. If the value of the property cannot be determined, then the variable is not replaced. When a new User-defined Field is added, each content record must be re-published before the default value is available.
Printing from a pop-up window
If your site includes content that opens in a pop-up window (for example, a member profile or other information), you might want to provide a way for users to easily print this content (the information within the window only, without the background window content being included). You can do this by adding a Content Html content item to the content record you are using for your pop-up window.
-
Go to RiSE > Page Builder > Manage content. Open the content record.
-
Click Add content and add a Content Html content item in the zone of the page where you want the Print this page option to appear.
-
In the HTML view, add the following code:
<A HREF="javascript:window.print()">Click to Print This Page</A> -
Click OK after adding the HTML, and if necessary, drag and drop the panel to the position where you would like it to appear on your page.
-
Save and Publish the page.
This HTML will display a basic hyperlink that says Click to Print This Page. When the user clicks the hyperlink, the JavaScript window print function will open the Print dialogue, which offers the user a choice of whether to continue with the printing, and allows the user to select the printer.
Updated about 2 months ago