

Managing product classes
A product class, also known as an Item class, determines the purpose of an item. The product class specifies the default GL accounts, tax schedule, standard discount percentage, and other settings to be used for the commerce item.
Adding a product class
Do the following to add a product class:
-
Go to Settings > Commerce > Product classes.
-
Click Add new item.
-
In the Product Class section, define a Name.
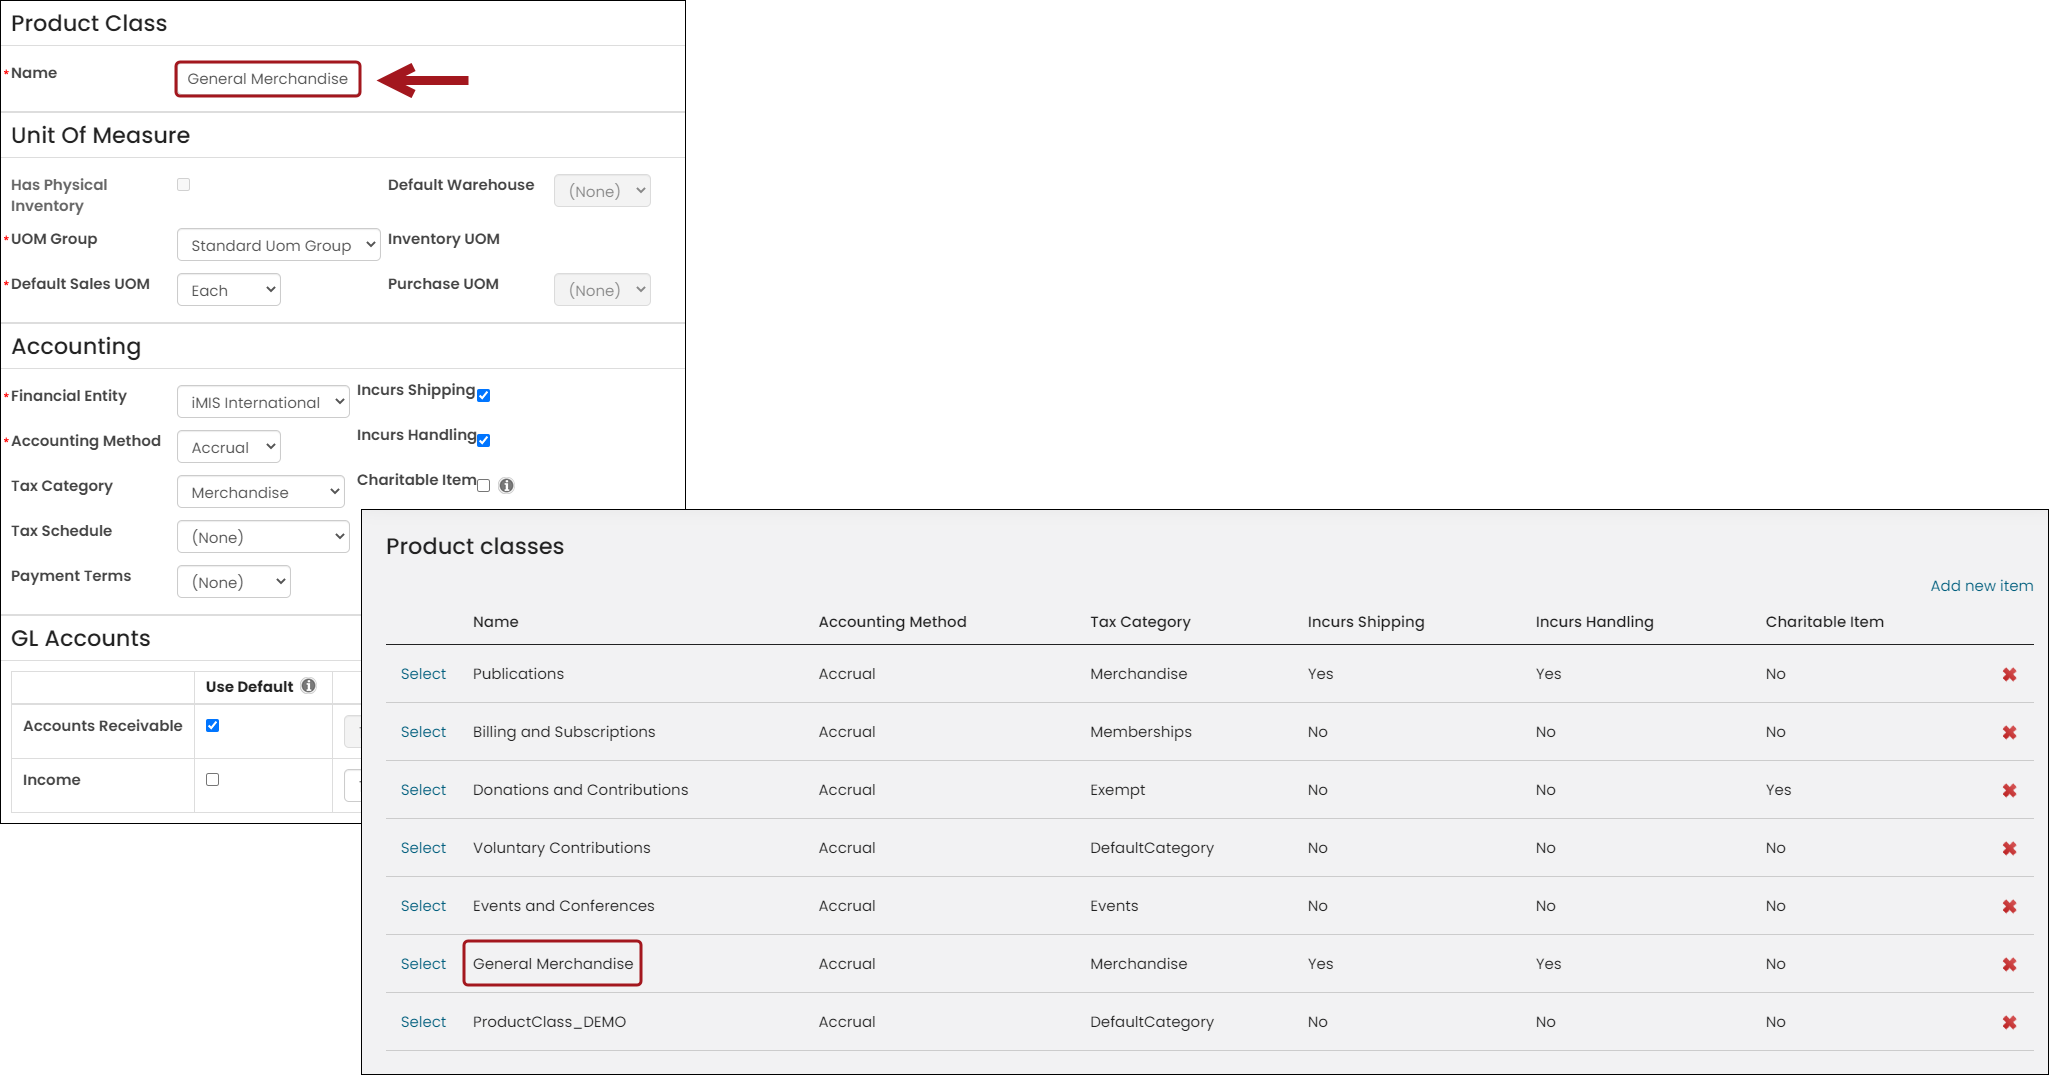
- Unit Of Measure - (Not in Use) Items under this area currently have no effect on the product class.
- In the Accounting section:
- Financial Entity — Select a specific entity in order to capture your organization’s account transactions.
- Accounting Method — In order to override the default accounting method, select the desired method (Accrual or Cash) for all items in this product class.
- Tax Category — Specifies taxation rules for a general set of items. To override the default tax category setting, select a tax category for all items in this product class.
- Tax Schedule — Consists of all tax authorities that apply to particular situation and the order in which taxes are calculated when more than one tax applies. The Tax Schedule should be set to None unless the schedule for the items in this product class will always be the same regardless of the situation.
- Payment Terms — Select the frequency with which fundraising receipts can be delivered to donors for all items in this product class:
- None
- Annually
- Monthly
- Net 30
- PrePaid
- Quarterly
- Incurs Shipping — Enable this option to add shipping charges when the user checks out.
- Incurs Handling — Enable this option to add handling charges when the user checks out.
- Charitable Item — Enable when all items in this product class should be reported as charitable. Recommended to be enabled on any product class where the transactions associated with the items created for that product class should ordinarily be eligible for receipting.
- In the GL Accounts section, select the GL accounts to use. Select the Use Default option to use the defined Financial Entity default. For more information, see Financial entity.
- Click Save.
Editing a product class
When editing a product class, any subsequent changes will not affect any commerce items that have been previously added. Only the commerce items that have been added after the edits have been made to the product class will apply. To change the product class for existing commerce items, users must edit the Item class for each individual product.
- From the Staff site, go to Settings > Commerce > Product classes.
- Select the name of the product class you want to edit.
- Edit the product class and make necessary changes.
- Click Save.
Deleting a product class
Users cannot delete a product class when it is in use somewhere. If a commerce item defines the product class that you want to delete in the Item class field of a specific product, the product class cannot be deleted.
- From the Staff site, go to Settings > Commerce > Product classes.
- Click the Delete this item icon ( X ) for the product class you want to delete. A prompt is displayed asking you to confirm that you want to delete this item.
- Click OK.
Notice that when editing or adding a new commerce item the Item class drop-down no longer contains the deleted product class.
Updated 5 months ago