

Entering payments
From the Enter payments window, staff users can do the following:
- Enter payments against open invoices
- Enter a single payment method for multiple open invoices for a single contact
- Enter a single payment method for multiple open invoices for different contacts
Do the following to enter a payment:
-
Go to Finance > Pay Central > Enter payment.
-
Use one of the Retrieve invoices fields to locate the invoice:
- By invoice number - Select the lookup icon to locate an open invoice. Use the All open invoices query to search only on open invoices. Continue using the lookup icon to add additional open invoices.
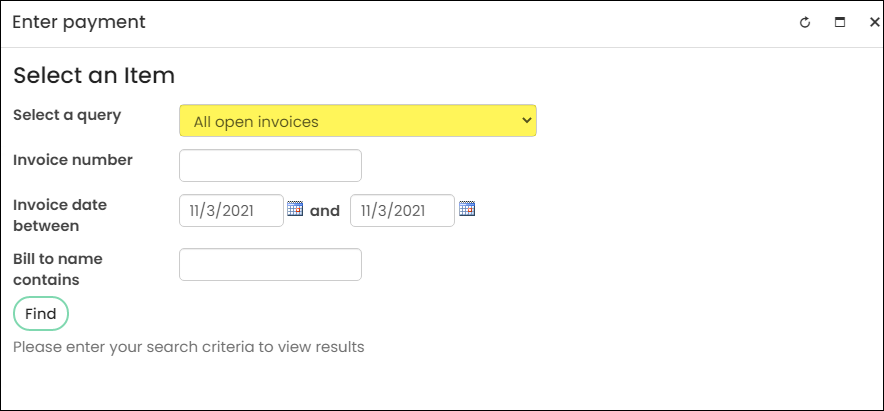
- By bill to (Contact ID) - Select the lookup icon to locate a bill-to contact that the open invoice belongs to. If the bill-to contact has more than one open invoice, all invoices are displayed. No invoices are selected for payment if the bill-to contact does not have any open invoices. Continue using the lookup icon to add additional open invoices for other bill-to contacts.
-
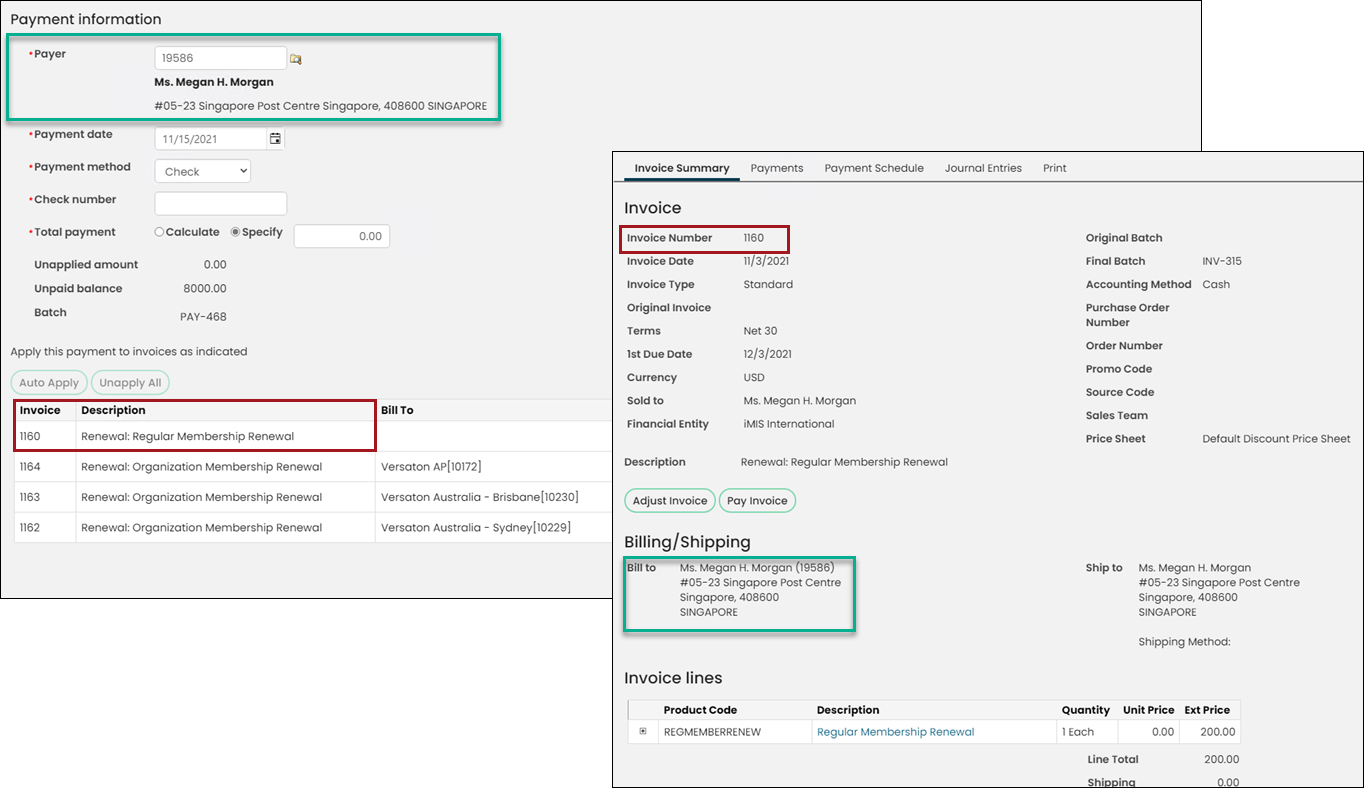
By default, the Payer field is automatically populated with the bill-to contact information. If you have added more than one invoice, the bill-to contact from the first invoice you selected is used. Manually update the Payeror search for a different Payer if required.
-
For cash or check payment methods, select the Payment date. The current date is the default date. You can use the date field to backdate cash and check payments, but credit card payments must be today's date.
-
Select a Payment method from the drop-down, and enter the information for your chosen payment method in the appropriate fields.
-
Select a Total payment option:
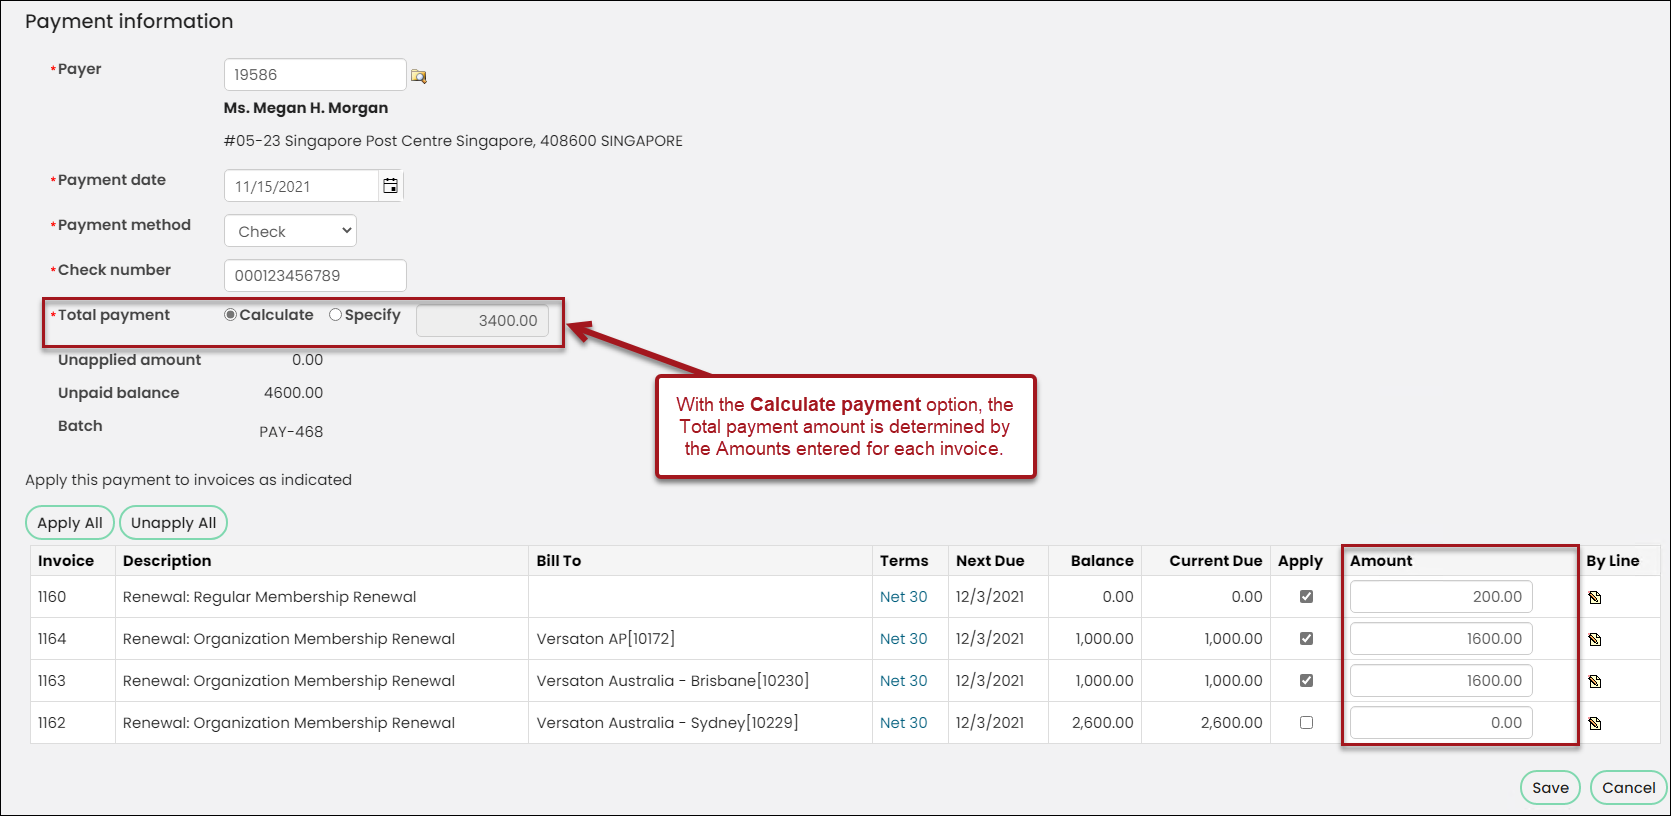
- Calculate - Use this option to determine the Total payment after all invoice lines are populated with an Amount.
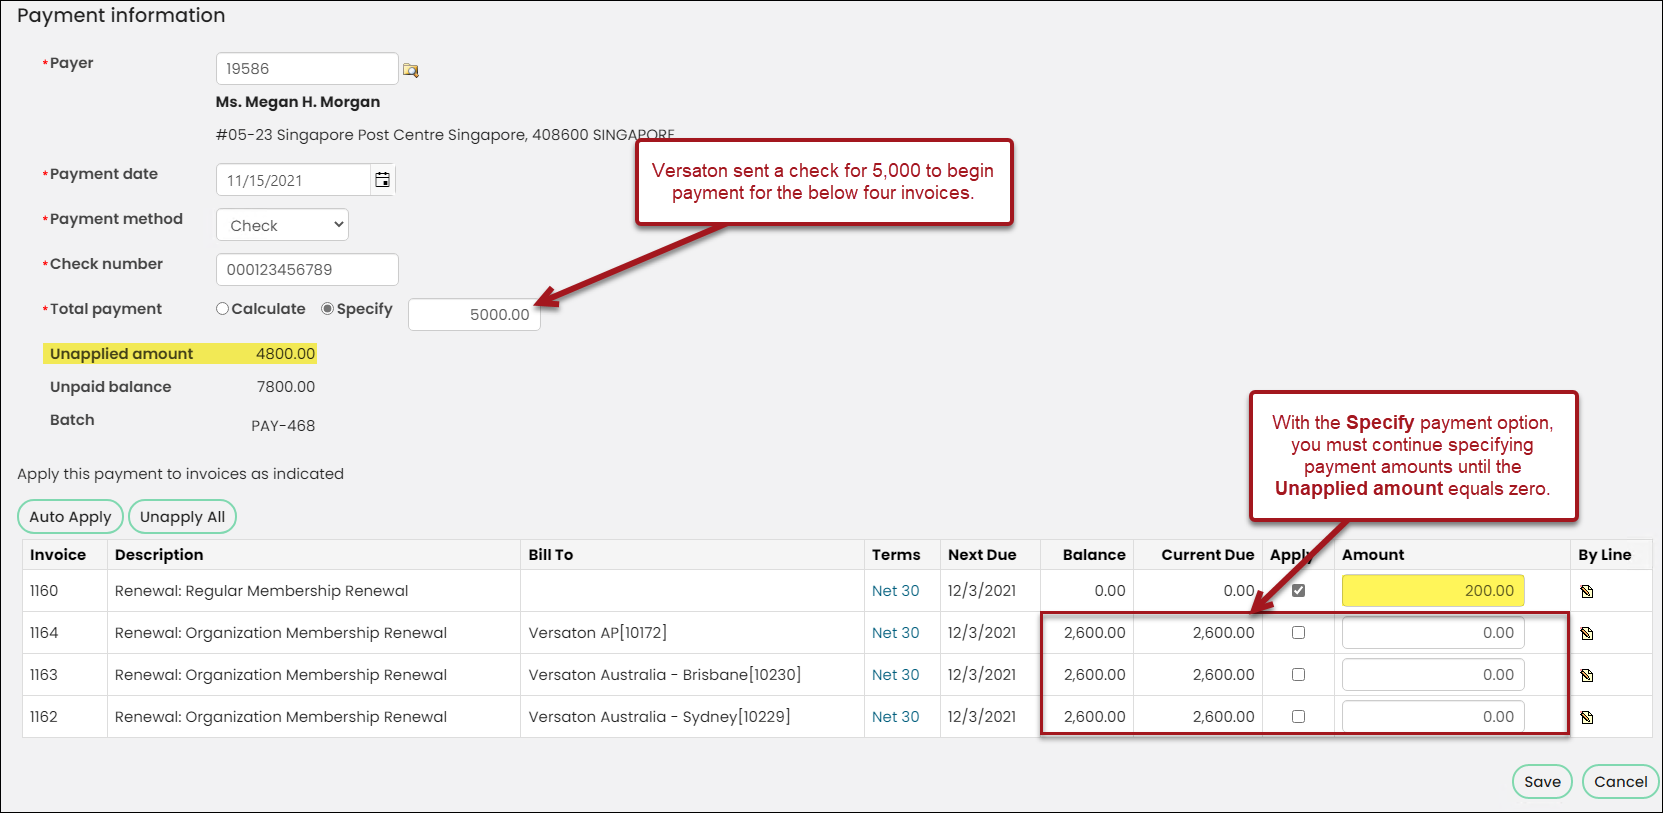
- Specify - Use this option to specify the Total payment before the payment is distributed amongst invoices. The Unapplied amount must equal zero, meaning, the amount specified must be distributed amongst all selected invoices.
-
Enter the Amount to be paid for each invoice.
-
(optional) Click the By Line icon to change which particular invoice line items are paid, if the payment Amount is less than the Balance.
-
When ready, click Save. The invoices are updated with the specified payments. To review the invoices, go to Finance > Invoices.
Invoice details
The invoice grid is populated when the invoice data is retrieved. The following fields are found in the invoice grid:
- Invoice - Shows the invoice number.
- Description - Shows the type of invoice.
- Bill To - The bill-to contact listed on the invoice.
- Terms - Shows when the amount is due for payment. For example, Net 30 means the full amount is due within 30 days of the purchase.
- Next Due - Shows the next payment due date.
- Balance - Shows the outstanding balance.
- Current Due - Shows the amount that is currently due for payment.
- Apply - Check to add the specified amount to the Amount field.
- Amount - Shows the amount that will be paid.
- By Line - Opens the Invoice Lines window. This window allows the Staff user to edit invoice line items.
NotePayment amounts for invoices that do not have a current due date will have to be manually entered into the Amount field of the invoice grid.
Storing credit card information in iMIS
Credit card information is not stored in iMIS. The credit card information exists briefly in memory (encrypted) until an authorization response is received from the gateway. Then the credit card information is removed from memory.
The following is a basic outline of the process:
- A cardholder enters payment data into a secure web page, then submits the data.
- The cardholder details are securely sent to the iMIS application server by way of SSL (Secure Socket Layer), using a protocol called TLS (Transport Layer Security) 1.2, which encrypts the cardholder data in transit.
- iMIS extracts the cardholder details from the transmission and re-encrypts the cardholder details while held in memory.
- The cardholder’s payment information is sent encrypted from iMIS to a payment gateway using the same secure SSL/TLS 1.2 protocol, above.
- The payment gateway sends a response (for example, an authorization) back to iMIS.
- iMIS deletes the memory-only object containing the encrypted cardholder information, unless this transaction is for an AutoPay enrollment.
NoteFor an AutoPay enrollment, iMIS sends the cardholder data to the Pay Central Service. The tokenization engine encrypts the cardholder data and stores the data for future AutoPay transactions. The tokenization engine returns a token representing the cardholder data back to iMIS, which iMIS uses to request payment.
Updated 5 months ago