

Creating and editing scheduled tasks PLUS
NoteThis is a licensed feature. For more information, contact your AiSP or ASI Technical Support.
Do the following to create a new scheduled task:
- Go to RiSE > Process automation.
- (Tasks tab) Click Add new task.
- Enter a Name that indicates the purpose of the task.
- (optional) Enter a task Description.
- Select Scheduled task as the task Type.
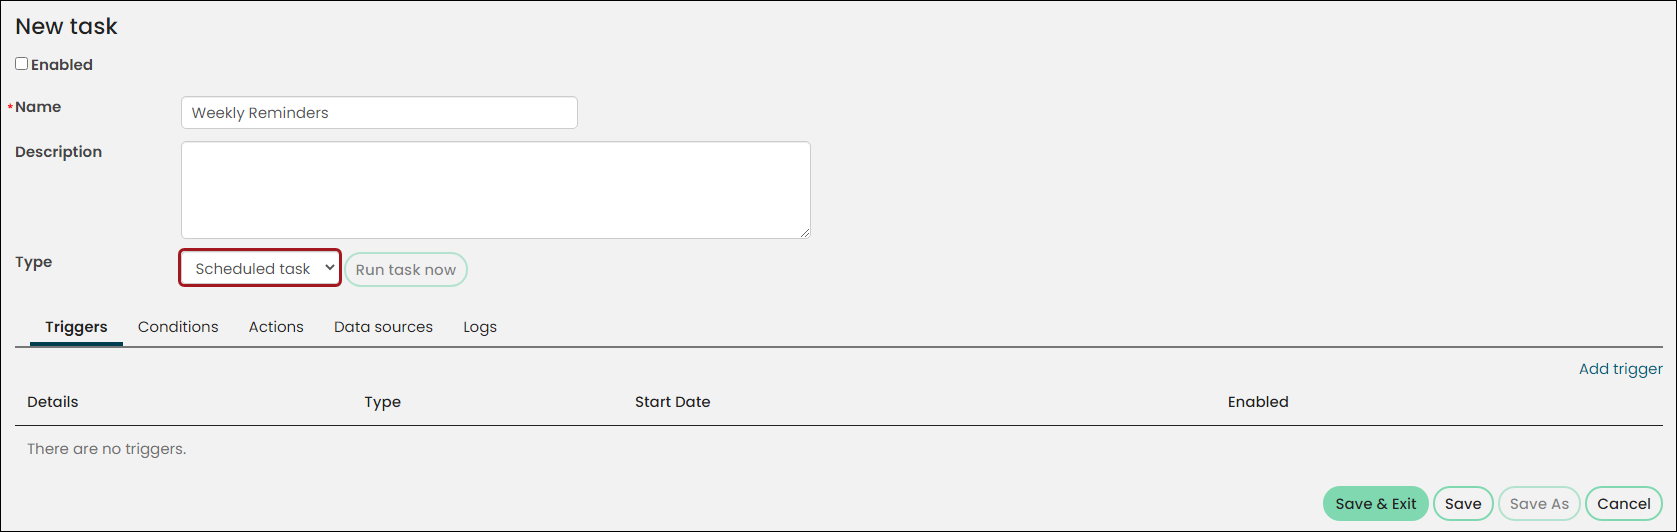
- (Triggers tab) Create Triggers that tell the task when to run.
Click for details

Triggers determine when and how frequently the communications are sent. You can schedule one time, daily, weekly, and monthly communications.
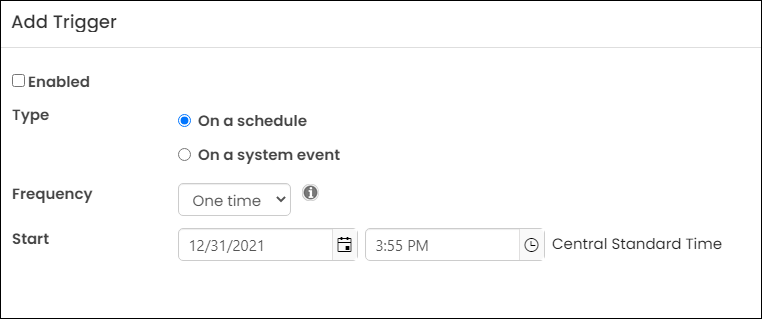
- Click Add trigger.
- Select a trigger Type.
Trigger type details
System administrators can add triggers to scheduled tasks, enabling iMIS to run a task when a pre-defined trigger event occurs. Once a trigger event occurs, iMIS will run the appropriate task.
You can add triggers to tasks as you create new tasks, or you can add triggers to already-defined tasks. Select the type of trigger to use:
On a schedule
System administrators can specify the exact time a task will run, as well as the frequency with which the task is run.
- Select a Frequency of One time or Daily. You can Schedule a Daily task to run at specified intervals.
- If you select a Frequency of Weekly or Monthly, you can select the Day of week or Day of month when the task will run. You can select multiple days of the week or month.
- Select the Start date and time. When using a Frequency of Daily, Weekly, or Monthly, you can also select an End date and time. The start date and time is based on the system Time zone setting.
On a system event
The task can be defined to run after a specific system event occurs, for example, a task can be defined to run every time a gift is received. You can choose from a predefined list of common system events, and the task will run whenever that event occurs in iMIS.
For system events, there is a corresponding Business Object that can be used to build IQA queries that can be included as data sources in the tasks. The Business Object identifies the unique key of the object which triggered the task and allows you to easily access any other related data about the object. The unique key is identified in the Business Object with a property name of TriggerId. This property should be added as a filter in the IQA queries with the value equal to “@TriggerId”. This will filter the results of the query to the object which triggered the task. Leave the filter Prompt set to No.
- Charitable item purchased (Non-batched) - This system event trigger causes the task to run for each charitable item that is ordered and paid for in iMIS. This includes gift items and any products or event program items that are selected as a Charitable item.
- CharitableItemPurchasedTrigger Business Object should be used in queries as data sources in the task if you wish to limit the results to just the gift that triggered the task.
- The unique identifier is the Order Kine Key. In the CharitableItemPurchasedTrigger Business Object, the TriggerIdOrderLineKey property can filter queries to just the item which triggered the task if the filter is set to TriggerIdOrderLineKey = “@TriggerId”.
Do the following to create a task on a system event:
- Create an IQA query using the CharitableItemPurchasedTrigger Business Object as a data source.
- In the query, add a filter for TriggerIdOrderLineKey = “@TriggerId”. Include the Id of the donor as a display column along with any other gift information you would like to include within the email. Leave the filter Prompt set to No for the @TriggerId.
- Create a communication to send to the donor. If you wish to insert information about the gift be sure to use the same column names that are used in your new IQA query. See Sending scheduled communications for more information.
- Create an automated task with a trigger type On a system event.
- Choose the event Charitable item purchased (Non-batched).
- Add an action to the task with the type Send a communication. For the data source, choose your new IQA query.
- Choose your new communication.
- Save the task.
When this task runs, the Order Line Key representing the gift is passed to the IQA query and it will be filtered to return a row for just that order line (gift). The ID of the donor will be passed to the communication which will then be sent to just that recipient.
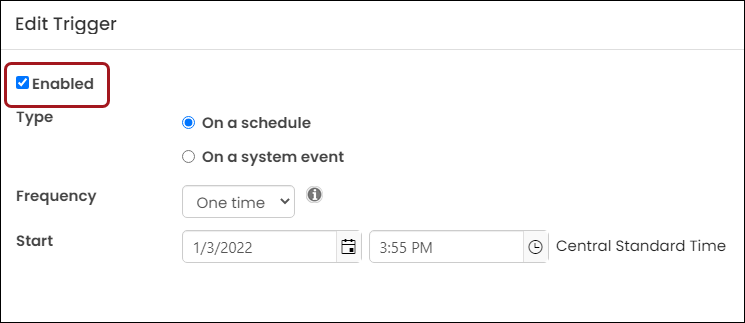
- Select Enabled to enable the new trigger.
- Save the new trigger.
- (optional) (Data sources tab) Create and manage query data sources for the task.
Click for details

All query data sources created for this task are listed. The name of all data sources will populate in a drop-down when defining a Condition or Action. You cannot delete a data source if the data source is selected within a Condition or Action, however not every data source you have defined must be used when creating a Condition or Action.
- Select Add data source.
- Enter a Data source name. It is recommended that you choose a name that indicates the type of records returned by the data source. The name must be unique.
- Select an existing query or click Create source query to add a new query.
- If you select an existing query, the $/Common/Tasks/Queries folder opens by default.
- If you choose to add a new query, you are taken to the Intelligent Query Architect where you can define a new query.
- Save your data source.
- If needed, add additional data sources.
- Select Add data source.
- (optional) (Conditions tab) Specify Conditions that must be met in order for the task to run.
Click for details

- If a query data source was defined on the Data sources or Actions tab, select one of the following options:
- Use existing data sources - select a previously defined data source from the drop-down that will only display data sources that are not being used in any otherConditions.
- Use results of IQA query as data source - select this option to define a new data source.
- Enter a Data source name. It is recommended that you choose a name that indicates the type of records returned by the data source.
- Select an existing query or click Create source query to add a new query.
- If you select an existing query, the $/Common/Tasks/Queries folder opens by default.
- If you choose to add a new query, you are taken to the Intelligent Query Architect where you can define a new query.
- If there were no previously defined data sources from the Data sources or Actions tab, provide the following required information:
Enter a Data source name. It is recommended that you choose a name that indicates the type of records returned by the data source.
Select an existing query or click Create source query to add a new query.
- If you select an existing query, the $/Common/Tasks/Queries folder opens by default.
- If you choose to add a new query, you are taken to the Intelligent Query Architect where you can define a new query.
- Save your data source.
- If needed, add additional data sources.
🚧 Warning
When a task is triggered, it only executes its action if the selected data sources return one or more records or no Conditions are defined.📘 Note
This data source will populate on the Data sources tab once you click Save. You can also edit and remove data sources from the Conditions tab.All query data sources created for this task are listed. The name of all data sources will populate in a drop-down when defining a Condition or Action. You cannot delete a data source if the data source is selected within a Condition or Action, however not every data source you have defined must be used when creating a Condition or Action.
- Select Add data source.
- Enter a Data source name. It is recommended that you choose a name that indicates the type of records returned by the data source. The name must be unique.
- Select an existing query or click Create source query to add a new query.
- If you select an existing query, the $/Common/Tasks/Queries folder opens by default.
- If you choose to add a new query, you are taken to the Intelligent Query Architect where you can define a new query.
- Save your data source.
- If needed, add additional data sources.
- If a query data source was defined on the Data sources or Actions tab, select one of the following options:
- (Actions tab) Define the action the task performs when it runs. The Actions tell the task what to do when it runs. When the Triggers occur and the Conditions are met, the task executes the Actions. In this case, the action is sending a communication to a recipient list generated by a selected recipient data source using a specified communication template.
Click for details

- Click Add action.
- Select an action Type.
- Send a communication - Automatically sends a communication on a scheduled basis. See Sending scheduled communications.
- Calculate engagement scores - Automatically calculates engagement scores. See Scoring.
- Issue and email gift receipts - Select a receipt data source and communication you want to send.
- Generate recurring donation invoices - Generates a recurring donation batch. Click Run on the Generate invoices tab to run this task. See Generating invoices for more information.
-
Send invoices to Pay Central - You can select an Invoice source query to use as the source of the invoices you want to submit for processing.
📘 Note
The Invoice source query you select must include the code_InstructionKey column. Use the following values:
-- Property - Recurring Transaction Instruction Key
-- Alias - code_InstructionKey
If your queries are not updated, you will receive an error.Click Run on the Submit payments tab to run this task. See Submitting payments for more information.
- Retrieve payments from Pay Central - This refreshes the payment status of the submitted payments and writes the submitted payments back to iMIS. Click Retrieve processed payments on the Retrieve processed payments tab to run this task. See Retrieving process payments for more information.
- Run a report - See Sending scheduled reports.
- Run a stored procedure - Enter the name of the stored procedure you want to run.
- Run content workflow - Select the communications for the content and navigation workflows.
- Reverse past due renewals - Reverses renewals for members who appear in the Past-Due Renewals query. Review Reversing past-due membership renewal invoices before using this action.
- (optional) If you select Type of Send a communicationor Issue and email gift receipts, select a Recipient data source query, which determines the recipient list for your communication. Data sources added on the Conditions or Data Sources tab are available. For more information on creating recipient data source queries, see Creating a list of contacts to email.
- (optional) If needed, you can click Add new data source to select additional query data sources if you select Type of Send a communicationor Issue and email gift receipts.
Enter a Data source name. It is recommended that you choose a name that indicates the type of records returned by the data source.
- Select an existing query or click Create source query to add a new query.
-
If you select an existing query, the $/Common/Tasks/Queries folder opens by default.
-
If you choose to add a new query, you are taken to the Intelligent Query Architect where you can define a new query.
-
- If you select the Type of Send a communication or Issue and email gift receipts, specify the Communication email template that you want to send to the recipient list:
- Select an existing email template.
- Create a new template.
- (optional) If you select the Type of Run a stored procedure and your task contains a Trigger with the Type of On system event, an option to Enable TriggerIDs as parameters is available. The stored procedure specified must contain at least one TriggerId parameter if this option is enabled. Select the information icon for specific parameter names and data types depending on which system event was selected in the Trigger.
- (optional) If you select the Type of Issue and email gift receipts, an option to Group gifts from the same donor into a single receipt is available. Enable this option to include gifts from the same donor on the same receipt. If this option is not enabled, receipts for each gift are issued separately.
- If you select the Type of Run content workflow, specify the communication email template that you want to send to the recipient list:
- Navigation workflow communication sends a notice for navigation that has expired.
- Content workflow communication sends a notice for content that has expired.
For more information on content workflow, see Workflow Management tab.
- Save the action.
📘 Note
Some of the following list items might not be displayed depending on the Type that is selected.The following are the action types to choose from:
📘 Note
You are not required to select a recipient data source if the communication template used by the action already contains a recipient data source. If you select a recipient data source in the action and the communication also contains a recipient data source, the action’s recipient data source is used.📘 Note
For more information about templates, see Creating a newl communication template.📘 Note
If any of the defined trigger type has On a system event selected, receipts for each gift will be issued separately even if the Group gifts from the same donor into a single receipt option is enabled.📘 Note
You can also edit and remove actions from the Actions tab.All query data sources created for this task are listed. The name of all data sources will populate in a drop-down when defining a Condition or Action. You cannot delete a data source if the data source is selected within a Condition or Action, however not every data source you have defined must be used when creating a Condition or Action.
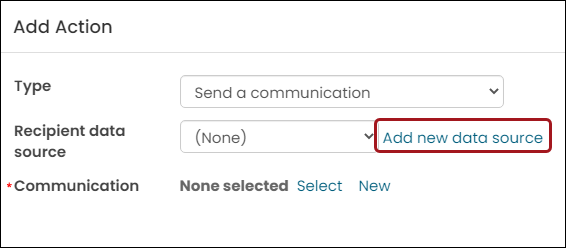
- Select Add new data source.
- Enter a Data source name. It is recommended that you choose a name that indicates the type of records returned by the data source. The name must be unique.
- Select an existing query or click Create source query to add a new query.
- If you select an existing query, the $/Common/Tasks/Queries folder opens by default.
- If you choose to add a new query, you are taken to the Intelligent Query Architect where you can define a new query.
- Save your data source.
- If needed, add additional data sources.
- To activate the task, select Enabled.
- Save the task.
- (optional) Click Run task now to run the task immediately.
- (optional) (Data sources tab) Create and manage query data sources for the task.
- (optional) Review the Logs to determine which scheduled tasks have been run, which actions have been performed, and whether any scheduled tasks did not complete successfully.
📘 Note
When clicking Run task now, DO NOT refresh your browser; otherwise, the task will start over. To see the log, click the Logs tab, then click the Find button. The log for the last runs of the task will be listed. Also keep in mind when you click Run task now, you will see a message that says Your task was executed. You will not see the log for this last run until you go to the Logs and click Find.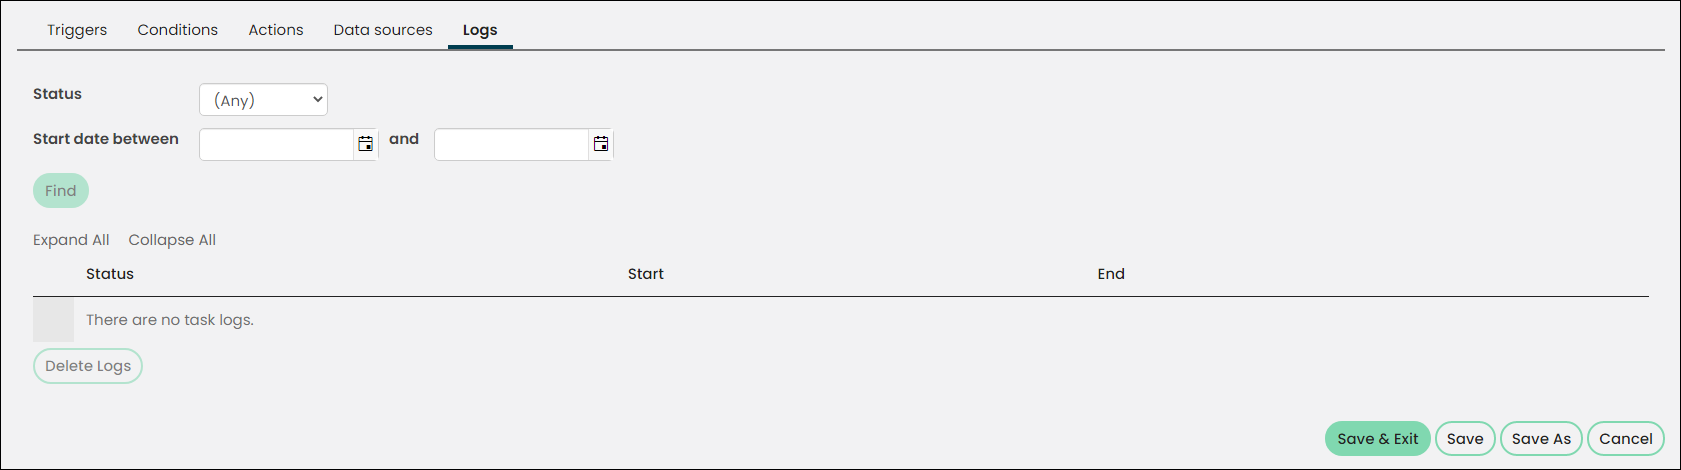
- You can search for specific scheduled tasks based on the name of the task, the status of the task, or the date when the task was initiated.
Click for details
- From the Staff site, go to RiSE > Process automation, and select the Logs tab. You can also review the log for each scheduled task by opening the task and reviewing the task Logs tab.
- You can search for specific scheduled tasks based on the name of the task, the status of the task, or the date when the task was initiated.
- In progress - The task has been initiated, and is currently running. The task has not yet ended.
- Completed - The task has been initiated, and ended. There were no results by which a Succeeded or Failed status could be determined. The task evaluated the data source specified in the Conditions, but there were no results for the task to act upon. The task only executes its action if the selected data sources return one or more records, or no Conditions are defined.
- Failed - The task was initiated and ended, but the task did not complete successfully.
- Succeeded - The task was initiated and ended, and the task completed successfully.
- A list of scheduled tasks is displayed. You can click the name of the scheduled task to open a task editor.
- To view the log for a scheduled task, click the Expand ( + ) icon. This will open the log details for the specified scheduled task. You can also click Expand All to see log details for all scheduled tasks.
- Trigger execution - This is the moment when the scheduled task is initiated.
- Datasource evaluation - The scheduled task evaluated the data source specified in the Conditions. If there are results for the task to act upon, this event will have a Succeeded status, and an Action execution event is initiated.
- Action execution - If the Datasource evaluation is successful, the task continues to perform the action defined for this task.
- You can also do one of the following to delete logs that you no longer need:
- Click the red X to delete a selected log.
- Click Delete All Logs to delete all recorded logs on the Logs tab.
- You can manage the scheduled task log entries to avoid expanding your database size. See Process automation for more information.
You can search for scheduled task logs based on the following statuses:
The log identifies the following events for most tasks:
If any of these events cannot be completed, a Failed status is displayed, and the task is ended. You can then investigate why a task event failed.
📘 Note
If you are not self-hosted, you must contact your host for assistance modifying web.config files.
Updated 5 months ago