

Managing panel sources
Panel sources are fundamental components within iMIS that store and organize the data displayed in panels. This article covers the management of panel sources, including viewing, adding, and deleting these sources.
NoteTo allow a panel source to be accessed through the REST API, enable Available via the REST API. If this option is not enabled, the panel source cannot be accessed externally. See Restricting or granting REST API access to panel sources for details.
Understanding the difference between panels and panel sources
Panel definitions and panel sources are distinct yet interconnected components of data collection and management in iMIS:
-
Panel sources – User-defined or system-provided data sources that store the information collected in a panel and define the data properties or fields. When a user enters or modifies data in a panel, this information is stored in the panel source. Panel sources are represented as business objects in iMIS.
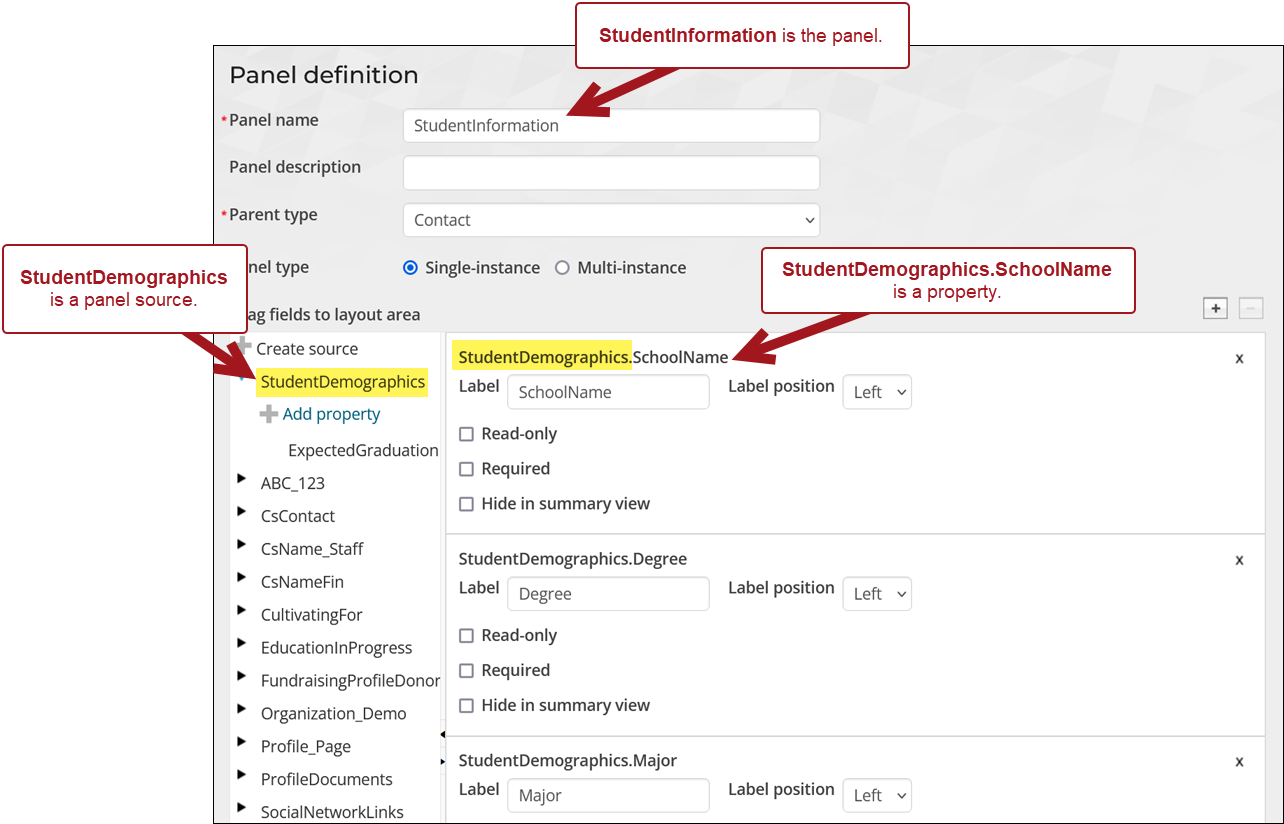
-
Panel definitions or Panels – Custom form made up of data fields from one or more panel sources. Can be added to content records using the Panel Editor content item to collect, display, and modify data. Panel definitions control the layout and appearance of the data properties.
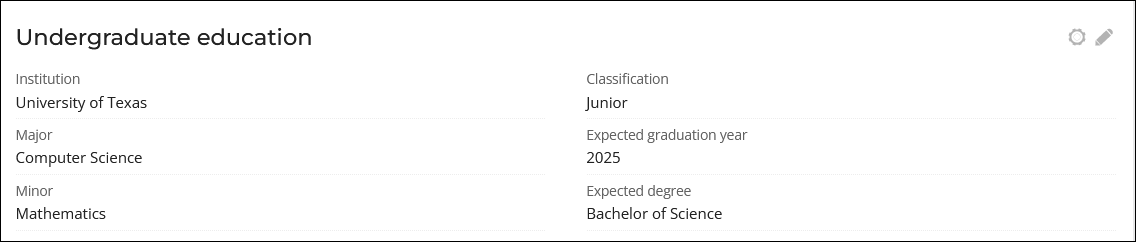
-
Panel Editor - The content item that allows you to display /include a Panel in content. Panels can only be displayed to end users if they are in a Panel Editor content item in a content record.
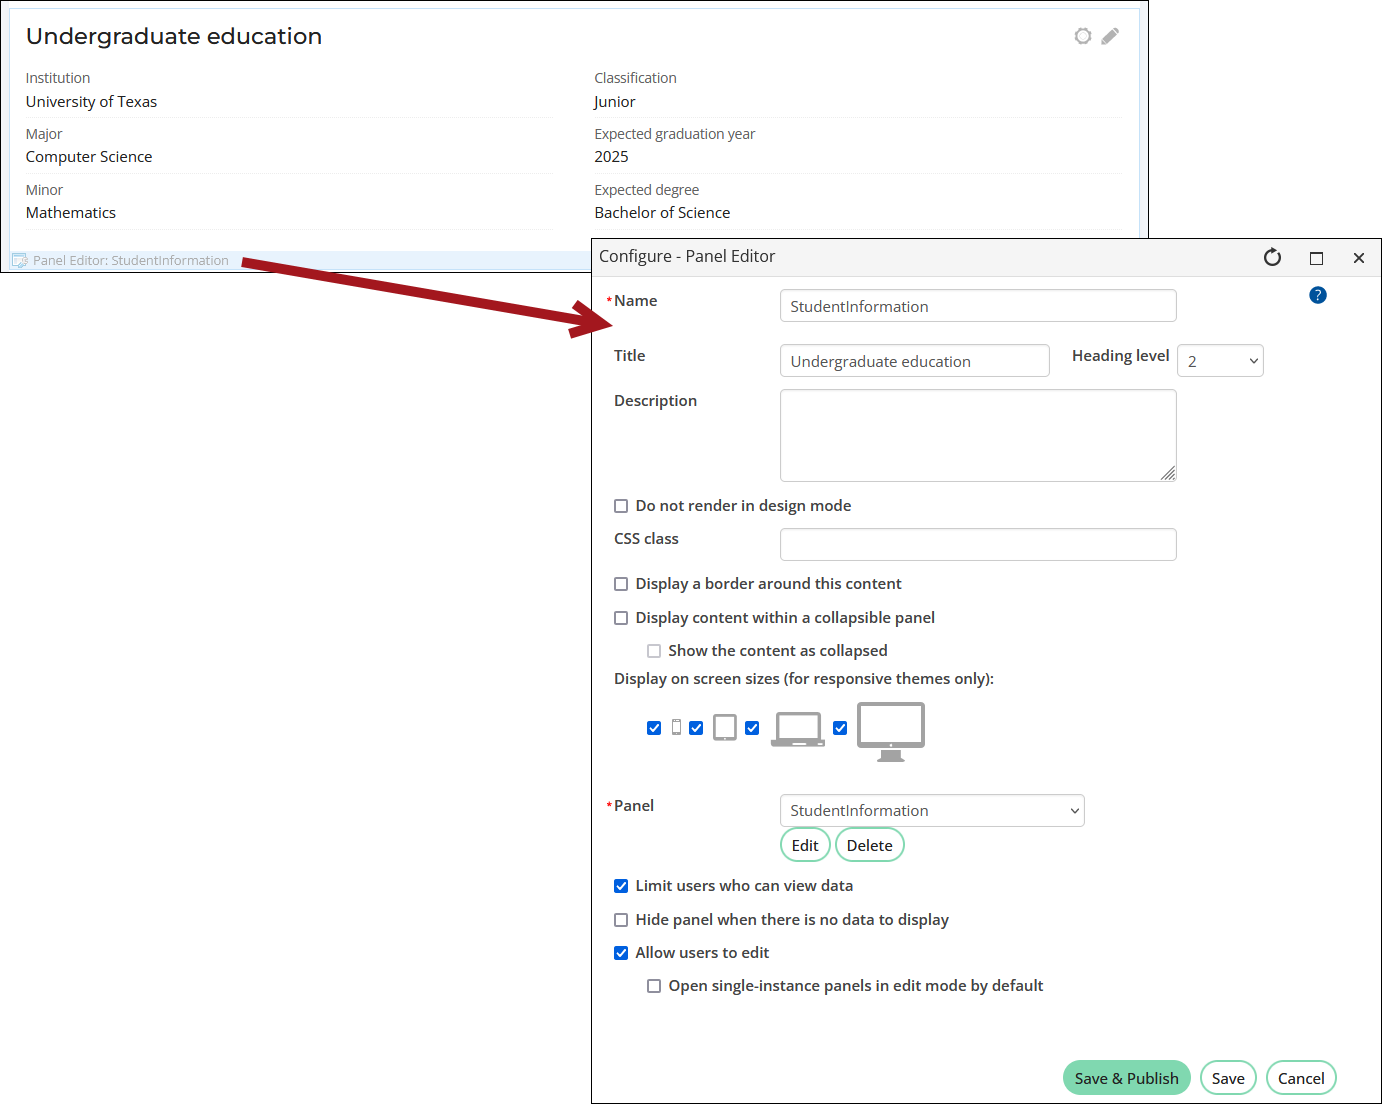
In short, panels are visible forms that can be included in content to collect and manage data from users, while panel sources define the properties and store the data.
Managing panel data
Do the following to manage panel data:
Creating panel sources
To create your own data source with properties, work within Panel definitions. Each new source you create is available for immediate use in the current panel. When you Save the panel, that new business object is saved to the iMIS database for use throughout the system. After you save it, you cannot rename it.
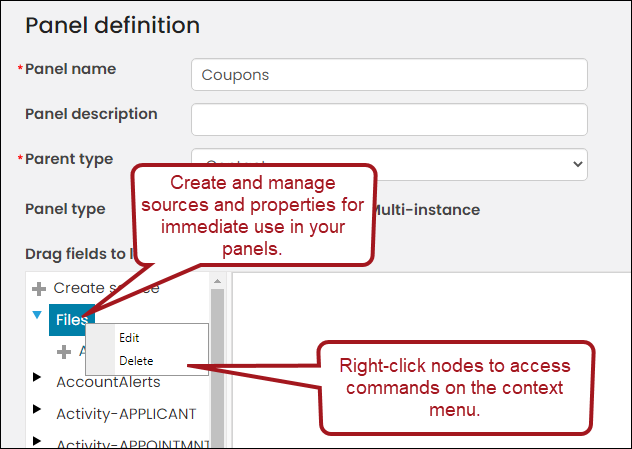
To create a new panel, do the following:
- From the Staff site, go to RiSE > Panel Designer.
- Select Add panel definition.
- Enter a Panel name and optional Panel description.
- Select the Parent type of the panel:
- Contact – Associates the table data with a specific contact. These are the panels you put on user account pages to display data that is specific to each contact.
- Groups - Associates the table data with a specific group type. These are the panels you put on a group page to display data that is specific to each group.
-
Event - Associates the table data with a specific event. Panels can include properties for resources, sponsors, hotels/venues information, or any data you want a value list for. Panels associated with events results in creating panel sources such as tables and business objects that have a column for EventKey. An EventKey is a unique value used to join a business object to other panel data sources and business objects in IQA that represent events. For event panels, an EventKey is automatically generated for the business object that represents the panel data source.
- Standalone - Does not associate table data with a specific contact. Standalone panels are multi-instance only and can be used anywhere in iMIS. These panels are useful for anonymously tracking information or creating a multi-instance form. See Creating standalone panels for more information.
- Select a Panel type. The Panel type you choose determines which panel sources appear.
Click for details
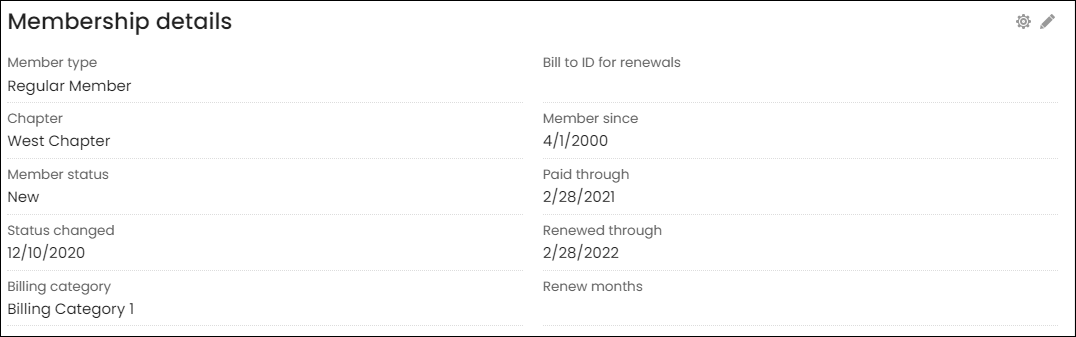
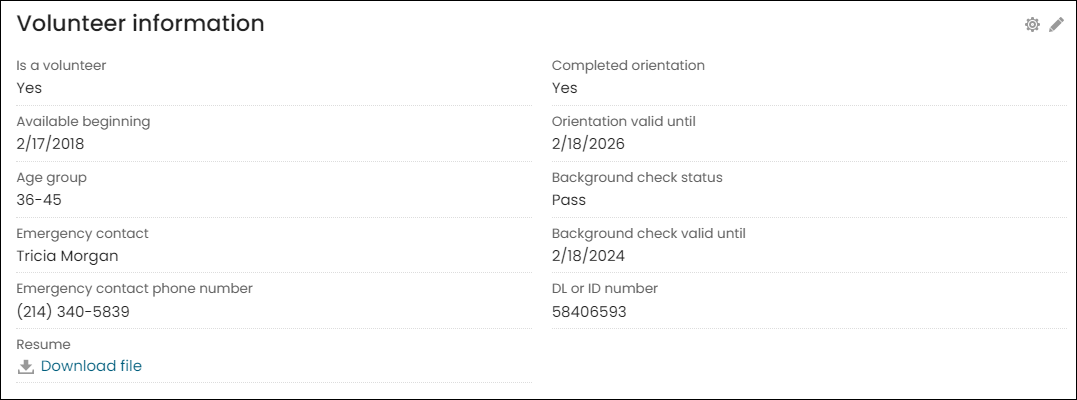
Single-instanceSingle-instance panels allows for one entry per panel property and contain properties that can have only one value. The following are out-of-the-box examples of single-instance panels:
- The Membership details panel located on the Overview and Membership tab of contact account pages.
- The Volunteerinformation panel located on the Volunteering tab of contact account pages.
 Multi-instance
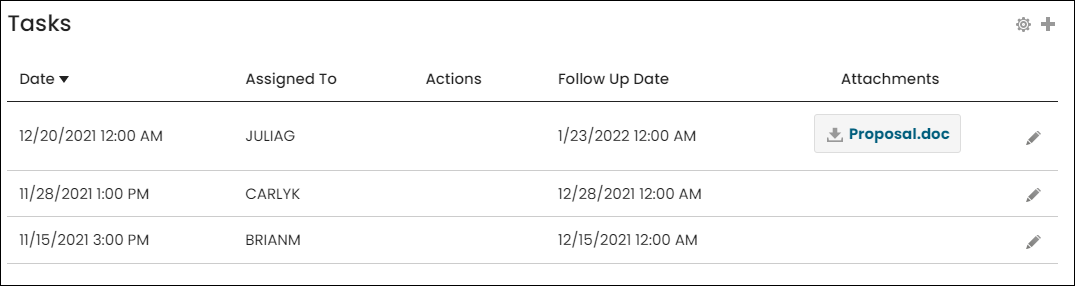
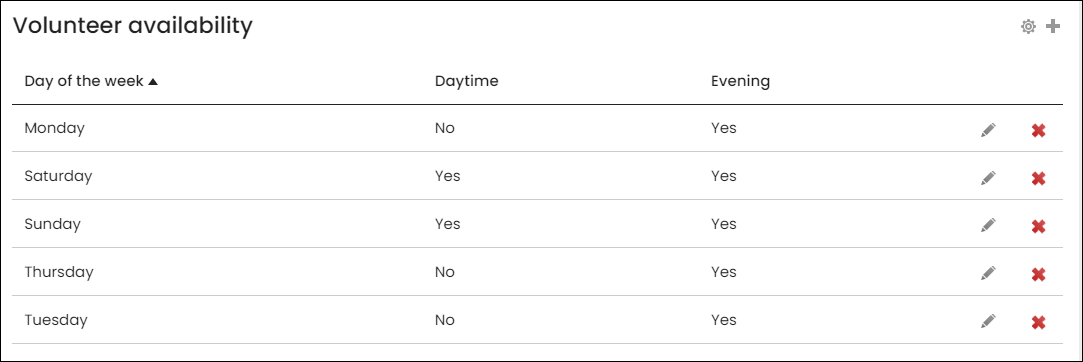
Multi-instance panels allow multiple entries for a single panel property and contain properties that typically have multiple entries for a single value, such as employment history, emergency contacts, or skills and interests. See Creating a panel that allows multiple entries for more details about multi-instance panels.
The following are out-of-the-box examples of multi-instance panels:
- The Tasks panel located on the Overview tab of contact account pages.
- The Volunteer availability panel located on the Volunteering tab of contact account pages.
- Select Single-instance. If you want users to be able to enter multiple entries per object, see Creating a panel that allows multiple entries.
- Click Create source.
- Enter a Source name for each new source. The Source name must meet the following criteria:
- Starts with a letter.
- Contains only letters, numbers, and underscores.
- Is unique across iMIS. The Source name cannot match any existing iMIS data or SQL Reserved Words.
📘 Note
We recommend that you use an organizational prefix (such as ABC_) so that your sources are unique, sort together in the tree view, and are easy to identify as sources that you created. - Click OK.
- Click Add property for the new source:
- Enter a Property name that:
- Starts with a letter.
- Contains only letters, numbers, and underscores.
- Is unique within its source.
🚧 Warning
Do not name a panel source property “MarkedForDeleteOn” because it is a reserved name. When data is populated for a given row in a source named “MarkForDeleteOn”, the row is excluded from queries and panels.📘 Note
You can configure your panel source to auto-populate the date and time an entry is updated. Refer to Auto-populating the date and time a panel source is updated. - Choose a property type that best fits your purpose:
- Currency: 19 total digits (precision), with four digits to the right of the decimal point (scale). The default masking displays two decimal places.
- Date, Date and Time, Time: January 1st, 1753, through December 31st, 9999.
- Decimal: 28 total digits (precision), with 12 digits to the right of the decimal point (scale). The default masking displays two decimal places.
- Email: Creates a mailto link, which launches the user’s default mail application when selected.
- File upload: Allows contacts to associate a file with their record. After a file is uploaded, it can be downloaded by anyone who can view the panel. By default, all file types are accepted. Enter specific Allowed file types to restrict the type of files that can be uploaded. The maximum file size allowed is 10 MB.
- Integer: –2,147,483,648 to 2,147,483,647 (±2 billion).
- When left blank, the default value is 0.
- Text: By default:
- The maximum character limit for single and multi-line Text fields depends on when the original table was createdoriginal table was created. Older tables (table was created in or before July 2015) will have a maximum of 400 characters, while newer tables (table was created in or after August 2015) will have a maximum of 3,999 characters.
- Pre-defined values from a query, source table (general lookup table), or explicit list that display as a drop-down:
- Query – Lists the results from a query, such as a list of countries. Click Browse to select a query. Click Remove to remove a previously selected query.
- Source table - Choose a general lookup table from the Source drop-down. The values defined in the general lookup table are what display as the values in the drop-down. See General lookup tables for more information.
- Explicit list – Lists specific terms that you define, such as industry type or regions.
- Allow multi-selections – Allows users to select multiple values for a single property.
📘 Note
HTML tags are not supported in single- or multi-line textboxes. If there is HTML in the textbox, users must manually delete the tags before saving.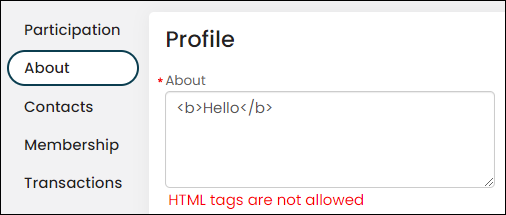
- URL: Creates a live hyperlink. When selected, a new browser is opened.
- Yes/No: Provides a checkbox for the user to select if Yes, or to leave blank if No.
📘 Note
For security reasons, we recommend that you do not allow .exe files. - (Does not apply to Standalone panels) Enable Log all changes if you want to track any data change made to the property.
-
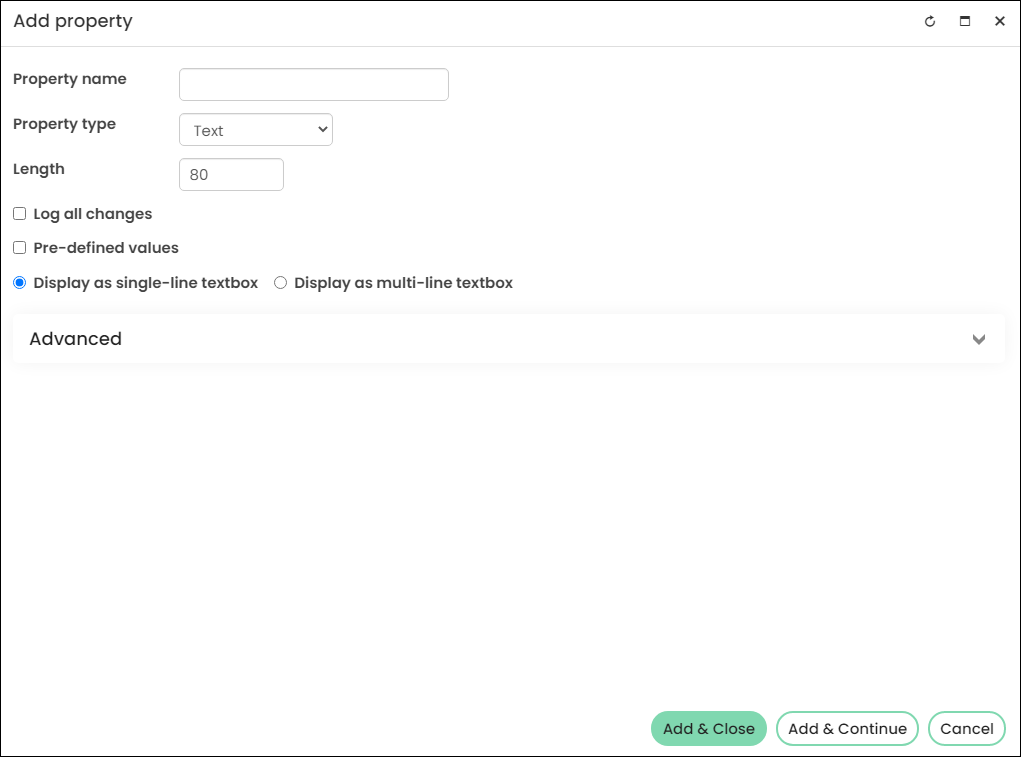
(Text Property type only) Enable Pre-defined values to display additional Text options:
- Enable the Allow multi-selections option to allow users to select multiple values for a single property. This option stores multiple values in a comma separated list.
- The Defined by query option provides validation-type properties based on the query results. For example, instead of typing out a list of countries, you could select a query that displays country values.
- Enable the Pre-defined values checkbox and select the Defined by query option.
- Click Browse, select a query, and click OK.
- Two additional fields are displayed:
- Data Value - The field you want saved in the database.
- Display Value - The field you want displayed in the list presented as a selection on the panel.
📘 Note
If Allow multi-selections is enabled, the Data Value properties cannot contain any commas. If the Data Value contains a comma, the properties will not properly display in the drop-down.While these values can be same, you might want to choose a different value to display on the panel. For example, the country code might not be as clear as the country name.
- Select the fields from the drop-down in the Data Value and Display Value fields.
- Click OK.
- The Defined by explicit list option allows you to create a list to display on the panel:
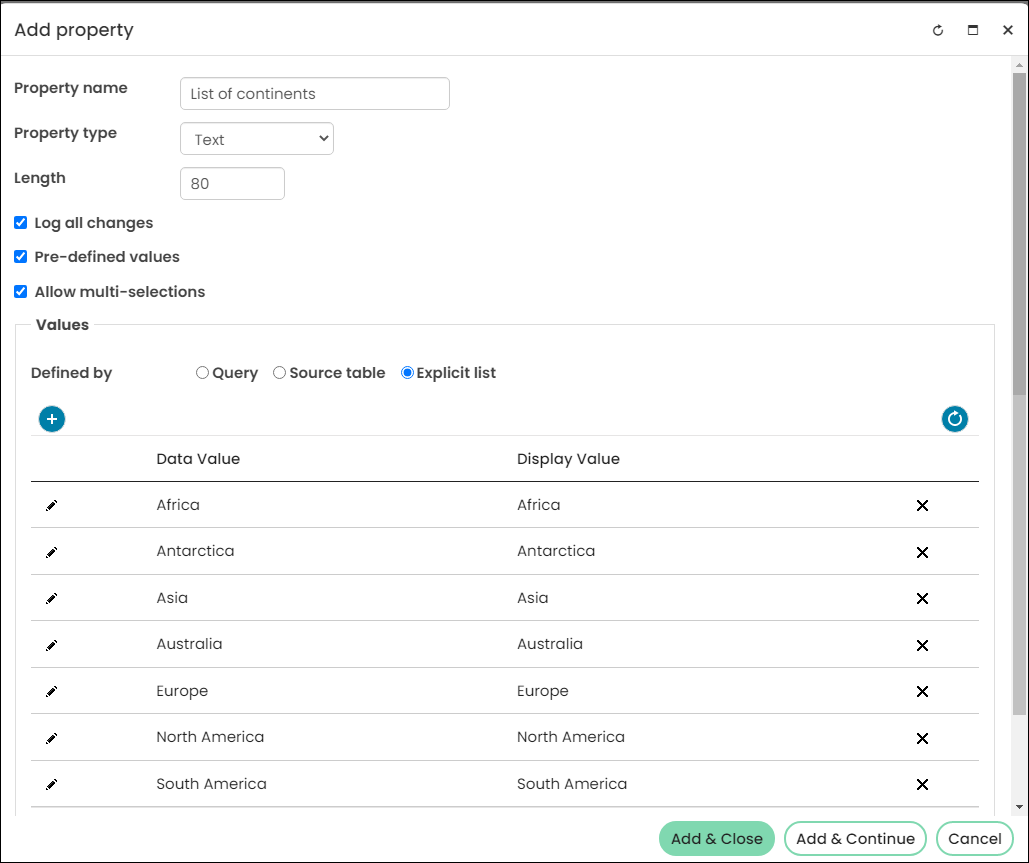
- Enable the Pre-defined values checkbox and select the Defined by explicit list option. A table grid is displayed.
- Click the plus icon (+) to add a data row. The data row contains two icons: Insert and Cancel, and two fields: Data Value and Display Value. The Data Value is the field saved in the database. The Display Value is the field displayed in the list presented as a selection on the panel. While these values can be same, you might want to choose a different value to display on the panel.
- Enter the appropriate values in the Data Value and Display Value fields.
- Click the Insert icon located to the left of the data row.
- Click the plus icon (+) to add additional data rows.
- Click OK.
📘 Note
The number you define in the Length field will be the total number of characters that can be used in the Data Value column. For example, if you enter 80 in the Length field, you can only enter values in the Data Value fields that have a total of 80 characters combined. The maximum number of characters for this field is 4000, however, indexing will be disabled if the number of characters exceeds 400.📘 Note
To learn how to edit an explicit value list, see Editing a panel with an explicit value list.
📘 Note
To retrieve the data with one row per value in order to filter or join on the values, use the DistinctUserDefinedMultiSelectProperties business object. This business object returns one row per person per value.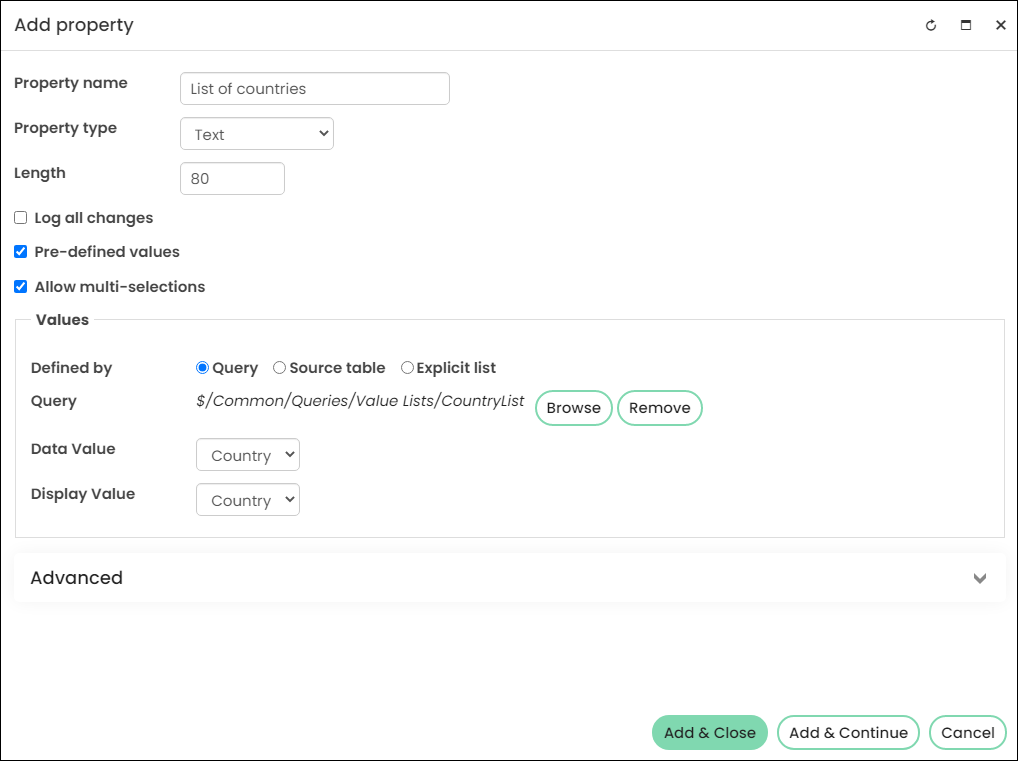
- (Does not apply to File upload or large Text fields of 400 characters or more) (optional) Expand the Advanced section and enable Index this property for improved query performance to index the panel property.
- Drag the fields to the layout area. You can also double-click a property to add it to the next available space in the layout area.
- Update the property Label.
- Click Save and Continue:
- After you save a property, you cannot rename it. Note that the sources will alphabetize properly on reopening.
- Each new property you create is available for immediate use in the current panel, but it is not limited to that panel.
- When you save the panel, the new business object property is saved in the iMIS database for use throughout the system.
- Once you save it, you cannot rename it.
- Do not Save until you create all of the properties. This way, you can view them as a set of properties and improve your naming convention before it is finalized.
- Navigate to any content record and add the Panel Editor content item to the page.
- From the Panel drop-down, select the panel you just created.
- Select Allow users to edit and any other content item configuration options you want to enable, then click OK.
- Save & Publish the content.
For Contact panels, an ID is automatically generated for the business object that represents the panel data source. The ID is a unique value used to join the business object to other panel data sources and business objects in IQA. It is also used as the iMIS ID for linking in IQA.
For Group panels, a GroupKey is automatically generated for the business object that represents the panel data source. The GroupKey is a unique value used to join the business object to other panel data sources and business objects in IQA.
All other properties and single and multi-instance panels can be used when created event-based panels.
📘 Note
When using the Bill to ID property, it is recommended you use CsContact.BillToId instead of CsNameFin.Bt ID.
📘 Note
Only staff users and system administrators can create, edit, view, and delete standalone panels. Public users cannot view standalone panels, and as a result, standalone panels should not be added to any public-facing content records.
📘 Note
Panel Editor properties with a pre-defined list of values are displayed as drop-down lists so users can select a desired value. If this pre-defined list is generated by an IQA query, any sorting criteria specified in the query is respected, and the order of the values presented in the drop-down is the same as the order specified by the query. Edit your IQA query as necessary to update the ordering on your drop-down.
📘 Note
Add the Change History Display content item to a content record if you want to display data changes made in the Name and Name_Fin tables, as well business objects.
It is recommended that property indexes be used sparingly. Enabling property indexes increase the speed of lookups and reports but could decrease the speed of adding or updating data in the source. It is recommended that this option be used for ID properties, such as codes in reference tables, fields aggregated in reports, or fields used in lookups.
📘 Note
The index is immediately rebuilt after the panel is saved. Rebuilding the index slows down the speed of a website, so it is recommended that indexes are added to existing panel properties during non-buisness hours.
📘 Note
HTML tags are not supported in the Label field. A validation message appears if there is HTML in the label, and upon confirmation, all HTML tags are removed from the Label.

📘 Note
If the panel is a Standalone panel, only staff users and system administrators can edit the panel.
Deleting single-instance panel sources
Do the following to delete a panel data source from a single-instance panel:
- Go to RiSE > Panel Designer.
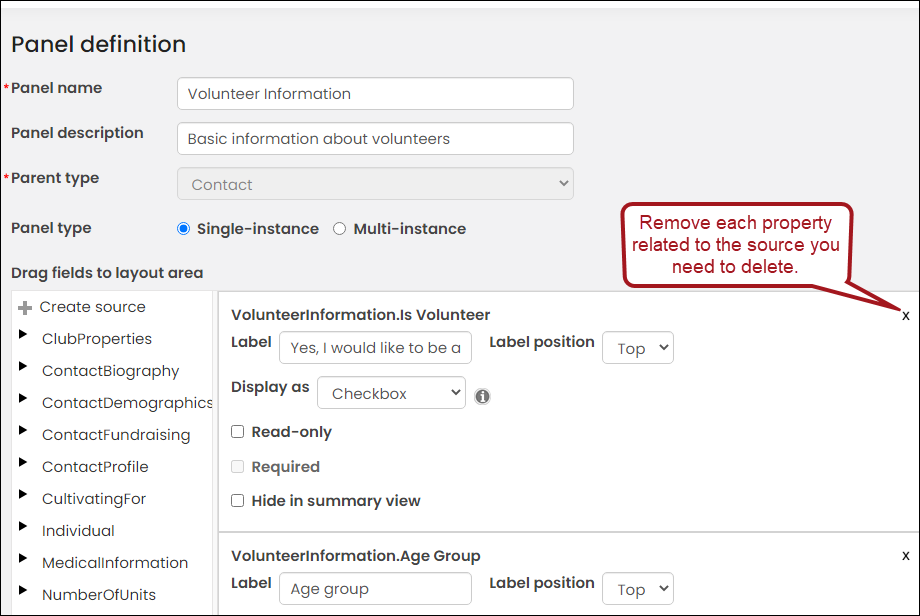
- Locate the panel(s) the properties are located on, then remove the properties from those panels.
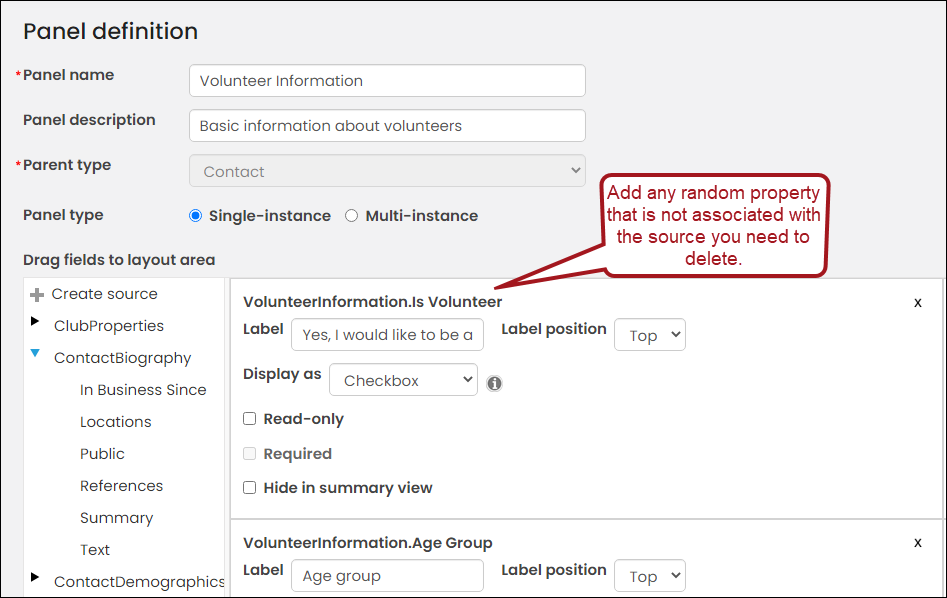
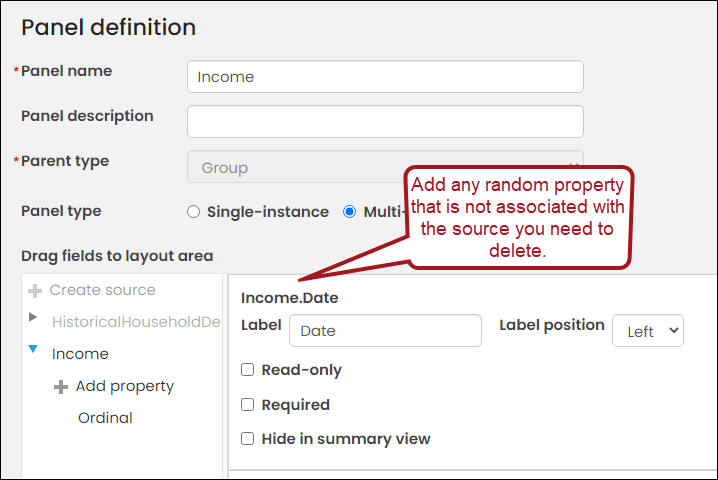
- If after you remove the properties from a panel and the panel is now empty, you must add at least one property from a different source in order to save the panel. This is because you cannot save an empty panel; however, if you do not save the panel after the properties have been removed, you cannot delete the source. Add any random property that is not associated with the source you need to delete.
- Save the panel.
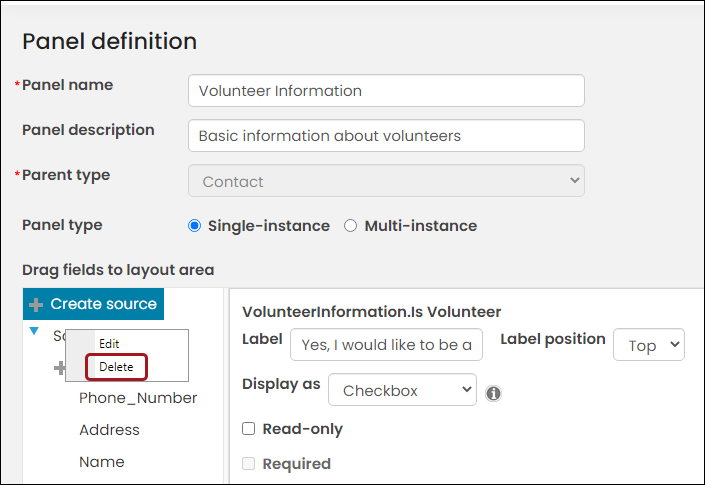
- Right-click the source.
- Select Delete.
- Click OK.
- Save the panel. The panel source is officially deleted after you click Save.
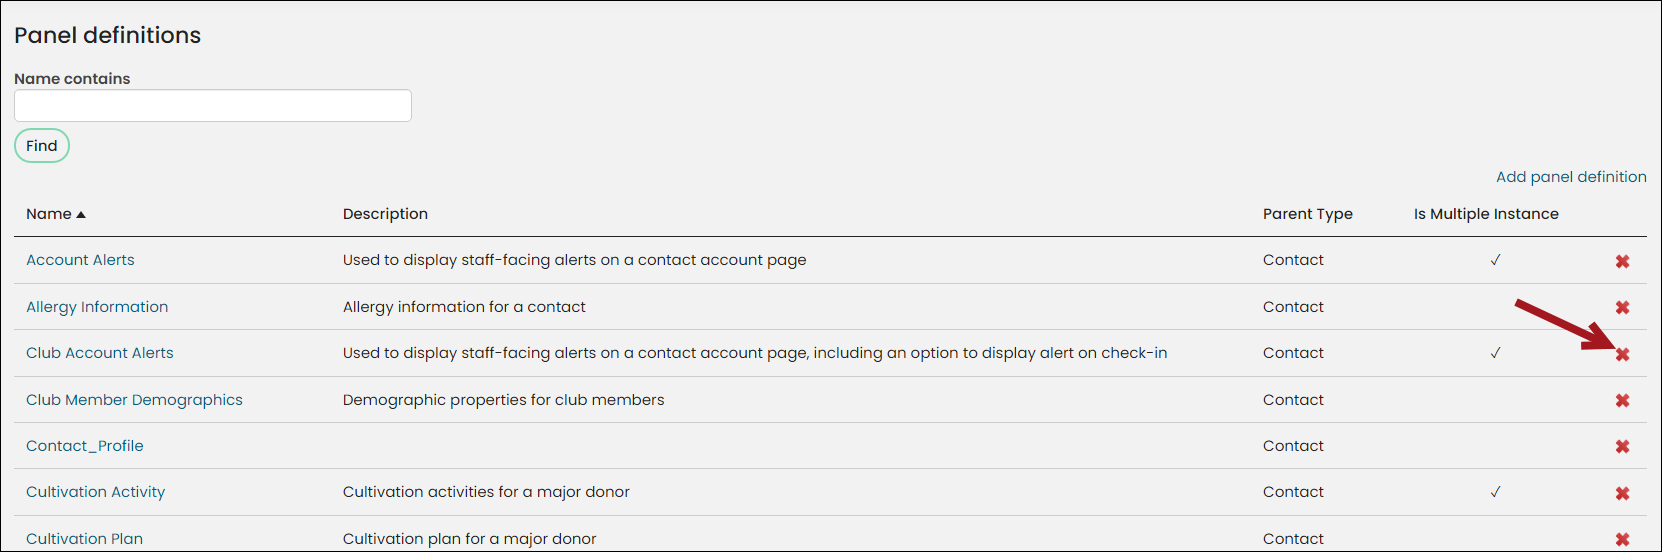
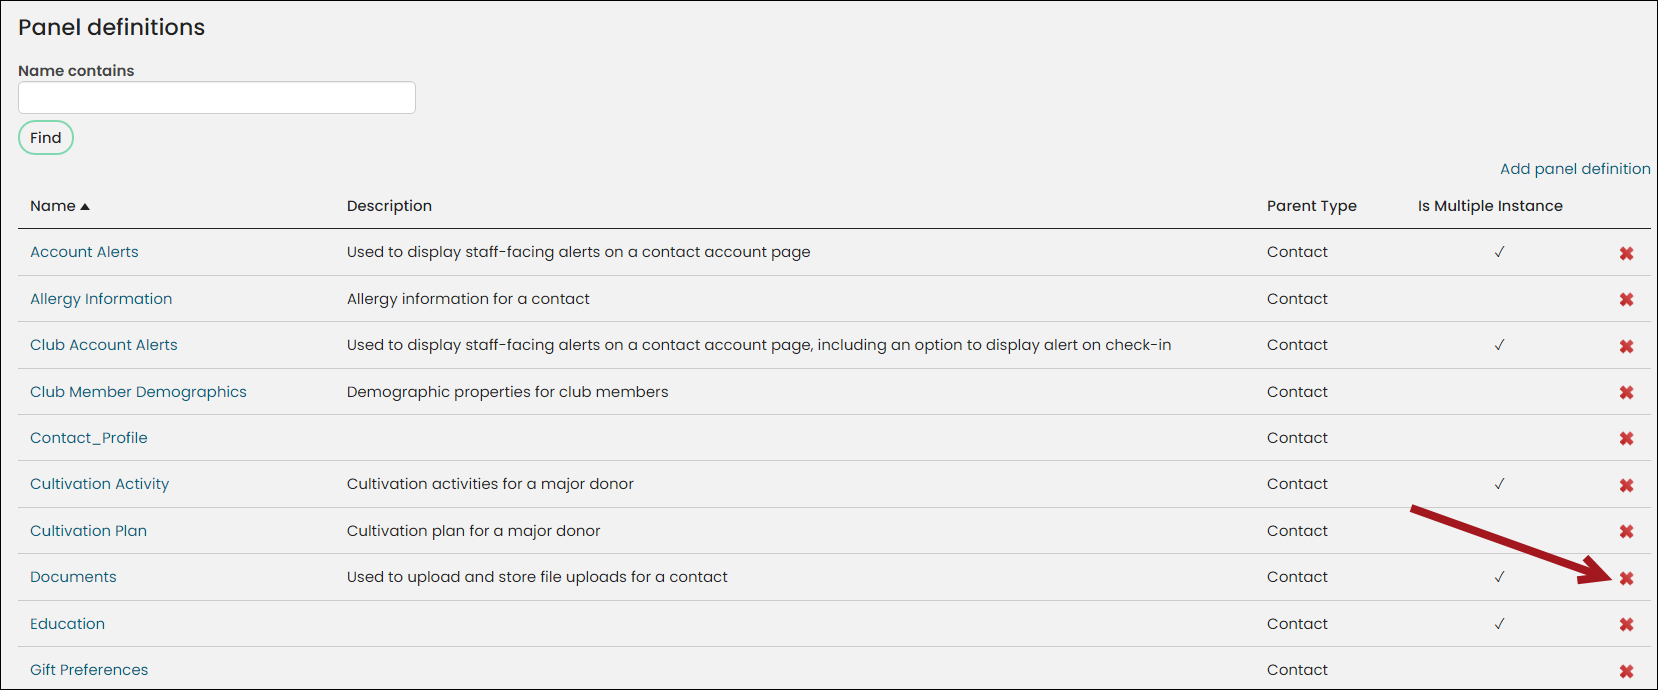
- (optional) If you no longer need the panel, delete it.
Deleting multi-instance panel sources
Do the following to delete multi-instance panel sources:
- Go to RiSE > Panel Designer.
- Locate the panels the properties are located on, then remove the properties from those panels.
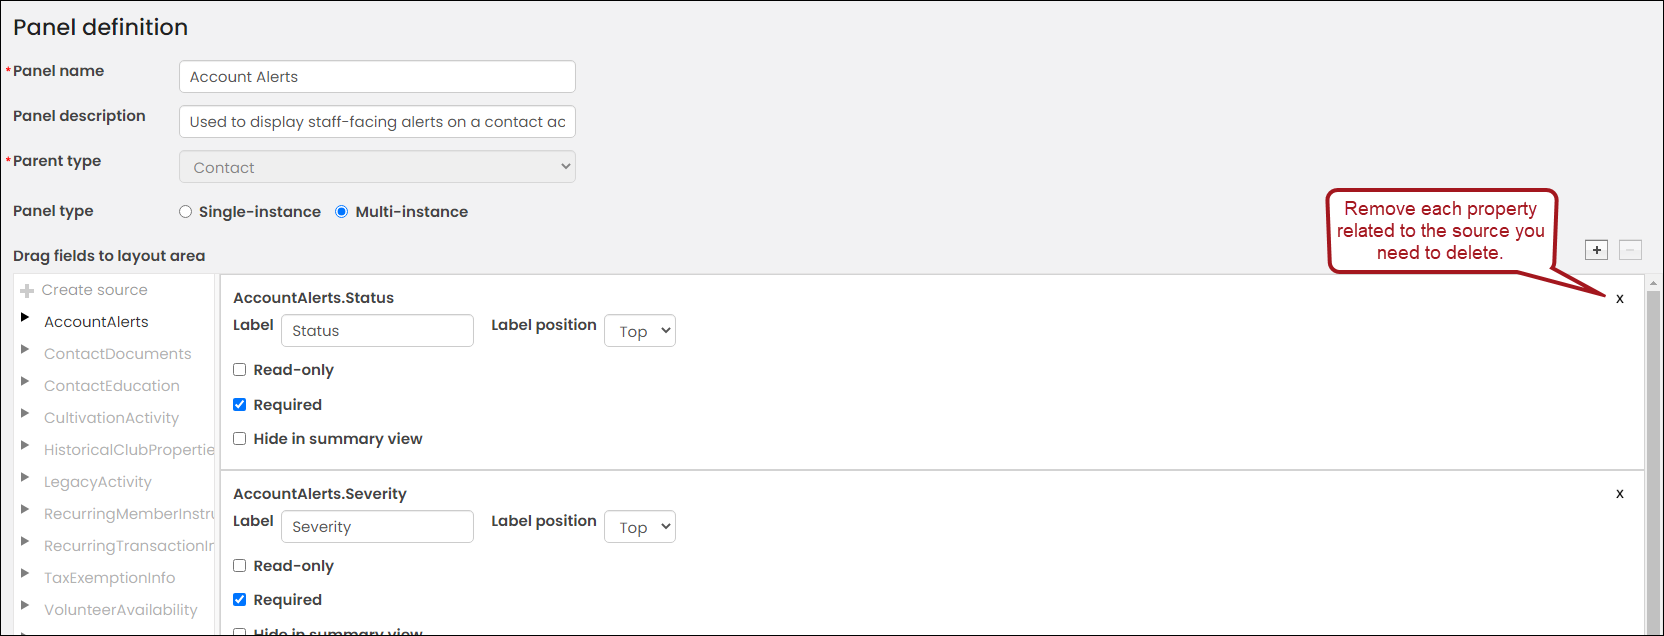
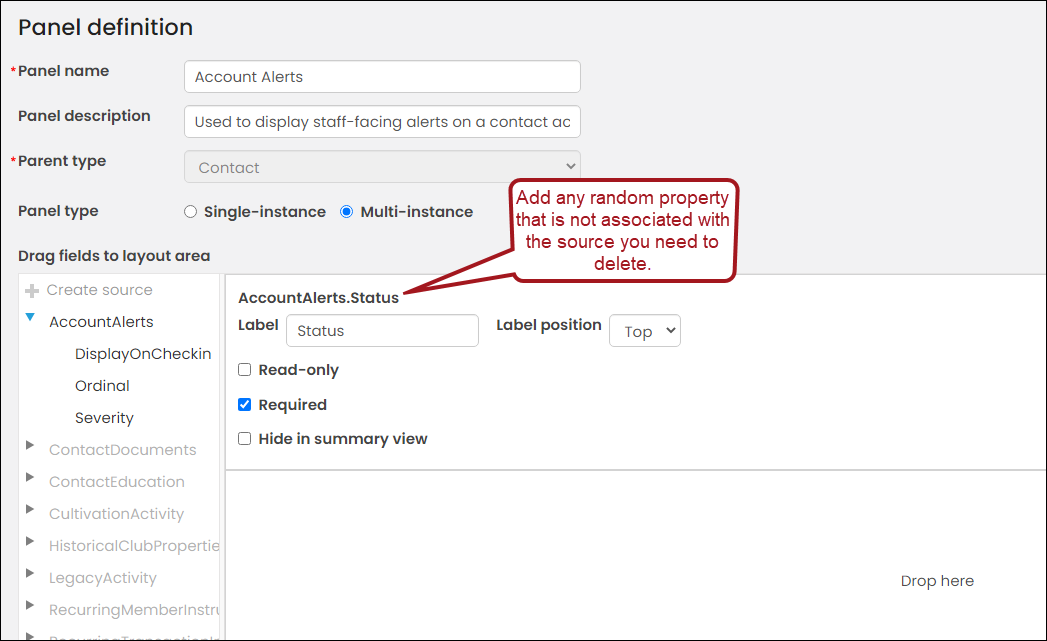
- After you remove the properties from a panel, the panel is empty. You cannot save an empty panel, but saving the panel is required before you can delete the source. Add any random property that is not associated with the source you need to delete.
- Click Save & Exit.
- (optional) If you no longer need the panel, delete it.
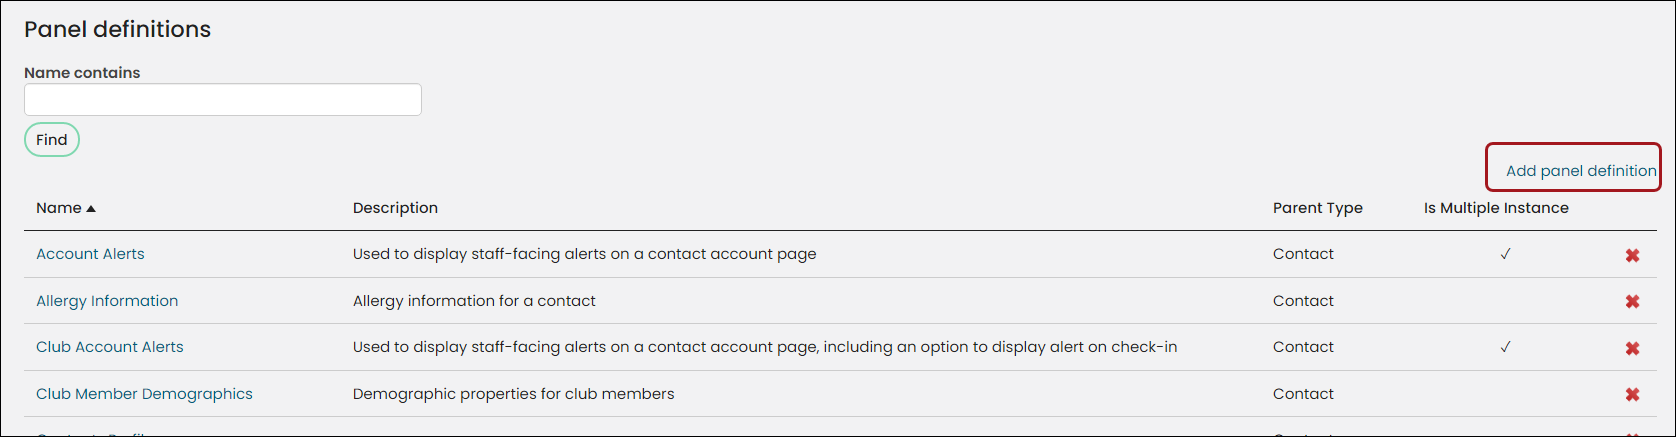
- Select Add panel definition.
- Enter any Panel name, such as Test Panel.
- Choose the same Parent type of the source you need to delete.
- Choose Multi-instance as the Panel type.
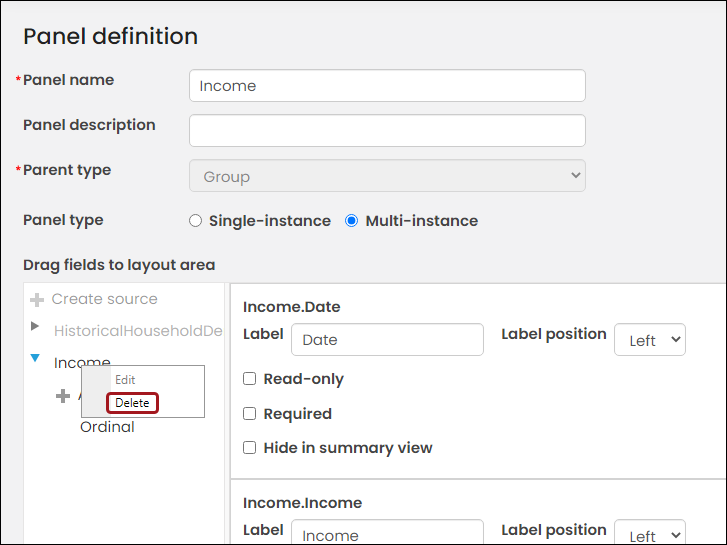
- Right-click the source you want to delete.
- Choose Delete.
- Click OK.
- You cannot save an empty panel, but saving the panel is required before you can delete the source. Add any random property that is not associated with the source you need to delete.
- Click Save & Exit.
- Delete the panel you just created.
Updated 5 months ago