

Defining products
Provide an online shopping experience for your customers by creating products. Easily define product details, such as the Item type, pricing information, tax configuration, and the GL account.
Provide digital products as well through the use of the post-purchase information feature. After purchasing a product, purchasers receive post-purchase information or content in the following:
- On-screen order confirmation upon successful order submission.
- Order confirmation email.
- Order History for a contact.
Adding products
Do the following to add products:
-
Go to Commerce > Add product.
-
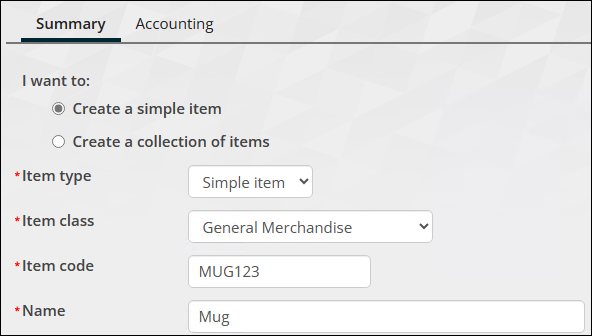
Select Create a simple item. To create a collection of items, see Defining a collection of items.
-
Select the Item type:
- Simple item - A simple item will have fixed Standard and Discount prices (this type applies to most items, unless they are gifts or donations).
- Gift item - Select this radio button if you want to create an item that represents a group of simple items such as a kit, or a list from which to select. You must first create simple items before they can be included in a collection. For detailed information about how to create a collection of items, see Defining a collection of items.
-
Select an Item class. The item class determines the default settings for the item, such as handling of tax, shipping and handling fees, whether it's charitable, and GL accounts. To learn more about the item class, see Managing product classes.
 Note
NoteIf the Item class is defined as a Charitable Item, the item will automatically be marked as a charitable item, and the purchaser can be issued a receipt. See Managing product classes and Charitable receipts.
-
Enter an Item code. For example, if you are adding a new coffee mug, the code could be MUG123.
-
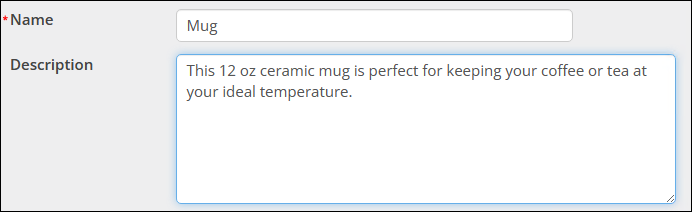
Enter a Name and a brief Description for the item.
-
(Gift item only) Enter a Suggested amount. When a donation is being made for this item, the suggested amount will initially be displayed, but for a Gift item that amount can be overridden by the donor before they process their donation.
-
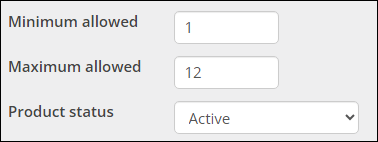
(optional) Enter the Minimum allowed. Users cannot purchase less than the specified number of items.
-
(optional) Enter the Maximum allowed. Users cannot purchase more than the specified number of items.
-
Select a Product status.
Click for details
- Active (A) - The default status for all new products is Active. Active products are always available for sale to your customers.
- Inactive (I) - Products that have an Inactive status are temporarily unavailable for sale to customers. Possible reasons for assigning an Inactive status to a product include an interruption of supply (for example, a supplier has gone out of business, or the product is part of an embargoed shipment), you are awaiting regulatory approval to sell the product, or the product is a seasonal item.
- Not Available (N) - Products that have a status of Not Available are no longer available for sale to your customers and can include discontinued and recalled items.
- Marked For Deletion (D) - Products that have a status of Marked For Deletion are no longer available for sale to your customers. Reasons to keep products that have a Marked For Deletion status in your system are for historical reporting and to prevent reusing a previously assigned product code. Products with a Marked For Deletion status have the same functional characteristics as Inactive products.
- Out Of Production (O) - Products that have an Out Of Production status cannot be reordered from suppliers.
-
Can only be purchased within a collection of items - Enable this option if this product is intended to be sold within a collection only and should not be sold as an individual item.
-
(optional) Enter dates and times for Show in search to provide a date range during which your product will show up in searches. If no date is entered, the product will always show in search results. Staff users can choose to show inactive products in their search results.
-
(Simple item only) Enter the Standard price (non-member) and Discount price (member).
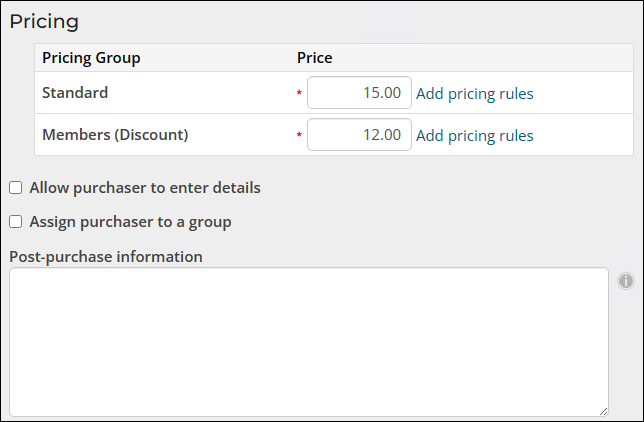
- (optional) Allow purchaser to enter details - Select this option to enable adding specific details about an item at the time the order is being placed. For example, when a charity accepts merchandise or services as In-Kind gifts, a staff user can specify details about the items or services received from the donor. These details are entered prior to adding the item to the cart, and will be displayed in the Shopping cart and on the Order confirmation page.This option uses the Note field property of the CsOrderLines business object.
- (Gift item only) (optional) Supports recurring donations - If you want donors to have the option to donate regularly, select Supports recurring donations. For more information, see Automatic payments (AutoPay). If Supports recurring donations is selected, you cannot enable Assign purchaser to a group. Recurring donations cannot assign purchasers to a group.
- (optional) Assign purchaser to a group - Select this option to automatically add all purchasers of this item to a group. You can create products that offer group-based access to post-purchase information or content based on a group membership. For more information, see Granting access to secure website content.
Click for details
When Assign purchaser to a group is selected, the following configuration options are displayed:
- Group - Select an existing Group to which to which purchasers are assigned.
- Group role - Select the Group role to be assigned to purchasers.
- Term span in months - In months, specify the term span of the group membership. This is the term for which the purchaser can remain a member of the group.
📘 Note
The statuses Active, Inactive and Pending must be included in your group type. For more information, see Setting up groups.
📘 Note
For UK Direct Debit with AutoPay: Automatic membership renewal term spans of one month (monthly), three months (quarterly) and 12 months (annually) only are supported.
When assigning a purchaser to a group with a term length other than 12, each time the purchaser renews their membership in that group using the same product, their membership is advanced by the specified number of months. Also, if your product is included in a collection of products that assign purchasers to group memberships and the other products in the same collection have different term lengths, the resulting memberships can become unsynchronized.
When the selected group is an Is Member group with a membership term basis of Product-driven, the following options will appear:
- Term start date: Enter a start date for the product.
- Term end date: Enter an end date for the product. The Term end date must be after or equal to the Term start date.
Group membership begins depending on how you define your Accounting method on the Accounting tab:
- Accrual: The purchaser is an active member of the group as soon as the invoice is issued.
- Cash: The purchaser is not an active member of a group until the invoice is paid.
Select the Prorate fees. Prorating is only available when groups bill on an annual or fixed-term basis, as opposed to an anniversary or rotating term basis:
- Do not prorate - Same dues regardless of when customer joins.
- Standard monthly prorating - Prorating for the current year (depends on the billing interval). For example, if a customer joins in month 7 and annual dues are $200, the calculated dues would be one half of the total dues, or $100 (six months out of twelve).
- Use a custom schedule - User-defined prorating rules, depending upon the needs of the organization. If the Use a custom schedule option is enabled, proration rules are created from prorating schedules on the Staff site.
Enable Advance end date to end of subsequent term starting in month to extend the length of the membership term. Select the month of the subsequent fixed membership term. The month that is selected is the month to which the expiration date of the new membership will be extended and included in the next fiscal year. This option will only be displayed if the Term span in months is 12 months.
📘 Note
(Gift item only) If you choose to confer group membership with purchase, be sure to select a group type where Extend Active Membership Term is checked so that the shopper will have the option to contribute more than once to this gift item.
-
(optional) Post-purchase information - Information to be displayed to a user following purchase of this item. Post-purchase information is included in the order confirmation message and can be used to indicate how to retrieve downloadable content.
-
(optional) Tags - You can select a tag to apply to this event. The tags allow events to be more easily retrieved and displayed in search results. Click Modify to select new tags. For more information, see Defining tags.
-
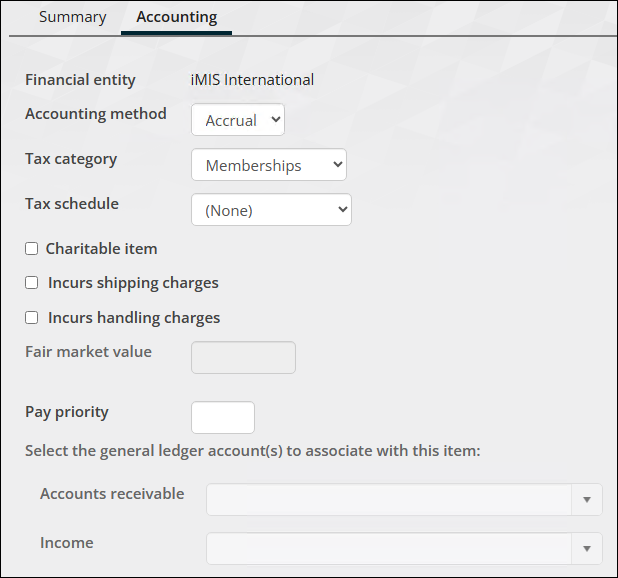
(Accounting tab) Review the default settings and make any required changes for the item:
 Note
NoteIf you change the item class, the system repopulates the GL account assignments with the defaults associated with the new item class. If you want to override these defaults, you must reenter the overrides after selecting the new item class.
-
Accounting method - To override the default accounting method, select the desired method for this item:
- Accrual
- Cash
-
Tax category - The tax category specifies taxation rules for a general set of items. To override the default tax category setting, select a tax category for this item.
-
Tax schedule - The tax schedule consists of all tax authorities that apply to a particular situation and the order in which taxes are calculated when more than one tax applies. This option should be set to None unless the schedule for this item will always be the same, regardless of the situation.
-
Charitable item - If the Item class you defined on the Summary tab is defined as a charitable item, this box is automatically selected. If the Item class you defined is not defined as charitable, but you would like this product to be a charitable item, select Charitable item.
- Fair market value - Provide an estimate of its fair market value if the item should be reported as charitable. This amount is included in the receipt to help your members track their donations for tax purposes.
-
Incurs shipping charges - Select this option to add shipping charges when the user checks out.
-
Incurs handling charges - Select this option to add handling charges when the user checks out.
NoteShipping and handling charges do not apply to renewals.
-
Pay priority - The Pay priority value determines the order in which the products are displayed and paid for. The higher the priority number, the lower the priority. A product with a Pay priority of 1 will always come first.
-
Select the general ledger account(s) to associate with this item - To override the default general ledger accounts specified for the Item Class, start entering the desired account name or code to select from a filtered list.
NoteIf the GL account you are looking for does not appear in the drop-down, check the GL account's configuration and make sure the Financial Entity is selected.
-
-
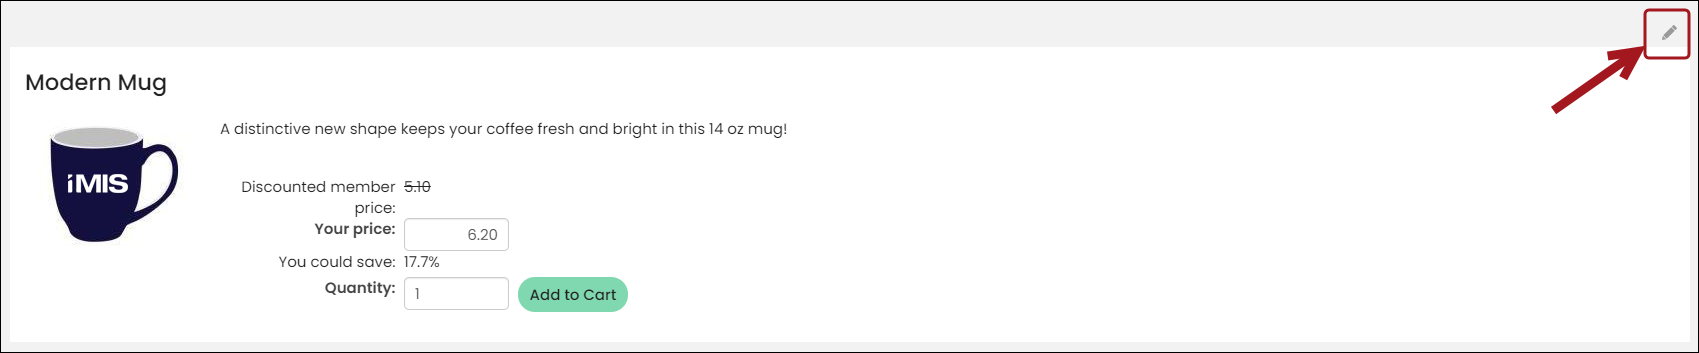
Click Save. The item detail page is displayed as it will appear to users. In addition, the item will display in the list of product items. The user can click the item name to view details.
Editing products
Do the following to edit products:
- Go to Commerce > Find products.
- Select the product you want to edit.
- Click Edit.
Note
The Edit link will not be displayed if the product is currently in the cart.
Deleting a product
You can mark a product for deletion, so that it no longer appears in the list of products, or in product search results.
Do the following to delete a product:
- Go to Commerce > Find products.
- Select the product, then select the Edit .
- (Summary tab) Change the Status to Marked For Deletion and Save.
The product still appears in the Manage Products list, but is not displayed on any other pages where you are using the Common Search content item to list your products.
NoteThe Inactive, Out of Production, and Not Available status options have the same result of hiding the product from the search list. Staff users will still see the product if they choose to Include inactive items.
Updated 5 months ago