

Reviewing and updating AutoPay enrollments
iMIS provides an easy approach to tailoring automatic payment enrollments, whether it is a recurring donation or membership. Staff users can display a list of automatic payment enrollments and provide members with details of these transactions.
Users are also able to quickly update each enrollment based on various factors. For example, if a member’s enrollment status changes, this modification can be made quickly.
NoteIn order to use AutoPay for recurring payments, you must have a license key. For more information, contact your AiSP or ASI Technical Support.
Viewing and updating enrollments
To review or update existing AutoPay enrollments, do the following:
- Navigate to the member or donor's account page.
- Do one of the following:
- Update a membership enrollment: Click the Participation tab.
- Update a donation enrollment: Click the Giving tab.
- Select View membership or View donation.
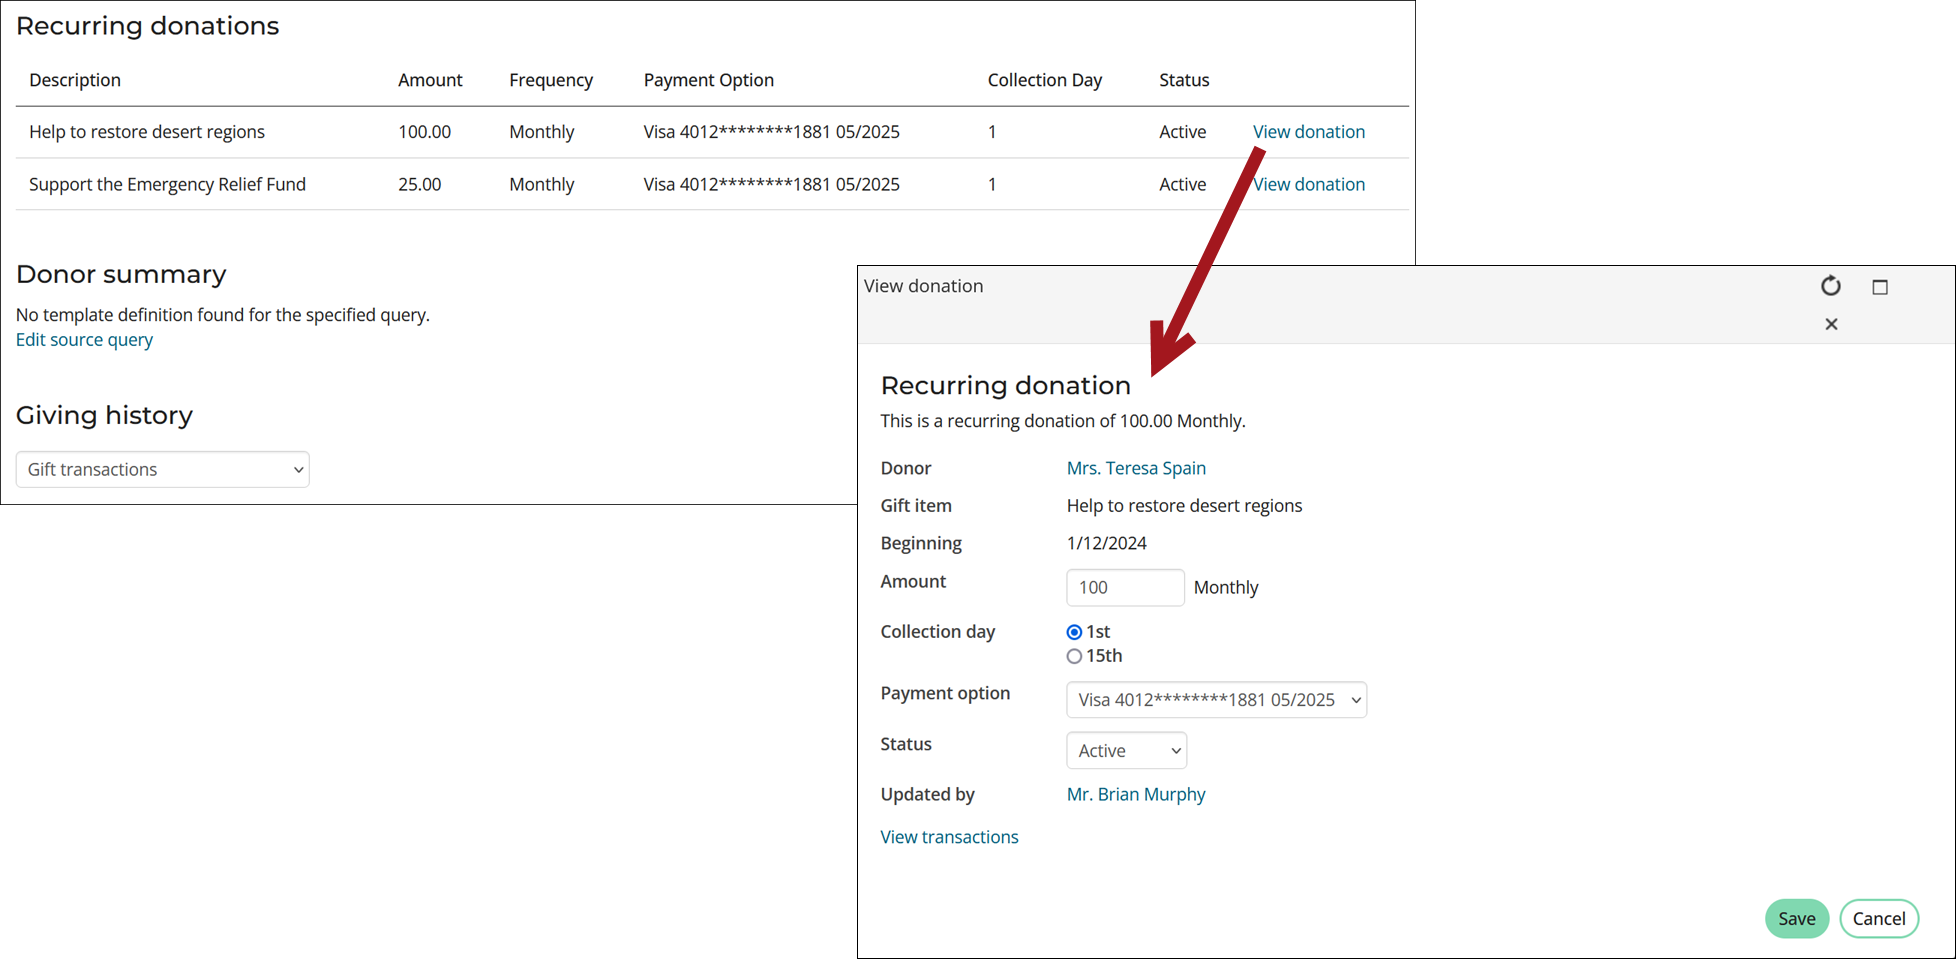
- The following information is available to review:
-
Member/Donor - Select the enrollee’s name to view their account details.
-
(donations only) Gift item – The Gift item receiving the recurring donation.
-
Beginning – The date the enrollment started.
-
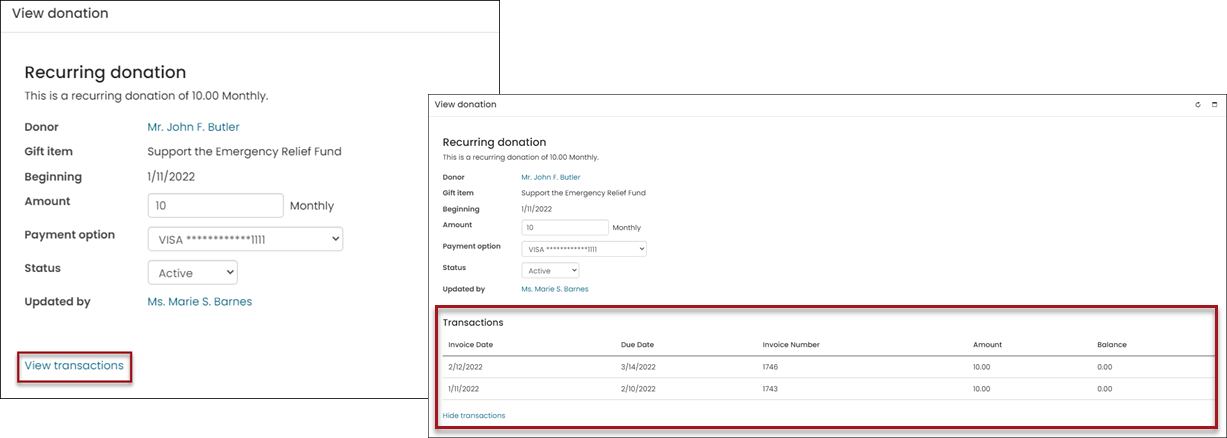
Transaction history – Click View transactions to review the following information for each transaction associated with the enrollment:
- Invoice Date - Including past and future dates
- Due Date
- Invoice Number
- Amount - Each transaction for the selected enrollment
- Balance - Each transaction for the selected enrollment
-
Updated by – The last user to update the enrollment.
-
- The following information is available to adjust for active enrollments:
- (donations only) Amount – Change the donation amount for future payments.
- (donations only) Collection day – Change the collection day for future payments.
- Payment option – Add or update the payment method for future payments.
- Status – Select Cancelled as the status to cancel the enrollment. Once cancelled, the enrollment cannot be reactivated.
- Make sure to Save your changes.
Cancelling AutoPay enrollments
To cancel a recurring enrollment as a staff user, do the following:
- Navigate to the member or donor's account page.
- Do one of the following:
- Update a membership enrollment: Click the Participation tab.
- Update a donation enrollment: Click the Giving tab.
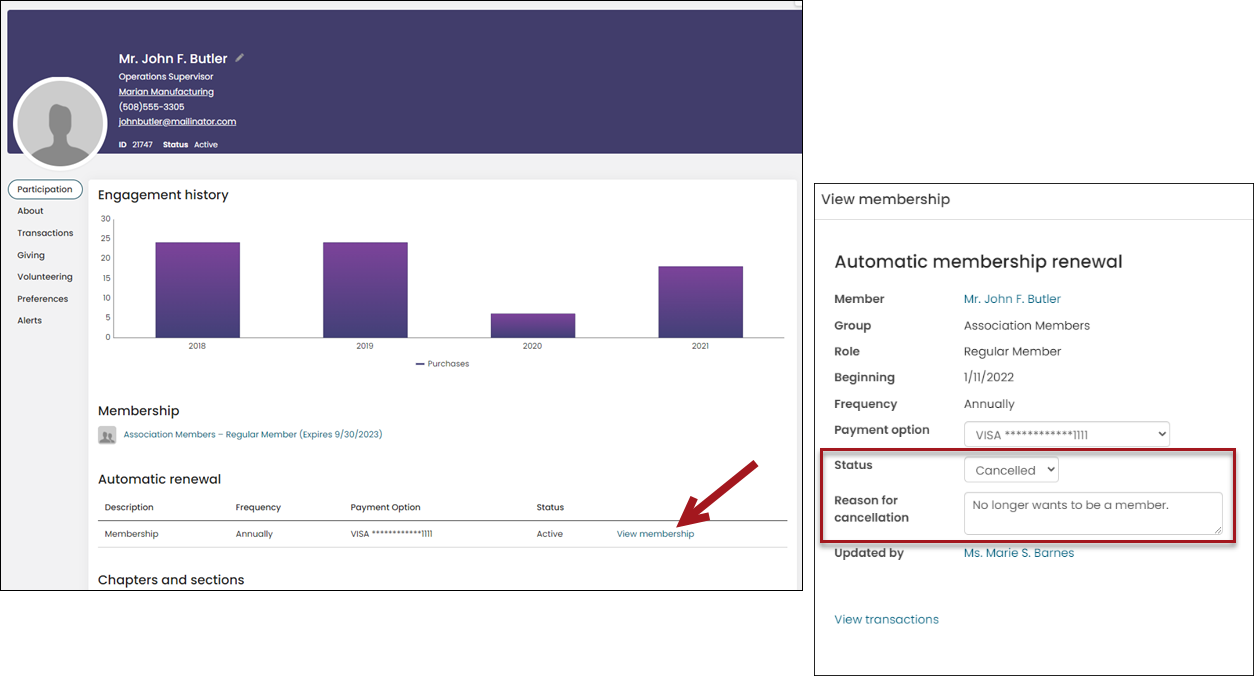
- Select View membership or View donation.
- From the Status drop-down, select Cancelled.
- Enter a Reason for cancellation.
- Save the changes to cancel the enrollment.
A Cancelled on date is displayed with the current date of the cancellation; this date cannot be overwritten. The name of the staff user who modified the enrollment will be automatically added to the Updated by field.
NoteCancelled automatic payment enrollments cannot be reactivated. When an enrollment is cancelled the Amount, Payment option, and Status fields are greyed out.
Customizing the AutoPay information displayed on account pages
Most of the recurring payment information is displayed using the Automatic Payment Enrollments content item.
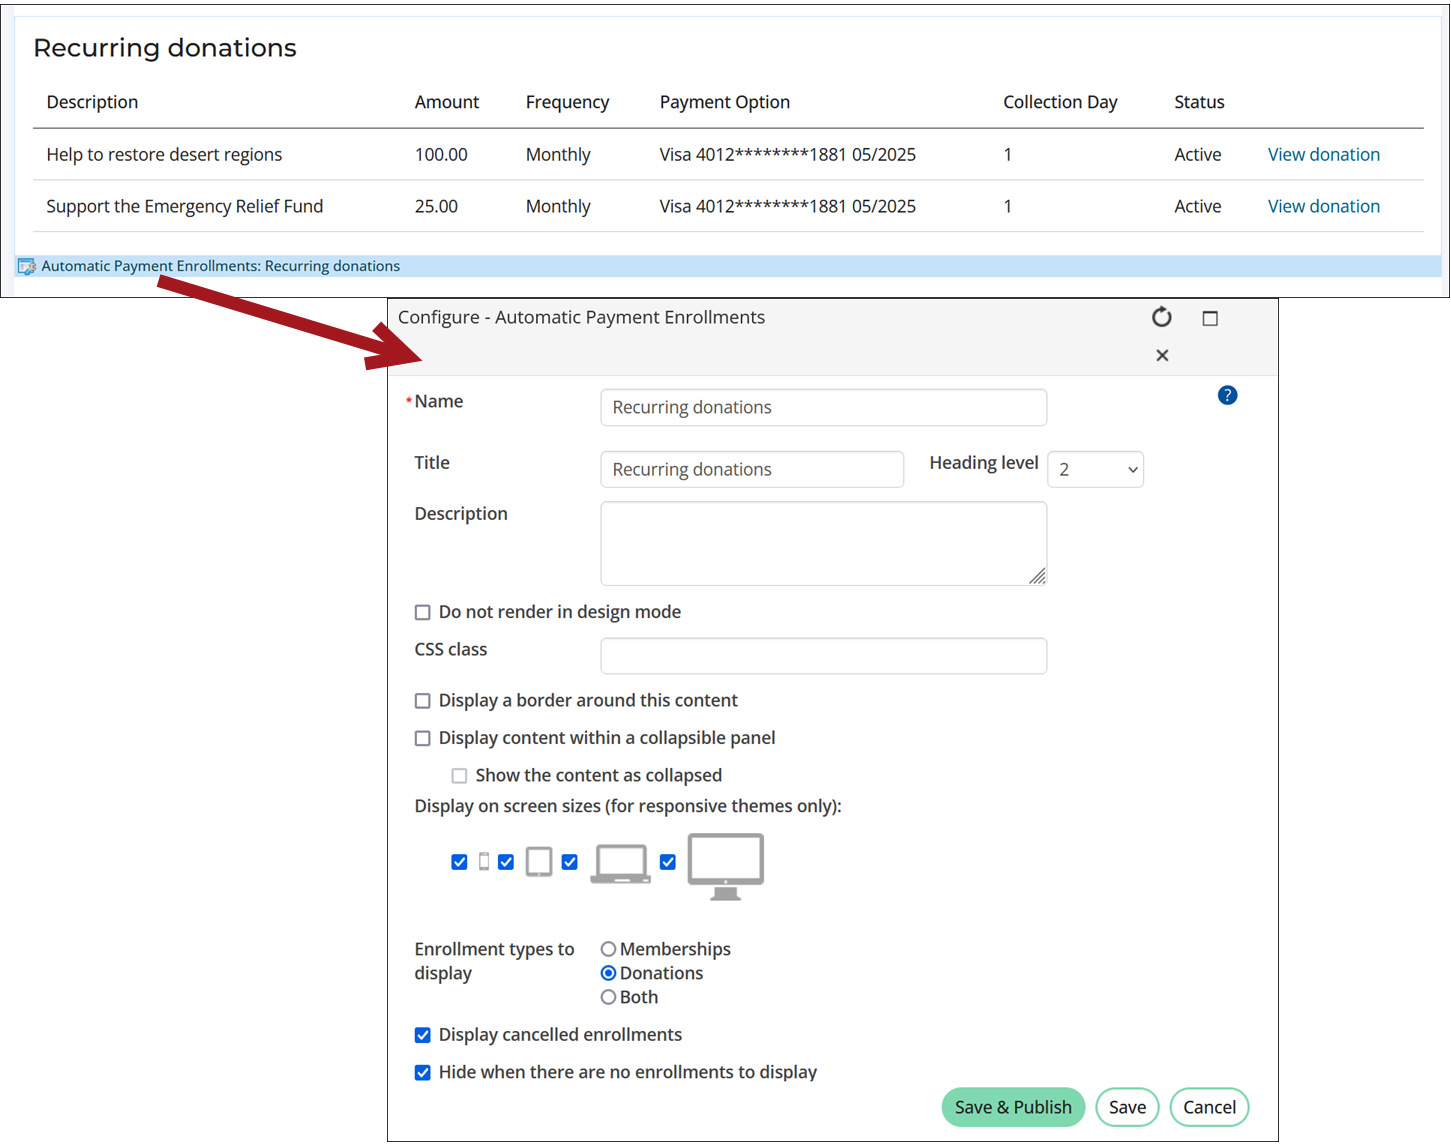
Configure the content item to best fit your organization’s needs:
- Choose Both for the Enrollment types to display to include both membership and donation enrollments in a single grid.
- Enable Display cancelled enrollments to include cancelled transactions in the automatic payment enrollments grid.
- Enable Hide when there are no enrollments to display to not display the content item on profile pages for contacts with no existing AutoPay enrollments.
- Enable the Allow public users to cancel enrollments option to give your members and donors the option to cancel their membership or recurring donations. For more information, see Allowing members and donors to cancel their own enrollments.
See Understanding and modifying account pages to learn how edit account pages.
Updated 5 months ago