

Understanding and modifying account pages
iMIS provides out-of-the-box account pages with content records displayed in a tabbed format.
Comparing the staff and public views of account pages
There are two primary views of an account page:
-
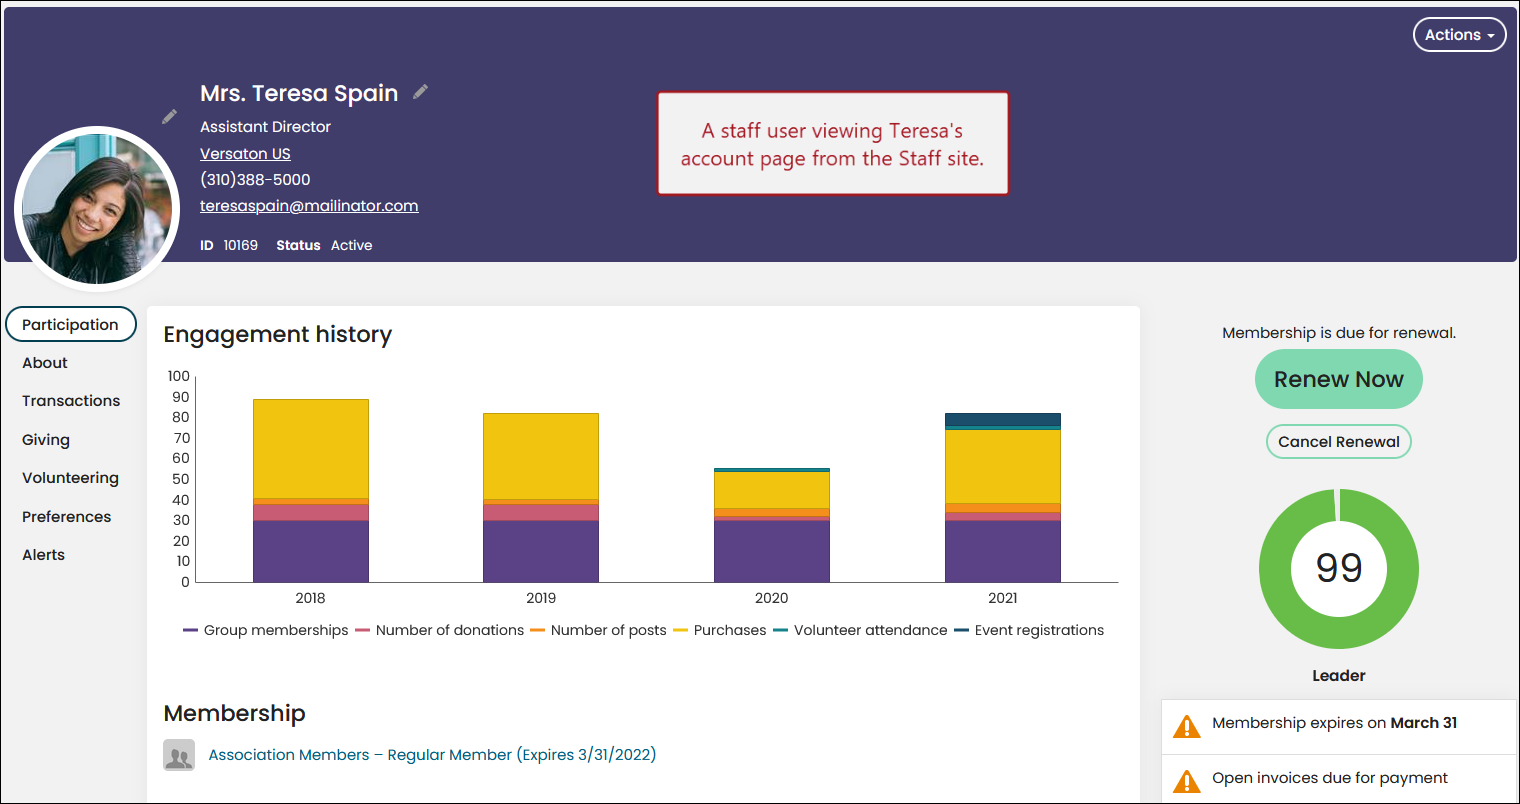
The staff view: Staff users can view an account page from the Staff site. Their view contains details about a contact that only staff users have permission to see.
-
The public view: Non-staff users can review their own account page when they log into the public site. Staff users can also view an account page from the public site, and they will see the same information that they see on the staff site.
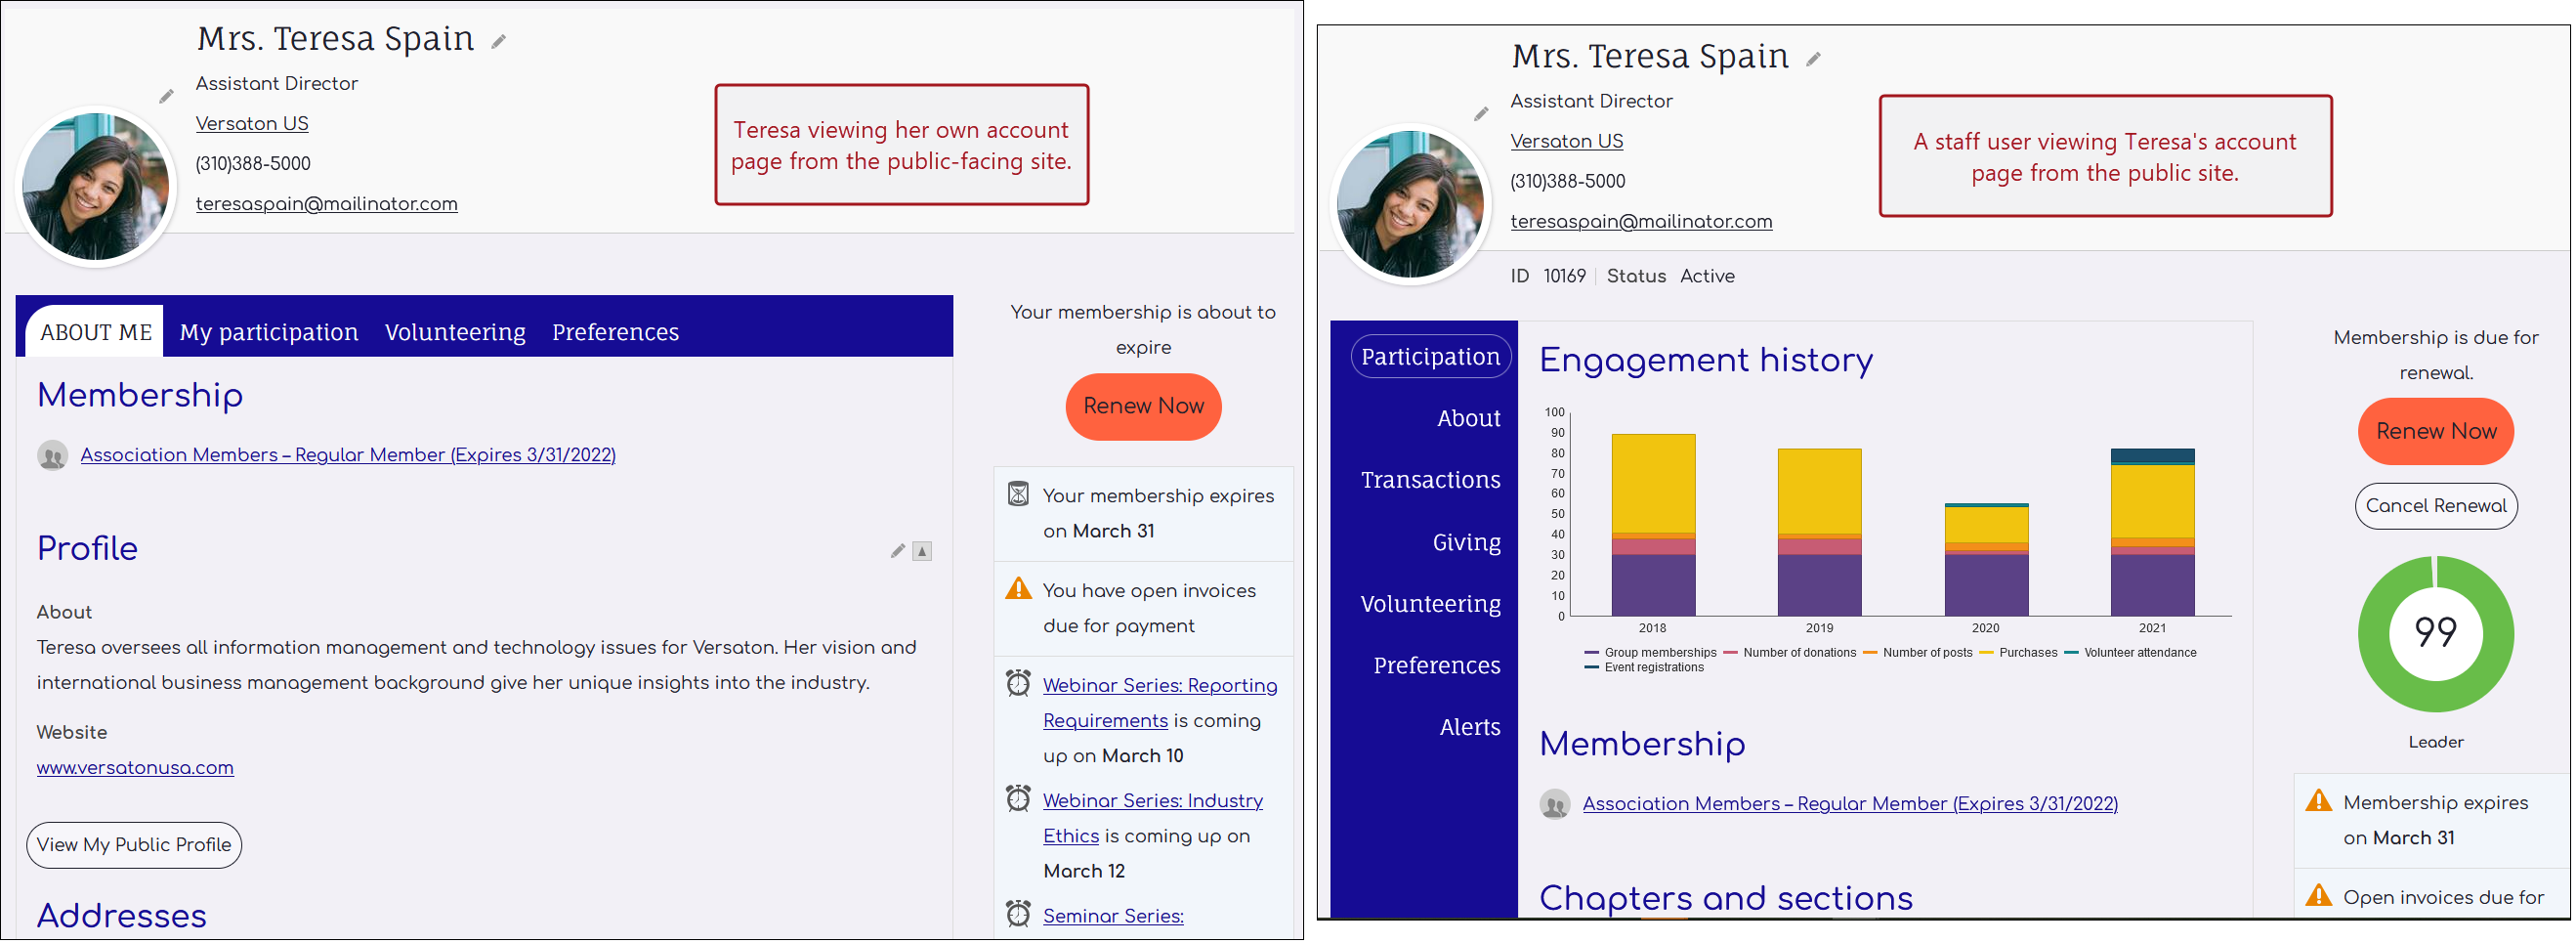
Out-of-the-box, the account pages are in system-content folders, but the pages can be configured to meet your needs.
Staff view: Creating custom account pages for individuals
Creating custom account pages for individuals
For the Staff account pages only, you can copy the tabbed content to a specified folder and make edits or add custom content. This will allow the content within the tabs to be customized while keeping the out-of-the-box content as is. With every upgrade you will automatically get the updates made to the content outside of the tabs and keep your custom content. To create custom account pages for individuals, do the following:
- From the Staff site, go to RiSE > Page Builder > Manage content.
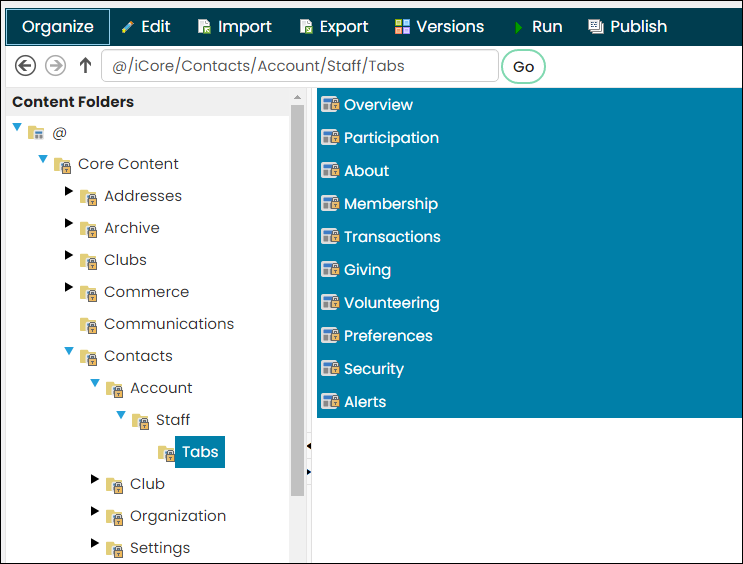
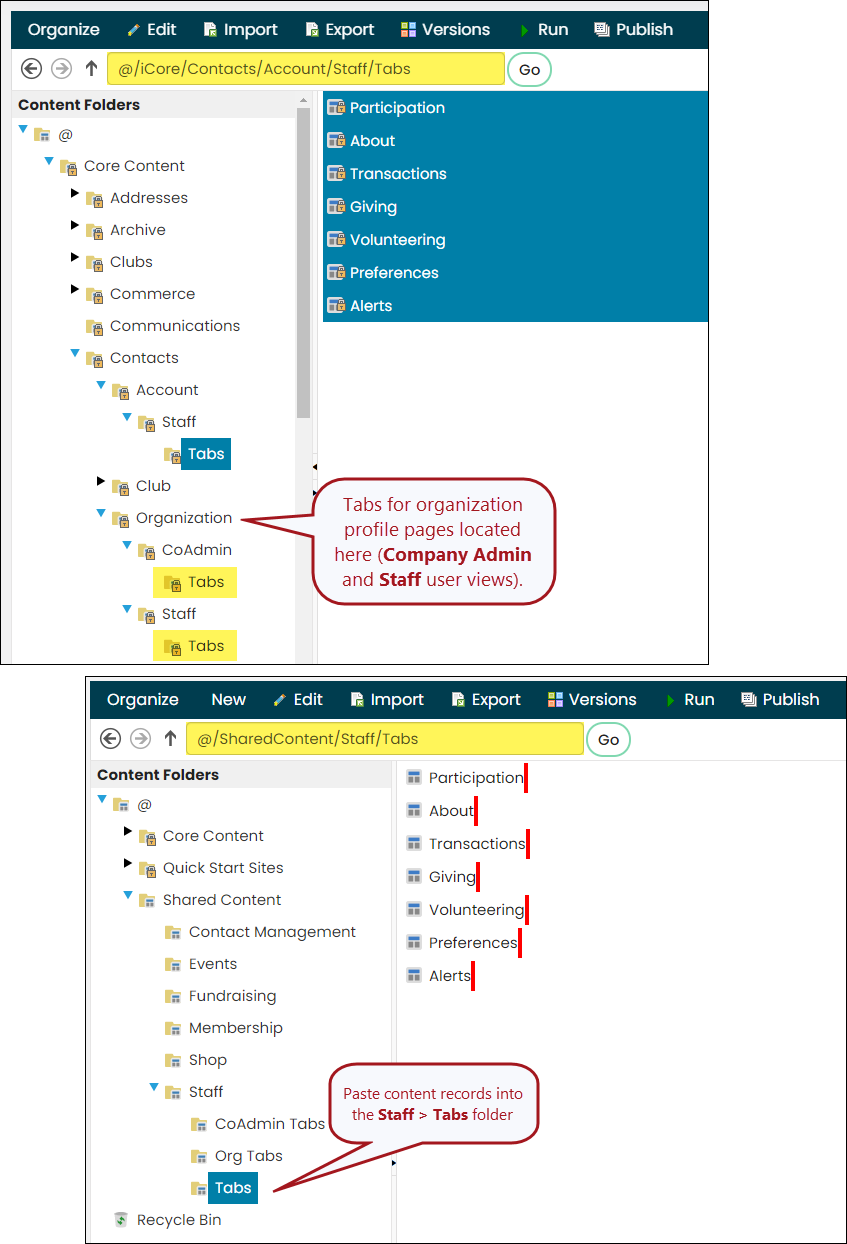
- Navigate to @/iCore/Contacts/Account/Staff/Tabs.
- Copy all content records in the Tabs folder (Organize > Copy).
- Navigate to @/SharedContent/Staff/Tabs.
- Paste the content records in this folder (Organize > Paste).
- Select all content records, then select Publish.
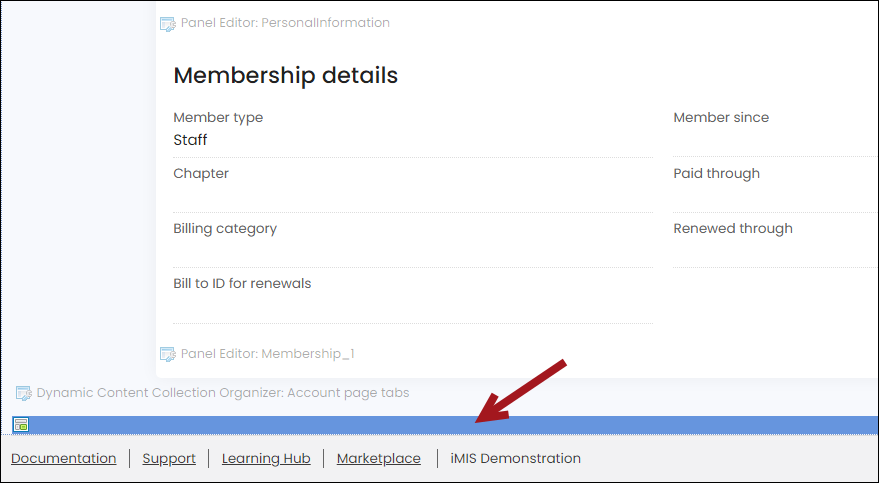
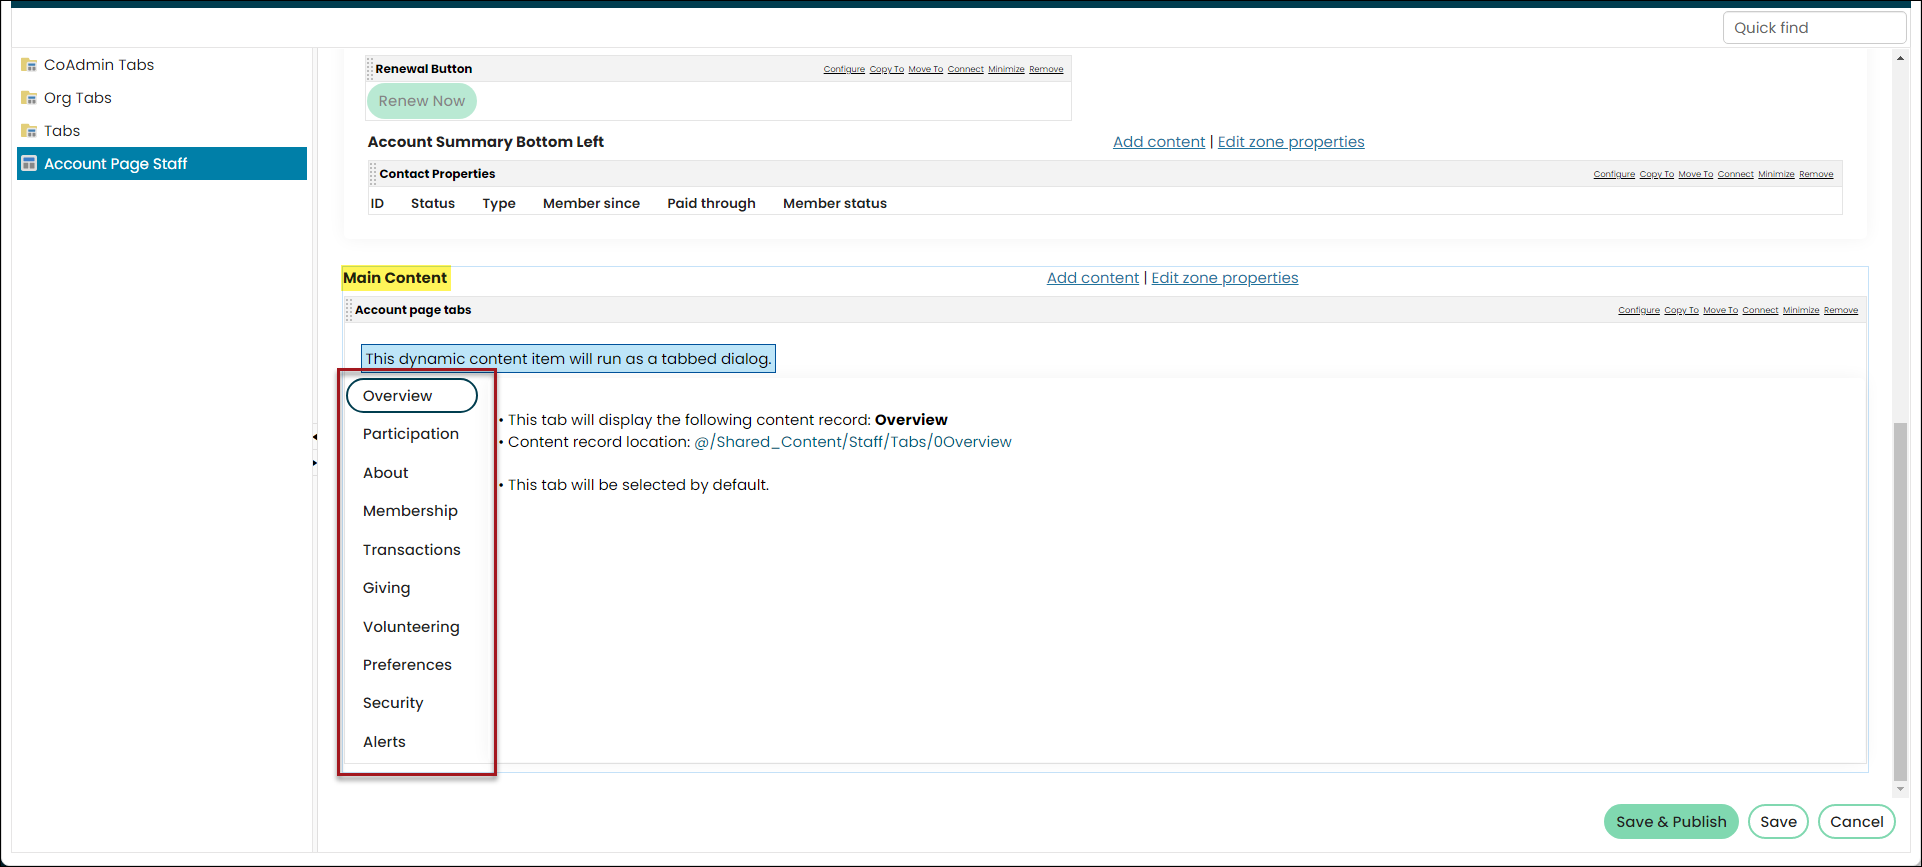
- Navigate to an individual's account page, then enable Easy Edit. You will see that you can edit the content items directly from the page now. To open the entire page for edit, scroll down to the bottom of the page and click the edit bar for the page.
- To edit a specific tab:
- Click the edit bar at the bottom of the page.
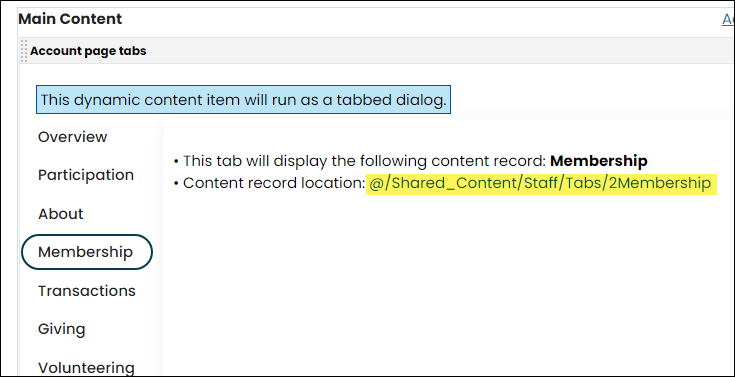
- Scroll down to the Main Content area, then click the tab.
- Select the link that displays for Content record location. The page displays available for edit.
📘 Note
To copy all content records at once, hold down Ctrl on your keyboard, then click each content record. Then from iMIS, go to Organize > Copy.
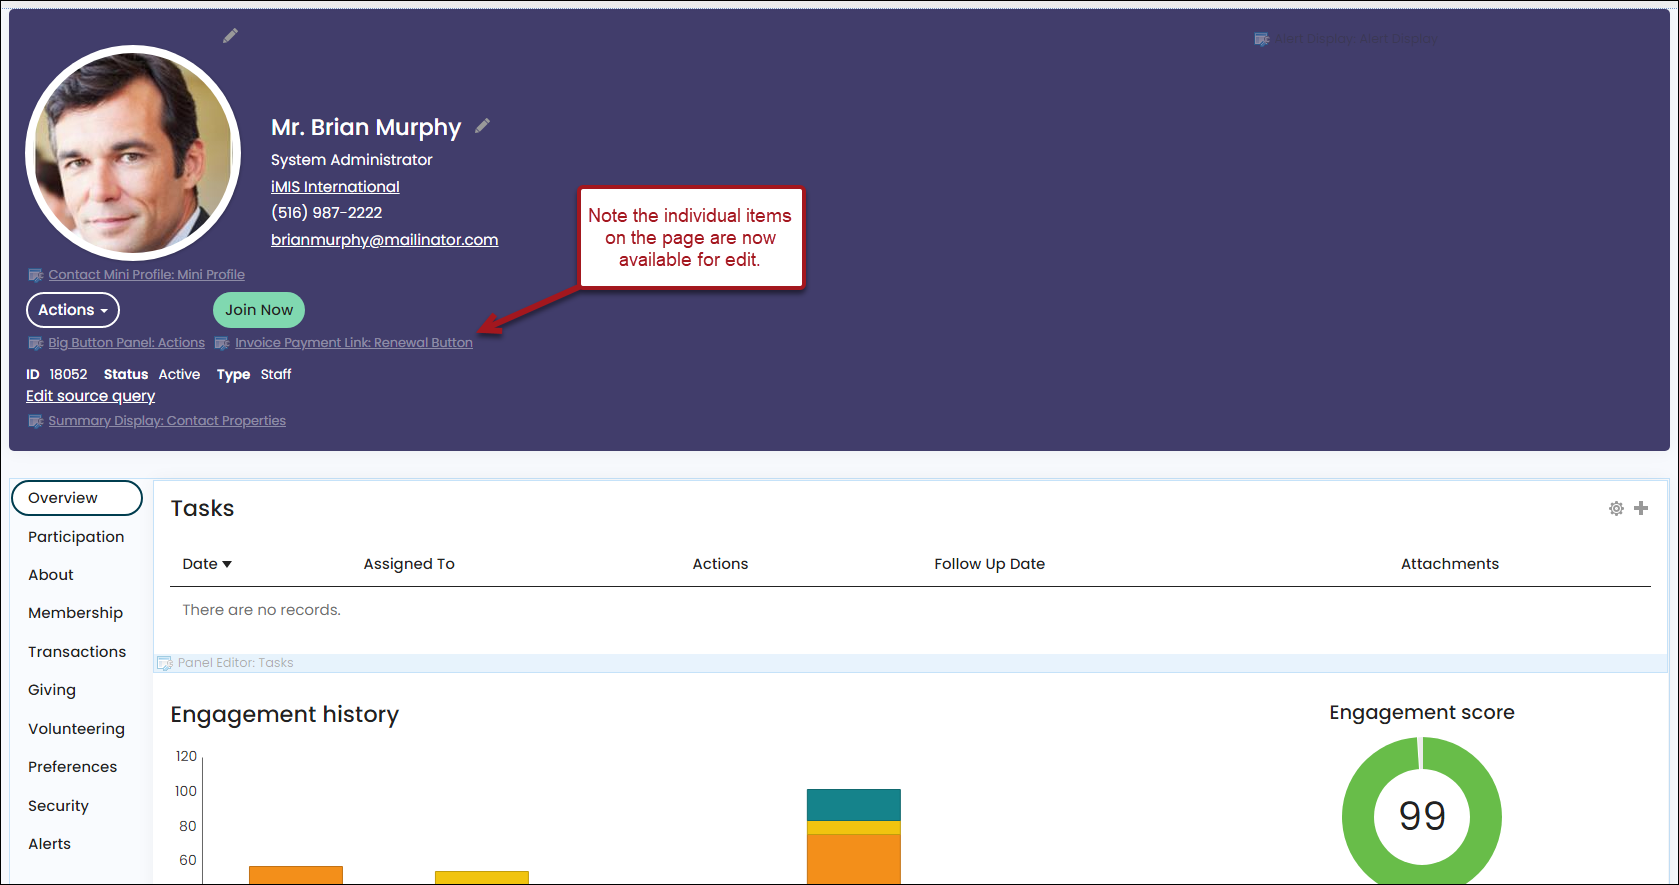
Now, when you navigate to staff-facing profile pages, you will be able to edit all content on the tabs without worry that the information will be overwritten on an upgrade.
Alternate method for tailoring the staff account page
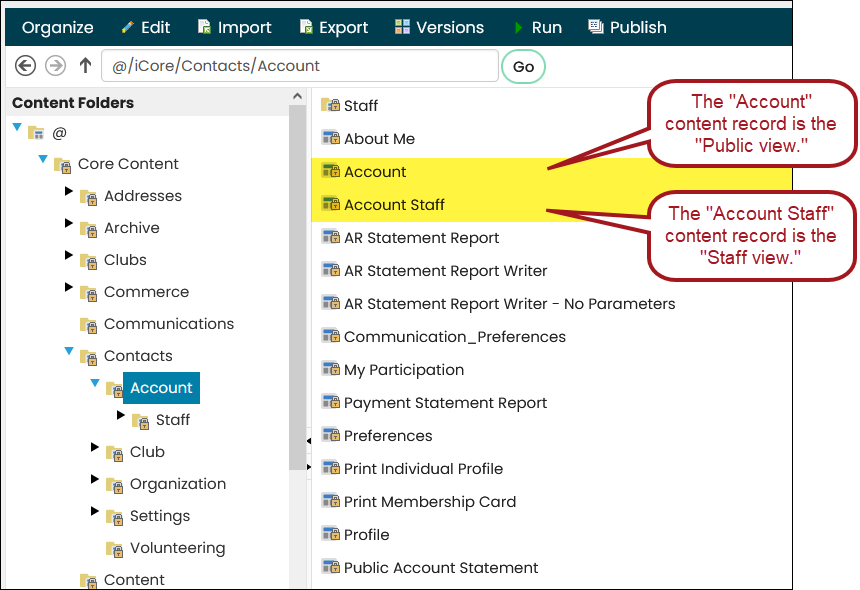
An alternate method for tailoring an account page is to copy the page and modify its system shortcut. First, copy the page (Account Staff at @/iCore/Contacts/Account), and save the new content record in a Shared Content folder. Make any desired changes in your version of the content record. Then, edit the FullAccount shortcut (used for All Sites) to point to your modified content record. If you use this method, you should check the system Account Staff after upgrades for new features that you might want to include on your version of the page.
Staff view: Creating custom account pages for organizations
The same process can be done for organization profile pages. There are also two different organization profile page views. One is the view a staff user sees, and the other is the organization's company administrator view. A member of the company will always only see the Profile tab of the company administrator's view.
Public view: Creating custom account pages for individuals/members
To begin creating custom content that will display on a member's profile page, do the following:
- From the Staff site, go to RiSE > Page Builder > Manage content.
- In the search bar, enter @/iCore/Contacts/Account, then click Go.
- Copy the About Me, Account , My Participation, and Preferences content records (Organize > Copy).
- Paste the content records into a Shared Content folder (Organize > Paste). For example, the @/SharedContent/Membership folder.
- If you need to display additional tabs on member profile pages, continue adding content records to the @/SharedContent/Membership folder.
Next, you need to update the Account content record to point to the other content records you just pasted in the Membership folder:
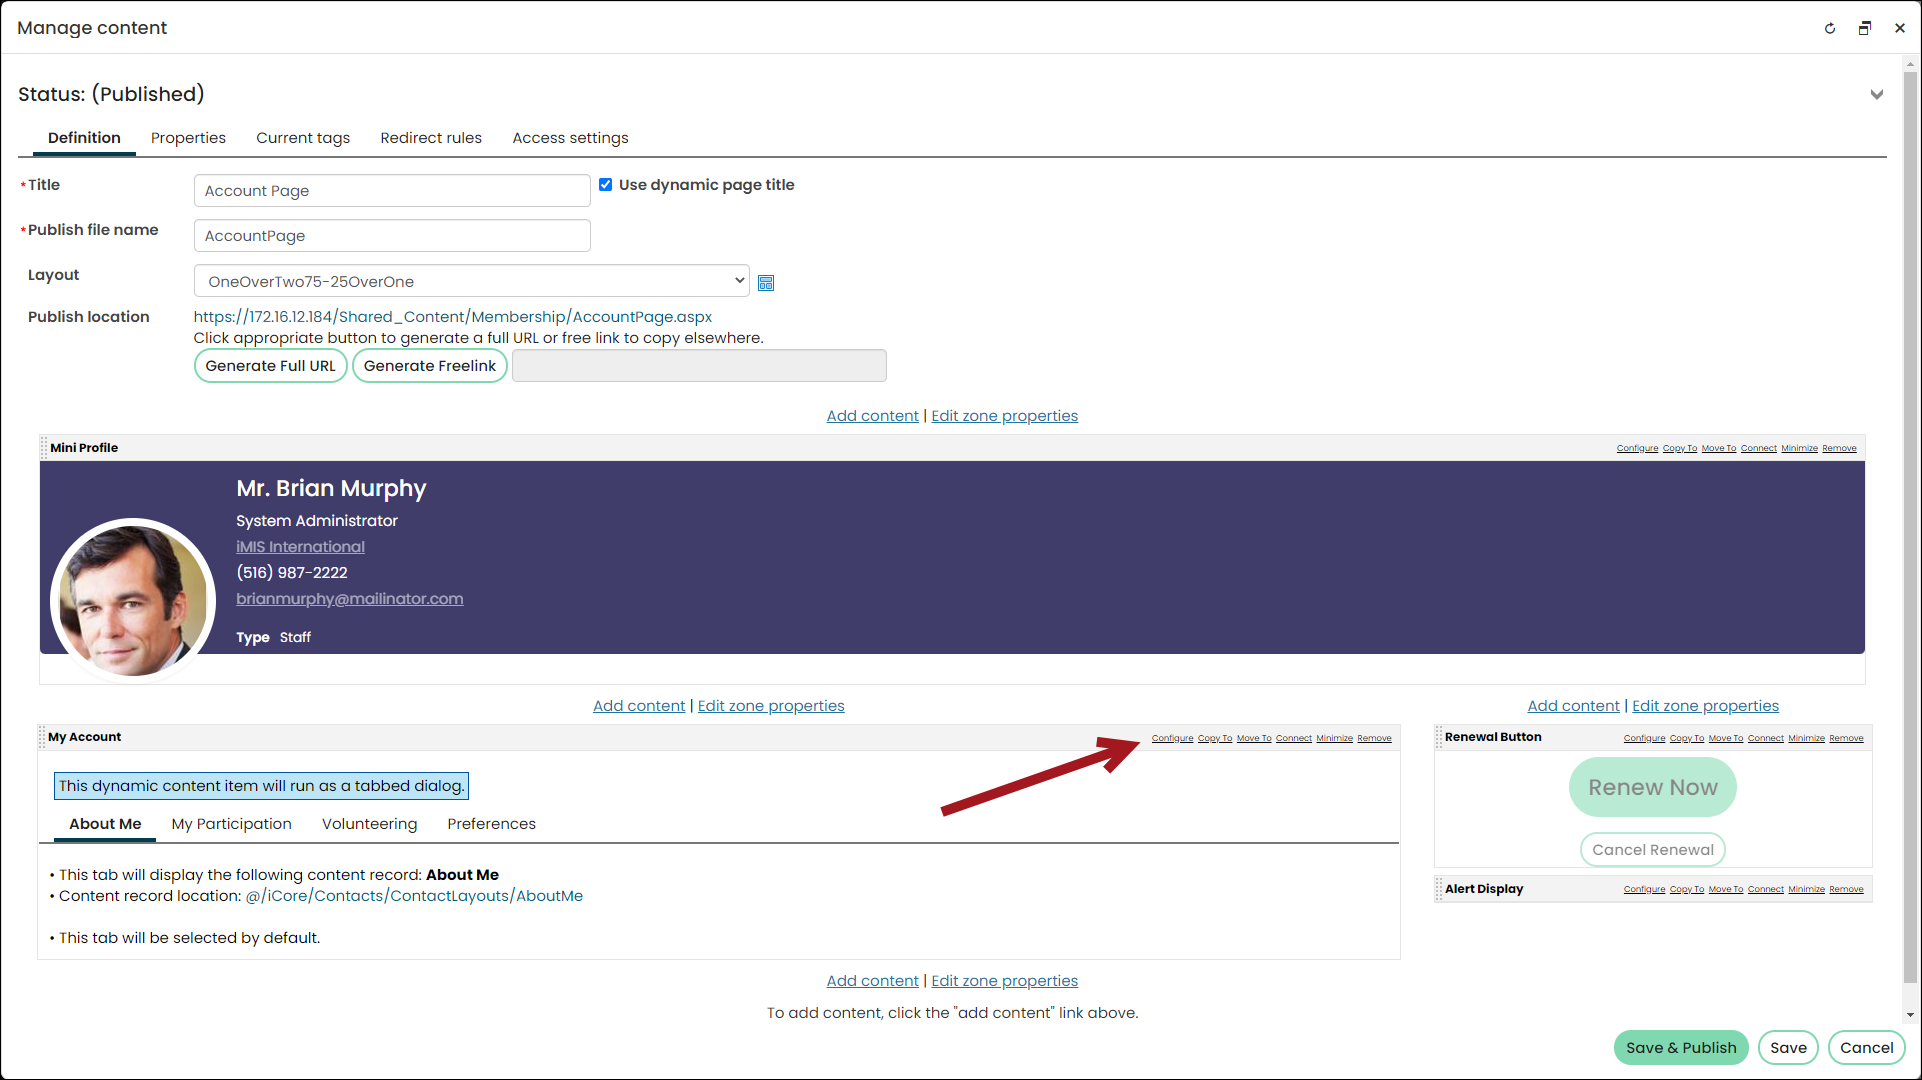
- Open the Account content record for edit.
- From the Account Tabs content item, select Configure.
- From here you have two options: Update each tab individually, or point to an entire folder:
- Individually update each tab:
- Pointing to an entire folder:
On each tab there is a Content to display field. You will need to select the appropriate content record for each of these tabs. For example, the About me tab will need to be updated to point to @/SharedContent/Membership/AboutMe.
Enable the Use content folder to define tabs option. From the Source folder field, select the @/SharedContent/Membership folder.
📘 Note
The Account content record must be in a different folder than the other content records in order to use this option. - Save & Publish the content record.
Next you must update the MyAccount shortcut:
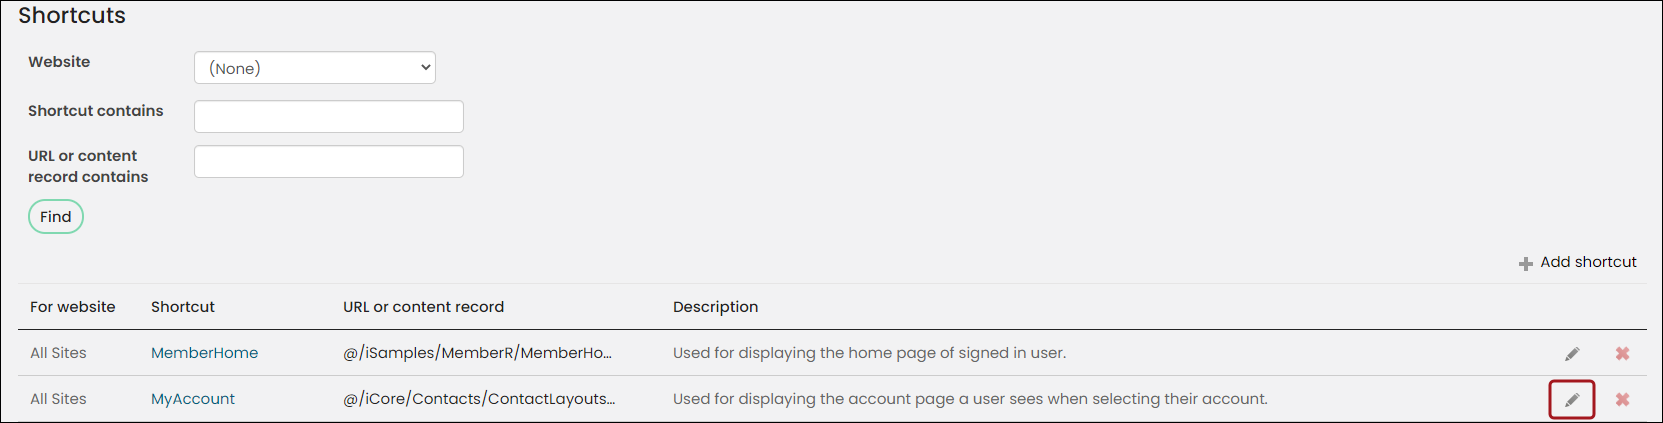
- Go to RiSE > Site Builder > Manage shortcuts.
- Find the MyAccount shortcut, then click the Edit icon.
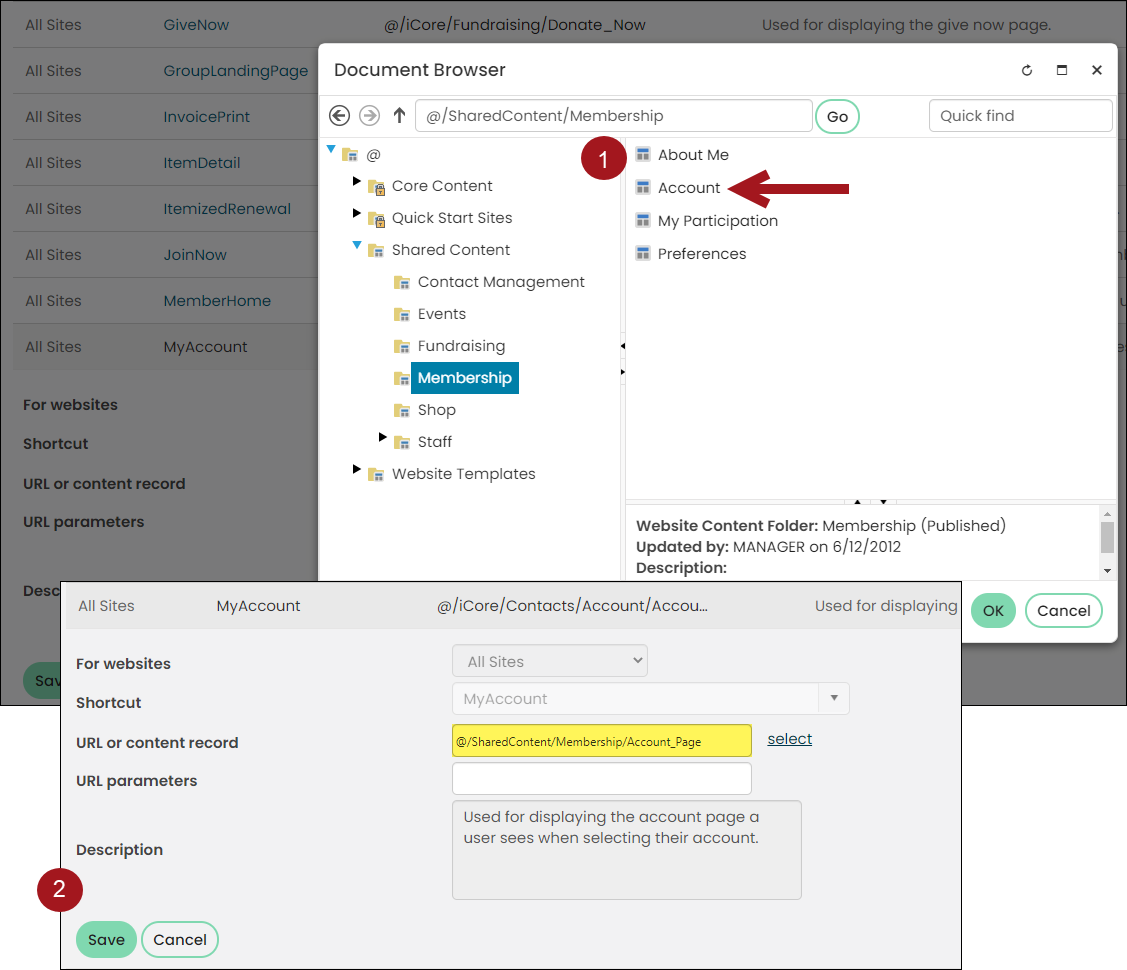
- From the URL or Content Record field, select the @/SharedContent/Membership/Account_Page content record.
- Click Save.
As a staff person viewing a user's profile page, you will see the content pointing to the FullAccount shortcut. To view a member's profile page as a member would see it, you must view the page directly from the MyAccount shortcut. To do this, go to RiSE > Site Builder > Manage shortcuts, locate the MyAccount shortcut, then select the MyAccount link.
Updating the account page shortcuts
For all account pages, customize the shortcut to point to custom content. To update the account pages for individuals and organizations, you must update the related shortcuts:
| Account page/shortcut | System location | Paste location |
|---|---|---|
| FullAccount | @/iCore/Contacts/Account/Staff/Tabs | @/SharedContent/Staff/Tabs |
| MyAccount | @/iCore/Contacts/Account/AccountPage | @/SharedContent/Staff |
| OrganizationFullAccount | @/iCore/Contacts/Organization/Staff/Tabs | @/SharedContent/Staff/Org_Tabs |
| OrganizationAccount | @/iCore/Contacts/Organization/CoAdmin/Tabs | @/SharedContent/Staff/CoAdmin_Tabs |
The label for each tab is the Title for each content record. The display order of tabs is sorted in alphabetical or numerical order by the content record Publish file name. Numerical items have precedence for display order. For example, if you have two content records and their published file names are 2Creator and 1Record, 1Record is displayed in the first tab before 2Creator.
Updated 3 months ago